HomeSlice
-
Posts
4,676 -
Joined
-
Last visited
Content Type
Profiles
Forums
Events
Everything posted by HomeSlice
-
Here's a sql dump of the whole database. You might need to edit out stuff like the faquser table.... phpmyfaq_data.2011_01_05_15_43_02.sql.zip
-
Here's a phpMyFAQ sqlite database with a few FAQs already in it. db user: admin db pswd: 0neRen I actually posted forum topic about phpmyfaq about 6 months ago. amfaqs.zip
-
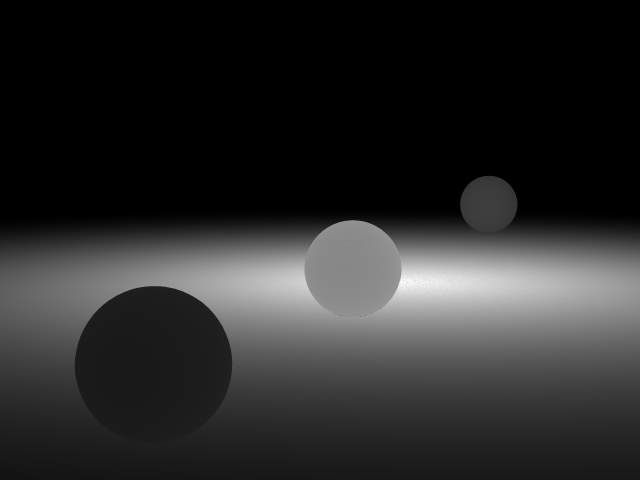
What about if you remove the group, then restart A:M, then try to render the sphere?
-
If it happens every time, send in a bug report. Include the exact steps you do, plus the result you are getting. For example: *Open AM *Go to Tools > Customize > Appearance and choose "Bordeaux" from the Scheme menu. *Exit AM *Restart AM. *The scheme reverts back to the default. Or whatever is happening....
-
Have you removed the SSS group? Have you tried making a simple sphere with SSS applied to one half of it? If you can get a very simple project to consistently display the error, it will be much easier to fix.
-
Happy belated birthday Spleen.... better late than never
-
Happy Birthday Tony
-
Yappy Hew Near 2 U 2, Simon
-
Whatever rig you use, follow these same basic steps. Place the basic geometry bones. Assign CPs to the bones. Apply Control Point Weights (There is no magic formula for CP Weights. It just takes lots and lots of practice) There is a tut on weighting a face in the Featured Tutorials section. Since weighting a face is pretty complex, you will probably learn whatever you need from that tut. If there is some area that absolutely cannot be solved with CP weighting, only then do you resort to Smartskin. After all CP weighting and Smartskinning is done, *then* install the control rig.
-
You should smartskin the Geometry bones, not the Control bones. Especially with TSM. It has been a few years since I rigged a model with TSM, but from memory .... it is easiest to go back to a version of your model where you placed all the base (geometry) bones and assigned control points, but *before* you installed the control rig. Then smart skin the geometry bones. *Then* install the control rig.
-
Go to Tools > Options > Global and make sure "Show advanced properties" is turned ON.
-
Looks like a job for v16 netrender. Do you have a multicore cpu?
-
Hmmmm ... a hot little mama ... birds and bees .... a bee pollinating a flower .... What's not to like?
-
That's really nice Josh, but your highlights are getting blown out on the wall and it is pretty noticeable. Did you adjust the levels in After Effects or something? Or did the renders come out like that? If you render to exr with light buffers on, you can play with the lighting in A:M Composite without having to rerender. Just make sure that none of the lights are pure white or pure black. I don't think you can adjust the color of the lights if they are pure white or pure black.
-
Do you have Mirror Mode on? Try it with a different model. Do you get the same results?
-
Think of the turret on top of a tank body. It can swivel 260 degrees. It can stop and start again from the same place it stopped. It can go left or right. Why do you want to create an action for that? Why not just rotate the bone in the Chor? It will be less fiddly than having to worry about Action Blending for such a simple task.
-
Anata ga watashi no yūjin o kangei shite iru
-
It sounds like yo already found a solution with the After Effects plugin, but here is a way to get what you want just using A:M with your idea to use a material effector and Nancy's idea to use a camera rotoscope with all the models set to "Front Projection target.". *Make an image that is all black. It can be a small size like 256x256 or whatever. *Import it into A:M and drag it onto the camera shortcut in the Chor as a camera rotoscope. *In all your models, set Options > Front Projection Target to ON. In my test project, I set this in the models themselves, not the model shortcuts in the chor. But it will probably work either way. *Make a new material named Ambiance, with only a single Attribute. *In the Ambiance material, set the Ambiance Color to White and set the Ambiance Intensity to 100%. *Make a new Material Effector and set its Falloff Softness to 100%. *Drag the Ambiance material onto the Material Effector. *Drag the Material Effector into the chor and adjust the position and Falloff size how you want. This will work even on models that have decals. Here is a normal render: Here is a render with all Models as Front Projection Targets and the Material Effector in the chor: And here is a sample project file: Depth_Buffer_Test.zip

-
You could try rendering 1 pass (like Robert suggested) with the Blur Post Effect. That way you wouldn't have to do any extra processing to get aliased edges. This sounds like it might be a bug. Have you rendered a depth map without the null shader? Is the with top still white even though it is in the middle of the scene? If it is, please make a simple project the shows this and submit a bug report.
-
In v15J and above, you can hold down the [Ctrl] key while you click on the Rotate Manipulator and the dialog will pop up allowing you to change the rotate snap angle. It is a little faster than going through Tools > Options.
-
You can also do that in the Chor while in Modeling Mode. When in Modeling Mode, changes you make to the model in the chor DO affect the original model. I have found that often I must hit the [G] key first to tell A:M I want to select some CPs. Then drag around the desired CPs with the mouse.
-
Here is a Sweeper tut in PDF format http://www.hash.com/forums/index.php?showtopic=30336
-
I'm getting ready to go out of town, so I don't have a lot of time to write a description, but the candy cane I've attached uses the same principle. If you examine the pose, you'll see that I used Hold interpolation. You can also use Spline or Zero Slope, but it is a lot more work. candy_cane.zip
-
They do. Read this tut. http://www.hash.com/forums/index.php?showtopic=29738
-
Try turning on the Bias Handles. Select the keyframe that represents the tip of the hair, and drag the bias handle straight up so the curve going into the keyframe enters it from the top.