robcat2075
-
Posts
28,276 -
Joined
-
Last visited
-
Days Won
406
Content Type
Profiles
Forums
Events
Everything posted by robcat2075
-
I don't know either way, I had only just gotten Newton dynamics figured out then... POOF... out with Newton in with Bullet! I don't know enough about Bullet to know if the parameters are behaving like they should or if a bug report is due for something. I'm hoping someone will investigate Bullet more thoroughly than I have had a chance to do and report to us. Maybe that person can be you!
-
I'm not sure I ever showed this before. This is test of cigarette smoke done with streak particles. You'll probably have to full screen it to see the smoke clearly.
-
Tell us when you are back! There are other ways we haven't tried yet.
-
I figured you had just a simple plane underneath the land areas, so... Anther solution is to decal it once on that whole mesh (not the Patch image method), then use the repeat values to skinny the tiles down. I'm guessing X and Y repeats in the range of 10-30 might do.
-
Here is a thread with some people (including me) trying it out for the first time... https://forums.hash.com/topic/48895-bullet-soft-body-dynamics/?tab=comments#comment-418430 I'm sure there is more to it than these simple tests. If you are familiar with it in another program perhaps you can tell us more about the possibilities?
-
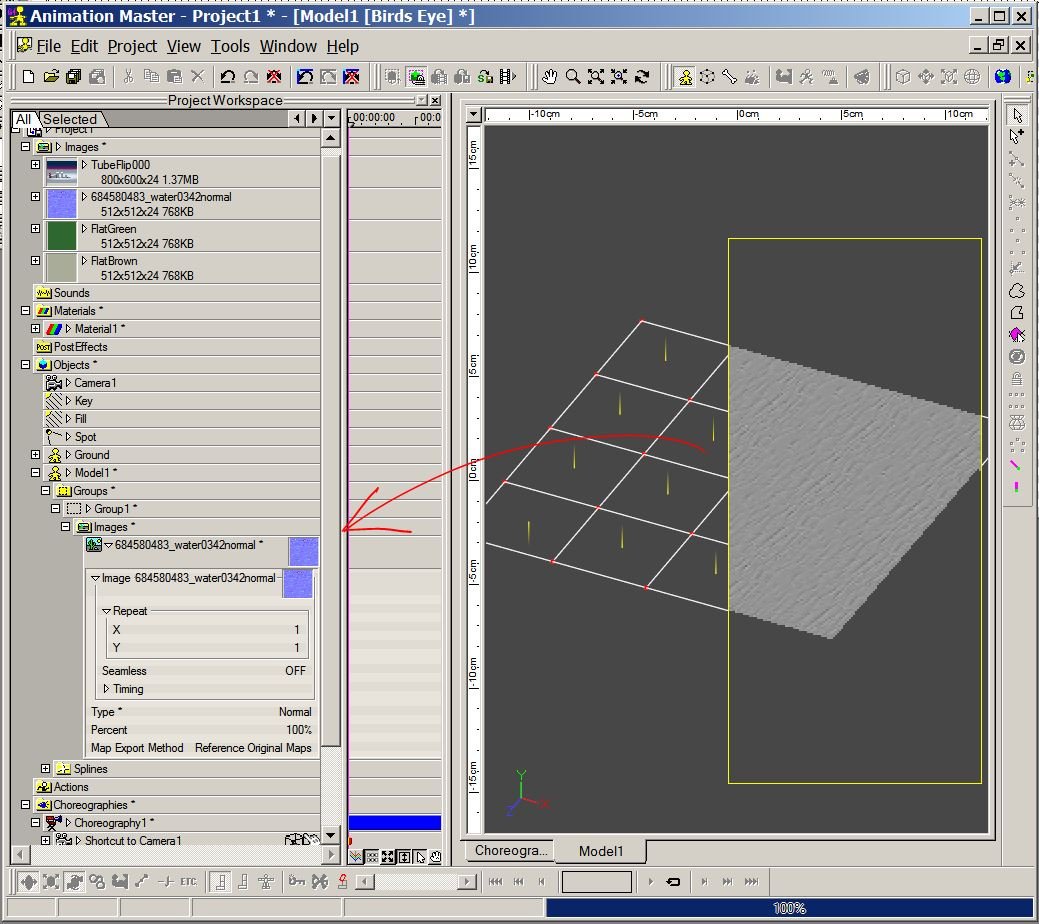
If your water plane is a grid with fairly square patches, the easiest way to use the normal map is to select it in the modeler>RMB >Add Image and choose the normal map from the drop down list. This creates a Group of your selection and puts a copy of the image on every patch in the Group. (This is called a "Patch Image") In the properties for that image set Type to "Normal" If the image is facing the wrong way you can select the Group>RMB>Rotate Images to turn it in 90° increments, or you can rotate your water plane. If the pattern is too large, you can shrink it in multiple by setting the "Repeat" values to 2,3,4... Or you can remodel your water plane to have smaller patches and do the patch image over.

-
Give me a chance to sleep and we can look at the options for some canal water.
-
Bitmap Plus does have a "normal" option
-
When you tried Dan's decal, did you set the type to "Normal"? I think if we made a bump material with a noise combiner we could get the waves effect that Dan showed you and also be able to have it move for animated shots.
-
It's a bit still but it does look more watery!
-
Update of flame simulation i did long ago, but I can't find the old long ago thread!
- 1 reply
-
- 5
-

-
Do you have a treatment planned for the water?
-
Makes me want to visit!
-
Too bad there's no animation potential in woodpeckers.
-
If you want to decrease the fog effect, you can increase the End distance. The fog accumulates from zero at the Start distance to 100% total fog at the End distance. Increasing the End distance will make it accumulate over a longer distance and reduce the effect. Here is another thing to try. Drop this Sky Dome into your chor and scale it to reach past the back edge of your scene. This has a gradient to make sky look less flat. Sky Dome.mdl
-
Wow! This just gets bigger and bigger! Lets try the fog again. Go to menu Tools>Options>Rendering and make sure that "Use Settings from " is set to "This Dialog" (If "the Camera" were chosen then you would need to make all these render setting we have been making in the properties for the camera. That is valid, but since we haven't been doing that, we'll stick with "This Dialog") Then when you go to render, set Fog ON and set the Fog Start distance to 800cm and the End distance to 5000cm and lets see what comes out.
-
That's looking sunnier! How far back on Z does your model go?
-
Next... in the properties for that sun light again... Set Width to 0cm A Width greater than zero makes shadows fade out as they get longer, to appear less severe, but you don't need that with AO. Set Options>Cast Shadows>Darkness to 100% A Darkness of less than 100% adds some light to shadows to make them less severe, but you don't need that when AO is adding light. You can rotate your Sun light to any angle to get shadows in any direction. Since it casts infinitely parallel rays, its placement doesn't matter, only its angle.
-
Make a mental note to look into the dual-boot option so you can preserve an OS that runs all the apps you need.
-
It's good that you can revert, at least for now.
-
There should be some visible cast shadows and I don't see any. Are you sure that in the properties of that light you have Options>Cast Shadows>ON?
-
That must be a different picture, now it has some shadows! Try the Key light instead. If you look up in the Objects folder and look in the properties for the light that is named "Key" you will see that it is set to Type "Sun". That is why i call it a Sun light.; Sun lights cast parallel rays like the Sun does and light the entire scene, like the Sun does. Make sure to turn on its Options>Cast Shadows property. It is not on by default. You can vary the ratio of intensity between your Ambient Intensity and the Sun Intensity for different looks. For now try to have the two of them add up to about 100.
-
Are you sure you have the sun on and shadows on? We should be seeing clear shadows from the sun light.
-
Also, notice how good that looks with just 10% sampling. For a lot of cases it doesn't need to be any higher.
-
It looks more grounded! Maybe one end of the bridge is still in the air.