robcat2075
-
Posts
28,276 -
Joined
-
Last visited
-
Days Won
406
Content Type
Profiles
Forums
Events
Everything posted by robcat2075
-
Is this something you could show me? If I saw it the solution might be more obvious. Changing the path will probably have the effect of changing the length of the path which will either stretch or squish the distance between bones, so that is an added complication.
-
It will be necessary to slightly overlap the beginning and end of the path so the bones can return to their starting point. the "post-extraoplation " can make the looping automatic The trick is to force a keyframe on every ease channel at the first and last frames that the spacing is properly staggered and delete the 0% and 100% keys outside of those example PRJ SimpleWormDemo03_loop.prj If it's like a chain saw, do you really need to traverse the entire loop? couldn't you just travel far enough to reach where the next identical link started and repeat that? It would look the same
-
When I first happened upon that Animation Showdown contest I was was just floored at seeing people getting anything done in four hours. I had spent months on things like walk cycles and never got very far. And there they were getting something done in just four hours.
-
I think I remember that one. It seems like just yesterday we were doing that, doesn't it?
-
I'm going to need convincing
-
Parented location... do you mean the bones have to be literally attached and not just look like it?
-
A fine first project!
-
It can be done and will be easy to do in Animation:Master! BasicWormCrawl.mov I used that basic workflow to do my Worms! animation and played with the staggering and interpolation between keys to make for the squishing crawling motion 8wDmFzHPXTA
-
I think some non-animation topics might cool too. I recall we had a few four hour modeling challenges and I got a somewhat less elaborate version of this "game controller" done for that. A materials topic might be fun too. Or rigging. I'm not sure what a four hour rigging topic would be but maybe there are some.
-
Here's how it worked so anyone in any timezone could participate on any day of the week they wanted and everyone still got just four hours. -Each new topic wasn't revealed on the forum, it was just announced that a new topic was up and would be up for a week. -When you were ready to do your four hours you would email to a moderator's account that had an autoresponder message set up. It would send you back the topic and since it's email it, of course, records when you were sent the topic. -you had four hours from when you got the topic to animate, render and email back your entry. That email records when you got done. -there was a filesize limit (1 MB) for the entries which had to be in Quicktime form. Lighting and texturing were not part of the contest so render times could be minimal. -When the one week window to enter closed, the mod would make a quick check that the entries were indeed returned in four hours, then post them to the forum and set up a poll so anyone and everyone could vote on their favorite. That poll would be open for a few days, then a winner crowned. Was it possible to cheat and get more than four hours? Yes, there were a few times I thought that happened but once those people realized they were cheating to win a contest with no prize they drifted off. None of those entries i thought were suspiciously elaborate ever won anyway.
-
If you're itching to do dialog, the 11 second club has that situation ready to go for you every month. I don't think we need to duplicate that challenge. Dialog is the last thing learning animators should be trying. It literally is the last thing they have you do at animation school, after you ostensibly have character body mechanics under control. There is a danger of having too frequent, too complex forum events. People have to drop whatever personal project they are doing to get involved and the forum community can get worn out by it. The ultimate example of that, of course, would be a movie project like TWO which wore a lot of people out. Something small and easy to get involved in might be good. About ten years ago there was a weekly contest called "The animation showdown" on another now-defunct forum. You got a brief premise like "Get down from there" and then you had four hours to animate something for that. You couldn't spend more than four hours on it, so it didn't consume too much of your time. You can see my entries here. I got a lot out of that. The prizes could be something low-stakes. I've got a lot of animation and VFX book and magazines. I could donate one to each winner. Maybe some other people have closets they want to clean out too. Something simple like that, that dealt with basic character animation problems might be a good contest for us. Maybe every other week, rather than every week. The crowd could vote on the winner.
-
I have no idea what it's about but the shots are good looking!
-
Some sort of Mexican girlie calender on the wall in "Bugs Bunny and the Three Bears"

-
I can't tell if that's a feature request or if you have figured out how to do it.
-
For me, and probably some others, it came up rather unexpectedly while I was in the middle of something else and I couldn't devote adequate time to it. The "pirate" created a lot of model complications beyond the task of animating. That made it hard to jump into.
-
Was there someone you knew in the damage or just helping out?
-
Is he climbing out of a crater that his landing made? I don't think that would look like rock it woudl be morlike mounds of dirt and not so veritcal. Dirt will be harder to do than rock, however. I agree with the camerawork comments above.
-
Update: forget the new blank model part, you can use a Null that you add to the chor with >New>Null. No need to add a model.
-
It seems a Layer can only have its model bone. If I understand what you want to do, make another model (it can be empty, all you need is its model bone), add that to the chor and position it to where you wanted the new Layer bone to be and then Translate To and Orient Like constrain the Layer to the bone. Typically I would not use a Layer if I needed to "rig" an image like that, I'd make a model with a flat patch and apply an image as a decal and give it bones, but if you've got a Layer, you can constrain it to other bones directly in the chor to do what you want.
-
Here is a thread that covered some of the details of creating proper alpha channels. http://www.hash.com/forums/index.php?showt...++flaming++pear and another with explicit steps... http://www.hash.com/forums/index.php?showt...++flaming++pear Note the mention of the Flaming Pear solidify plugins.
-
What age is v6 from? What comes before Stone Age?
-
One argument against the AMD architecture I'm finding is that Windows isn't optimized to distribute threads for it. If there are four threads to put on the CPU, Windows will assign them to an Intel CPU's real cores before it resorts to virtual cores for best performance However, on an AMD FX CPU which shares one FPU between every two cores, Windows may distribute those four threads to the first four logical cores (only two FPUs for four threads) instead of distributing them to every other logical core (four FPUs for four thread).
-
Possibly we have some difference in our "color manegement". My Photoshop is ostensibly set to not monkey with color when loading images ("Color management OFF") but various version of PS seem to address this control a bit differently. However, I think an alpha channel will serve you better than color keying in this venture.
-
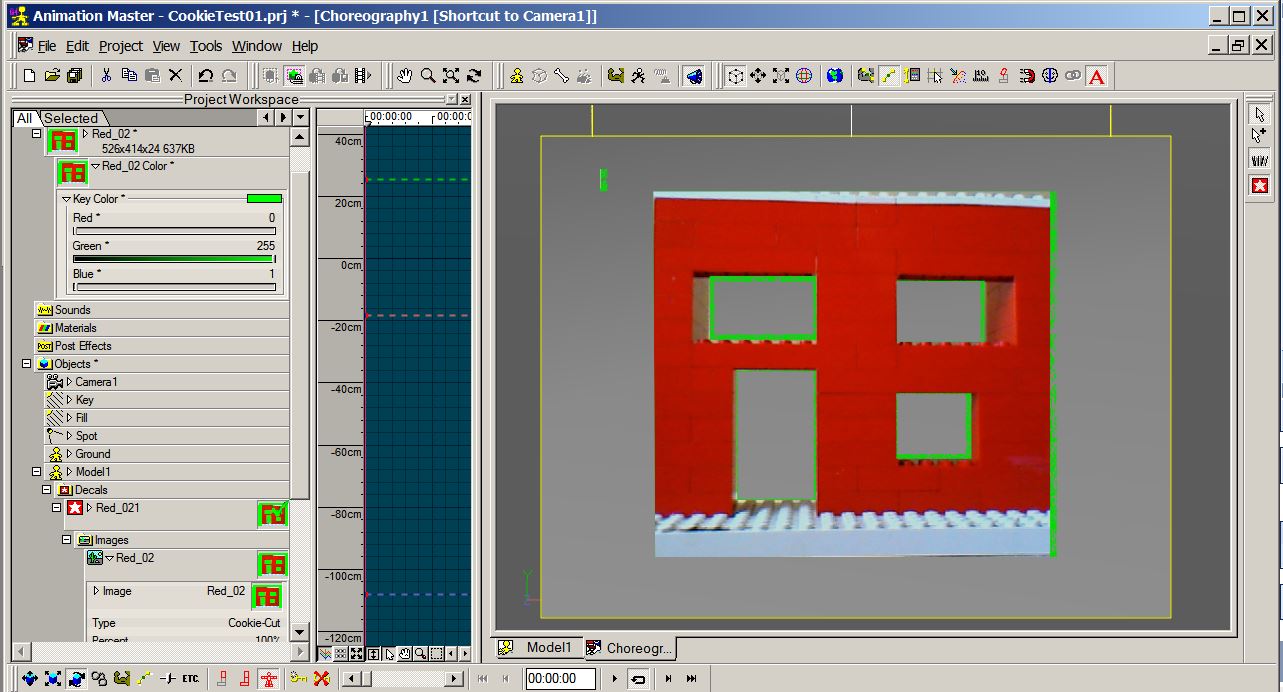
Here's my result with 0,255,1. Note that there will still be problems with jpg compression around the edges. PNG or targa will get a cleaner result.
-
When I load your image in Photoshop i find that the RGB values for the green color are 0, 255, 1 Perhaps you have set 0,255,0 as the key color.