robcat2075
-
Posts
28,261 -
Joined
-
Last visited
-
Days Won
404
Content Type
Profiles
Forums
Events
Everything posted by robcat2075
-
My first thought is to make the hooks that ran longer the short ones and vice versa. Then all the hooks could end on a halfway point on a spline instead of a quarter point.
-
I'm fairly certain the room lighting is changing because it has keyframes making it do that. I preferred the version where he was silhouetted against the brighter room. Are those motorcycle spoke reflective? It would be simpler to make them a regular color. It's a bit odd that the scene seen directly is darker and grayer than when seen in teh binocular lenses. The man getting out of the car seems to have lost all contrast on his face. When I'm trying to run down lighting problems I find it easier to do half or quarter size renders and just a few frames per second. That will usually catch things like drifing lights or other mistakes without having to wait for a full render.
-
She looks well-shaped! Is each hook on its own spline segment or are there more than one on a spline segment?
-

"Paint fall" Image Contest WIPs
robcat2075 replied to robcat2075's topic in Work In Progress / Sweatbox
The Nancy Sinatra boots and the opera gloves may need to be rethought. -
"Paint fall" Image Contest WIPs
robcat2075 replied to robcat2075's topic in Work In Progress / Sweatbox
I think I'm going to steal the body from this character I made 20 years ago...
-
For the A:M users who come to the forum and yet somehow never press "View New Content" and don't check "Current Contests"... Summer Image Contest
-
that's wonderful!
-
Summer 2017 Image Contest! New Deadline Sept 22!
robcat2075 replied to robcat2075's topic in Contests/Challenges
September 18 is just two weeks away! You won't want to miss out! -
"Paint fall" Image Contest WIPs
robcat2075 replied to robcat2075's topic in Work In Progress / Sweatbox
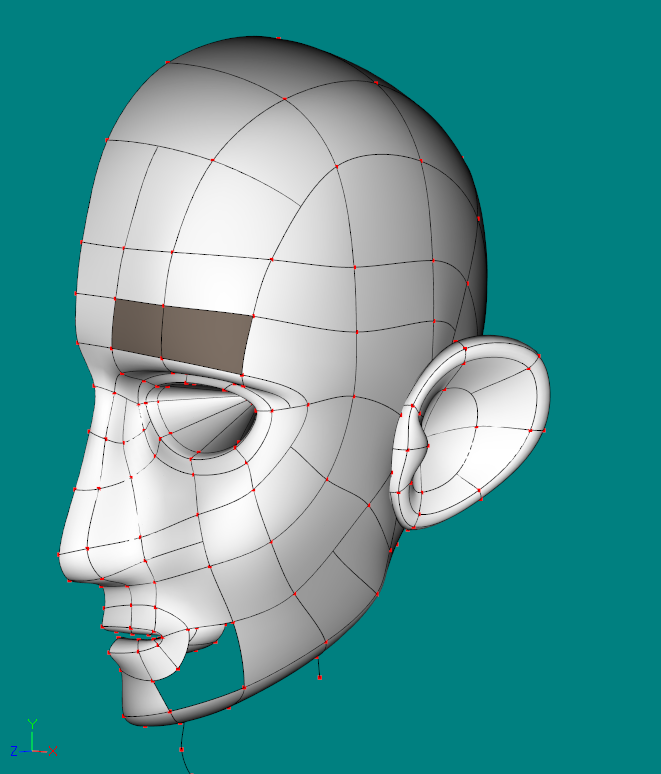
Extending out the easier parts like the back of the skull I've tried to make the splines arrive at hole with as many CPs as the ear i will build to attach there I've noticed Pixar is doing very simple ears, basically a dish with no ear hole. i will try that. Putting the ear right up to the head makes it hard to find the splines to connect... ...so I will temporarily move it to the side and extrude out some extra spline to draw across and match up to CPs on the head... Even though both rings had 8 CPs, they don't necessarily match up exactly so some become hooks. Once I had the connections made, I deleted the ring that made the hole on the head since it would be superflous after I moved the ear back towards the head. I also resplined the inside of the ear to eliminate the lathed hole.
-
Moving locomotive smoke test
robcat2075 replied to R Reynolds's topic in Work In Progress / Sweatbox
this is quite interesting Rodger! Good looking smoke! I'll need to digest it. -
You could do two renders. One that does the AO right and one the that does the reflections right and composite them together. For the AO render you could set all the reflecting surfaces to a solid pure color (100% ambience) and use that in your compositor to "green screen" in the portions from the reflection render. Hand painting should not be necessary for this. Of course, test that out with one frame before you re-render the whole sequence. If the camera never moves, you'd only have to render one reflection frame.
-
Flashing sky looks like lightning. I'm going to guess that some mistaken key frames are causing that. I presume this is just a quick render and that's why there are no shadows. The sequence makes sense. Is that guy really supposed to have such wide hips? From a distance I thought it was a female. Some curve flattening would probably fix the sliding feet.
-
"Paint fall" Image Contest WIPs
robcat2075 replied to robcat2075's topic in Work In Progress / Sweatbox
I do the simple shapes first, for which I have some confidence about how many CPs they need... then I start extending splines from them to stitch them together... This first pass is looking disappointingly flattish. I have to keep telling myself that this isn't final. I can modify and respline it later once I have the whole general shape to appraise.
-
"Paint fall" Image Contest WIPs
robcat2075 replied to robcat2075's topic in Work In Progress / Sweatbox
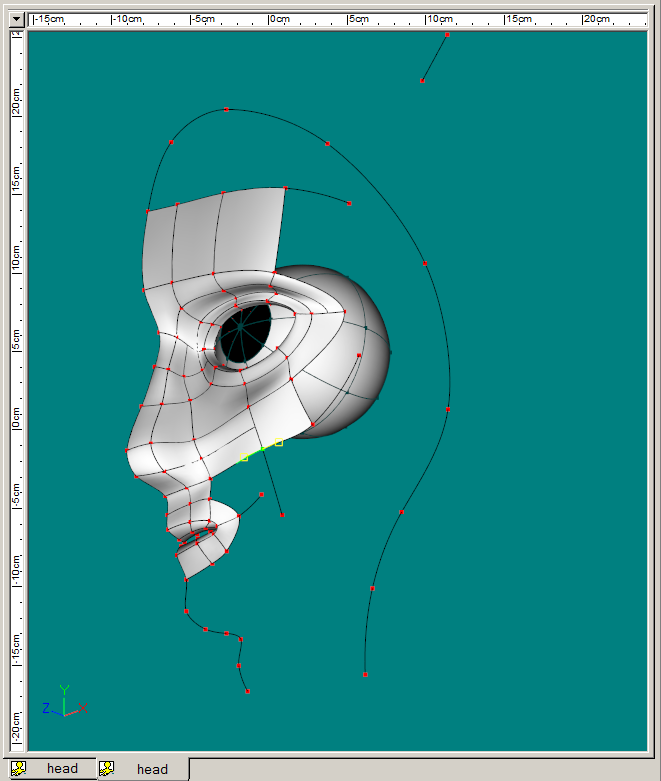
My typical starting gambit is to minimally spline the profile off the rotoscope, then stick some eyeballs in. I know that anything I make after this has to be outside the eye balls... ...and i can use the surface of the eyeballs to place the eyelid opening. Easy to do with Snap-to-surface.
-
"Paint fall" Image Contest WIPs
robcat2075 replied to robcat2075's topic in Work In Progress / Sweatbox
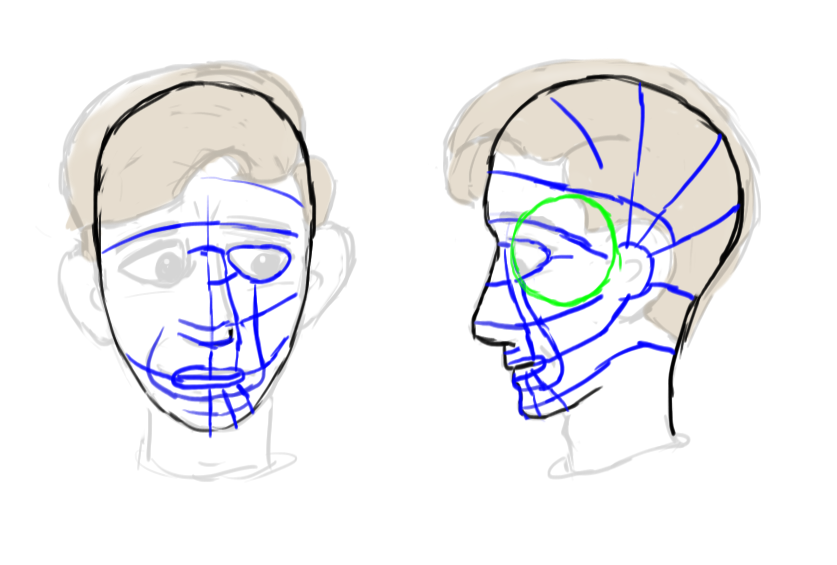
Trying to think through some of the major contours involved in the head. This will not be accurate enough to just draw over in A:M and after I start splining I'll find that much of it is mistaken, but it's a starting point.
-
Save and identify the PRJs that crash in v19 and work in v18 for now if you need to get work done.
-
"Paint fall" Image Contest WIPs
robcat2075 replied to robcat2075's topic in Work In Progress / Sweatbox
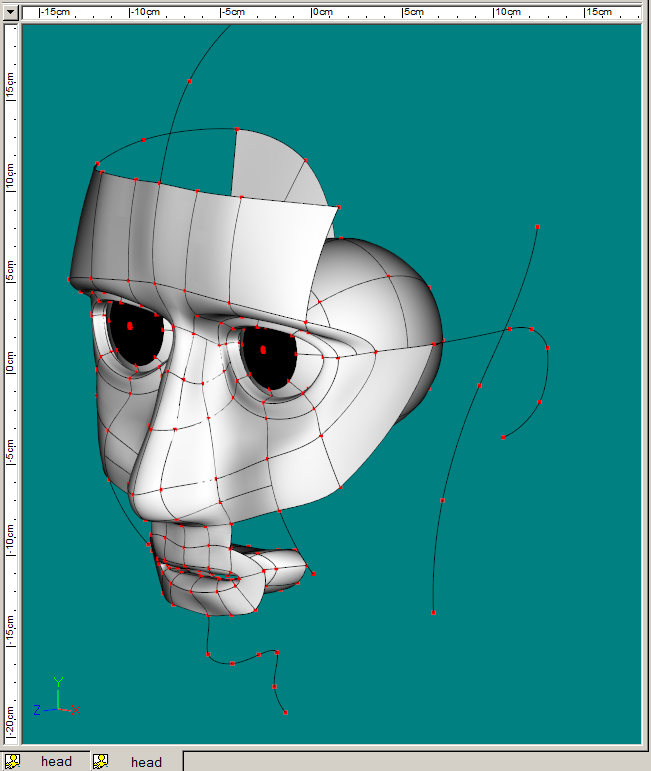
I'm trying to get a head with my project...
-
It seem you can not apply a decal to a Prop. However you can apply a material to a prop and the "projection map" material allows you to position a bitmap image on a surface. The effect you show there looks quite a bit like how AO darkens the recesses of an object. I'd do an overhead AO render of one, then position it back on the with the Projection material. Use the render both as a color map and as a specular map (to make the recesses dull and the high parts shiny)
-
Summer 2017 Image Contest! New Deadline Sept 22!
robcat2075 replied to robcat2075's topic in Contests/Challenges
Three weeks! That's how long it takes to hatch an egg and that's how long we have to get our Summer Memories Image Contest entries done. I hope you all are farther along than I am! -
And one of the Hash people was a parrot keeper, i recall.
-
Even better!
-
Perhaps it was a nod to the monochrome styling of some traditional African art... No, it is not. When this has been discussed before, Martin has said that the splash screen should remain.
-
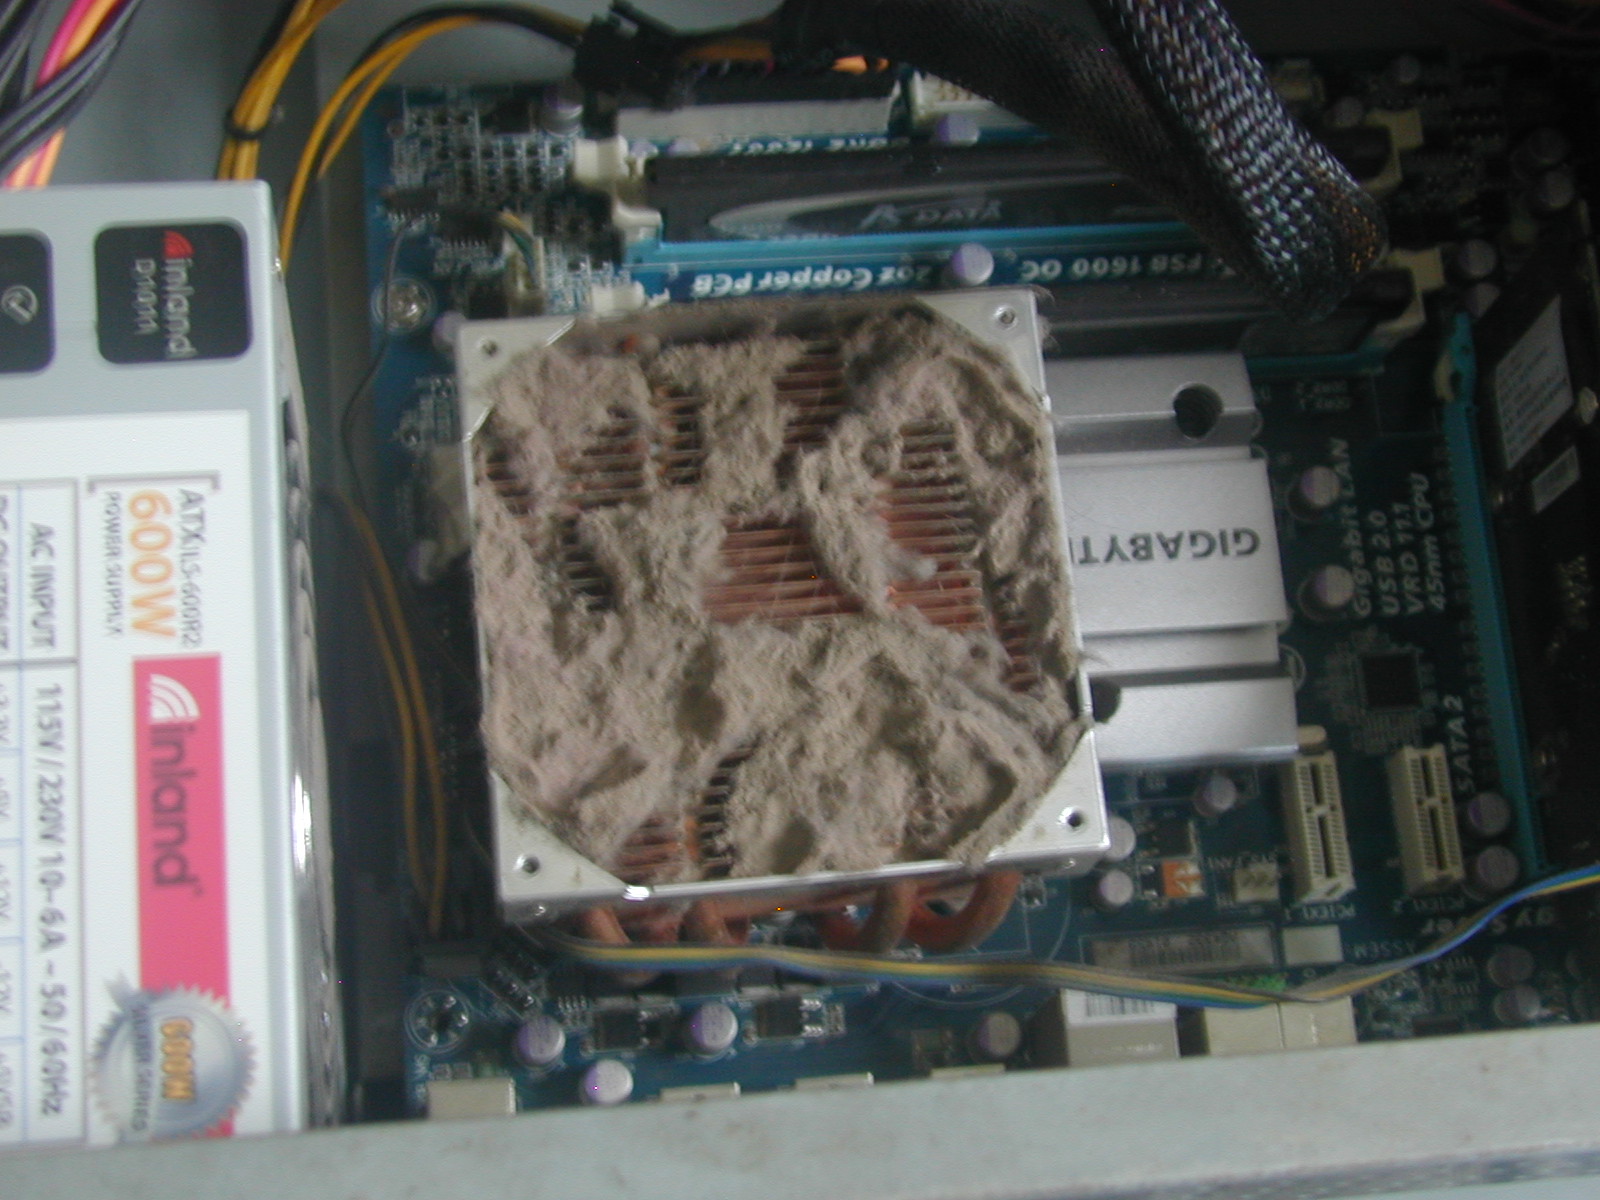
Genuine copper.
-
Windows keeps a log of events that may tell why the last shutdown occurred. How to View Previous Shutdown and Restart Details in Windows
-
The more I think about this the more I think something is overheating. AM v18 certainly hasn't changed recently. It might be a part starting to fail but the symptoms sound like something isn't getting cooled right. An accumulation of dust like this might impede the cooling enough to cause a failure. I didn't see this until i took off the fan. Or.... maybe a fan has just plain failed? A computer can limp along with incomplete cooling until it has to do real work and then the lack of full cooling causes a shut down.