-
Posts
7,863 -
Joined
-
Last visited
-
Days Won
15
Content Type
Profiles
Forums
Events
Everything posted by NancyGormezano
-
My first approach would be to model the finished shape: probably using a spiral path, a circular shape (for the cross section extrusion) and the plug-in sweeper, with minimal number of cross sections. Then I would attach a bone for every resultant spline ring cross section, and use the original path and a path constraint and ease (for every bone), starting them all at 0%, and ending them at the appropriate % for the cross section (eg last one would be at 100%, one before that at 90%, next 80%, etc) (EDIT: now that I think about it, you probably could get away with just modeling a straight tube with appropriate # of cross sections, and just constrain each cross section to spiral path)
-
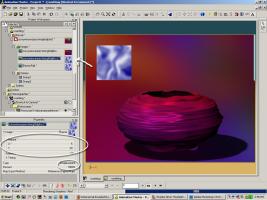
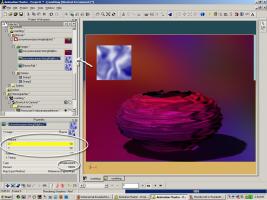
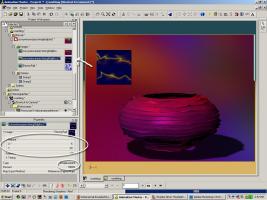
Hi - I tried a few things using cylindrically mapped decal with 2 different patterns (already had these images). I varied the repeat counts for the images so that you could get the idea of how the varying the displacement % and repeat count works. You would have to monkey based on what image you used, and what appeals to you Hope this helps some. EDIT - added new image to show example of grayscale image used for the color, displacement and spec size, cylindrically mapped in same decal container, different repeat count, different displacement %
-
So what material or method are you using now? decal? Material settings? Looks like you are trying to use displacement method (not bump). The same rules sorta apply tho (white is most raised, black is indented) I would approach this using a decal to start (cylindrical map, displacement type) whereas the image would probably be horizontal stripes/bands of varying soft gradations of gray. I always turn to decals first, because I understand them better, and I feel like I have easier control to modify.
-
Which material are you using? The answer depends on what this material is doing. Size variation in bumps (bump maps) are usually a result of the deviation from neutral gray (RGB=127, 127, 127), whereas white (RGB=255,255,255) would be the maximum protrusion (bump out), versus black (RGB = 0,0,0), the maximum indent. The spikes, rectangular effects that you see, may be because the material does not have smooth transitioning between the values. There is also usually a percentage value that one can change to indicate how intensely the material is to be applied. Many times you can specify percentages that are way above 100% to have more dramatic effects.
-

Captain Crazy Pants works out
NancyGormezano replied to NancyGormezano's topic in Work In Progress / Sweatbox
Thanks Rodney. Are there any particular things that stand out for you? I know I don't like the framing (should have zoomed out some). I don't like the color balance, hot spots. The cloth is too jerky, and cloth still intersects with his legs. Can't see his expression, eyes very well. Hair might be too sparse which makes it scintilate. The handspring isn't as finessed as I'd like, arm movement is awkward, the end pose/turn isn't right either. The costume material has some dark spot anomalies when it stretches. I also think it would be more humourous if I had used a dark ominous stormy cloud background with lightning bolts, and made the time of day = night. Perhaps with moving searchlights aimed at him as if the police down below, and were trying to talk the "nutter" down -
Wonderful character, image, lighting, textures - and as I told you before - got my vote!
-
very NICE! And very interesting to see how you worked in both A:M and 3dcoat
-
Now that I think about it, cats really control their tail movement for balance, purposeful action, and perhaps wouldn't actually have the traditional "cartoony" lag/whip type 2ndary action that we usually see? To be fair, that's when he was 19 pounds & still sporting his baby fat...or was it the traditional extra holiday-time poundage? I forget. He's slimmed down considerably in his old age to a svelte 16 pounds...
-

Captain Crazy Pants works out
NancyGormezano replied to NancyGormezano's topic in Work In Progress / Sweatbox
Thanks Tore, Rodney, John This is the last one for this sequence. Enough with the handspring, already! On to other things..But first, I decided to see how handspring would look using the Rear window set. Rendering of the set itself was taking 28 seconds for 1 image or 1 minute for stereo (5 pass, soften, shadows, SSS, hair, 864 x 480), even after I tried to eliminate most of geometry in FOV (by zooming close to roof top, ie increased focal to 200, angled camera). So I wanted to get rendertimes down for testing. First, I dragged my chor action for Crazypants from my chor into the Rear window choreograpy, then translated, rotated character model to top of roof (where the camera was now aimed). Baked the particle hair there. I rendered frame 0 first without the character, then used that as a camera rotoscope, to front project onto the buildings (which were also set to flat shaded). Turned OFF the dome. I didn't like the color balance of the lighting, & there were too many shadows on characters face, using the rear window scheme and also to decrease render times, I turned off Stereo, turned off shadows on all lights except the sun klieg (turned out to be the biggest time killer), turned off SSS (didn't need), set Global Ambience IBL to a rosey colored image, added fakeAO, 5 pass, soft ON, hair - came to average about 10 secs/frame, including the character. I tried originally to use the rotoscope for the IBL image, but it made things tooo blue. The lighting is still funny, but more pleasing to me. Probably would have looked more consistent if I had used same lighting for generating the camera rotoscope. Highlights are too blown out, so I probably should have decreased intensity for IBL and/or sun. 2Gormezano_000h264best.mov -
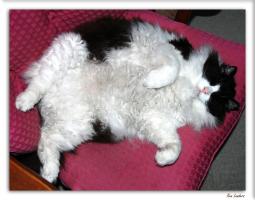
OOooo...nice! The leg motion looks good! I am surprised that there doesn't seem to be much tail motion. Are you going for accuracy or comic? Being the owner of ONE very fat, very stubbied leg puddy, my comments are based on a limited sample: I've never seen my cat run so gracefully. When he does run, usually up the stairs to hide under the bed because the doorbell has been rung by an evil stranger, its a straight line blur with barely any up/down motion. If I were to film it in bullet time I guess I would probably be surprised. EDIT: couldn't resist uploading a baby picture of Brewster
-

Captain Crazy Pants works out
NancyGormezano replied to NancyGormezano's topic in Work In Progress / Sweatbox
I decided to try out cloth for the cape. Eventually I gave up on using any deflectors, too much fiddly stuff. Couldn't get it to run without errors, even by eliminating cps from deflector groups. Didn't want to spend that much time on it. So easiest for me was to assigned the cape CPs to all one bone, run the simulation without deflectors, NO checking for intersections, no self collide. After the simulation I adjusted the cape bone (rotated and translated it) so that it wouldn't intersect model. It's ok. Sorta. Chor settings for simcloth simulation: collision tolerance =.1 solver precision =.01 check intersections=OFF substeps = 4 (default) adaptive subdiv = 3 (default) Cloth material settings: Particle Mass = 10 Self Collide = OFF Friction 250 (default) stretch stiff = 200 shear stiff = 100 stretch damp = 2 bend angle stiff = 6 bend damp = 2 Air drag = 10 I did try using dynamic constraint on the cape, with only the end of the cape be the cloth material. (no example uploaded). It would probably be a good alternative for some situations, as it is more likely to find a solution. Would be good for frilly sleeves, bottom of a skirt. To do it this way, I baked the dynamic constraint system first, (no collision detection). Then used a master bone to move the cape away from the model. Then ran the simcloth (with same settings above...I think?). Didn't look as convincing as the all cloth cape solution. EDIT: just noticed, forgot to turn on hair...oh well. 12handspringcapeh264bestloop.mov -

Captain Crazy Pants works out
NancyGormezano replied to NancyGormezano's topic in Work In Progress / Sweatbox
Caution: I know nuthin' about the working status of the MAC version of TSM2. But it's worth a try, just to see how easy it is to install. I too, wonder about using this plugin with future versions of A:M. At some point, it's very possible that models rigged in ver16 with TSM2 won't work, or work well in ver X...And if one has to do texturing, weighting, etc in ver16, because the work flow necessitates doing that to the pre-rigged model, then one loses ability to easily use future improvements to texturing, materials, hair, modeling tools, other capabilities, etc. Don't know how far in the future that is, but my guess is, if that ever occurs, that there will be something else to replace it. -

Captain Crazy Pants works out
NancyGormezano replied to NancyGormezano's topic in Work In Progress / Sweatbox
I am working in ver 16b-32bit PC for everything, only because Ver 17-32 renders slower on my machine than 16b and Fakeao doesn't work either (in 32 bit). I also believe tsm2, doesn't work in 17 (install process only), but I didn't try it. Once rigged in ver16, model should work in 17. -

Captain Crazy Pants works out
NancyGormezano replied to NancyGormezano's topic in Work In Progress / Sweatbox
Thanks Zaryin! Just imported Mark's IK/FK seamless switch add-on model into my model - works like a charm! I dimly recall that the difference is between FK arms that maintain their orientation to the torso as it rotates and FK arms that maintain their orientation to world space as the torso rotates. Have still not figured out the elbow roller (looked on my install CD at the TSM2 tutorials) - so I will ignore it, leave it alone. And Yes, found out that: Regular arm FK set to 100% makes the arm rotate/orient when the torso moves, whereas when set to 0%, the arm is "isolated" and maintains it's orientation (ie as in 2008 rig parlance: stays steady). -

Captain Crazy Pants works out
NancyGormezano replied to NancyGormezano's topic in Work In Progress / Sweatbox
Oooooo...an add-on for TSM2? Do tell, kind sire, Can thoust leadeth me to the righteous link? Yes, I came to miss the brilliant seamless IK/FK switching with the 2008, lite & Squetch rigs found the link to the update! It was 'hiding' as the very first pinned topic in the TSM2 sub-forum...Tricky devils... -

Captain Crazy Pants works out
NancyGormezano replied to NancyGormezano's topic in Work In Progress / Sweatbox
Oooooo...an add-on for TSM2? Do tell, kind sire, Can thoust leadeth me to the righteous link? Yes, I came to miss the brilliant seamless IK/FK switching with the 2008, lite & Squetch rigs I'll have to refresh myself on the distinction. Does the TSM2 manual (found in the install folders) explain anything? I shall go take a look again (don't remember reading anything about it). Yeah...it's probably safe for me to try cloth again, but this time in earnest...my hair is already almost completely white -
Neat Matt - I liked what you did very much... but of course, too bad about the mandatory icky videos...
-

Captain Crazy Pants works out
NancyGormezano replied to NancyGormezano's topic in Work In Progress / Sweatbox
Me too. Sooooo...As I was inspired by the exercises that Simon has been doing, especially the handspring, I decided to give it a whirl with Captain Crazy Pants. I'm pretty rusty and I'm just learning the TSM2 rig...so I'm struggling with: 1) smoothly switching between FK/IK arms, ie what's the best strategy, sequence. Found it awkward to set the pose to 100% for IK, and then move the IK hand to approximate place (as normal hand) in next frame. 2) What's strategy for stretching the spine? ie I'm guessing I should have initialized the spine stretch pose to 100 at the beginning and then just use the torso and pelvis to do the stretch throughout. I didn't do this so, I had to adjust the stretch pose around the frames that I wanted to do stretching. Awkward. 3) Still trying to figure out what the settings for the arms are. In particular, how to use the elbow rolling manual/automatic?(what's the diff?), and what's regular FK for the arms (versus not regular?)? Currently my settings were 0% for manual elbow, and 100% regular FK - but I have no idea what I should have done. Here's first (hah!...ok...more like 9th refinement) of the handspring movement with crude manual posing for the cape (needs better boning, and change in cape geometry for using dynamic constraint). 9AhandspringcapeH264.mov -
I think the beginning sequence of that video is probably a better reference than the "steps" they've outlined How_to_Do_a_Front_HandspringShorter.mov
-
here's one I just tried and it worked (converted to a mov) http://www.clipconverter.cc/ and here's an article talking about how to do it safely (not all free youtube download software is safe) http://www.digitaltrends.com/computing/how...youtube-videos/
-
Congrats Marcos, Sebastian, Ludo! Wonderful entries.
-
I believe this is one modeled by Gene the Spleene (that has brakes) http://www.hash.com/forums/index.php?s=&am...st&p=315144
-
Yes, having the property triangle OFF does not prevent a bone from being dragged in the chor. HOWEVER: I find that when I have the property triangle showing (ON), then the act of clicking on it in the timeline to expand the property can sometimes cause the bone to be dragged/relocated inadvertently. So I am less likely to have this occur, if I inspect and alter the properties in the separate panel, and not in the timeline with Property triangle OFF.
-
Ack. UGGY. This is my least favorite bug in A:M. One can inadvertently/accidently drag bones in the timeline to become a child of another bone, yet one can't drag it back to it's rightful place...and yes, then all is lost if you don't notice it right away. I have found that, for me, this is more likely NOT to occur if I have UNCHECKED the "show properties triangle" in tools/options/Global and then I have the properties panel up instead. (View/Properties or alt+3). Try this way, and see if it occurs less frequently. I also have other suspicions: either because of my graphics card driver? or I've done something too fast while in the chor, ie I didn't give A:M enough time to think about it, or my chor has become too complicated? I really can't pinpoint what causes this...but yes it is a bummer.


