NancyGormezano
-
Posts
7,863 -
Joined
-
Last visited
-
Days Won
15
Content Type
Profiles
Forums
Events
Everything posted by NancyGormezano
-
Yes. ANY excessive small resolved detail (renders to few # of pixels) has the potential to look noisy (busy) when it starts to move. Doing stills is quite different from animation. For animation, you are best to go with images that are less busy. ie gradual changing differences in value - pixel to pixel Enlarging an image to 1000x1000 will not create new detail (actually will create less dense detail as same section of image will now occupy more pixels). The fact that the image had a lot of detail to begin with, ie rapidly changing values in adjacent pixels, is what is causing the scintillation. The size of the image used for the map doesn't make much difference. As an experiment, you might try "blurring" your displacement image (the 1000 x 1000 image), and using that for your decal - and see how that reduces the noisy look. Try different amounts of blurriness (small, medium, lots). EDIT: forgot to say: it is probably the image that is used for color that is causing most of the perceived scintillation - try using a more gradually variegated colored image. 74 stamps? yikes! perhaps you need to investigate "flattening and planar mapped applied versus cylindrical applied versus one image/patch (which you changed to)" Using a very noisy image for a patch (one/patch) is also a cause of introducing scintillation. Don't sweat the small stuff in terms of decal/image stretching. Again animation is different from still imagery. When the model moves - no matter what method you used: the decal, image will stretch - just the nature of patch geometry, as the patches themselves are stretching and thus their displacement and pattern will stretch.
-
That pose is familiar. Dennis the Dog pose?
-
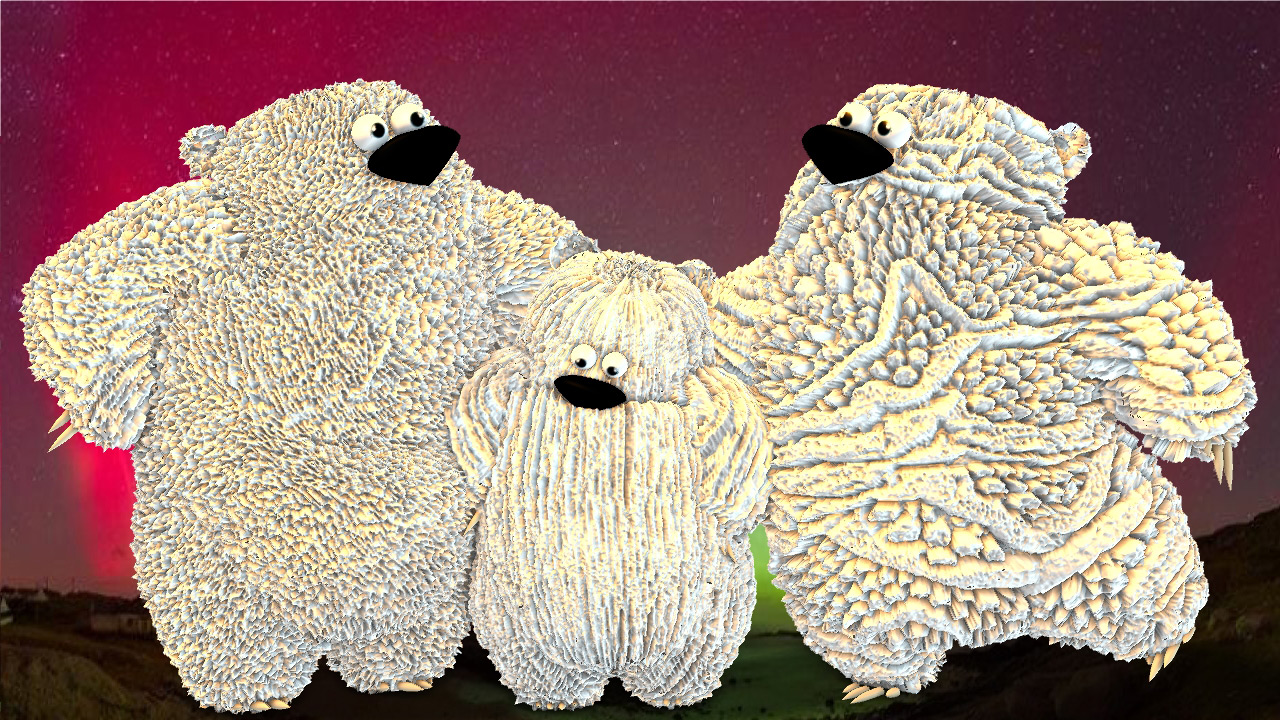
Yes forgot to say - great photo of Northern Lights! but it needed some Irish Polar bears

-
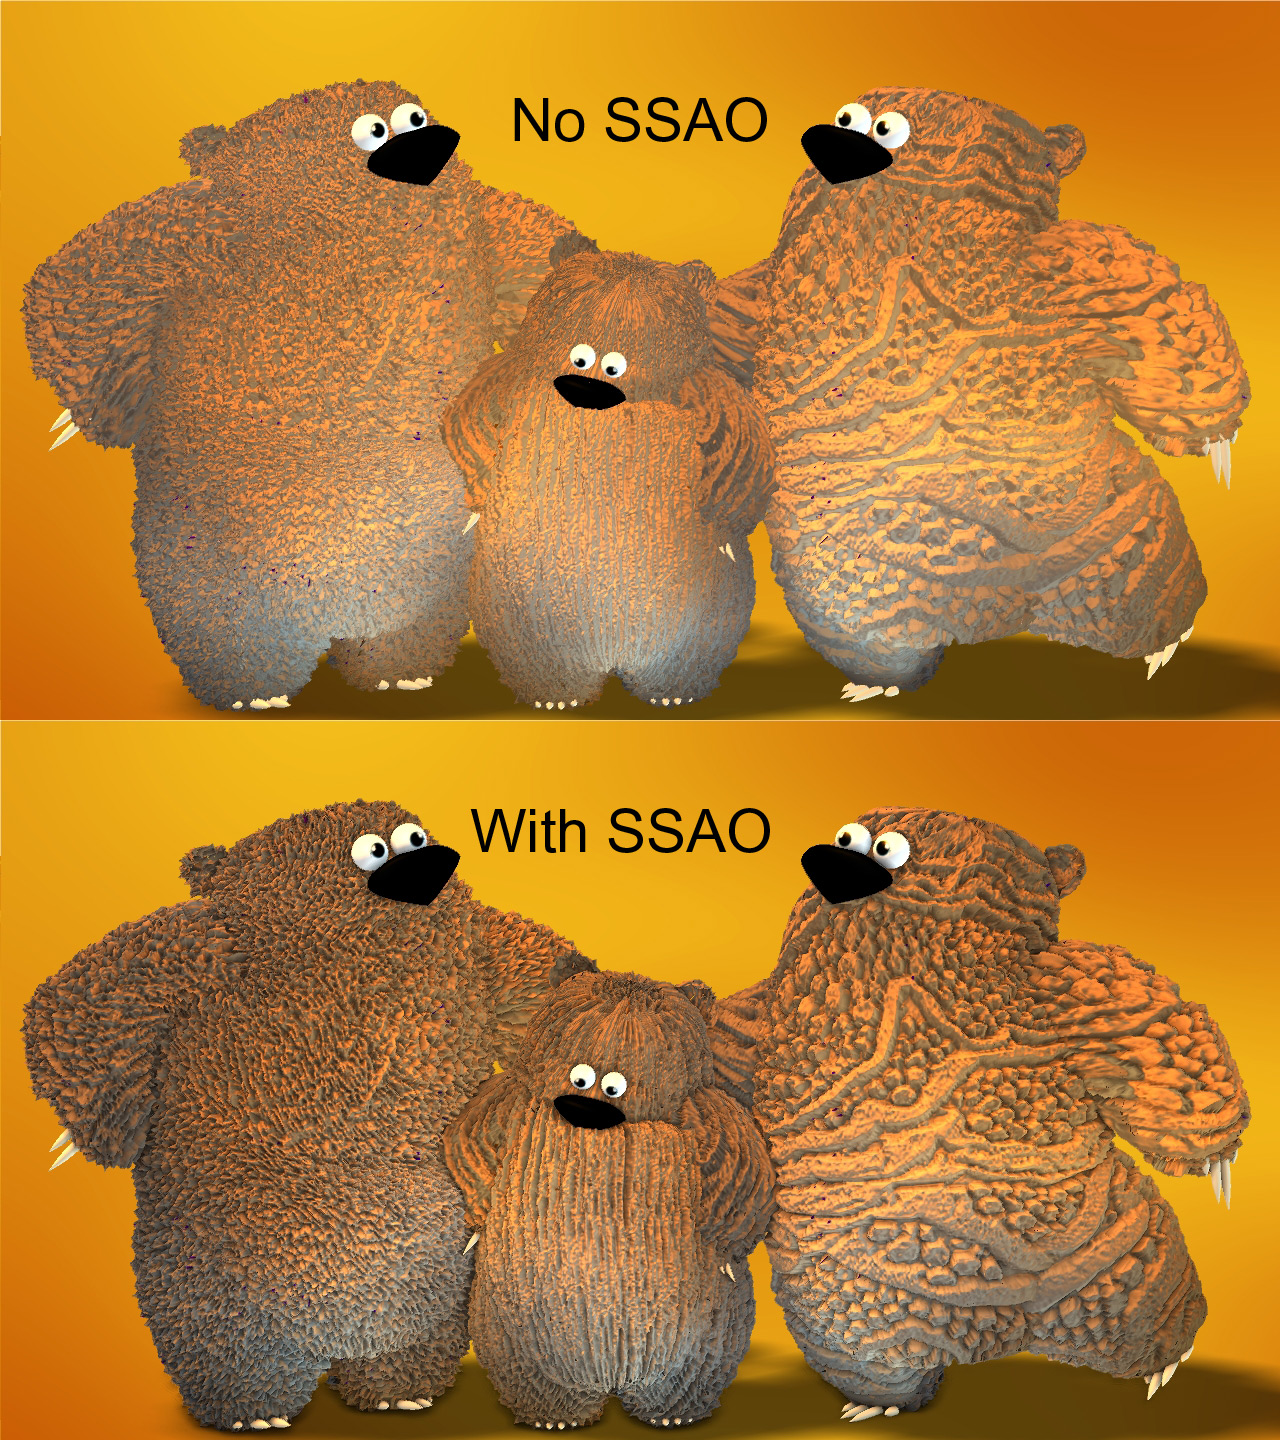
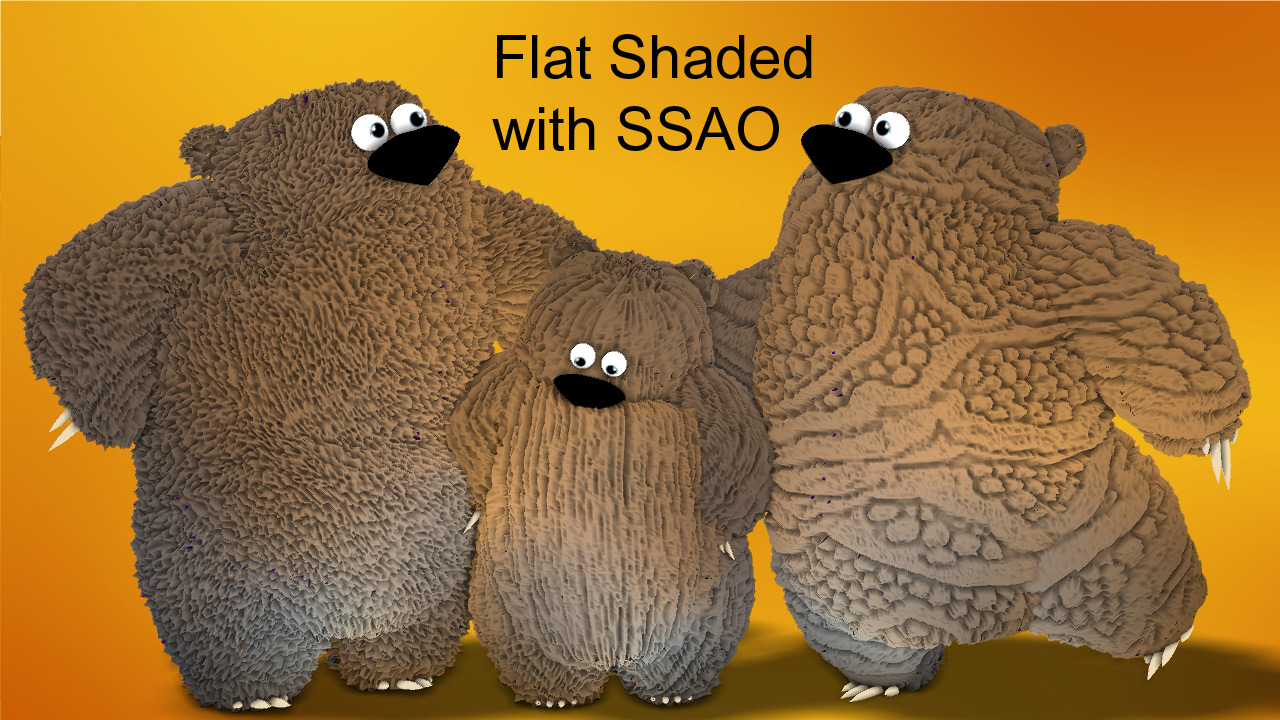
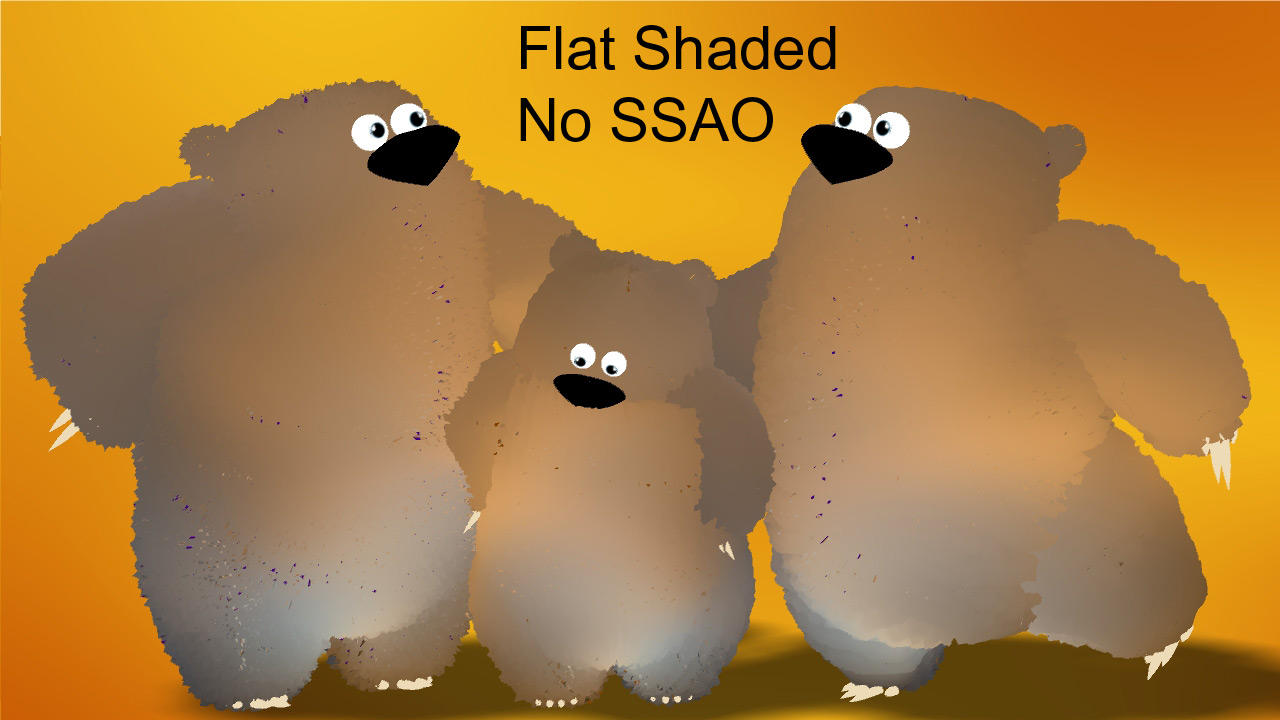
Your model is definitely getting there! However, your model is going to look different rendered in the chor depending on your lighting setup. If you want it lighter, or exactly equal to the coloring of the image used for the decal than you could make your models options property/Flat shaded = ON. (in the shortcut to model). You are really going to have to play in the chor to see how things will really look. Also - Do not forget about using SSAO (screen space ambient occlusion) - you will get much better definition of the displacement's furry goodness. I am assuming you are working in vers 18? First example is a comparison of without SSAO, then with SSAO. Same lighting setups (global ambiance = color/white=75%, 1 orange klieg 100% with 60% dark z buffered shadows, default blue sun 45%, default white sun 10%) 2nd example is same models with flat shaded = ON, with SSAO ON and same lighting setup. 3rd image is flatshaded No SSAO. Note that the coloring on each bear is not influenced by the lighting setup. EDIT: so that you can see the difference, uploaded a 4th image,screen capture of one of the models in the modeling window - not so hot using that lighting.
-
Have you tried the Benchmark project located here in the first post? Then we would have a better understanding of your new computers performance relative to other computers, and versions of A:M Cute character!
-
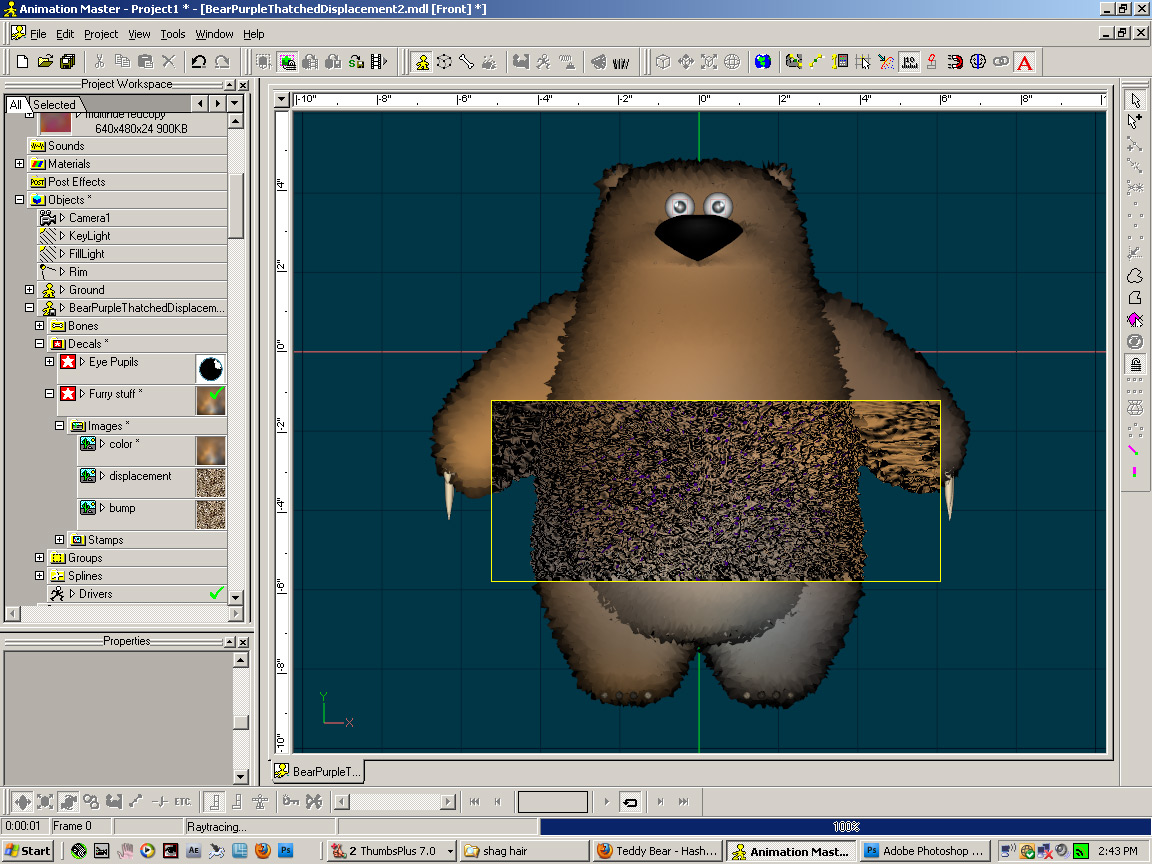
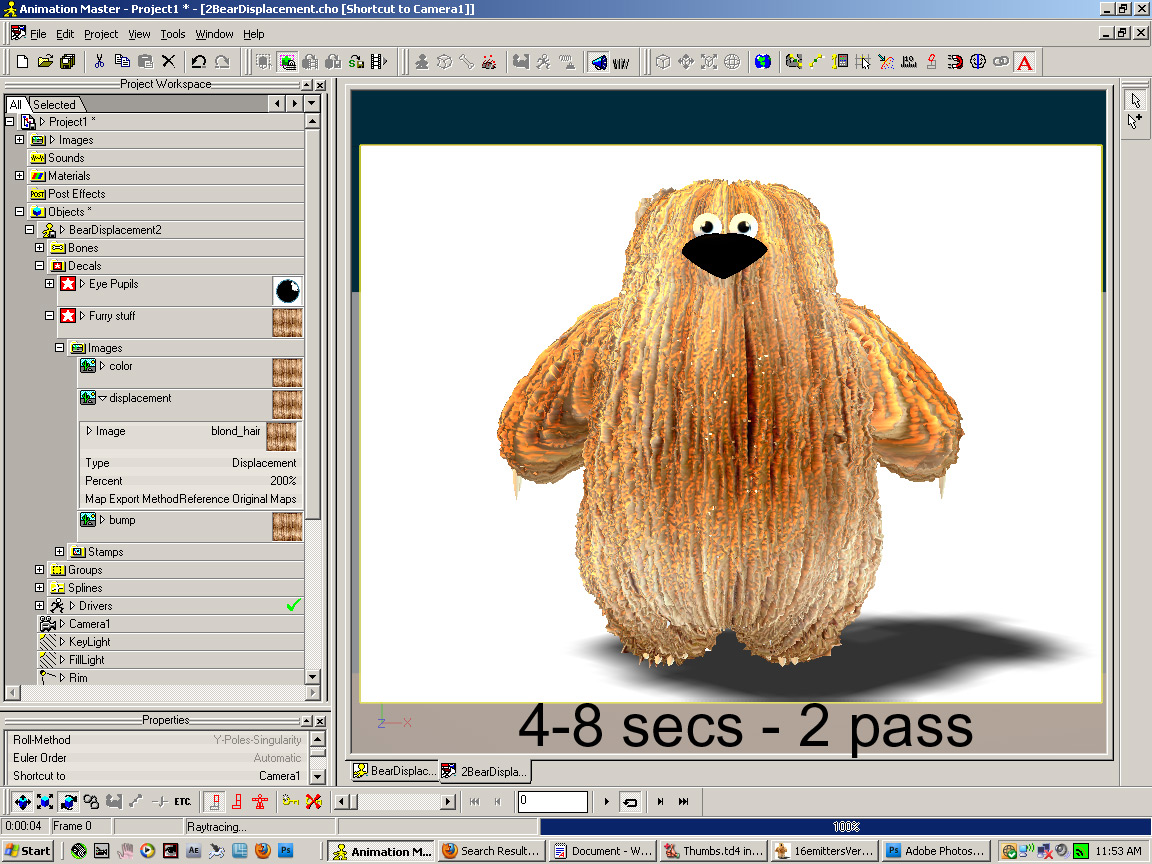
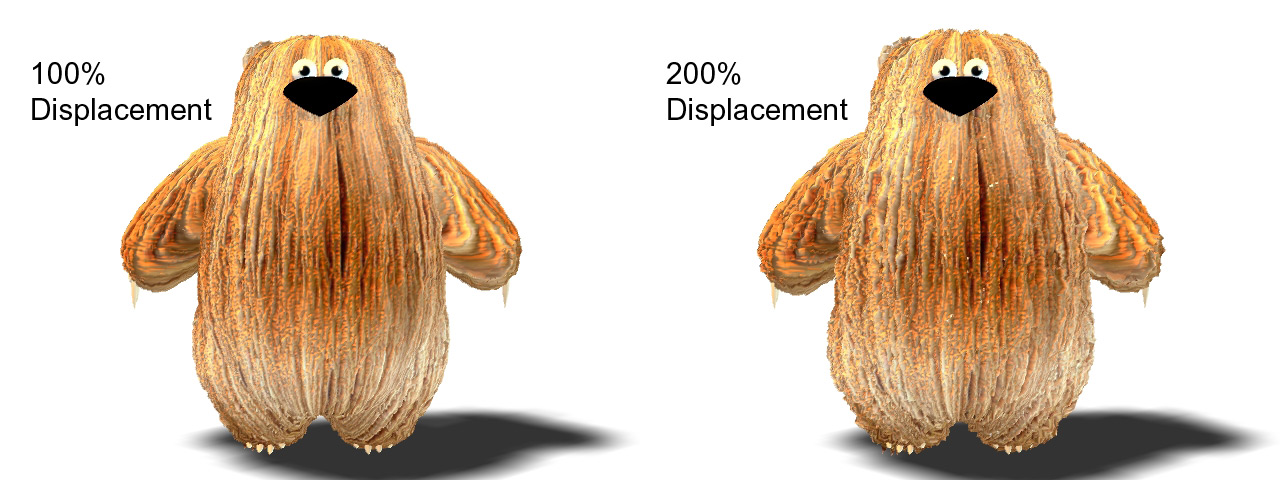
Also - I am going to suggest that for way way way faster rendering speeds (way faster than shag material or hair material) that you investigate using a decal (cylindrically mapped probably) covering the entire surface of your model (fur parts only), with a stylized image of fur, or whatever you want. Then experiment with using the same image for setting the bump and displacement properties as well. Then experiment with the displacement percentages, as well as the bump percentages. Then experiment with different images for different looks. Here is my quick test on a modified "Panda on Fire" model (from Hash 2001 CD) - with a comparison to show differences between 100 and 200 % displacement, using an image that is somebody's blonde hair (don't know where I got it). Tweek to taste, ad nauseum.
-
The dark oval shape is black because the diffuse color in the surface properties for your head model is black - somehow you changed it from the default of white. When you pasted the model into another model it became white because the default for that model was still white. The surface properties of any group of patches that doesn't get explicitly changed/set picks up the properties from the surface properties of the model
-

I NEED AN A:M MODEL FROM THE 90'S by Rich Lovato
NancyGormezano replied to JackDrama's topic in Work In Progress / Sweatbox
Rich Lovato is mentioned in this post (along with other animators). However the link to the project files in that post seems to be broken. Do not know if that character was used in that contest There is also the caveat: -
Sports Day (2014 Open Games) February
NancyGormezano replied to Simon Edmondson's topic in Contests/Challenges
Good antic with the knight, however he looks like he's sliding a bit. As for eye target, not sure why you had trouble animating it? I'm assuming it was because it was constrained to the head? A quick trick would be to have the eyetarget constrained to the camera, or to some other null positioned in the chor instead, for minimal animating. Then he would always look at that object or the camera - no matter what. Another option: if you move/change the eyetarget null to be a child of the head in the bones hierarchy, then you wouldn't need to constrain it to the head, and it would be easier to animate & it would still move relative to the head. -
I've just noticed this as well on PC with 18a/32 with opengl, in an action (nvidia). It does not happen with opengl3.
-
Sports Day (2014 Open Games) February
NancyGormezano replied to Simon Edmondson's topic in Contests/Challenges
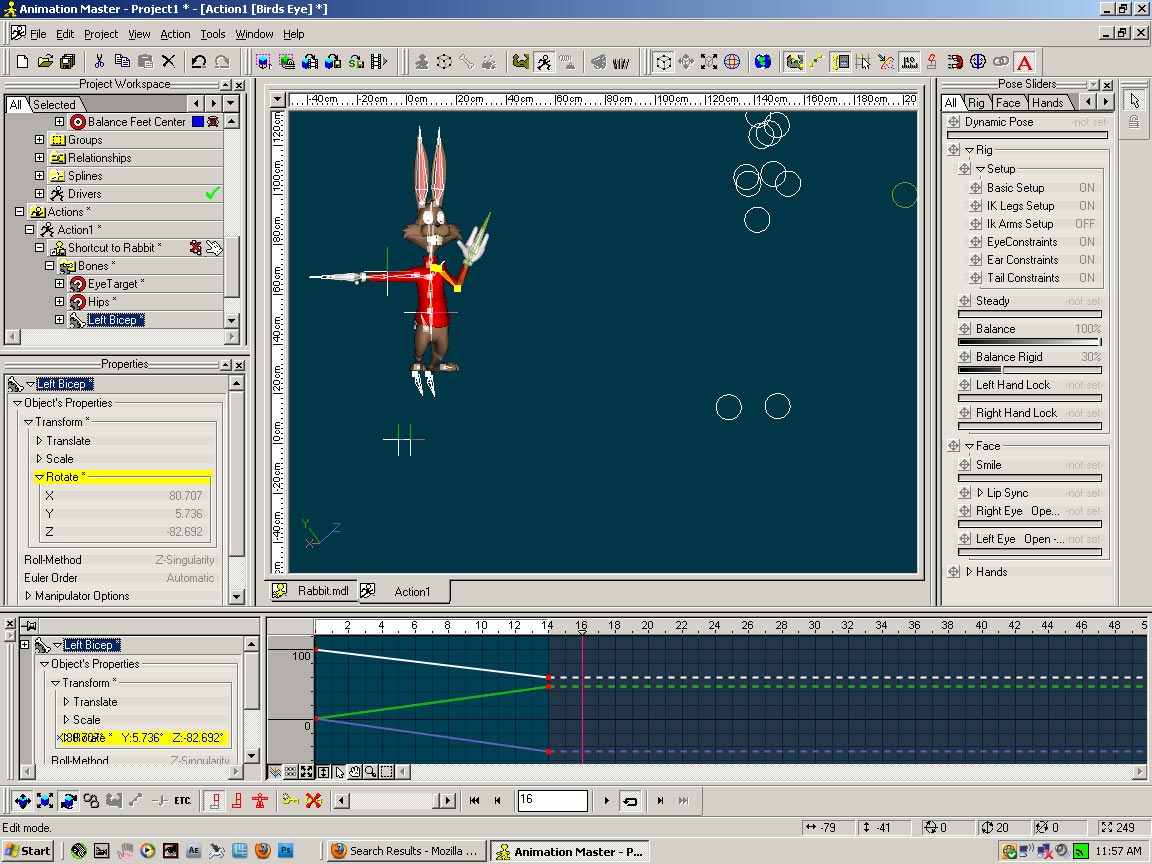
The rabbit has an eye target null - you need to animate it to keep the pupils looking in the "correct" direction. My guess is that the eye target null is behind the head, as it doesn't automatically move if you are using the body bones (eg hips) to move the rabbit thru space -
MS Windows XP support ends on April 8 2014
NancyGormezano replied to robcat2075's topic in Open Forum
yes it does (xp pro 18a/32) -
beautiful lighting!
-
Painting with Light? It Can't Be Done! Feb 2014
NancyGormezano replied to robcat2075's topic in A:M Tutorials & Demos
Muy muy bueno! Love seeing the A:M data structure revealed & explained, as well as how to use spreadsheet and text editor. Wonderful new helpful info ! -
excellent!
-
So very very sorry to hear this...My heartfelt thoughts are with you. Get better Soon. Please.
-
I am using 18a/32 and my system crashes (always) if I use opengl (SSE2) and shaded display with decals/rotoscopes, any model, project. I have found things seem to work better with opengl3. I suspect it is because my drivers are not up to date? BUT I do not have problem with opengl in 17, 16, 15 etc.
-
Sports Day (2014 Open Games) February
NancyGormezano replied to Simon Edmondson's topic in Contests/Challenges
Yes! quite amazing. Good reference - Thanks!...(um...I might try this...well...er...not me...but Captain Crazy Pants might...) Yes another good reference! - Thanks -
Yes I have the same question. I am not sure how they achieved the simulated project. When I run newton on the unsimulated project (rt click chor/plug-ins/simulate newton)- all I get are the leaves falling to the ground. No forces seem to be interacting. Is there some other step to get forces working? I will note that the unsimulated project immediately crashes 16b/32 - can't even open it into A:M. But I am able to open it in 18a/32 and "simulate Newton". But the leaves fall to ground only. I am also able to open & simulate the project in 15j+. (leaves fall to ground only). Did not try 17g. So Rodney - What are the steps that you did with "blow_start.prj" to get the same results as the simulated project - Blow_start_sim.prj"? And what version of A:M are you using? Here is my result (but only simulated the first 120 frames). What am I doing wrong? 18asimulatedleavesSoren.mov
-
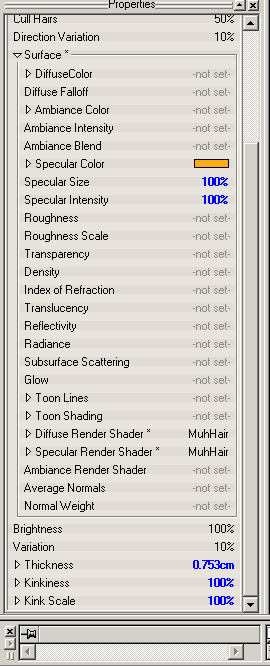
I suspect you don't see the "face camera" property because you are using muhhair in the surface render shaders properties of the emitter? Muhhair is usually used for "realish shiny skinny" hair and is hard to control the look. For a stylized hair look, with a flat wide emitter, with flat coloring, it's not necessary, nor maybe desireable. I have always found I can get shiny hair, more controllable with changing the spec size, spec intensity, spec color on the surface properties for the emitter and usually giving the emitter some "bow" percentage - 75% HOWEVER I am just noticing that the bow property for emitter is not showing up in ver 18a for a new hair material...but it does show up in 16b. ugh. (perhaps a bug?EDIT: it eventually did show up in 18a - had to restart A:M)
-
In the properties for the hair EMITTER (2nd to last property) - change Face camera to 0%
-
But it looks weird, and wrong unless there is a wall behind her? - the shadow should be projected on the ground if there isn't a wall, no? This looks like the shadow computation might be wrong. EDIT: never mind - I can see how that might occur with a certain camera angle - just confused my widdle brain
-
Well done modeling! I am curious: the shadows/ghosting surrounding her thighs/calves/legs look very odd. Is that coming from some light source? or is it from SSAO? what version A:M?
-
Nice style. However, you may run into collision problems when you give her a body. Unless you plan on restyling, the hair will run into the shoulders, etc. I have found that collision detection is a bitch to work with, altho John Bigboote uses it. And....I wonder why the hair is twitching a bit at the scalp area?...if I were to guess, I would say that you are using the default setting for face Camera = 100% - If so, I suggest using 0%. That usually helps. It might look better at the scalp if you change the thickness/shape of the emitter to be tapered more (like you did at the ends)? And if you decal/color the scalp some, that will also help perhaps. Nice job!
-
Thanks everyone! Robcat - yeah - probably true - but I would also finish the dance and make it have some sort of story...not sure I want to work more on this Rodney - Me too. I think this example isn't quite the settings I would end up with...I had scaled the ork 20%, and didn't adjust the SSAO (not sure what to adjust...maybe distance) John - yes - it does need a sound track - but since it was so short (11 secs) - I think I'd have to do some more with it for an appropriate track...that's why I made it loop (too short). Of course there's always the ubiquitous, repetitive, make ya gag track "Pink Fluffy unicorns dancing on rainbows"