KenH
-
Posts
13,816 -
Joined
-
Last visited
-
Days Won
1
Content Type
Profiles
Forums
Events
Everything posted by KenH
-
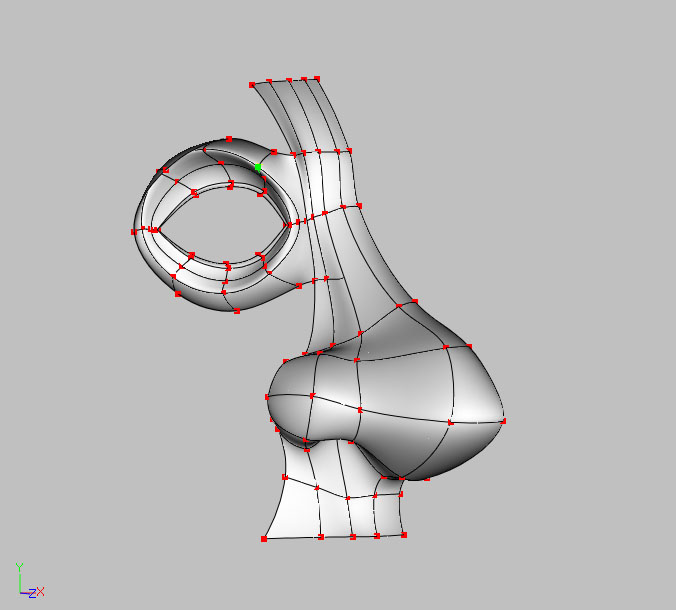
The most obvious thing is you need more vertical splines to form the nose....While modeling, I found that even though you attach a cp to another, it's spline doesn't necessary join up with the spline on the opposite side. You can check this by moving the bias handle of the spline(select the end of the spline) and see if the other spline moves too(then undo this move). To get a nice smooth eye, I lathed the profile of the eye. Once this gives you the basic shape, move cps together eg multiselect the top cps of the eye to move them all back etc rather than individually tweak them. The nose and the eye done this way will all have 4 point patches and then it's just a matter of using 2 five point patches to joint them. Good luck!
-
Whoohoo......Just like the movies!
-
Download v11f and it might fix the problem.
-
It's coming on. If you want to animate her, and I assume you do, you'll need rings around everything that moves like the mouth and eyes. The bust will animate just fine
-
Here you go: http://www.colins-loft.net/tutorials.html Some advice on modelling....use as few splines as you can to get the shape. You can always add more later. Also, make use of the multiple cp manipulation tools like magnet and cage tools as this will keep more continuity and smoothness. Good luck!
-
Can ye guess who it is yet...."Tie Me Kangaroo Down Sport...." Thanks to Colin Freeman for his great face tutorial. Incidentally, does anyone know how to adjust the colour of a "Printscreen" grab. I mean so it grabs the right colour.

-
Great! I don't know how it's done either. Looking forward to the tut!
-
I'll echo that and add "how the heck is that nest made!?"
-
Hooks: These are simple to do and allow you to reduce the geometry without creasing. It's easy to make a mistake while doing them though. The correct method is: Left click on the cp you want to hook. ** You must continue to hold down the left mouse button. Leting go will allow you to move the cp, but it won't be possible to hook it** Move the cp over the spline you want to hook on to. Now right click(also with LMB held down)
-
John: Yes I know why you used 5 point patches. I just don't get the workflow to use them with Zbrush. ....Because I export a model with the 5 point patches being converted to a 4 and 3 patch. Then I can paint on them in Zbrush and bring it back into AM. Then I convert the 4 and 3 patch back to a 5 point patch, but I can't figure out a way to get the image onto that patch. Is this the method you use? Thanks.
-
They are cool...cool enough for a desktop....now that's an idea! Competition winners should have the honour of becoming the "Animation Master wallpaper champions" whereby all the losers have to put the winning image on their desktop. Oh and it could be put on the Hash site with big writing "Created by Animation Master" on it.
-
Looks like he's from the 50s Good start!
-
John: At the beginning of this thread, you suggest saving the model as an AVA and re-importing it. Is that the same as an .AV2 because that's all I can see. I tested this format and it converts a 5 point patch to a 4 point and 3 point patches combined. If that's what you mean, is it not better to initially model with 3 point patches instead of 5 pointers? Cheers.
-
I'll do that. Thanks Bryan!
-
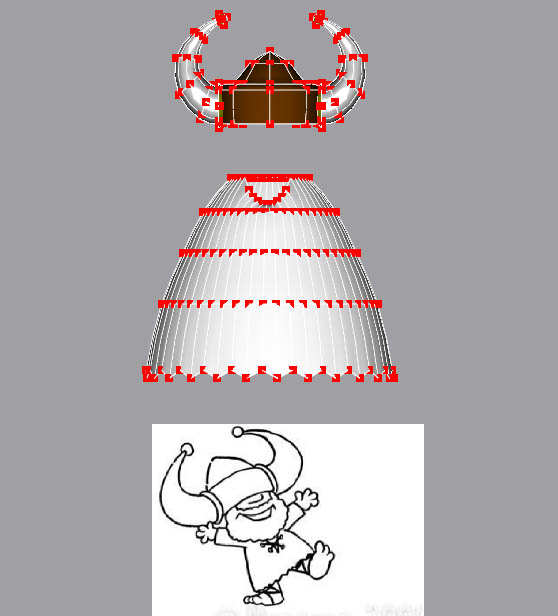
I'm trying to model this guy I got off the net. The helmet was fine, but I'm having difficulty with the clothes....I don't even want to think about the beard! Am I going about the clothes the right way? I just extruded the shape but now I don't know how to stitch in the arms.
-
Here's what he looks like...
-
Here's my effort. At least I learned abit more about modeling with him Buff.mdl
-
Pretty damn good! If I were an employer, I would expect to see a humanoid in there somewhere. I really like the look of the green dino...really rubbery looking and well animated too. So some crits....this is your big shot to impress, so squeeze as much in there as you can. It should ooze personality. I might expect some sound. Even though this is an animation reel, the texturing should be abit better....you want to knock their socks off. Also, perhaps instead of just a showcase of the models, you might make a story with them to give it more interest. Maybe the dinosaurs are facing off each other. It doesn't have to be long...just put as much expression/character in there as possible. Finally, you might look at demo reels done with other apps to see what you're up against. They are on other forums to see. All of the above is just my opinion and doesn't have to be acted upon! Good luck finding a job! PS...another idea....you could have a close up of a mouse in the socket of the dino skull and then zoom out to reveal what he's made his home in.
-
It's getting better alright. Unless you're going for the look, the hair still has a painted on quality to it. I don't know maybe this is as good as AM can do hair.
-
Models made in Z2 do work in AM but you have to be careful with them and know how to go about it right. Also, decals don't have to be pre-assigned in AM. It's possible to bring in the undecaled model into Z2 and paint on it there....all the uv co-ords are automatically looked after and work in AM.
-
No it's only available as an obj file. You're half way there already. Just export the model with the texture on it as an obj from Z2. You can then import this into AM and just change the texture to a displacement type map. Hints: You will have to flip the texture vertically before bringing it into AM(you can do this in Z2) and you might want to devide the mesh in Z2 before bringing it into AM as this will get more detail.
-
I brought the tiff into Z2 and put it on the model. Then I saved the obj with a bmp map.
-
That hair looks great. Can't wait for the final render of it! Only one opinion....I'd make the shadow within the hair darker. Contrast is king!
-
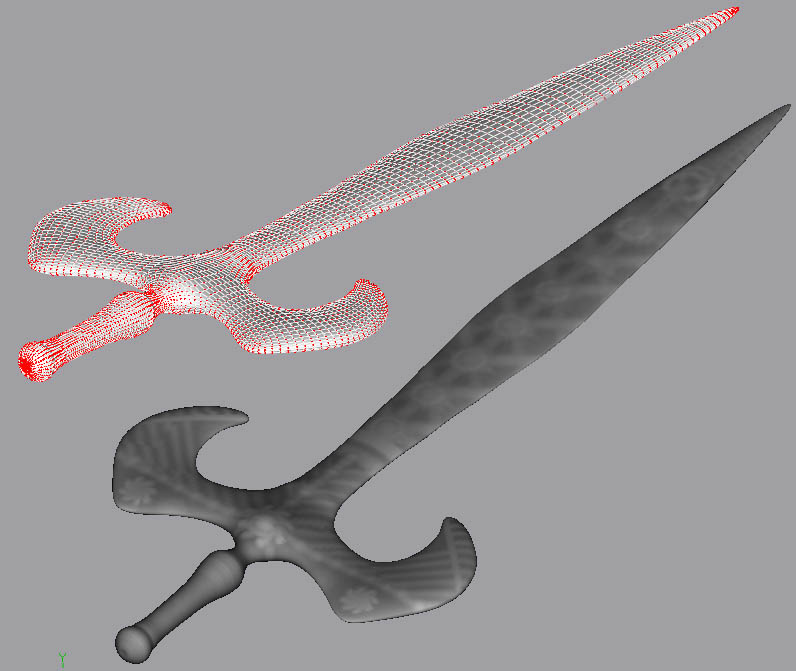
Bernd: I hope you got permission to post that other persons screen grab. The sword does look very clean in that shot but hopefully AM's displacement abilities will be improved upon soon. But lighting might account for some of the defiencies in my grab. Rodney: Here's the sword broken down. As you can see it has alot of patches!
-
Here's another test. I had to up the patch number and there is a little artifacting but other than that it turned out great! It took about 10 minutes on multipass 4...I'd love to test it with the web based skylight, but I haven't worked out how to use it yet! (Model courtesy of Zbrush creator)