KenH
-
Posts
13,816 -
Joined
-
Last visited
-
Days Won
1
Content Type
Profiles
Forums
Events
Everything posted by KenH
-
And pic

-
Here's the latest and associated .chor file. Don't forget to go up his nose! I'm gonna animate him now. Geri.chor
-
You got wipped....can you post them again?
-
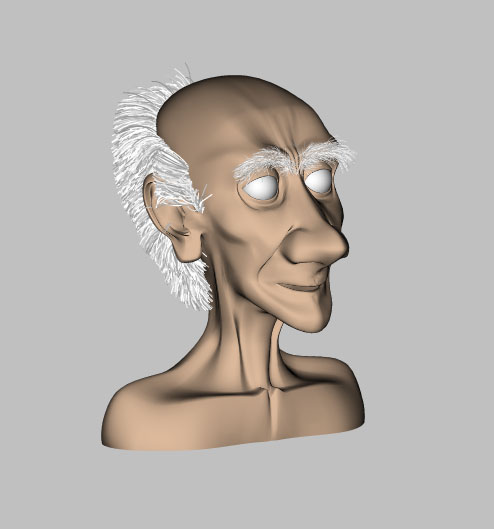
Do I see the new hair features of AM being used here?
-
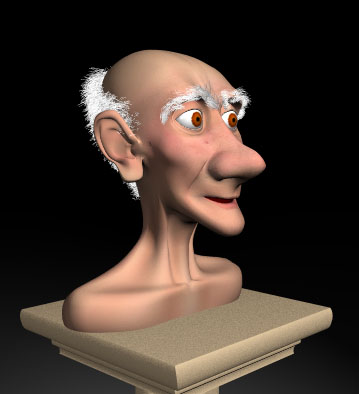
Thanks for the comments guys! I intend to animate him and I'm only going to concentrate on his face. So, modeling wise, this is as far as he'll go. Here he is with hair....it's a shame AP doesn't support it....yet. Anyone know the secret to keeping the hair from poking through the ears? Just shorten it or will collision detection look after it?
-
Class stuff!
-
Here he is in all his artic pig glory. Ger1.model
-
Looks great. I seem to remember someone else around here making one of those too. They're popular models!
-
It's just a 3D font that you can see there. Nothing else in the scene.
-
I'm making a homepage and doing some titles for it. But I'm getting some artifacts on the right side of the images. Anyone know why this it?
-
Gold star to Rodney! But you weren't far off Frank
-
You do know that if you get any of your models included in the Hash CD(hint hint ), your name will be built into it and it might get some advertisement for you.
-
Damn cool! I assume you used the teeth from the scull? Are you going to add bumps to the skin with displacement/bump maps? I'm interested to know what companies you're applying to.....do they deal with splines? If not, do you have a knowledge of modelling with polys?
-
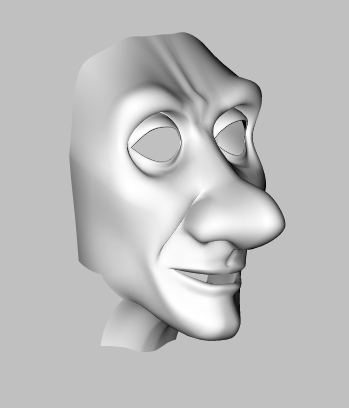
Thanks! I adjusted that hook. Alas I can't take credit for the design. Don't you know who it is yet? I'm doing him by eye, so that might explain it.....here's a more complete picture that should illuminate him.
-
A quick update
-
The tile map is the image that was with the model originally. You might be on to something with this method though. That's nice and neatly layed out. Was there alot of tweaking after you used "flatten"? I just looked back at that model and it seems it was a spherical map. Here's an example of a tile map that was used for the sword above. Bernd: Could you tell me how you unwrapped that mesh getting the back in there too. Thanks.
-
I think you're right. They look abit rigid. Now I'll have to get on my a** to see what happens!
-
Thanks! The animation is just in shaded view. When I'm happy with it, I'll do it all like above.
-
I don't have it handy....Bernd probably does. Just to let you know that Zbrush uses a mapping method called Adaptive tiles. Basically each poly/patch is represented by a square and they are all over the place. They have introduced a new method called "Group Adaptive Tiles" where the maps are divided into groups. This map is a little easier to read. Though, what you're saying could possibly work fine with the 3 basic mapping methods which it also supports.
-
I've got it up to 14 seconds! Man animation is slow Please download it and see the changes. I think you might be amused by it.....I am and I made it Obviously, it will all eventually look like the image above. It's ballooned to 4 MB I don't know how...I thought quicktime was compressed. Baby Blues
-
The trouble is that model hasn't got a "parallel type" map on it. So, it's impossible to align the map to stamp it onto the model. I've tried models with spherical maps, but the maping origin is different between the two packages. The closest I've come is to flatten the patches I'm going to alter before doing so. Then I take a screenshot of those patches rendered. Now alter the patches(if you do it while everything else is hidden, no other patches will lose their images). Now you can use your previous screen shot to lay on top of the altered patches. It's tricky to line it up though and changing the patches to 5 pointers can cause points to become unflattened.
-
Looks great! A very noble cause to donate your time to. Well done.
-
Great tips guys! I'm incorporating them as I speak...... This is just going to be a simple animation with the baby and the ball. The ball is the same colour because that's why the baby hasn't seen it yet.....but he will accidentally. I'll have to brush up on how to do the ease in and out now!
-
And a grab
-
Hey! This is a first pass of a little short I'm working on. It's my first real animation and I would appreciate any pointers anyone can give. In particular, I'm having difficult with what to do with the hands. Anyway, let me know what you think. Here's the 900kb file: Baby Blues