KenH
-
Posts
13,816 -
Joined
-
Last visited
-
Days Won
1
Content Type
Profiles
Forums
Events
Everything posted by KenH
-
Nice model Some look like they are in perspective and not "plan view". In the side view for example, you can see her far arm. But her face looks right....maybe you've done something in Poser to give that effect? I don't know if you're familiar with splines but I would get a good example body off the net and learn how best to lay them out. You're target image is easily possible in AM. Good Luck!
-
Pretty cool. Works fine here.
-
Just a tip for those wanting to use a Zsphere model in AM: Before you paint a texture/displacements or model any details, make sure that the base mesh looks good in AM. So export it with merge set and groups unset. As you can see in the image, there is discontinuity(easily spotted in a rendering) on the left leg and the right leg has been rebuilt by deleting the offending cp and re-splining. Once this is done on your whole model, it can be exported as an obj and the detailing finished in Z2.

-
Always turn off Mirror and Magnet mode when your finished with them. It will save you alot of bother!
-
Hello, and ahh.... IT WORKED!!!
KenH replied to chadtheartist's topic in Work In Progress / Sweatbox
Actually I'm not sure now. I think I'm confusing it with making a zsphere where you have that option before sub-dividing. I had a look since for an optimiser in Z2, but it appears to have been dropped since 1.5. -
:JAWDROP:
-
Hello, and ahh.... IT WORKED!!!
KenH replied to chadtheartist's topic in Work In Progress / Sweatbox
She looks good!....in a monster sort of way On the question of reducing the mesh, I found a quick way to do it is to bring it back into Z2. Go into the geometry option and you'll see it's on sub-division level 2. If you drag that to level 1 the geometry reduces and you can import that into AM. It might speed it up abit if it looks good. -
If you drop that on to another character, wouldn't the character have to to have the exact same dimensions as your model? I wouldn't fancy tweaking all those bones to fit! Hell my computer seized up just unhiding them all!
-
You only sent the displacement tiff file....no bmps. I converted the tiff into a bmp in Photoshop. Then when AM asks for the bmp(it thinks it's a texture not displacement map) I chose this. In AM I changed the image type to displacement. But you can do that with the texture. Then to apply the displacement map, do this: Import the bmp drag it onto the model as a decal right click and change it's type to displacement Apply the image The displacement type will automatically apply the correct UVs. I should add this is the way to do it in v11. I hope you downloaded it. Also, at the moment there is a problem with preserving the uvs in objs after you save the project. It will be fixed next release.
-
Here's what I got. I don't know if it's how it should look....The first is the model imported with v10 and the second is done with v11. They look the same but I thought it was v11 causing the "breaking" at the joints. I haven't had that in other models. You can see around that area that the mesh is disjointed so it must be what John said is the problem......hmmm...when you exported from Z2, did you select "groups" in the export options? As a rule, I select merge and deselect groups. PS also I assume you converted the tiff to an 8 bit bmp. It asks for a bmp for the texture for me.
-
I had a look at the rig....boy you have some patience!
-
They all look fine. Good work! I'd love to have had such models on the CD.
-
Here's a 5 min displacement test. I'm not sure what the breakage is at the nose and other areas, but I think it's to do with the texture seams not being repaired in z2. Was it made in the old zbrush? I'll email you the model and texture. PS Actually the texture is abit big to send...what addy do you want the model at?
-
Yes some of the wrinkles don't show up in 8 bit. You can use a bumpmap and displacement together, but I think they both have to be 8 bit images too. I'm not sure how that would show up the details better. I haven't a clue what you mean by 0 to 1 though Your model comes in just fine. I would say that there are too many rings around the mouth area. You only need about 3-4 otherwise it will animate badly in AM.
-
Chad that's a stumper. I don't know why it's not showing up. Hopefully a clean install will fix it. John: Hash say the uv problem will be fixed in 11a!
-
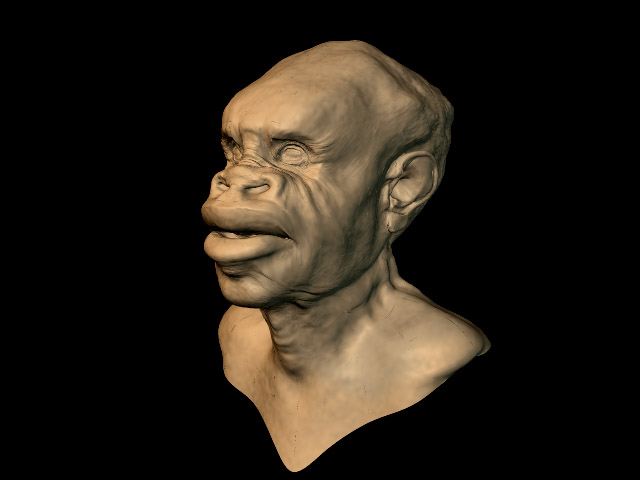
I thought it was a "hie" folder and not "hxt" in v9? But in any case it needs a different obj plugin. I don't have it handy, but it might turn up somewhere. Here's another test. Man this is fun.... Model creator: Copyright © 2004 Sami Sorjonen Sami Sorjonen s-s@sci.fi www.cgmill.com
-
You just import the displacment map as a decal. Right click on it and call change it's type to a displacment and then apply it. The uv mapping is then automatically applied to the image so it "knows" where to go on the model. Again, the polys need to be all quads if it's to stand any chance of animating properly.
-
Something's spooked Jim!
-
You mean there's more!?! 8)
-
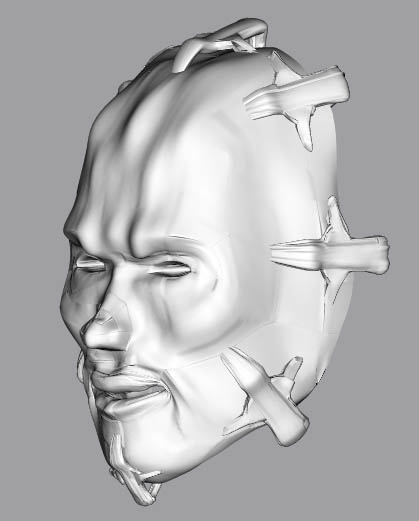
Here's a test model given out by the Zbrush people. This image has also been posted on a zbrush forum and doesn't fair too badly against the other software efforts. You can see a little banding at the edges of some patches and it's only an 8 bit displacement map. As far as I know, AM can't use 16 bit Tiff files yet. I have to say I'm impressed not only with displacements but with AM's importing of them.
-
Nice! He does indeed look spline heavy. I guess that is to get the displacement to work properly.
-
We're going for the toon look now. Does anyone know of a good way to do simple clouds?
-
To create a circular object... Draw a shape in the xy plane. Select a spline(not a cp) on that line Press L (for lathe) Voila!
-
Brilliant Mike! I might just use that one. I see him reading the coupon intently while taking a bite out of the frizbee. In fact, it's a great idea for any real pizza men out there!...the frizbees that is.
-
A new addition....