MMZ_TimeLord
-
Posts
1,495 -
Joined
-
Last visited
Content Type
Profiles
Forums
Events
Everything posted by MMZ_TimeLord
-
Golden Gate Bridge High Detail model
MMZ_TimeLord replied to MMZ_TimeLord's topic in Work In Progress / Sweatbox
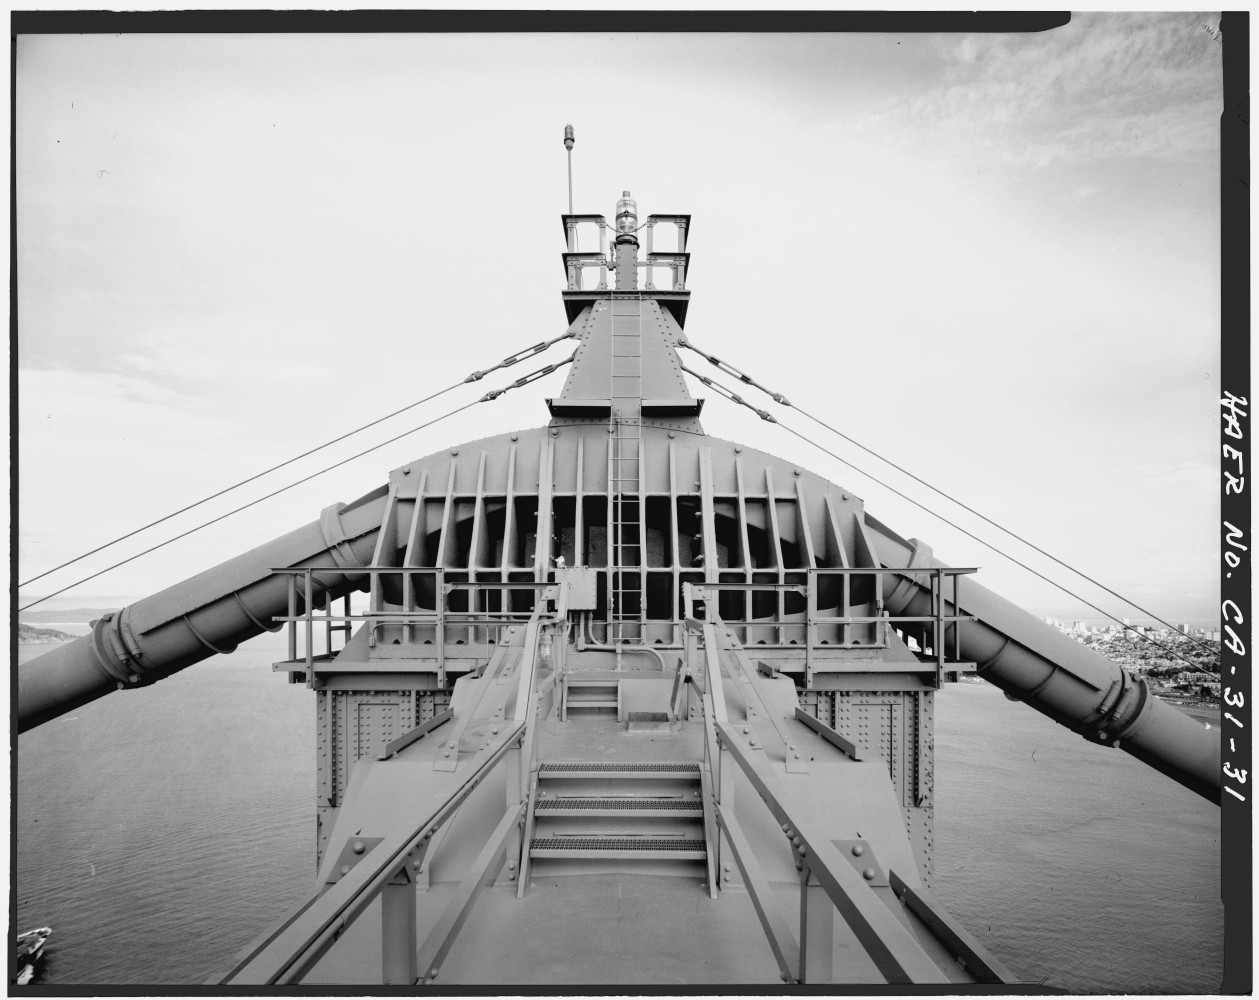
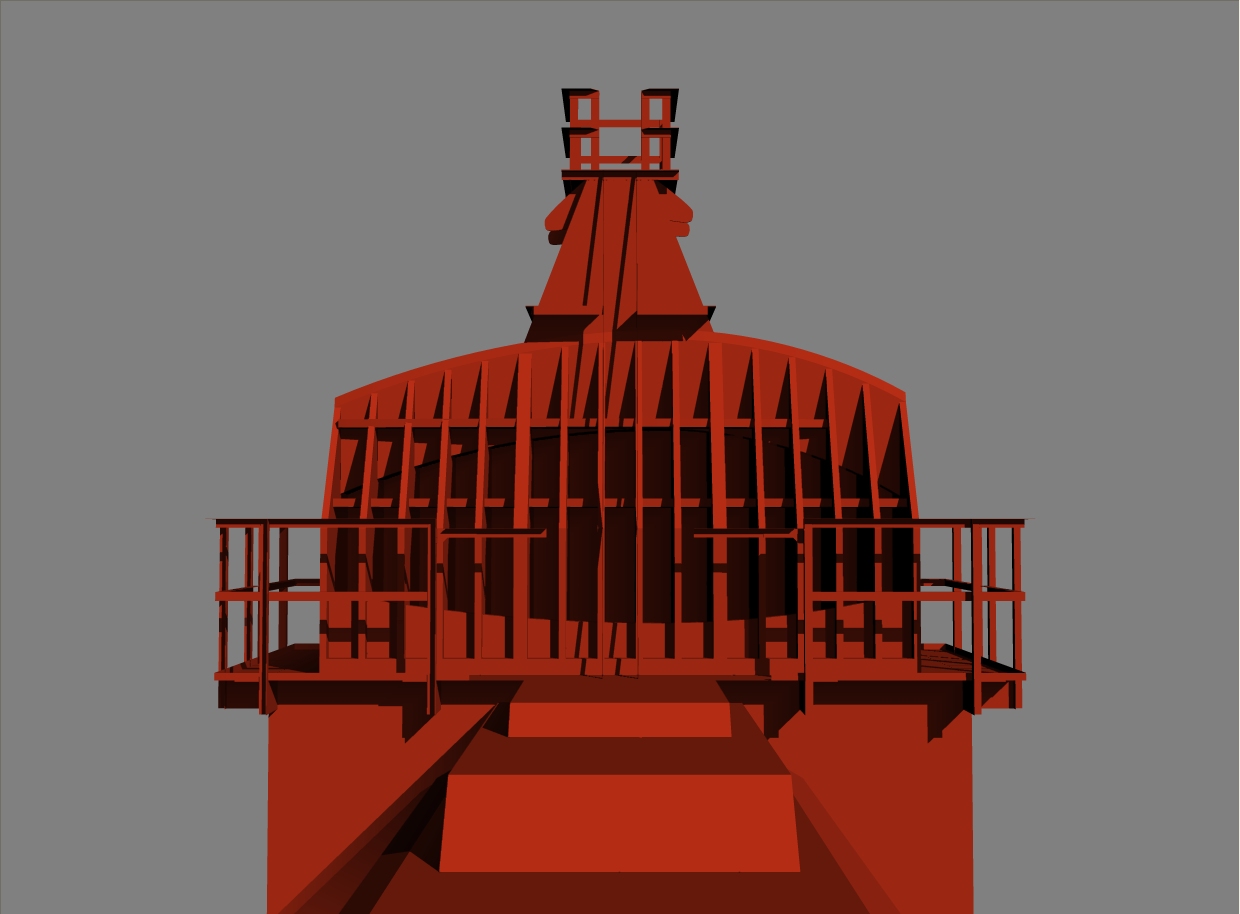
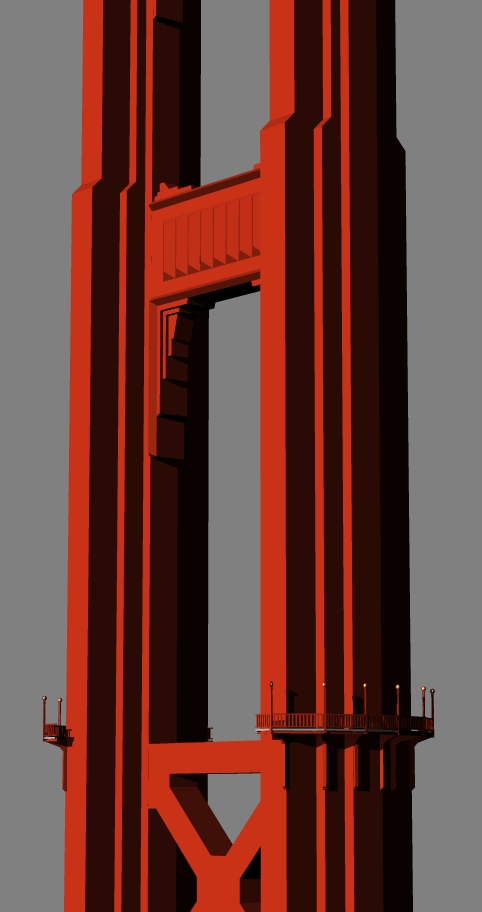
Whew! Here's another WIP picture of the top of the south tower. There's a TON of detail on just the top of these towers... Take a look at the reference photo for proof. The original TIF image of that reference photo is 4 times that size! Excellent for seeing the small stuff.
-
Colin, I've been watching this thread since you started it... I am still amazed at your modeling ability. I hope to be able to model humanoid type characters with as few splines as you do and still get the muscle tone and definition that you do... just... WOW! The hair on the legs looks great! (Probably a bit more dense, but that would be my preference.) Take care... can't wait to see him roar!
-
Golden Gate Bridge High Detail model
MMZ_TimeLord replied to MMZ_TimeLord's topic in Work In Progress / Sweatbox
Thanks for all the comments folks. Dahr, I'm actually basing the general dimensions on a dxf I found on the net (VERY basic structure). But all the details are being done off of archive photos from university websites (UC Berkeley, etc.) and any other photos I have scrounged up from the net. And yes Ken, I'll get back on the TWO project. I've was seriously distracted last week with the death of my wife's father. (Italian family on her side, so we were all very close. They live about 25 miles away.) I intend on using simple detail decals for displacing the rivets. And yes, I was contemplating action objects to control the actual patch count in the choreography. i.e. - adding low action to the model would give you simple handrails, light posts and superstructure (girders). Medium action would make these slightly more detailed and of course high action would put full details in. Again, I'll need to play with the action objects some to understand how that works. Anyone know a short tutorial that explains it? I can't seem to find it. Anyhoo... I'm working on the top of the towers today. I should be able to post a few more updates soon. -
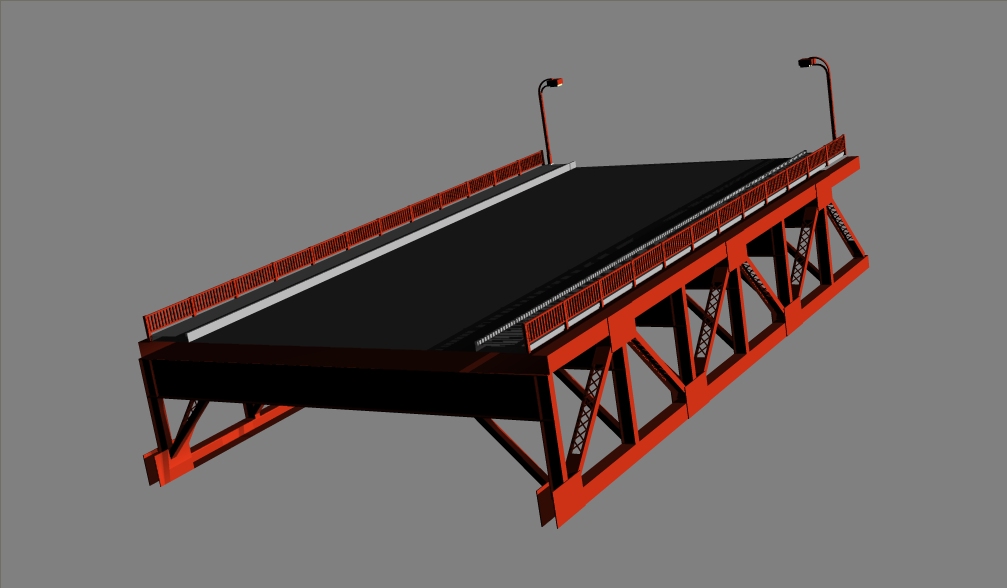
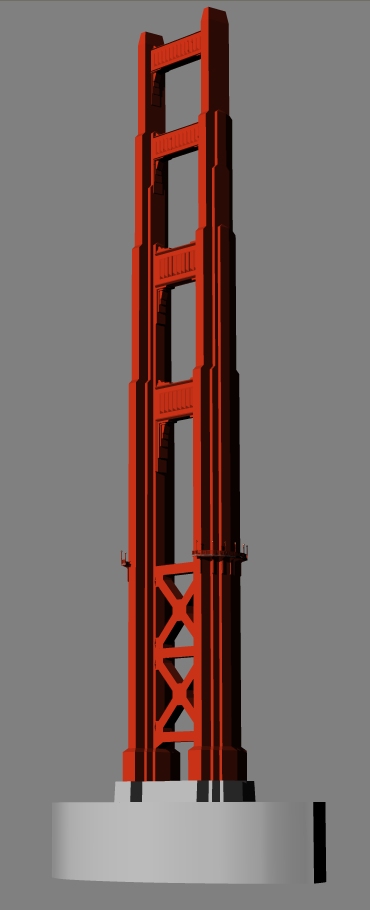
Well, here is the 'in progress' renders of a section of the roadway deck and of the south tower. Lots of detail to add to the top of the south tower and more for under the road deck. Also there are many MANY other lights that are designed to illuminate the towers at night, so I'll be adding those as well. This model will have the lights added. I will probably need some help with that as I'm not quite sure how Yves did his skylights with only one light and the action added it numerous times to the skydome. I'd like to do the same thing here, where all the regular street lights are copies of one 'type' of light and the spot (klieg) lights for the tower illumination will be another one, etc. That way the end users won't be bogged down with hundreds of lights to adjust if they are not happy with them. They can just tweak the few 'parent' lights to taste. Anyone that can help me with the lights, please chime in. Lastly, I will be including a lower patch version as this high res version will probably go over 50,000 patches. Enjoy... comments and critiques are welcome.
-
I had started to model this some time ago and let it go to the back burner... but you can have all the reference images I have.
-
Actually this isn't necessary. If it's a tilable image, you can apply it so it stretches and then in the properties just increase the number of times it tiles...to 10. Ken, The problem I've always run into is that cylindrical mapping tries to wrap the image around the object once. I was unaware you could specify a number of repeats to wrap around the object. Can you please elaborate?
-
It's gonna crash!!! There's no pilot!!! You may want to look for this thread for a way to make the rotor look more like it's spinning. Really good start, congrats on getting A:M and welcome!
-
What robcat means by a fuzzy klieg light is that you replace your 'sun' light with a wide klieg. (I'm pretty sure that's what he means) When you do that you can experiment with the width of the light so get your shadows softer around the edges and darker under the vehicles. Robcat, please correct me if I'm wrong here.
-
The cylindrical application will attempt to apply the decal around the Y-Axis. You will have to do two things. 1. Rotate your decal 90 degrees in your graphics editing program and duplicate it so it's a longer tread. Right now it tries to stretch it all the way around a wheel. 2. Rotate your wheels 90 degrees and apply your decal, then rotate them back. EDIT: Here is the tread after I duplicated it in Photoshop 10 times across and after application on a quick tire. I followed the directions above exactly. The tire was created with it's axis of rotation along the Y-Axis and the decal was applied that way, THEN it was rotated 90 degrees to orient like a real car tire. Sorta like a mechanic having to mount your tire then put the wheel back on your car.
-
bit of a pause during his transition from sign to 3D... I'd suggest cutting out a few frames there... otherwise it looks good.
-
Nicely done... Excellent details... Way to go Slipin_Lizard!
-
glow can be moved with the right set up
MMZ_TimeLord replied to johnl3d's topic in Work In Progress / Sweatbox
Interesting, that could be used on space ship engine flames to vary the glow (flicker) ... hmm -
I don't believe there is a limit, but someone from Hash (Martin) would have to answer that for sure. It could be that your realtime rendering is set to limit the frame rate time. Check this in your 'Tools->Options' under the 'Global' tab. Make sure that the 'Interrupt drawing' setting has the 'Limit max drawing time' unchecked.
-
Troll, faerie fly-fishing...
MMZ_TimeLord replied to zandoriastudios's topic in Work In Progress / Sweatbox
Your pencil art is always top notch Will! I like the look of the characters... look forward to more progress. -
I'm sure it's possible. I don't believe anyone here has done one that realistic. There is a tutorial on A:M Matrix for lightsaber with fanning effect. This is probably the same tutorial you have been pointed to in the past. I have not seen a light saber done more real than that in A:M. I would grab the project from the tutorial and see if you can make it more 'realistic' (seeing as how a lightsaber is fictional)
-
I went through the site, you and your peers have done some fine work to date. I really like all the ship designs. I can't wait to see the trailer... then maybe, the movie!
-
It's not the warehouse, I used that for my walk lesson and it showed reflections just fine at 640x480. Rendered pretty fast too... under a minute per frame. I believe Stuart is correct, you have WAY too many lights in there to expect it to render quickly. Mac platforms historically render slower (not my fault, just what I read) I would say open the properties for the lights in choreography and turn all the streetlights to 'Active = off'. Then do a test render of a few frames to get a feel for it. You also have two other lights, the fill light, rim light and the key light. For my own projects I get rid of the original key, rim and fill lights.
-
DXF Model Cleanup (For Fun)
MMZ_TimeLord replied to MMZ_TimeLord's topic in Work In Progress / Sweatbox
Wires of updated "AL" and... Wires of the raw DXF in A:M
-
I was digging around the old hard drive and found an old DXF model of "AL". I had played with him before back in the version 8 days, but it was just too much work to remove all the extra splines that resulted from polygon models. Low and behold someone posted a link to "AccuTrans-3D" and I decided to save a quads copy of "AL" and import him and see how much work there was to do. Sure enough it made it bearable. So I've done some significant cleanup. Split his mouthline and given him an inside to his mouth, cleaned up the face, touched up the ears (A LOT) and completely merged his jacket with his biceps and forearms and his pelvis with his thighs and calves. I decided to see how much progress I had made and figured I'd give Ambiant Occlusion a try while I was at it. (AO settings are Render Option AO=ON. Choreography settings = Global Ambiance Type = Global Color, Ambiant color = White (255,255,255), Ambiance Intensity = 100%, Ambiance Occlusion = 100%) Looks a lot better even with just simple surface colors and the mesh cleanup. I think I'll touch up the hands some more and add teeth, then I'll rig him. This could bode well for fairly simple characters such as this.
-
Excellent work serg! I love the style. Good smirk too!
-
AND... always remember to do an in-choreography render (final using 'render mode') to make sure you are getting what you want BEFORE you commit your machine to hours of rendering time.
-
Featured Artist of the Month....
MMZ_TimeLord replied to DarkLimit's topic in Work In Progress / Sweatbox
Yeah, congratulations! I've seen your work here over the last few years and it just keeps getting better... Cheers! -
Margaret, Here's a familiar place to get your astronomy animations started... I'll try to post my other planets of the solar system as well. There plenty of resources out there... Welcome to the world of splines!
-
Well done! I am impressed about the face not having too many 3 point patches or at least they don't show. Good work!
-
Welcome aboard... more new artists, more content, more diverse examples of extraordinary animation! I can't wait!