MMZ_TimeLord
Craftsman/Mentor-
Posts
1,495 -
Joined
-
Last visited
Content Type
Profiles
Forums
Events
Everything posted by MMZ_TimeLord
-
Earth with Hi-Res textures
MMZ_TimeLord replied to MMZ_TimeLord's topic in Work In Progress / Sweatbox
Here's the rub to putting this on ANYTHING that hash will be providing WITH it's product or to promote it's product. The site where I got my initial images is: http://www.space-graphics.com This run by a graphics hobby artist in Italy. The 'Rub' comes here. So, Hash Inc. would have to work out the legalities of putting his older and lower resolution bitmaps in the provided project for general consumption. I have used them to date with no problems because it's for personal use. Putting them into even a 'Bonus CD' that anyone can download but also comes as part of the product would be a 'Business' use. I am now saddened... -
Earth with Hi-Res textures
MMZ_TimeLord replied to MMZ_TimeLord's topic in Work In Progress / Sweatbox
Thanks for the comment Ken... I'll be happy to donate the project. A little tweaking left to do, but I'll post again when I'm finished and I'll put the project up on Hash's FTP (incoming directory) if they want. -
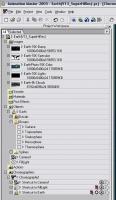
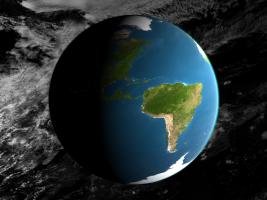
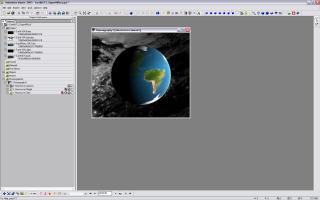
This was done in V13 Alpha 4... There was a boo-boo when I attempted a 2048x1536 render last night... I'll post both let you figure out which is which. But before you see the finished works, take a look at my project window... note the texture sizes involved here. (And, no, I don't think I can reproduce what happened... I'm clueless. It occured both render to file and in the chor window until I restarted A:M) I will attempt to re-render at 2048x1536 or higher tonight and post the results.
-
Yet another v13 Displacement Fun Thread
MMZ_TimeLord replied to aaver's topic in Work In Progress / Sweatbox
Thanks Anders! I'll put that in my V11.1i install. I do keep at least 3 or more working versions of A:M around for just such an occasion! -
Yet another v13 Displacement Fun Thread
MMZ_TimeLord replied to aaver's topic in Work In Progress / Sweatbox
I want that footprint plugin!!! -
Oz Map -- Another v13 Displacement Fun Thread
MMZ_TimeLord replied to Zaryin's topic in Work In Progress / Sweatbox
That's SOOO awsome... heheeh... I KNEW that hiding some patches would help... now we need that 'bake'. -
Oz Map -- Another v13 Displacement Fun Thread
MMZ_TimeLord replied to Zaryin's topic in Work In Progress / Sweatbox
Dan, I don't have the close-up images, but I have the 8000+x8000+ images of earth (bump, color and specularity + cloud layers, and city lights) I'll have to post an image in the showcase when I get it re-rendered with the new displacement maps. -
Oz Map -- Another v13 Displacement Fun Thread
MMZ_TimeLord replied to Zaryin's topic in Work In Progress / Sweatbox
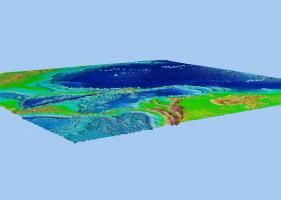
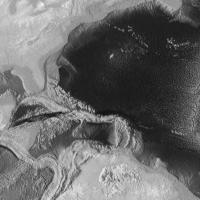
Yep, seemed to work okay, I used the colored map for the color and my converted map for the displacement. I think maybe the red channel needs to be tweaked somehow so it's higher up than the green channel... some of the red areas seem to drop a little. I probably need to either soften it some or bring down the scale some too... tell me what you think. Now I gotta go fix my earth model... bump map changed to displacment... oooo... can't wait. [attachmentid=13619] -
Oz Map -- Another v13 Displacement Fun Thread
MMZ_TimeLord replied to Zaryin's topic in Work In Progress / Sweatbox
Two things... someone mentioned culling of the patches you don't see... how about simply hiding them when you move your camera in. In other words, find a spot you want to zoom into a lot and hide all but that and see how close you can get the camera... don't forget to scale the camera down too... Second, on the colored satalite image, could that simply be converted to a grayscale image? Looks like th blue is the darkest contrast wise... hmm... I think I'll break out photoshop and play with it.... EDIT: Okay, I split the image into RGB channels, applied a negative filter to the blue channel and recombined them. Here is the resulting map after simple grayscaling. I'll do a render on a patch and post that next to see if it comes out right. [attachmentid=13618] -
Excellent work, I love all the finished materials... Can't wait to see more from you!
-
Oz Map -- Another v13 Displacement Fun Thread
MMZ_TimeLord replied to Zaryin's topic in Work In Progress / Sweatbox
I realize this is going backwards, but it's too bad we can't 'bake' the displacement. (i.e. - convert the patch(s) to a 1 patch per pixel mesh) I know it would create HUGE meshes, but here's the upside... We could then copy the part of the mesh we need for a scene, such as the the mountain scene you were talking about. Just a thought... probably thinking while sitting on my brains again... -
Justin, Generally when you do the animation you have a camera view with the outer pink/purple box that shows your rendering limits. Then there is an inner pink/purple box... that one shows what is 'tv safe' or will ALWAYS end up on your television screen for viewers. Took me a while to get used to that. There is also a 'title safe' frame, I haven't played with it. Both the 'tv-safe' and 'title safe' options can be turned on or off in the camera object properties. Hope that helps.
-
Here here!!! Let's hear it for RODNEY!!!!
-
"Platelets: Lepidopteraphage" - the film is finished!
MMZ_TimeLord replied to Dascurf's topic in Work In Progress / Sweatbox
I would have to say that was a very 'interesting' film. Well... I'm off to therapy now -
Since V13 Alphas started showing up I believe. Check the thread here... Oz Map -- Another v13 Displacement Fun Thread
-
Lookin good there John... Can't wait for it to breath fire and ROAR!
-
Yes, welcome back Mike! I too remember you... (I started with Playmation too, still have the floppies AND they work on one of my old boxes!) Go through the Art of Animation Master lessons and you will be on your way VERY quickly. But most of all, have fun with A:M! Enjoy!
-
Oz Map -- Another v13 Displacement Fun Thread
MMZ_TimeLord replied to Zaryin's topic in Work In Progress / Sweatbox
The one on the right has your normals pointing the right direction (out form center), the left one has the normals pointing in the opposite direction (in from the outside). I made the same mistake when I did my first test (see my first example earlier in the thread). The second one I did came out fine. Other than that, I'm not quite sure of the question (I want it ??) -
Oz Map -- Another v13 Displacement Fun Thread
MMZ_TimeLord replied to Zaryin's topic in Work In Progress / Sweatbox
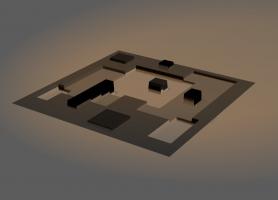
You guyz were right... I got home and checked it out. I did have the normal pointing in the wrong direction (down). I flipped it and got this... so White is indeed raised areas... black is recessed areas. Much better... I've included the picture I used for displacement and color again for reference. I also did a quick gaussian blur on the map and re-rendered to see the differences... -
Oz Map -- Another v13 Displacement Fun Thread
MMZ_TimeLord replied to Zaryin's topic in Work In Progress / Sweatbox
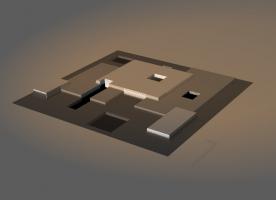
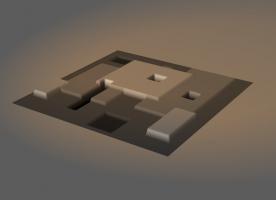
Here is my test to verify the height changes per color. I am attaching both the rendered patch picture and the original map used. The original map is 1000x1000 and the white is 255,255,255 and the black is 0,0,0 with the base or frame at 128,128,128. This was a really quick spaceship hull plate simulation. These are exteme transitions with very little if any gradient transitions. I rendered this with the displacement at 400% and a duplicate color map to show what areas did what. Hope this clears some things up. -
Not to mention raising simple hull plate detail on spaceships or rivet detail on steamship hulls, etc. Even, lots of small detail on things like dashboards, watch faces, etc... I'm as giddy as a school girl... wait... I'm not a girl...
-
I would say that would be a simple preoceedural texture and use it for a displacement or bump map.
-
Nicely done Eric2575!!!!! Can't wait to see that with the high priced paint job and the super model.
-
In your model you will find a folder called 'Decals'. Under that you will find your decal with a sub folder called 'Images'. On the properties for the image you are decaling, there is a 'Repeat option. It usually gets set to more than one in the X and Y directions during a cylindrical or spherical application if your on screen positioning decal is too small to wrap around the object. Try to remove all your decals, and start over, position your picture and then use 'planar' as your application method in the properties of the Decal itself. Then scale your decal to cover the object on the side you wish the decal to appear. Then right click on the positioning decal and select 'Apply' or simply hit Enter. Hope that helps.
-
Sweeeeeet! Now my earth elevation maps that are over 2000x4000 will be worth something!!! *HUGS* to Martin


