MMZ_TimeLord
-
Posts
1,495 -
Joined
-
Last visited
Content Type
Profiles
Forums
Events
Everything posted by MMZ_TimeLord
-
Golden Gate Bridge High Detail model
MMZ_TimeLord replied to MMZ_TimeLord's topic in Work In Progress / Sweatbox
Matt, I will probably not add all the bolts, as there is just too many. I will probably try and use decals for a lot of the rivet details and bolt details. I'll have to see how slow that makes my system. Right now, it's really not too bad in the action window when I hide the handrails and tower tops, really speeds things up. When I have all the details showing now it gets choppy when rotating the model assembly. Again, this is to test A:M's limits, my machine's limits and maybe mine too... -
Golden Gate Bridge High Detail model
MMZ_TimeLord replied to MMZ_TimeLord's topic in Work In Progress / Sweatbox
Nice bridge model there John! I've seen that bridge before (in pictures and movies). According to the history I dug up, the Golden Gate Bridge was started in 1933 completed in 1937 and shares quite a lot of details of design with Ambassador Bridge. Nice animation of the vehicles too... your fault, now I'll have to make some vehicles and pedestrians... shame on you! I'll probably pull them from the stock models that came with A:M and the first extra CD for that. -
Golden Gate Bridge High Detail model
MMZ_TimeLord replied to MMZ_TimeLord's topic in Work In Progress / Sweatbox
I don't know about 'need' Dan... this is an exercise for me in large scale high detail modeling. I'm also trying to show off what A:M CAN do in this area. Project Earth was an exercise in LARGE resolution decals, this one is an exercise in large scale models assembled in an action with very few parts that simply repeat a lot (roadway sections, streetlights, etc.). I probably could have gotten away with simply duplicating the hand rail sections in the action as well, but making a single section that was 150 feet long was easier for me. Plus, I didn't have to try and match the arch of the roadway with the handrails. It allowed the placement of the streetlights without additional items added in the action. The downside of doing it that way was that the street lights also start to tilt as the roadway angle changes. I may end up manually placing pairs of streetlights over the bases of the ones already in the action and then delete them from the roadway. That way, I don't have to guess or calculate their location. Anyway... I've rambled on long enough... Back to work... -
Golden Gate Bridge High Detail model
MMZ_TimeLord replied to MMZ_TimeLord's topic in Work In Progress / Sweatbox
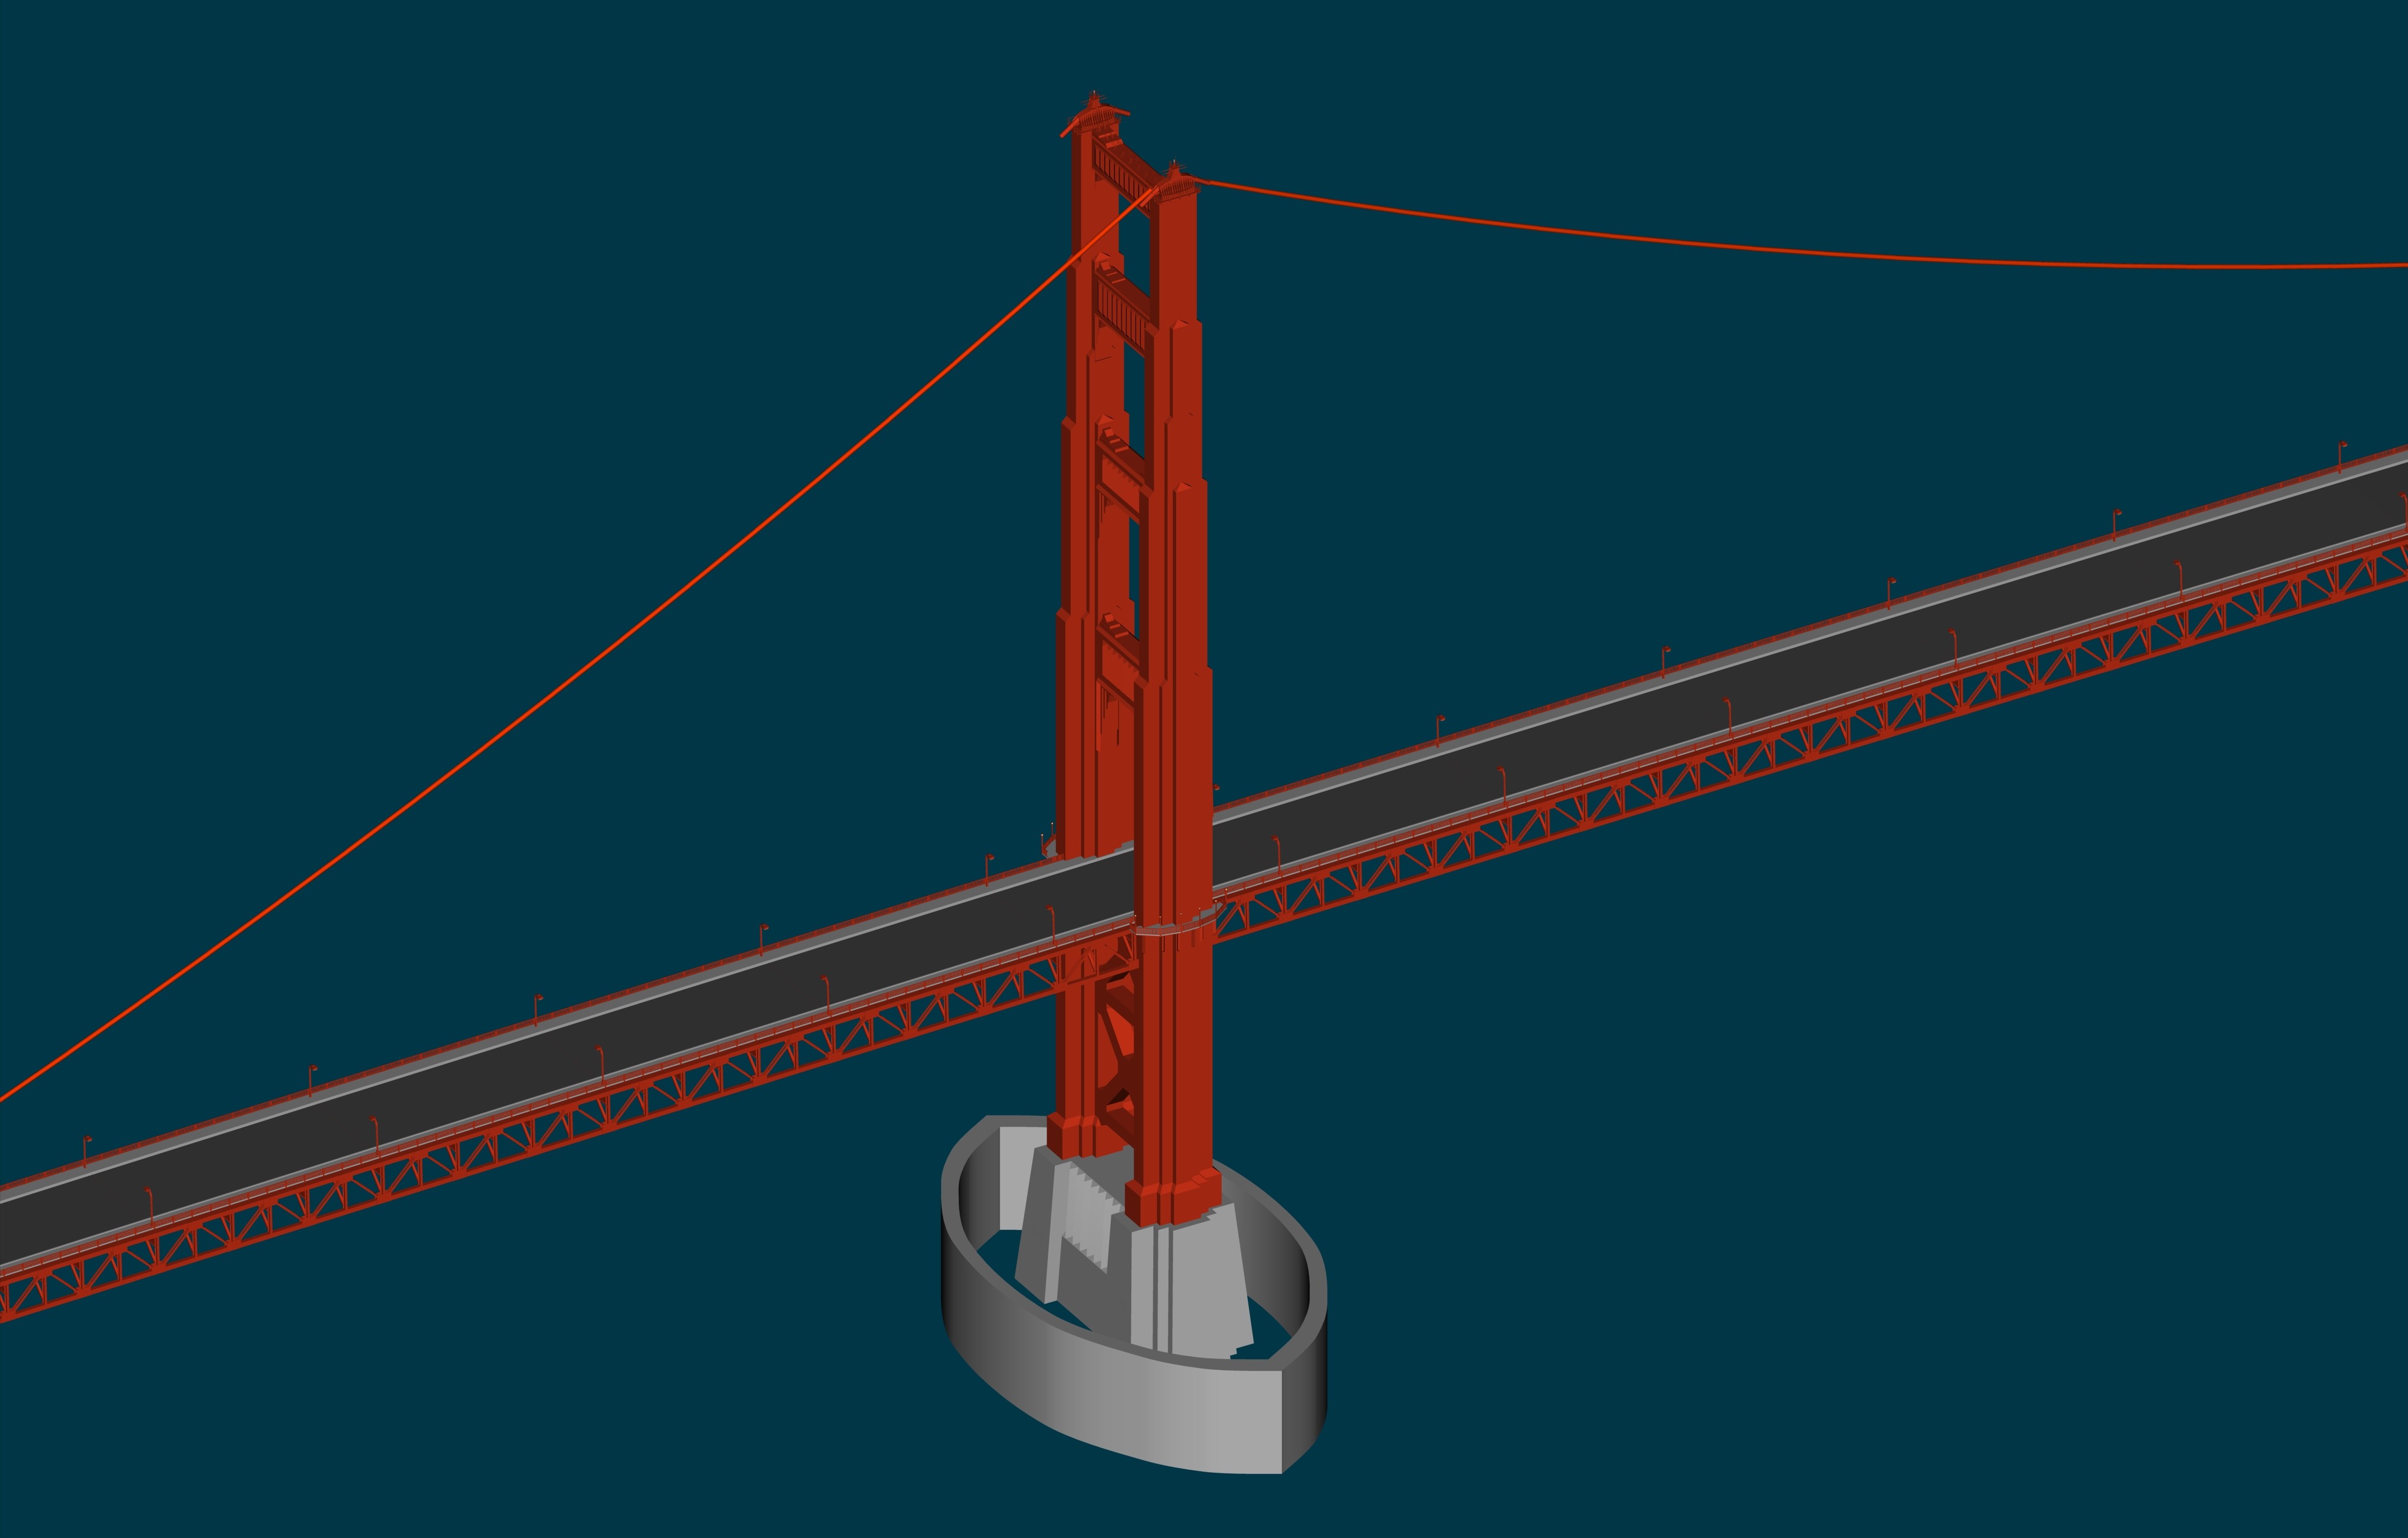
Another update with the walkways around the tower adjusted to match the new altered roadway sections. This render is still from the action window. Here are the patch counts I have so far for those interested. __________________________________________Patch______Model________Total_Patches Sub_Model_Name____________________________Count______Quantity_____in_Action Tower_Top__________________________________2908________4______________11632 Main_Towers_(each)_________________________6362________2______________12724 South_Tower_Skirt____________________________42________1_________________42 Road_Deck_Sections_(Standard)______________7179_______41_____________294339 Road_Deck_Sections_(Tower)_________________4711________2_______________9422 Main_Cable_Sections*__________________________8________8_________________64 Road_Deck_Section_Cables_(Standard_Sec.)*___256______250______________64000 Overall_Model_(High_Detail_version)_______21466______________________392223 *-indicates esimated values at this time. CAUTION!: Render is 4096 wide!
-
That's wonderful robcat! I really like that last elbow shaking effort to get that cylinder over the edge of the ramp! Gotta be careful how hard you push... you might go over... ... Too late!
-
I purchased Animation Master back in 1992 and I have been upgrading every year... Animation:Master has been worth every penny to me. I've learned more through using this software than I ever learned from books on the subject of animation or computer modeling. The software comes with a small book called "The Art of Animation Master" and is a series of lessons designed to springboard you into not only the software package, but the world of animation itself. The lessons are tailored to guide you through using the interface of the software so you can easily focus on your own creativeness. There are also video versions of almost all the lessons on Hash's website that you can download before you buy so you can get an early look at the software. I hope that luckbat and i have answered your questions ... if not, I'm sure someone else will come along and add to it. I wish you well in all your future creativity!
-
Golden Gate Bridge High Detail model
MMZ_TimeLord replied to MMZ_TimeLord's topic in Work In Progress / Sweatbox
That's funny Dahr... I LIVE in San Mateo... do you go to the Starbucks on 4th? or the new one on 3rd? -
Golden Gate Bridge High Detail model
MMZ_TimeLord replied to MMZ_TimeLord's topic in Work In Progress / Sweatbox
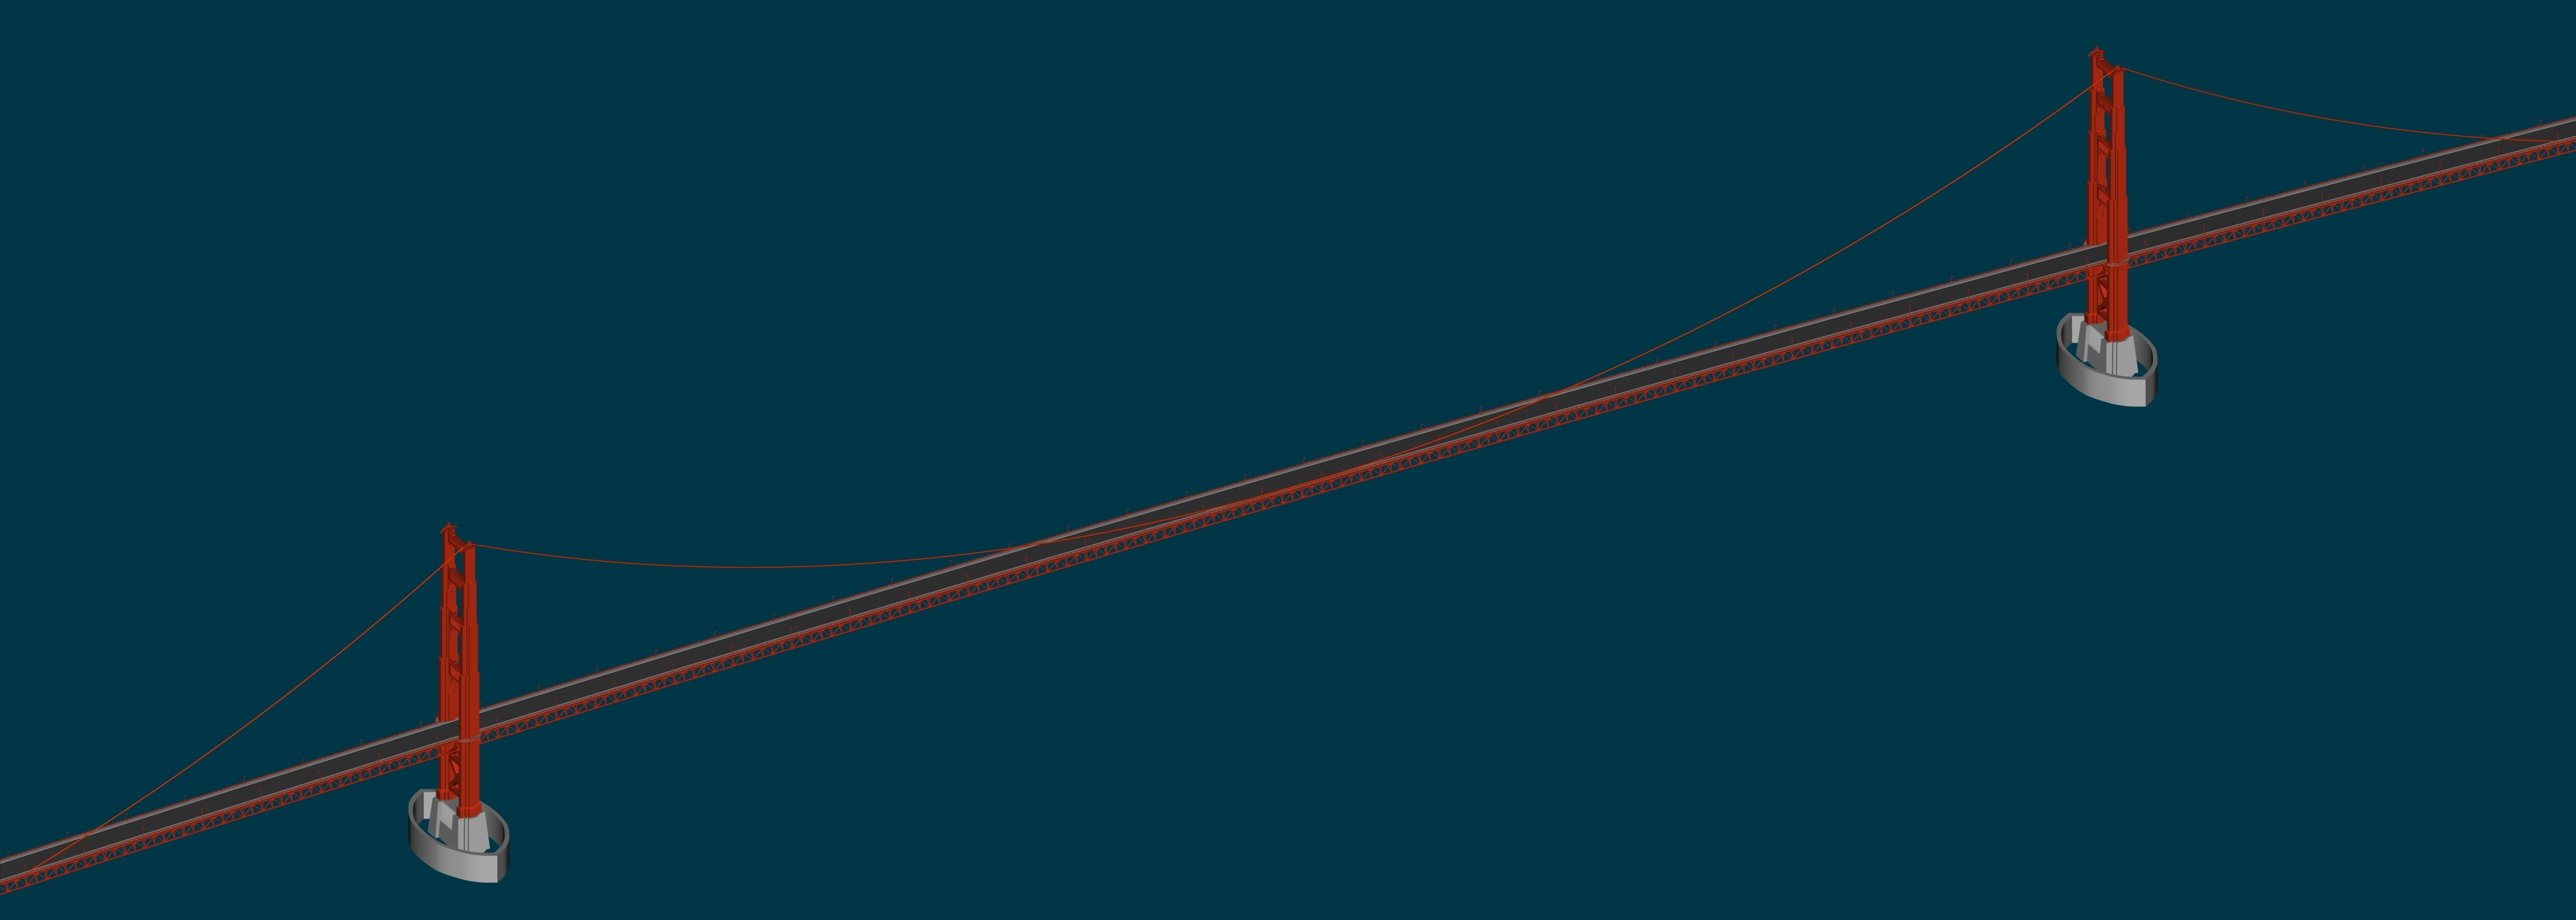
Okay, got the scale of everything tweaked and my assembly action almost done. Here is a render of the assembly action as it is now. (Yes, I know I only have one main cable and no stringers.) The South Tower will have the skirt split out to a separate object so I can add it just to the South Tower and not the North Tower. I also have to make a custom section of roadway for the towers so as to link up the sidewalks that go around the towers. More to do, but the nice thing is that now the total model patches of the pieces should come in under 50,000 patches, while the actual rendered model will be 400,000+ patches visible. Then it's on to texturing the parts so that it has more of a real world feel. CAUTION!: These renders are 4096 pixels wide!
-
Troll, faerie fly-fishing...
MMZ_TimeLord replied to zandoriastudios's topic in Work In Progress / Sweatbox
I like the flow of the story... should be excellent from your past work. Keep us posted! -
Golden Gate Bridge High Detail model
MMZ_TimeLord replied to MMZ_TimeLord's topic in Work In Progress / Sweatbox
I tried an AO render exactly like I did the pocket watch for Greg "gschumsky", but it came out all weird... I'll try it again tonight. I may have to let it render over night though... the last render I posted took an hour to render (LOTS of patches I guess) -
Golden Gate Bridge High Detail model
MMZ_TimeLord replied to MMZ_TimeLord's topic in Work In Progress / Sweatbox
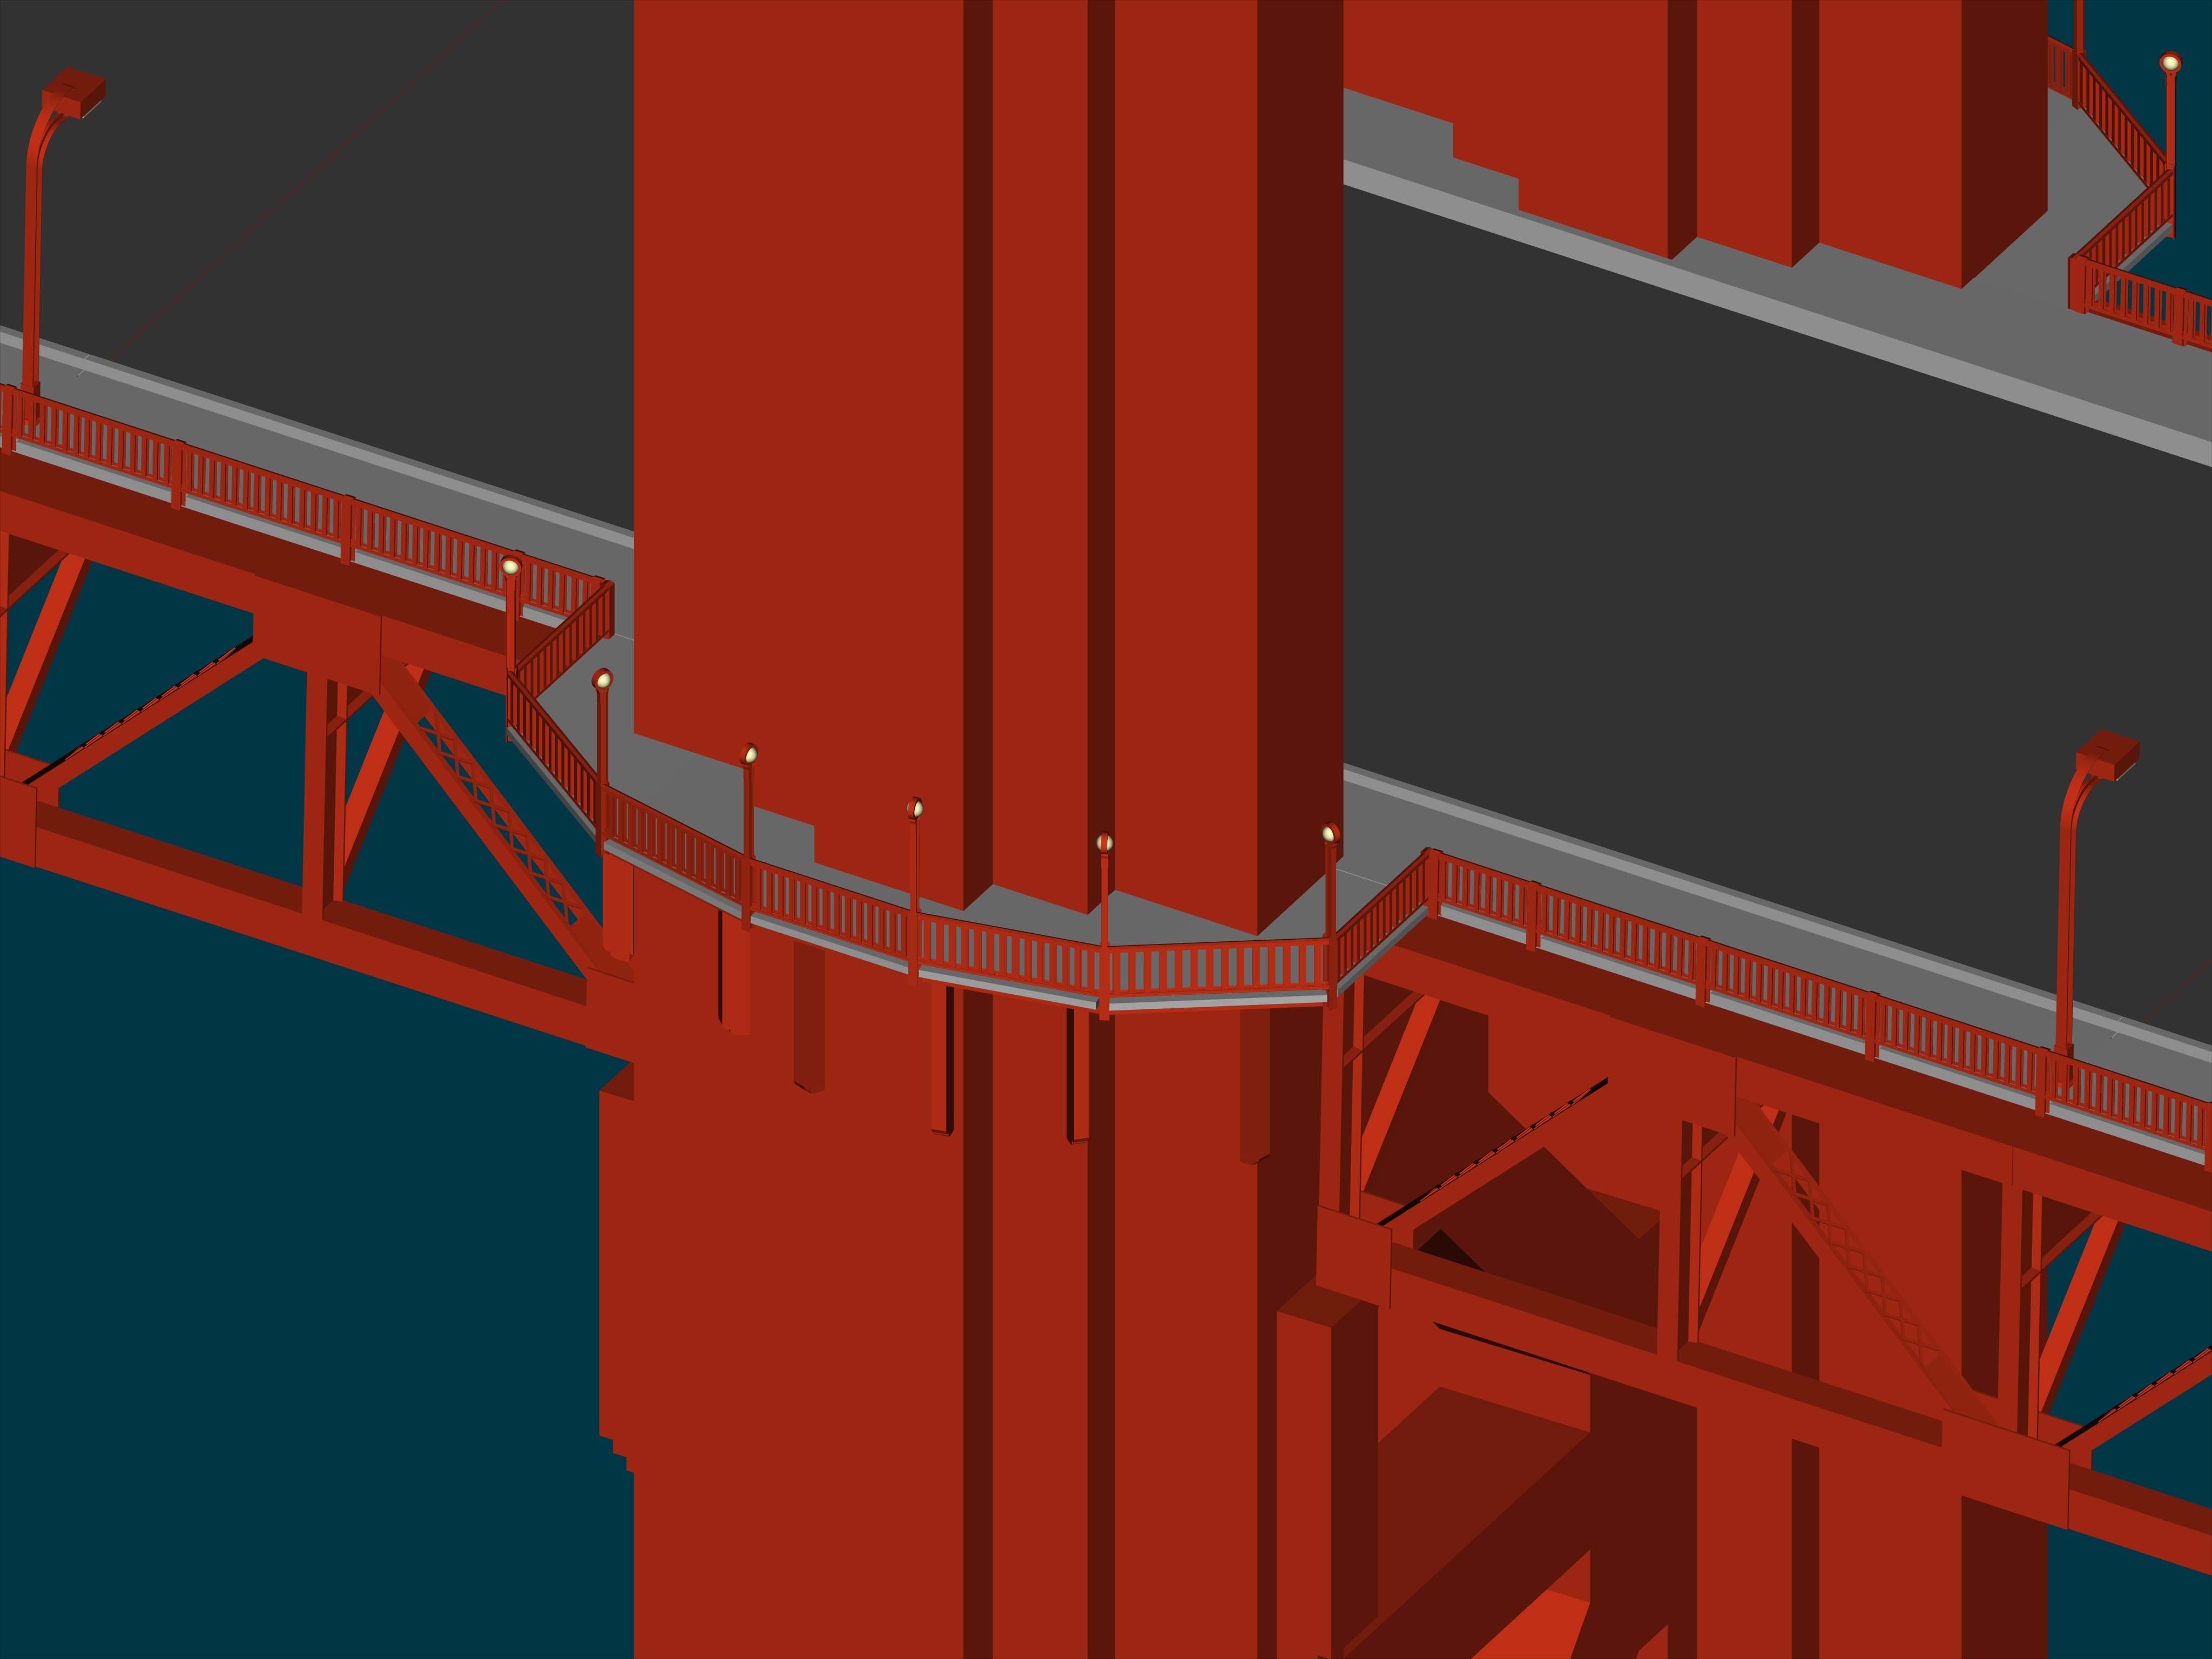
Dan, Thanks for the comments. The handrails are actually 3-D. They are just very thin angle iron type. I may thincken them up or simply give all the splines a 10% bias to give a small curve to them. If you look at the lower handrails on the left, you can see there is a small flat edge on the front of the horizontal rails. They are a true thin 'L' shapes so there are six CPs making up the cross-section of each one. Just like real angle-iron. -
Golden Gate Bridge High Detail model
MMZ_TimeLord replied to MMZ_TimeLord's topic in Work In Progress / Sweatbox
I won't need this level of detail on the medium or low detail versions, but on the high detail version, I will. Not done with the towers as a whole yet by a long shot. Lots more detail to add. (Catwalks, conduit, safety nets, etc.) Also, I'm going to see what I can do with texturing the rivet detials too... Another update, I got the turnbuckles in this evening after dinner. Two more items and the tower tops are done (minus texturing). The thing I'm trying to stay away from here is proceedural textures of any kind as the patch count alone is going to be a CPU killer. Caution: another 1080i image...
-
Default Choreography for the Extra CD II
MMZ_TimeLord replied to MMZ_TimeLord's topic in Work In Progress / Sweatbox
Ken, Done, should look good now. -
Default Choreography for the Extra CD II
MMZ_TimeLord replied to MMZ_TimeLord's topic in Work In Progress / Sweatbox
I'll have to make the corrections on the way home Ken, but I'll do that... -
Golden Gate Bridge High Detail model
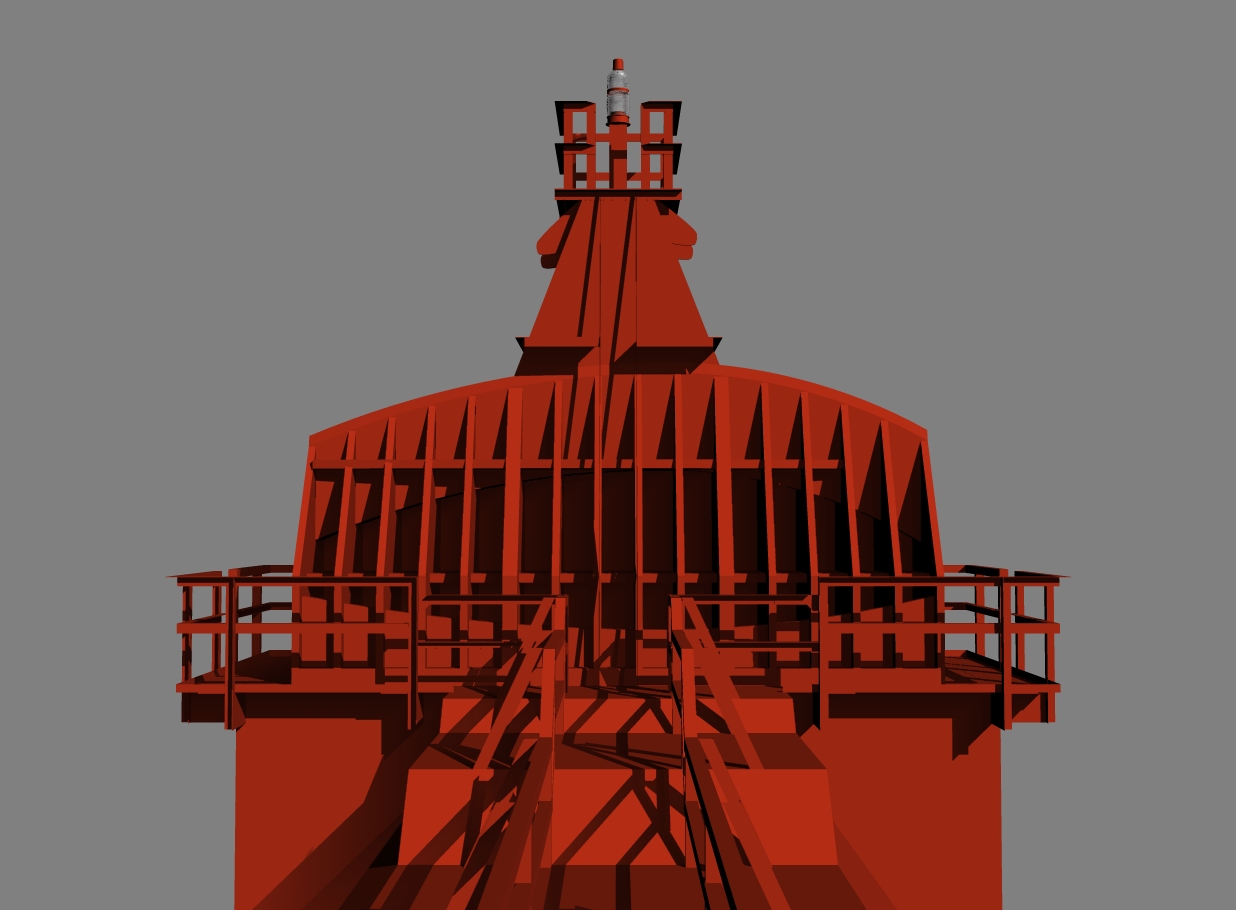
MMZ_TimeLord replied to MMZ_TimeLord's topic in Work In Progress / Sweatbox
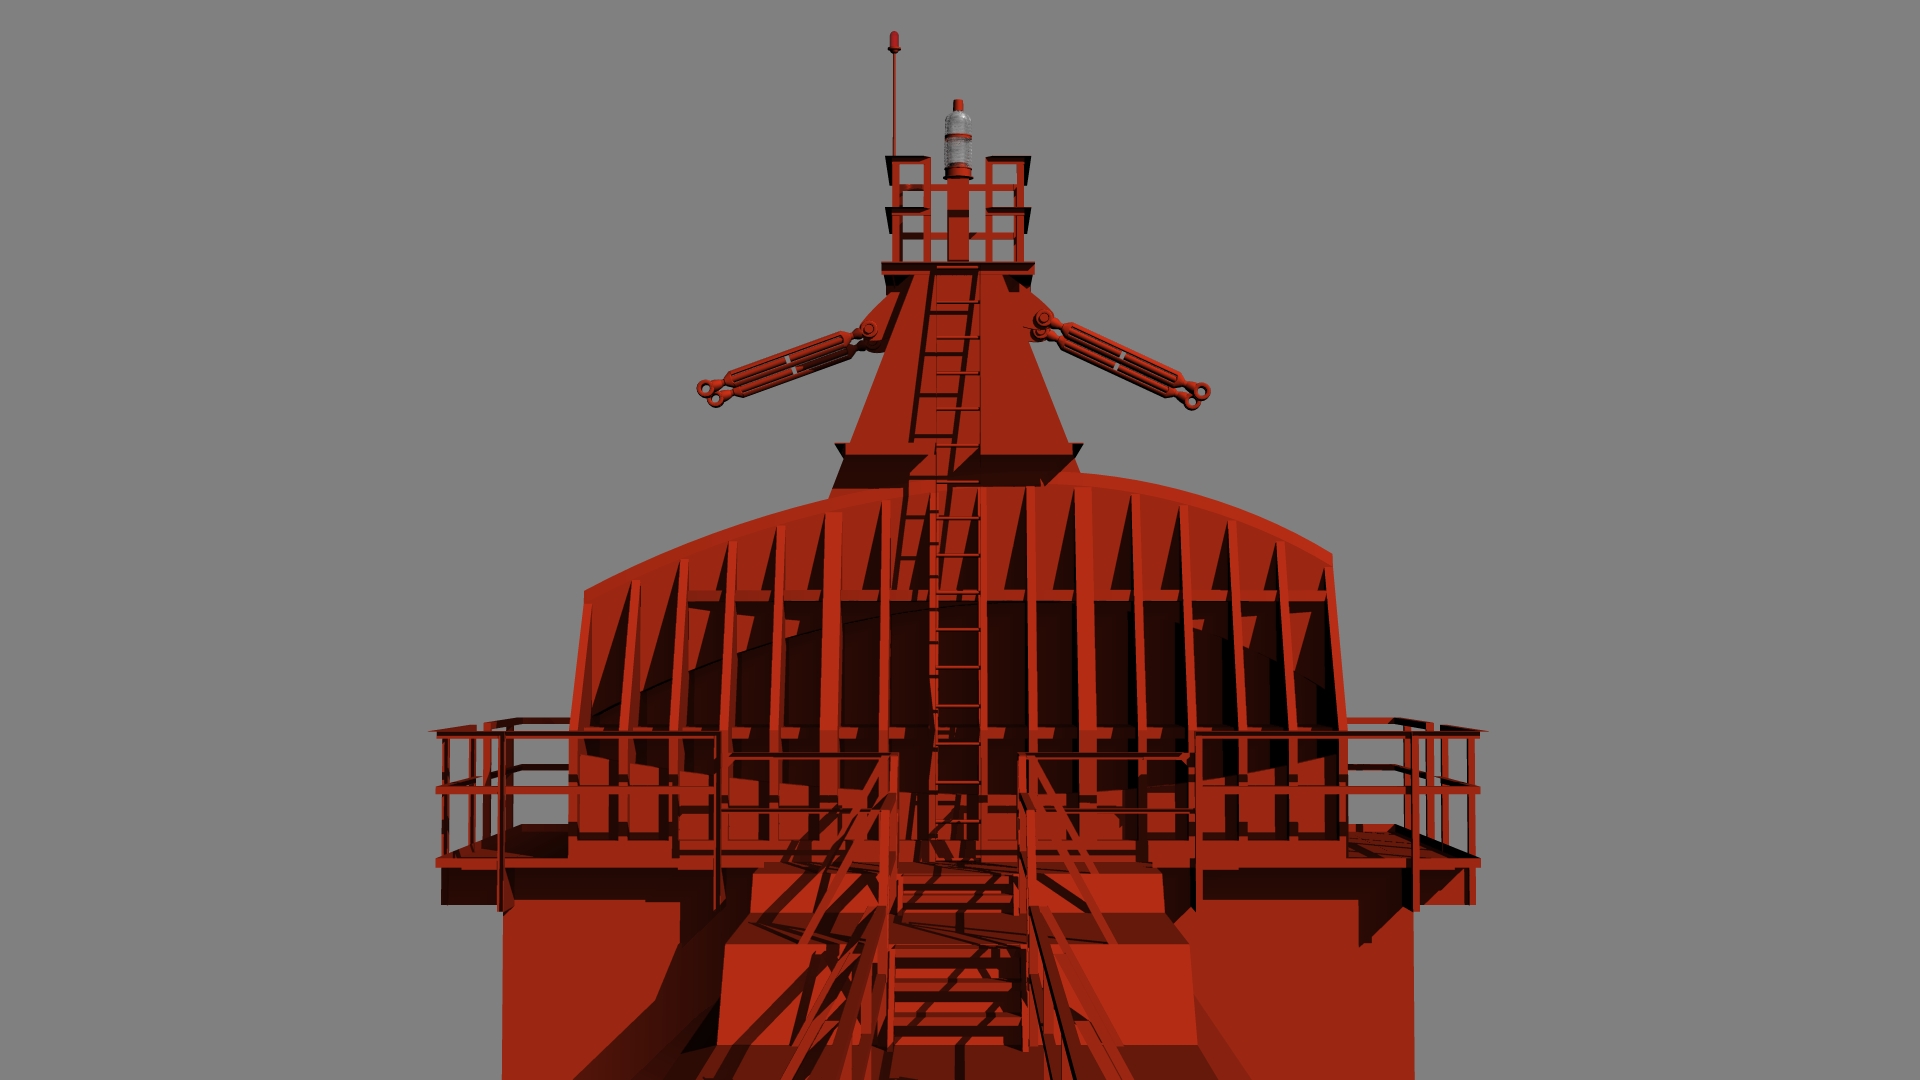
Okay, so handrails are more porportional now, second light marker is added and the steps. Now just to add the turnbuckles, cable bases and maintenance hatch and I'll call the tower top done. Then it's onto superstructure, roadway, tower spotlights and main cable details. After that, final assembly... WHEEE!!! Caution: HD 1080i picture
-
Here's mine... Render and zipped file. Rename your original 'Default Chor.cho' file to something like 'Default Chor Old.cho'. Then place the Default Chor.cho from my zip file in your Hash Inc\V13.0 folder. I can create this for V12, but I am making this for the new Extra CD and V13 should be a done deal by then. EDIT: 8:30pm 02/16/2006, I updated the zip file... per Ken's suggestions, you can now drop a 7' character in the chor and it will be perfect. defaultchor_timelord.zip
-
Yeah, my bad that's a V13 Alpha 8 project.
-
Okay, I did a quick test. I believe that the scale of your character vs the scale of my ponytail is different. That will explain the differences in collision radius. Take a look at the project and see if this is what you were looking for... PonyTailTest.zip
-
Golden Gate Bridge High Detail model
MMZ_TimeLord replied to MMZ_TimeLord's topic in Work In Progress / Sweatbox
Actually I have NO blueprints at all. The document you pointed me to is actually a blueprint for a wooden golden gate bridge puzzle that is 60 inches long. A couple of the tower facts will come in handy. -
Welcome to the forums! The dynamic chain in her ponytail is actually reacting properly as far as how a dynamic chain would react. Think of a rope, if you hit the bottom of the rope, the rope will make a wave all the way up it's length. The main thing I can see is you have an extremely small collision radius. With that in mind, you may have to increase the density of your mesh in her ponytail and make the bones in the chain smaller. I'm experimenting with dynamic constraints myself. I'll see if I can recreate a simple ponytail mesh and cape surface and try what you are doing with your settings. I'll let you know the results.
-
Golden Gate Bridge High Detail model
MMZ_TimeLord replied to MMZ_TimeLord's topic in Work In Progress / Sweatbox
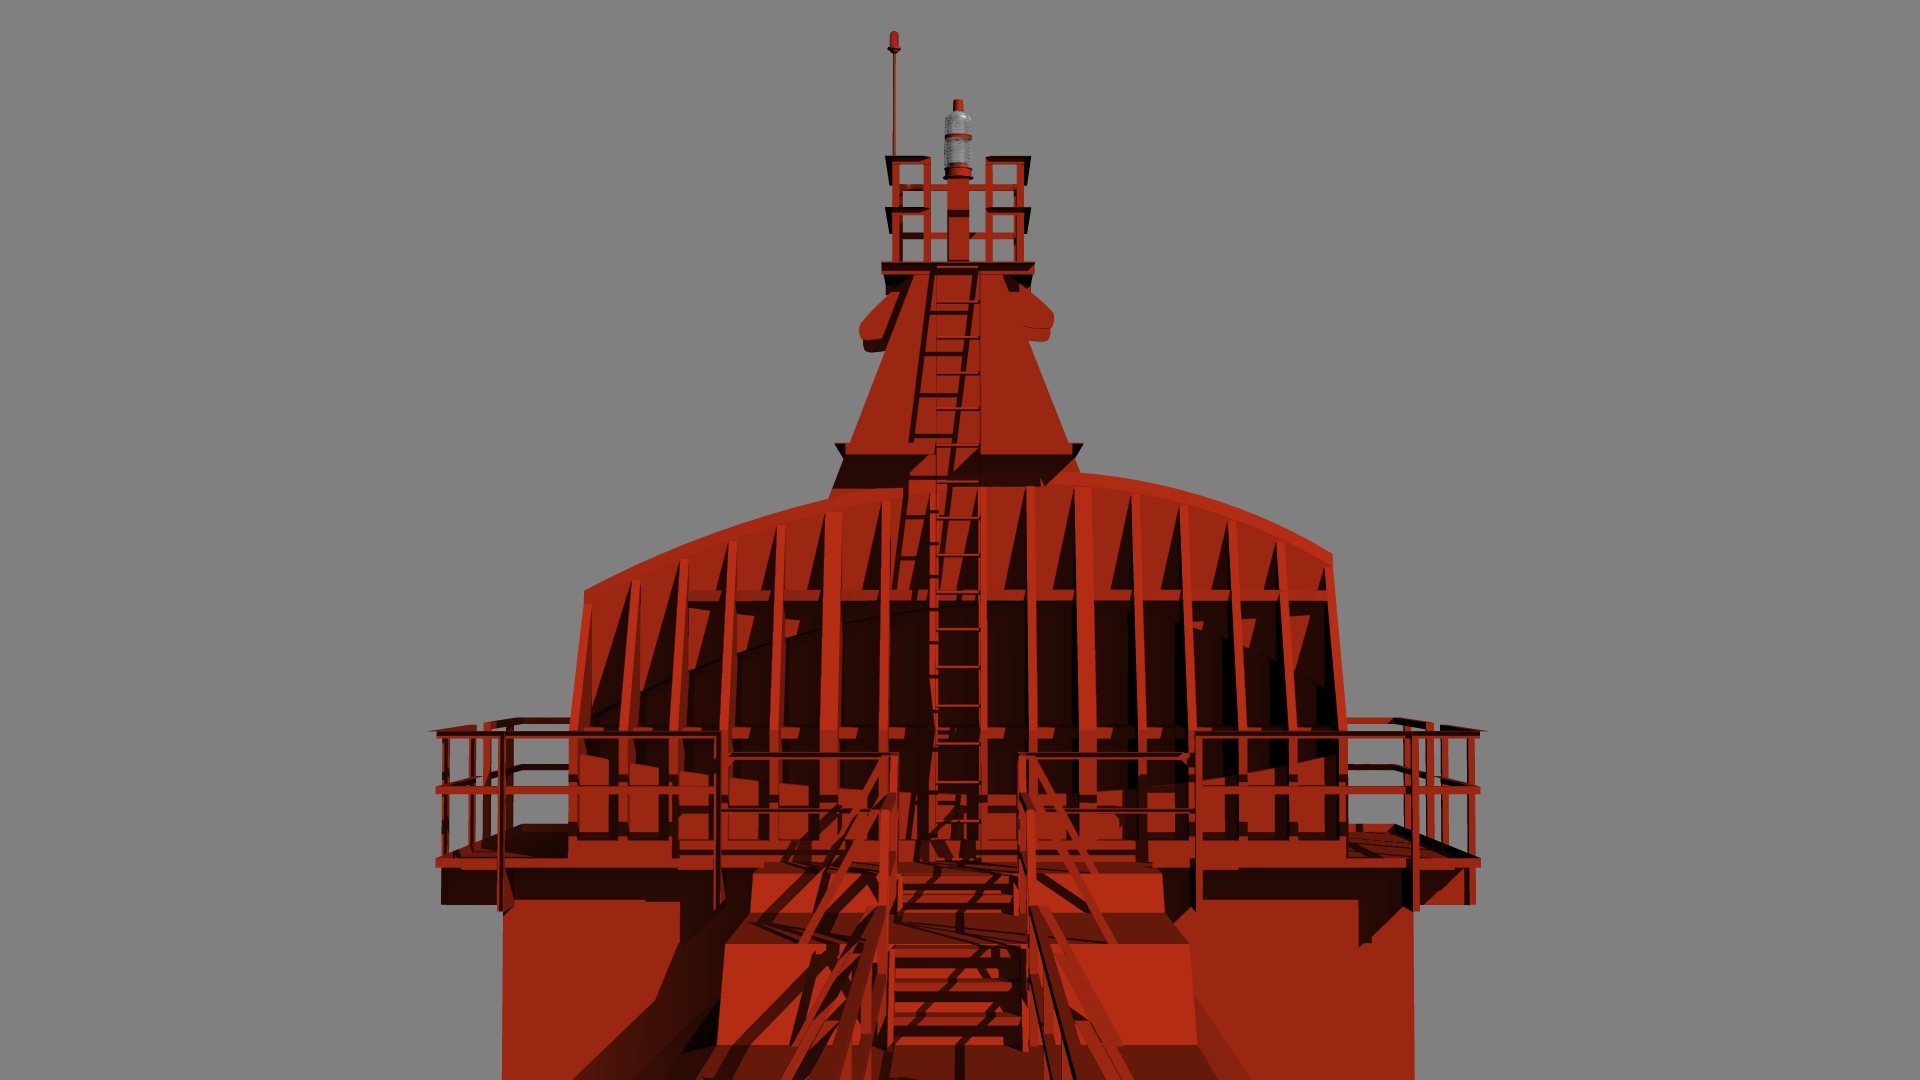
David, Actually I have about 6 different pictures of the top of the tower from various angles, perspectives and distances, so it was pretty clear that the finned cable support structure was WAY too tall as well as the handrail. Last little thing that bugs me is that all the angle iron in the shot is too wide so I may thin it up to match the main reference shot. Now I've got a few more light fixtures, steps, access hatch, cable clamps outside the finned support and a few other details and I'll call the top done. Then I'll move back to the walkway around the towers and add more details there. Then I'll start building the main cable sections with the mounts for the roadway support cables. Dahr, Not counting them, just trying to recreate them properly. -
Rusty Baby Mini Movie WIP
MMZ_TimeLord replied to Heath_Naylor's topic in Work In Progress / Sweatbox
Looks good... kinda confused about the ending... what's on the sign? Good work! -
Golden Gate Bridge High Detail model
MMZ_TimeLord replied to MMZ_TimeLord's topic in Work In Progress / Sweatbox
Okay, after seeing the reference photo side-by-side with my render, I realized that some of it was WAY out of proportion... so, after much toil... I have a new progress picture for everyone. More handrails, properly scaled handrails, and one of the tower's marker lights. Enjoy...
-
Ah... it must be another fighter of that era that had the Rolls Royce V12.... I think it was an american plane... Thanks for clearing that up... and thanks for the model!
-
Did the 190 have a radial engine? I thought it was a V-block type (V12)?