thefreshestever
-
Posts
821 -
Joined
-
Last visited
-
Days Won
2
Content Type
Profiles
Forums
Events
Everything posted by thefreshestever
-
i had this problem too once, but i just can´t remember the solution... it was exactly the same, right arm pointing aside... i might remember now... hmmm.... did you use the 2001 rig from the v15 web subscription version??? i remember i replaced it with my old version from the v12-cd, and everything worked fine... the v15-version seemed to be broke... i´m pretty sure right now that this was the issue... maybe you can try just replacing the relationship-folder so you don´t have to re-rig...
-
this looks great! very ambitious project i´d say, respect. 150 is a long way to go.... i do´nt know anything about pokemon, so i guess this thread will be kinda educational for me, lookin forward to the next 149...
-
hmm, don´t have that problem with squetch-rigged characters, so it´s not the rig i´d say... i would guess i get about 20 fps with shadedwireframe at lowest detail, wireframe only i´d say nearly 30 fps... but i only can say this about a chor with only one character and some props... did you try to save the chor and import it to a new project? i do this sometimes when strange things happen i can´t explain and i remember a few times it actually helped...
-

rendering issues with hair system
thefreshestever replied to thefreshestever's topic in Work In Progress / Sweatbox
ok... GOT IT!!!! if you could see my big smile now!!! there just were too much decals... i had one decal to color the ground-mesh and one to color the grass, just merged them together and used only one decal in two instances, one for diffusecolor of the mesh and one for diffuse of the hair system... my test-render with 15% hair-density rendered fine... let´s see what i get with 40% density, higher resolution and multipass... but i´m pretty confident right now... thanks guys!!! -
rendering issues with hair system
thefreshestever replied to thefreshestever's topic in Work In Progress / Sweatbox
i´m using v15.... the normals are all in the same direction, otherwise the hair would grow downside on those patches... just rendering another try... thanks for your help... -
rendering issues with hair system
thefreshestever replied to thefreshestever's topic in Work In Progress / Sweatbox
i´m just rendering a new test, maybe it works now... i guess it will take about 20 minutes, when the problem still appears i´ll post the project... thanks ahead mark... -
rendering issues with hair system
thefreshestever replied to thefreshestever's topic in Work In Progress / Sweatbox
dammit.... i thought it was because of the one big patch my soccerfield was made of (once i read in a turorial that one should avoid that large patches), so i made a mesh with 10x10 patches and then decaled it again... when i rendered it this happened... i´m just loosing my mind here, please help!!!!!!!
-
rendering issues with hair system
thefreshestever replied to thefreshestever's topic in Work In Progress / Sweatbox
same with normal 3-point lighting... but i just had a thought, i´ll try that... -
rendering issues with hair system
thefreshestever replied to thefreshestever's topic in Work In Progress / Sweatbox
ok, same thing with half of the decal-resolution and tga-format... next thing i´ll try is another lighting setup... -
rendering issues with hair system
thefreshestever replied to thefreshestever's topic in Work In Progress / Sweatbox
thanks... i can´t do it without the hair system, some renderings i´ve made before for this client were with hair-grass too, so they would ask why this new one doesn´t look as cool as the others... the decal that drives the hair-color is a 1mb jpg, 2400x3560px... i´ll reduce the resolution and save as tga and try to render it again... let´s see what happens... -
ok, i got a big big problem here, deadline is in 2 days... i have this shot i need to render in high quality, at least 2000x1500 px.... the soccerfields grass is a hair system, color driven by a decal. when i rendered it in vga-resolution for a test with low hair-density (5%) everything looked fine, but when i increase the density parts of the hairsystem renders white, not green anymore... the higher the density-value, the more parts of the grass are rendered white. i use a skylight rig with 25 lights, wich was no problem in the past, also in combination with a field of grass made with hair with similar density-values and size... i tried almost everything: rendered it on 2 different computers, pc and mac, tried it with and without skin shader, different resolutions, still got the same problem... does anyone have experience with this kind of rendering-issues??? screenshots/testrenderings attached...
-
about the easy learning curve you were talking about: i´ve tried some other 3d-apps before i found a:m, and for me a:m was the most easy to learn. i´ve tried strata studio (wich was pretty easy too, but isn´t that specialised for character-animation), carrara, cinema4d, max and maya, wich i always had to close kinda depressed after a few hours of trying stuff... what i like about the spline-modeling is that you´re totally flexible with only one modeling-tool: drawing splines! this made it pretty easy for me, because i am a 2-d designer and very familiar with drawing and tweaking bezier-curves in adobe illustrator. a:m is no different, except you have a third dimension... so my opinion is that a:m is very easy to learn compared to other 3d-apps with a bunch of different modeling tools... some shapes might be difficult at first to get them smooth, but that problem does exist in any other 3d-program too... the manual is incredible helpful, after you´ve done all the tuts in it (wich only takes a couple of days) you will be able to do a lot of cool stuff, there are a bunch of advanced video- and text-tutorials available for free and this community is the best thing that can happen to a 3-d-nerd and the price is really unbeatable: 49 bucks for a one-year-subscription is as good as nothing for such a powerful 3d-applicationl!!!
-
try to use streaks as emitters, i guess streaks can look more like sand than fluids...
-
i used a mixture of ambiance occlusion and some fill-lights... ambiance occlusion was set to "global color" (white), ambiance intensity 60% and ambiance occlusion to 150%... then i used some klieg-lights to achieve the back-light effects, so the chacacters edges had a sort of a glow... at the end there were 3 kliegs: one from the left front (30%intensity), one frome the right front (30%) and one from the back (60%). there was no ambiance set to any material, just diffuse and specular... hope that helps..
-
a good idea would be posting the project in this thread, hard to say what´s wrong without the opportunity to take a look at it.
-
that´s just great! love the texturing! this all looks awesome!!!! my crits about the walk: someone mentioned before that the arms look a bit rigid, i think that´s because they don´t vary a lot... looks like they´re sort of glued together. i would move the tail a bit more, also to the left and right, looks a bit stiff, especially at the origin. maybe you can move the spine a bit to the left and right too, so it´s in a flow with the tail... just a little, otherwise you velo will walk like a supermodel on the catwalk feets are still slippin a bit... but again: kick ass stuff, as ever!!!
-
that´s simply amazing... i guess i could never bring up the patience for this kind of extensive and detailed work... looking forward to the final renders...
-
also, when you´re ready with modeling and bias-tweaking, use the porcellain-material to make your model even a bit smoother... be sure to have the normals all in the right way when you drop the material on your model...
-
uploaded my rubberguy-clips 3 weeks ago, they never showed up, even though the form told me that my uploads were successful... sorenson3 compressed quicktime movs...using mac and firefox....
-
wow, awesome! nothing more to say here...
-
very cool... really good work... crit: you should take the time and model the speakers, they don´t look right with the decals...
-
My "Little Girl Voice"
thefreshestever replied to Dale_The_Bold's topic in Work In Progress / Sweatbox
i pitched it 200 cents up... maybe 100 could be enough if you worry about the mickey-mouse effect... -
My "Little Girl Voice"
thefreshestever replied to Dale_The_Bold's topic in Work In Progress / Sweatbox
it´s good, but you can make it even better if you pitch your voice a bit up. i did that with your file and it sounds much more like a girl... but be shure to preserve the duration when you pitch it, otherwise you´ll have a very fast talking 10 year old girl... pitched file attached.... pinkorblue_pitched.mp3 -
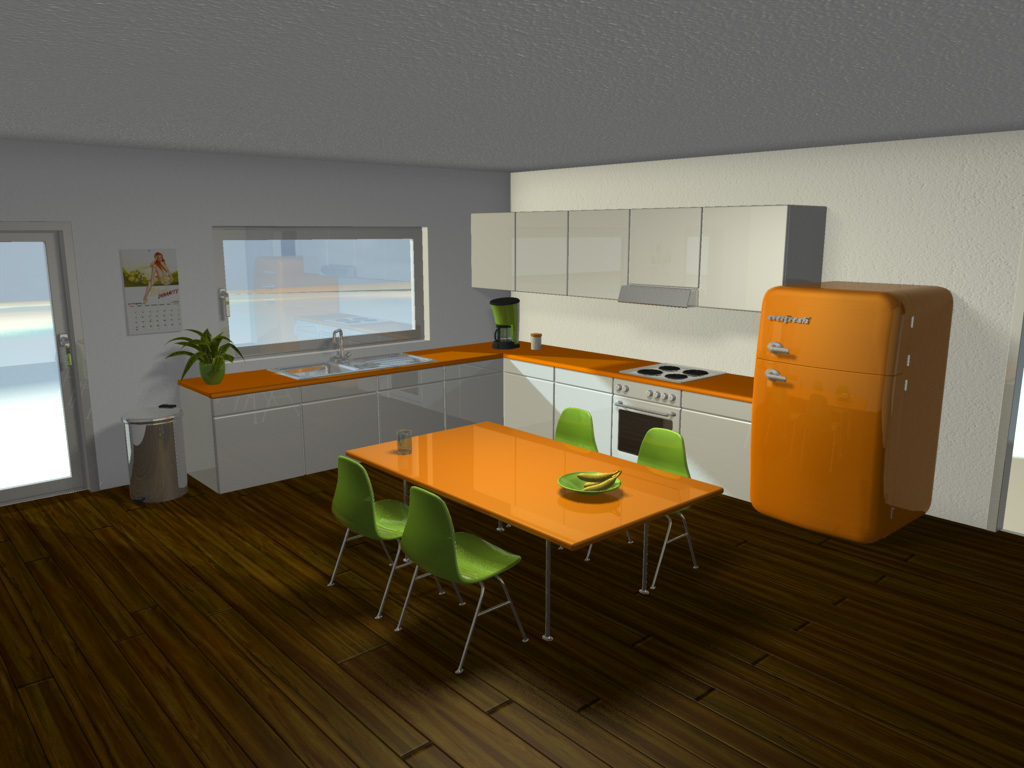
thanks masna, i´ll adjust the reflectivity of the windows when i modeled the outside terrain, i think it´s better to decide after that... here´s another quick update, i re-lit the scene, think it looks much better now. thanks to ben for the advice, i´ve made the dome and put a klieg slightly outside with 180° cone-angle, 100% intensity, causing raytraced shadows with 2 rays... then i added another klieg right under the ceiling, 180° again, 60% density, same shadow settings as the other klieg to simulate a bit of a radiosity-feel. i corrected the gamma slightly, provided the whole scene with 15% global illumination, and gave the walls an ambience intensity of 10%. i also added decals which shade the corners of the walls and ceiling to intensify the radiosity-fake (still far away from radiosity, i know ).... i´m almost happy with it right now since my render time is at 18 minutes for vga-resolution and 9 passes, i can live with everything that doesn´t cross 30 minutes per frame... but there are sill some areas where i would wish better looking shadows, i would love to get some ideas on that... i know it still looks too clean right now, next things will be dirt-maps and some more stuff lying around, a spice shelf and some other things...
-
the cougar looks way better now! the mountain too, but i think it´s still too warm-colored, could be more grey than brown, especially at the upper areas... i´m getting more and more curious how it will look when it´s ready...