itsjustme
-
Posts
5,792 -
Joined
-
Last visited
-
Days Won
59
Content Type
Profiles
Forums
Events
Everything posted by itsjustme
-
They are just like the links.
-
Here are a few links that might help: Union Jack material Solid stripe material Blending materials
-
For modeling humans, the Extras DVD has the "Cooper" tutorials by Colin Freeman. They can also be found here online. The DVD also included tutorials on "Digits", "Feet", "Joining an eye to a nose", "LathingMethods", "MagnetMode", etc. For modeling mechanical objects, I would recommend going through these tutorials: Yves Poissant Beveling Rodger Reynolds Non-character Modeling in Animation:Master (I think these are also on the DVD) Jim Talbot Texturing a Head Model in Animation:Master (included on the DVD) Matthew Krick Modeling, Rendering and Rigging tutorials (included on the DVD) There are a lot more tutorials and examples on the DVD...lots of good stuff. As far as plugins, there are some already built into A:M that are very helpful...I have used "Sweeper" quite a bit on mechanical objects and "BitMapPlus" is helpful when texturing. Of course, there are others that are very helpful...those two were off the top of my head. You might also want to take a look at the plugins made by Stephen Gross here. If you search the forums, you'll find a lot of useful tutorials and examples...in my signature, there is a link to a video tutorial for making an eye. Hope that helps.
-
Great looking character, Luis!
-
I circled a few things that I saw...I can't see under the chin very well in this image. Here are a few tutorials that might help: Basic Splinemanship 1 Basic Splinemanship 2 Basic Splinemanship 3 Internal patches Wannabe Tutorials Hope that helps.

-
It looks like you've peaked all of your splines...on an organic model, you would rarely do that (at least I would rarely do it). Select the spline and hit the "O" key. Hope that helps.
-
Great stuff, David!
-
They compute properly for the frame rate you have selected...a different frame rate would give you different results. I'm not sure what results you are after, but if you increase the frame rate to the point where your keyframes are all rendered, I'm guessing you'll be close.
-
If the keys fall between the frames, you won't see the keyframes when you render at that frame rate...they'll still be there, but they wouldn't be rendered (the frames between the keyframes would be rendered instead). There are several techniques that take advantage of keys between frames...like MUFOOF. Posting your Project file would help people figure out your problem faster, I'm thinking.
-
Great stuff, Stian!
-
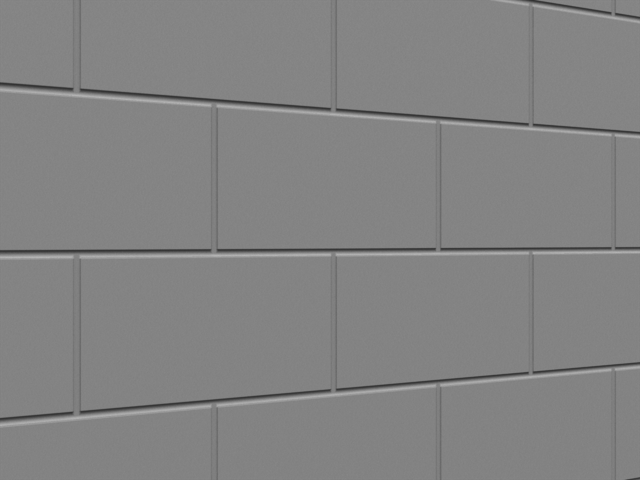
Here is a section of "cinder block" wall. It's not textured and would need finishing for it to be a complete wall. It is very dense splineage (which is the route I'm taking for the sets in this project), but I thought it might be helpful as an example of spline layout and gamma tweaking. This model uses the Porcelain material. If you don't have it, there is a ZIP of it in the first post of this thread. ------------------------- EDIT ------------------------- I had to repost the file...the first one had some flipped normals. cinder_block_wall_section_09_10_2010b.zip
-
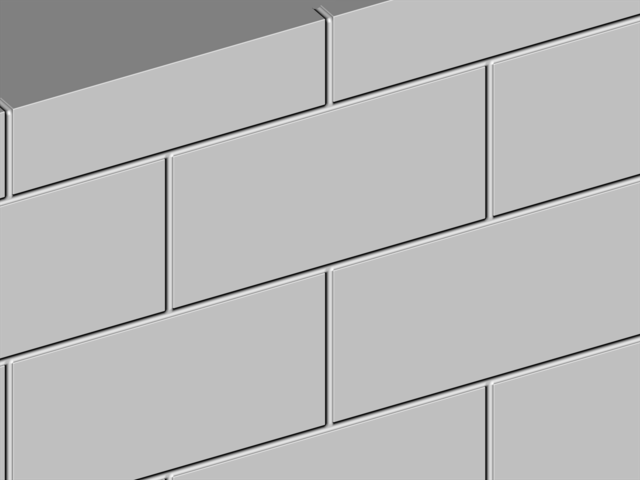
The geometry is crazy overkill...absolutely. I didn't think about it, but there is a future opportunity for a little destruction on the brick wall. I'd have to add a back side to each brick and change the way the grout is made, but I think it would be worth adding...at least for a portion of the wall. Thanks for suggesting it, Holmes! The cinder blocks are connected into large sheets, so they would be more work to break apart. Here are closer views of a section of the cinder blocks showing the spline layout and how it looks in a final render. ----------------------- EDIT ----------------------- I decided it might be better to post a section of the cinder block wall in the "Free Models" section...here.
-
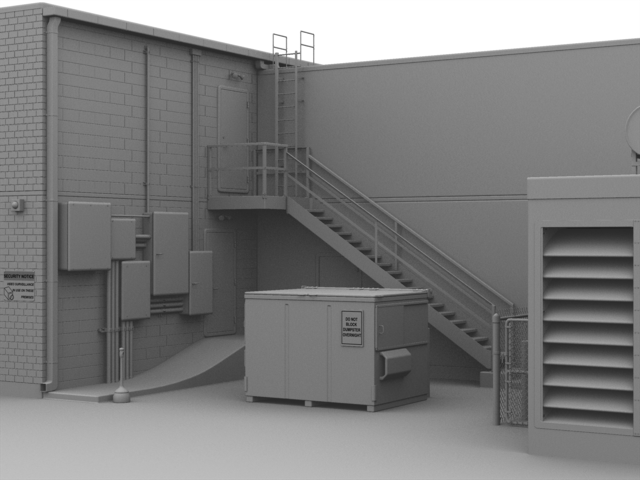
I haven't posted an update in about two weeks, so I figured I should do so to keep me rolling slowly forward. Unfortunately, it's been extremely busy for me...the progress doesn't look like much at the moment. I wouldn't have posted such a small change, but I needed to make sure I don't go more than a couple of weeks without showing something. I did several experiments before I went back to what I had originally planned for the walls...going down dead-ends can really eat up time. I went with a modeled cinder block wall and will eventually get all of the remaining walls looking similar. I'm hoping to get a little time over the next couple of days. The present patch count is at around 280,000. I'll try to have more accomplished next time I post something.
-
Looks great so far, Jesse!
-
It looks great! The only critique I have is that a few of the edges seem a little too sharp.
-
You'll bounce back even better, Steve!
-
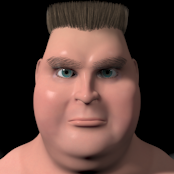
Nice character, Paul! If the hair is pointing inward, flip the normal of the patches affected by selecting them and then hitting the "F" key. You can make maps to prevent hair growing from places that it shouldn't...as well as maps for density, color, etc. You an also use the grooming tools to change the length and make it flow the direction you'd like. A visit to the Hair section of the forum might be helpful. Also, if you haven't watched the "Tech Talk" on hair, you can find it in this thread. Hope that helps. -------------------- EDIT -------------------- Lazlo's (Brainmuffin) polar bear is in the thread located here.
-
yes, i hate those things... there´s one at the head too, but you can only see it at the end when you scrub through the movie... ist there a trick to avoid these? or do i just have to get rid of these hooks? i mean i will have to use some hooks, at least at the hands... I haven't done any experiments lately, but I thought that the problem was fixed in v15...I could be wrong though. If you're rendering in v15, then I am. If it hasn't been fixed, I would avoid AO renders and fake the look if it was what I really wanted...which I haven't tried, but I think there were some experiments posted somewhere on the forum. i rendered it in v16beta because it´s faster, but in my test-renders in v15 i got the same... both on a mac though... What I would do is render the background with AO, render the character separately without AO and composite it together.
-
yes, i hate those things... there´s one at the head too, but you can only see it at the end when you scrub through the movie... ist there a trick to avoid these? or do i just have to get rid of these hooks? i mean i will have to use some hooks, at least at the hands... I haven't done any experiments lately, but I thought that the problem was fixed in v15...I could be wrong though. If you're rendering in v15, then I am. If it hasn't been fixed, I would avoid AO renders and fake the look if it was what I really wanted...which I haven't tried, but I think there were some experiments posted somewhere on the forum.
-
Looks great, Sebastian! The only thing I noticed that hasn't been mentioned is the darker mark on the back of the hand...I'm guessing that it is caused by a hook reacting badly to AO?
-
It looks great, Jesse!
-
Looks great so far, Sebastian!
-
body squetch slider doesn´t work somehow
itsjustme replied to thefreshestever's topic in Squetch - Rig
The "body_SQUETCH" controls are, as Mark said, treating the whole character like a squetch ball...they require a little different handling. Turn off the "hide_body_SQUETCH_controls" Pose, use the "body_SQUETCH_base" bone to move the character where you want them (it would look the same as if you were moving the model bone), adjust the "body_SQUETCH_pivot" Pose (that controls the origin of the squetching along the height of the character) and then use the "body_SQUETCH_control" null to set the amount of squetch. If you move the "hips" null around, it will affect the body squetching in those Poses, but, you can use the spine to move the character instead (set the spine to "1" for an IK spine without auto squetching). The "hips" null is a little different than a rig like TSM2, for what you are doing the spine would be a better way of moving the entire character...the video showing how to animate the spine might help explain. Hope that helps, Sebastian. ---------------------------- EDIT ---------------------------- Mark beat me to it and was more concise. -
body squetch slider doesn´t work somehow
itsjustme replied to thefreshestever's topic in Squetch - Rig
I made a few videos that show how some of the things in the rig work last year...I'm going to have to update them though. Here are what was made: Animating the spine Animating legs Animating hands Animating arms Hope that helps, Sebastian. -
The little raindrop that couldn't
itsjustme replied to robcat2075's topic in Work In Progress / Sweatbox
Great stuff, Robert!