itsjustme
-
Posts
5,792 -
Joined
-
Last visited
-
Days Won
59
Content Type
Profiles
Forums
Events
Everything posted by itsjustme
-
Two versions of rigged door. To add to one of your models, import a door model and then use the "door" bone in Bones Mode to position with the rotate and translate manipulators while holding down the "Ctrl" key (Windows) so that the geometry follows. Again, you will have to texture these other than a few bump and diffuse maps that are already applied. This model uses the Porcelain material. If you don't have it, there is a ZIP of it in the first post of this thread. doors_07_13_2010.zip

-
In order to keep the free models thread organized, I made this thread for comments, critiques and suggestions about the Free models thread.
-
Here are some nuts and bolts. Only the thread on the bolts (no thread texture on the nuts) and lettering on the heads of the bolts are textured with bump and diffuse maps, so you'll have to do some texturing...it's the price of free and it will make them your own. nuts_and_bolts_07_12_2010.zip
-
In this thread, I'll post models from this project that I'm making available to the community. They can be used for whatever purpose you want without restrictions. In order to keep this thread "models only", comments, critiques and suggestions about these models can be posted in this thread. The models may use the Porcelain material from the A:M CD/library...I'll post it here in case you are missing it. The models will work in v13 and later of A:M. Porcelain.zip
-
If you have any questions, post 'em. Included in the ZIP along with the "Posable_installation_steps_04_23_2010.txt" file are two PDF files named "Face_Setup_04_23_2010.pdf" for setting up the base face Poses and "FACE_Interface_Setup_04_23_2010.pdf" for setting up the FACE interface controls. Good luck with the install!
-
I would call that a successful experiment, Mark!
-
Those videos are for a much older version of the rig, so they may give you some insight, but things have changed drastically since then. I haven't watched them in a long time, so I can't outline where things diverge at the moment. There isn't a current video or follow-along instruction...things changed very quickly and it was hard to keep up. I'm hoping to get another set of videos done when I go through updating the rig in Bertram...it takes me way too long to get to things with the limited amount of time I have, unfortunately. If you have any questions, post them and we'll help where we can.
-
HAPPY BIRTHDAY, DrRIEGER!
-
If you are using v13s or later, then it wouldn't be a version problem. The Squetch Rig does not install like the 2001 Rig...use the instructions in the included text file. I can't think of a reason for there to be no bones showing up, what are the steps you are following? The only text file I saw was to reset all the constrants. Is this the file you mean. If not where would I find the file in reference? The latest version is in this post along with the latest Squetchy Sam. The text file for installation included in the ZIP file is named "Posable_installation_steps_04_23_2010.txt". ------------------------ EDIT ------------------------ The Squetch Rig uses an entirely different method of installation than the 2001 Rig...follow the included instructions. That would be an old version of the rig...you don't have to reset any constraints in the present version. Hope that helps.
-
If you are using v13s or later, then it wouldn't be a version problem. The Squetch Rig does not install like the 2001 Rig...use the instructions in the included text file. I can't think of a reason for there to be no bones showing up, what are the steps you are following?
-
Even better, Mark!
-
Nice! I'd go with that one, Mark.
-
I'll leave critiques on body mechanics to people more qualified...not something I know very much about (at least not enough to critique anyone's work).
-
I'm liking it so far, Mark!
-
You get better with each project, Gene. Of course, even the best can get trashed because there is always something that could be done better...and some of it is going to be a matter of opinion. What would you like the critique to concentrate on? If it's something I feel like I know enough to comment on, I'll send you my opinion...which doesn't necessarily mean I would be right.
-
Just a quick overall image to show a little progress...I was hoping to get more done, but here is where it is presently. The rain gutters and rain gutter mounting brackets are the only difference in this image. I'll try to knock out a bigger chunk tonight.
-
LOL! Great job, guys!
-
The only thing that bothers me is the smearing of the textures on the creature bodies. Great stuff, Mark!
-
I agree with you on that, Robert. You're probably not going to see 90% of the details in the shorts...I know it sounds like a waste, but it makes sense in my head. I think it would be harder to add details as needed than to just not show them. I always like to have more tools than I actually need...and I'm crazy. If things end up looking too busy, I can always cut back. I'll see how the test shots with Bertram in the set look once I get to that point. If I decide to not use something, the only time wasted is my own.
-
LOL! I realize I'm severely over-modeling things. I'm breaking a couple of rules of conservation in order to cover all possible angles in this set since it will be used several times and I'm not sure of every angle I'll be shooting. I have plans for a couple of animations here (at least), but I don't have more than that decided yet...and I'm obsessive.
-
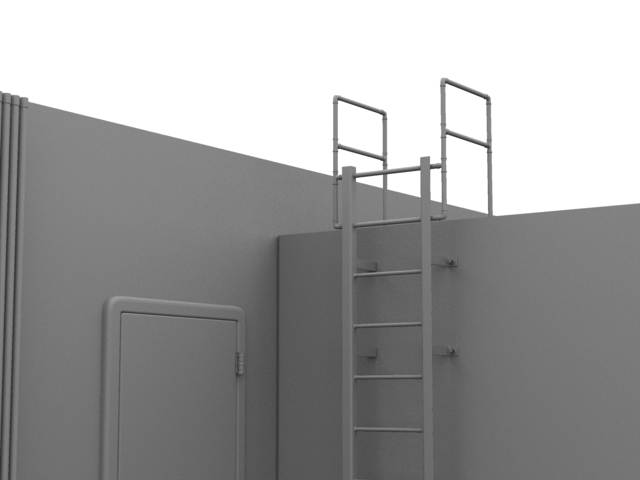
I was hoping to render more images, but I ran out of time this evening. Here is a closer image of the mounting brackets for the conduits and a render showing what the nuts and bolts I'm using look like. If I don't need the entire bolt, I use just the head of it to reduce the patch count as much as possible...even though it's still going to be extremely high. At this point, I'm almost done with the rain gutter and I have the mounting brackets on for the conduits that are already in the scene. The patch count is now 28,215.
-
Great looking trains, Stian!
-
It's been a couple of days since the last post from "Pain" in this thread...I'm assuming the installation problem was solved? If it has been, it would help others who may eventually have the same problem if the solution were shared with the community in this thread.
-
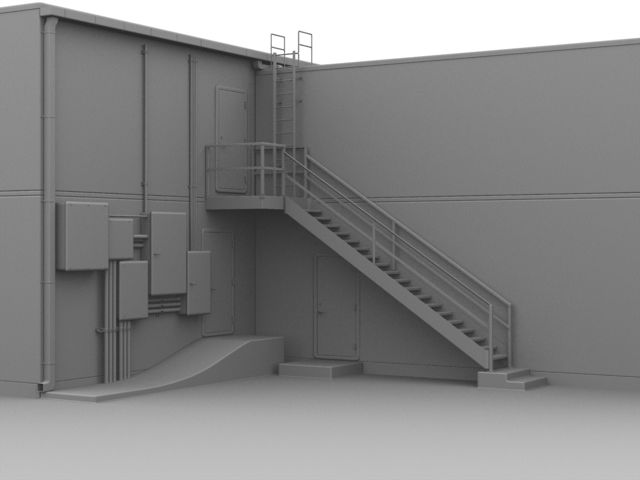
I got rid of the problematic hooks on the door frames, added some bolts to the boxes on the wall and modeled a set of stairs. For anyone keeping score, the patch count is at 17,299 at the moment...so, some over-modeling, but I feel alright about it. Still a lot of things to add...I'll get back to it tonight. Here's a few updated "so far" renders:
-
You don't need the setup on the disc...use the links I posted (v11stuff.EXE, then run AM2004.EXE). Make sure "autorun" is off, run those two EXE files with the disc in the drive. That should install the program, then, run it from the desktop icon.