c-wheeler
-
Posts
855 -
Joined
-
Last visited
Content Type
Profiles
Forums
Events
Everything posted by c-wheeler
-
Good Comment Dhar - -- Thats exactly what my animation lecturer said to me 12 years or so ago when I did my degree There are many great ideas out there, executing those ideas is the crux. The formulas that I have concluded, based on my personal observation, are as follows; Great story + great animation = a classic. Great story + bad animation = good. Great animation + bad story = bad. Bad story + bad animation = waste of time. Do what Vern says or not, there is no try
-
I find it hard to see from the picture - my eyesight is not too good at the moment- but one possible solution would be to check that all the normals are facing out around that area. Or you could try just messing with the bias handles - or drop a porcelain material on there. If you just paste a section of the face up as a model, I will have a look. Chris
-
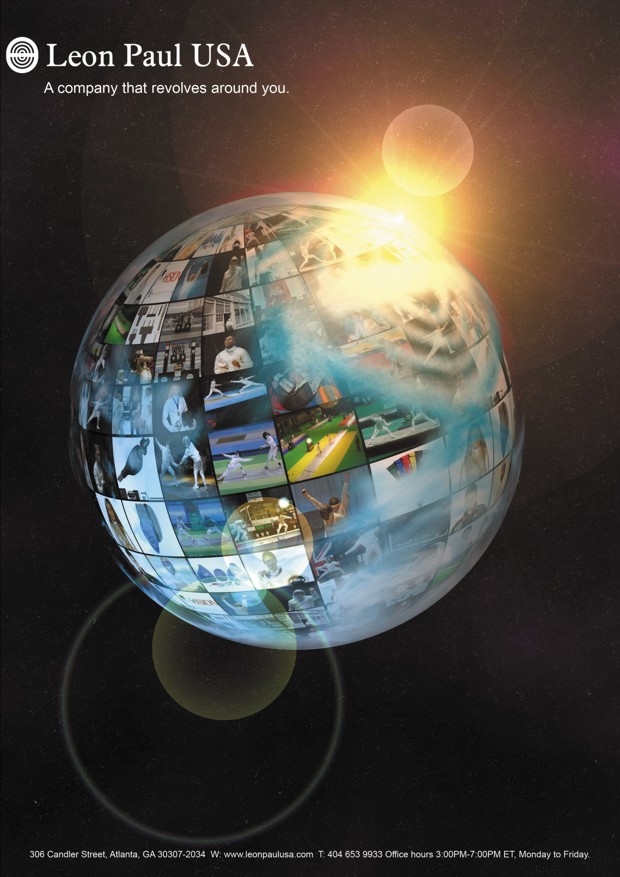
The background was created by using 3 concentric spheres and lighting. with the camera in the center Each stellar sphere was made using materials only, fractal sum combiners or turbulance. Although everything used was created fresh for the project I think credit for this part is due to Martin Russ who made the SpDk space projects. Its like most things I do in AM- everything is just a development of the work that goes on before. SpDka Page While on the subject - the halo effect is a re working of the wormhole effect posted some time ago by "VSAA" So credit due there too And I couldnt have modeled the world without all the tutorials I've looked at over the years so ... . . .... OMG Is everything I do so unoriginal
-
This is a contiuation of a previous post. I would have just carried it on, but I have been unable to access it. This is the completed advert that has just gone off to the publishers. It should be in the states soon, and the UK in a few months. Everything was created in AM except the decal photo's and the text. 2480 x 3508 Larger version will be here for a few days:-Larger Version Image was rendered in three stages, the 3d world was rendered then composited onto the star background. Final adjustment in photoshop.

-
Sorry about the size thing, I will edit the post to keep it down. I had been sending larger versions for aproval, since they want it both for printing as A4 and as a poster, but this is not the final version. This is where we are now, I have added the company logo in clouds and put a tilt of 10 degrees to it. If anyone wants to crit shoot away!
-
This is a picture for a magazine ad thats about to get published in the states. If I can sort out the reselution on the decaled pictures. All created in AM, and using Photoshop for the text
-
I like the toon one as well. You can get some cool results using standard render, then render out toon lines seperately, then composit the two together- a sort of french manga style Chris
-
In this case I would add the light to the choreography, I find it easier to use and play with there.
-
How about turning glow on in the surface properties? I am not sure what effect you are after but this might suffice. I suggest you change the bulb type to Klieg. Then call it something like easil light( or whatever suits) Add the new light into the cho window by dragging and dropping it. In the cho window simply go into a side view(shortcut 4 or 6) and position it by selecting the light model(left click)then drag it into the right position. press "r" or select rotate and rotate the light by grabbing the handles so that it points in the the desired direction. Do the same in the front window(shortcut 2). I suggest turning off all other light in the scene(In the cho project workspace click on "shortcut to Keylight, active,OFF" then repeat for all lights except the easil one. Dont forget to turn them back on afterwards) until you are happy with the effect. Then turn them back on afterwards. I hope this helps. Chris
-
Hi from the UK, william and welcome aboard! Chris
-
Awesome . Glad you posted m8
-
Hi T-Dogg I think I would be able to comment better if you could display a mov file rather than the pics you did- I suggest rendering out as a quick time move and under compression select sorenson 3 to save size. You could check out this site by Frank Silas as well:-Frank Silas lesson 2 Chris ps why not start your own thread on ABC in the students forum? Chris
-
Wow nice model. It looks just like a frost Atronach from the Oblivion game
-
Check tis out by David Higgins - he also did the game illustration in the AM handbook Space Marine
-
I think you have to first move to a format that will allow alph channels. I know tga will, but unsure about avi. Try outputting to .mov(quick time) for movie, or .tga for stills Any model you have in the cho window will normally be rendered, so make sure it only contains the bit you want to display(you can turn everything "off") Then when you go to the "render to file " settings tab, at the bottom under buffers make sure that alpha is turned on Render the file Chris
-
Nice looking Giraffe. you could have added some "interest" to the scene as well- maybe a picture as a background? When I saw the extension .mov I thought you had gone the whole way and added a rig as well as animated the model for us" Still I live in hope........ Nice model though Chris
-
Thats nice. A job well done. Now you could mess around with the weighting at the top of the thigh bone to get rid of the creases if you like.........
-
It could be the camera passing through a transparent object, like a bottle or glass?? Chris
-
There is no video for the Giraffe. Its kind of a test If you tell us whats the problem, we will try and help Chris
-
Welcome Aeion, what do you do in Prortugal? Telling people a little bit about yourself would be good! Chris Wheeler
-
Hi Roger, If youre unsure where to post, try reading this:- http://www.hash.com/forums/index.php?showtopic=21379 I understand that each of the excersises has its own spot, so you could post to the appropriate thread as well as elsewhere now. Having said that, you have made a good start. There are a couple of things though....... Take a look at his right foot, on the first couple of frames, even though he's standing on it, it slides accross the floor(drift I think its called) This happens again just before we switch to the cu, and again when he's walking away. Also you could change the lighting in the cu so we could see his face better. Chris
-

The clown-cook - a commercial advertising videoclip
c-wheeler replied to serg2's topic in Work In Progress / Sweatbox
Nice Work dood. Its good to see comercial work of any sort on the Forum -
Combining Two or More Models into One in the same Project.
c-wheeler replied to Technodandy's topic in New Users
What are you trying to achieve? I dont think you can combine surface groups like that. If you could give us more detail I am sure someob=ne can advise Chris