Rodney
-
Posts
21,630 -
Joined
-
Last visited
-
Days Won
114
Content Type
Profiles
Forums
Events
Everything posted by Rodney
-

New Childrens Video Finally Completed
Rodney replied to detbear's topic in Work In Progress / Sweatbox
The trailer looks great. Congratulations on the roll out of your video. Here is wishing much success to you. Looking Good! -
One way would be to replicate the standard film technique for twinking stars. Twinkling lights are often created by placing a mask on top of the field of lights and moving that mask across the field. This will result in sequence of stationary lights that appear to twinkle. Once the field of twinkling lights is created you could enhance the effect even more by adjusting the ambiance intensity and/or color of the Layer (under the Surface properties) .
-
Files types you would like to post to the forums
Rodney replied to Jason Simonds's topic in Showcase
I seem to recall trying to get .TGA images to load before but couldn't get the right MIME type assigned to allow it. Here is a general list of MIME types that are processed by IPBoards: http://www.utoronto.ca/webdocs/HTMLdocs/Bo...b/mimetype.html A quick Google search turned up a more current listing: http://www.w3schools.com/media/media_mimeref.asp I didn't see Targa on this list either. I think EXR falls into the same category of files generally not accessed by web browsers. Perhaps the MIME type might be acceptable as something like: application/tga Edit: TGA works! Thanks Jason. It's hard to argue with good logic. AM.tga -
Files types you would like to post to the forums
Rodney replied to Jason Simonds's topic in Showcase
Thanks Jason! Here is a list of the extension/files we can currently post: Note: Files that will open in A:M directly/indirectly are indicated in bold. Additional File Extensions for consideration: I am tempted to suggest adding the .PXD image format used with the online paint program PIXLR Image Editor. I mention it here only for those interested in checking it out. It can export to JPG and BMP as well as PNG (with transparency). A program such as this might be useful as a standard image editing program capable for newbies capable of creating shareable layered images for use in A:M as decals etc. That it is cross platform and accessible online is a plus. I'm sure there are other programs just as worthy but this may be the best/most accessible I've seen to date. No A:M Users are using this format (yet) so right now it's probably too early to add this extension. Here's a little bit more information about the PXD image format. There are some A:M file formats that aren't currently postable (some are text files): .cam A:M Camera file .cmp A:M Composite file .lib A:M Library file .lit A:M Light file .pre A:M Rendersetting Preset Files (enhanced file format as of v16 that saves render settings) .prjb (useful only if a reliable HA:MR viewer is still available) .pst A:M Post Effect etc. I haven't listed image files that can't be displayed in a browser but others have identified most of them. I haven't listed importable/exportable model formats as most of these should likely be compressed into a zip file prior to uploading. -
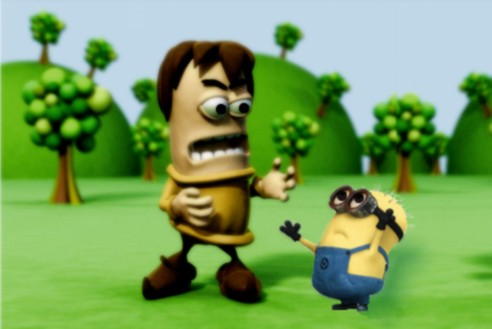
Okay... I know this is a very old topic of John's but I waited a few weeks to see if anyone would make note of the resembleness of the Minion's from the recently released movie "Despicable Me". Well... there IS a resemblance. But what are the chances people would recognize the Kapsules as being first on the scene? Fun movie. (John you should cash in on this) Apologies for the quick photoshoppin'... and I didn't grab a minion with much of a likeness... but those that have seen the movie know what I'm talking about. Forgive.

-
Thom with long cloth pants with cuffs
Rodney replied to robcat2075's topic in Work In Progress / Sweatbox
Robert, That's an important observation as it should help prevent that 'falling into place at the beginning of the animation' look. If I understand what you are saying correctly... If we delete all other keys around a specific generated set of keyframes we can use that as a starting place? If true then we should be able to scrub through a simulation, find the ideal keyframe sets, delete the rest and use that/those as a starting place. I recall Bob explaining something about this (perhaps in his Simcloth TechTalk) but it didn't sink in then. -
That's a pretty neat character/commercial. That clip does look like it's had a lot of post processing work applied to it. If trying to duplicate the referenced image with post effects it looks to me a combination of three post effects: Blur, Bloom and Denoise. Blur obviously would blur the creature/background, Bloom would push the highlights (and create a moody film look) and Denoise would blend pixels together... like blur but a more organic effect). Ultimately, I would probably composite two passes of the image together in photoshop (if a still image)... or if animated with A:M! (one with the post effects applied and one without) to get the detail in the creature's face combined with smoother background and body. Planet glow might give you a small part of the effect but it's mostly for generating a glow at the extremes edges of an object. That isn't likely to produce the effect we are seeing IMO. Anistropics and Sub Surface Scattering would also produce nice (but different) effects. (This submitted to suggest there is more than one way to skin a cat/wormcreature) Note: The smoke effect would be the toughest aspect to recreate.
-
You are correct. This is why Jason lists a requirement for the flyer as: I had to think about that myself for a few minutes... I now read that requirement as:
-
Thom with long cloth pants with cuffs
Rodney replied to robcat2075's topic in Work In Progress / Sweatbox
Sweet! That is one of the best cloth sims I've seen (period). Put a nice belt with that and I'd call that one near-perfection. -
Too much fun!
-
simply awesome. Makes me what to watch the show again. So... were you happy with the DOF effect?
-
David, Sometimes it can look like we aren't paying attention... but we are! I always look forward to your incremental updates and what everyone is up to.
-
Well... just a thought... you could change the characters and make them your own.
-
Honto ni sugoi desu! Please consider entering your characters in the A:M Mascot contest (hint hint). You have some especially nice anime sci-fi and character elements that I wish we saw more of in anime these days. If they did I'd be watching a lot more anime! Well done!
-
Well... good news. you can (to both of those). But in a strict sense of the words you have used we can't. You need a basic understanding of how to model in a Choreography window first. For that you'll want to investigate Modeling Mode (F5 is the shortcut key) and Muscle Mode (F7) If you are in Modeling Mode the original model will be changed but if you are in Muscle mode the change will only be effected as an Choreography Action. (To save the changes you'll likely want to export the model via Right Click/Export as Mdl.) For the second wish you state: (I wish I could) hold down one side while scaling the other. You don't have to hold down the one side. When you don't hold something down but select another part of the mesh/model in Modeling or Muscle modes only the selected part will translate, scale or rotate. Now when you get to copy/paste in a Chor you may have some problems but there are easy ways around this. One way would be to have the Model window open and either have them both in view and/or move back and forth between the two. ...and with the new Modeling wizards added to v16... there are some new really powerful tools for modeling in a Chor! Create a simple patch or spline and extrude it while in Modeling Mode. Right Click/Wizards/SplitPatch to add density to your mesh. It's not copy/paste but it is pretty cool! Not to distract you further but the Sweeper, Duplicator and Extruder Plugins can also be used to copy/paste meshes (and groups of meshes!) in the Chor.
-
BTW - I read your topic title as 'Cloth Attacks Groups' and thought, "Too Cool!" Now you've got me wondering what you are up to...
-
I would definitely do what Robert has recommended. Drop your cell into the Choreography multiple times and create your Prison there. If for some reason you want to save the whole prison (most likely unnecessary) all you have to do is Right Click and Export as a New model. There is another topic that is currently discussing building models in Actions but for repetition such as you are after I'd do it in a Chor. One handy tip that someone passed on to me a long time ago was how we can scale a model -100% in the Chor to get a mirror image of a Model. This could be of use if you have a cell that is slightly assymetrical. In that way there will appear to be more differences between cells. You can also export sequential models based on an animation too. Say you have a cell with a bed in it but want each cell to have the bed and/or other objects in different locations in each one. Animate the bed or other objects moving over time and then export the Model as sequences (ideally moving one cell to the location of the next cell down the row as you do. When you Import all of those sequential models into the Chor they'll drop right into place with all of the variations in the room. (as long as you've moved them to the correct place in the animation of course) At any rate... that's all experimental stuff. The simple way is to keep dropping cells into the Chor until you have them all in place. For precision placement you can type in their location in the Translate Properties in the Project Workspace listing.
-
Here are a few other quick variations created by adjusting the settings of the Model's Surface Properties and Decals. In this case I've moved away from using displacement. Changes like these might be driven by the mood you are trying to create. Note that I haven't attempted to change the color of what is beyond the bars in the cell. For that you should again consider the effects of Mood, Light and Layering.
-
Here is a quick example of what I'm talking about. What I did here was use your image to create the cell bars to apply a Decal image to. After applying the Decal I then added a few more instances of the same image and set their property randomly to Displacement, Color or Diffuse. Changing the percentage of the Property in each will yield a different look. Adding different decal images of course and changing each of their percentages will allow you to adjust the look. It should be noted that Displacement in this example is primarily added to create the effect of aged or corroded metal. You may not want that in your version. As Decals will override the underlying color of the model I will often add small color swatches (red, green, blue and yellow) as decals. By changing the percentage of those colors you can then create whatever color you want. For speed you can make these color images/swatches really really REALLY small. You can replace them later with larger images, textures or whatever you want to use. Layering is the secret here. You can layer in Rust, Color, Lighting, Texture... There is no end to the effects you can produce.
-
I may not fully understand your question... The layering of Decal images is a good way to effect color change. While all parts of the cell may have the same basic images applied through changing the percentages of each of the individual decals on each cell they can look entirely different.
-
I'd suggest closing down your project and restarting your computer. It's been too long since you did that.
-
Love the mini-tutorial on car rigging Mark. Too much fun!
-
D'oh! Can't believe I missed that. Very nicely done.
-
Congrats Mark. Very nice work. I predict they will approach you to do more animation... eventually with some damaged vehicles. Better get to practicing JohnL3D's Explode plugin workflow and Robcat's distortion map methodology.
-
Ralph, I'm very interested in the problems you are having and would like to work on specific solutions tailored to your needs. TaoA:M is sure to be refined in the future and it's important we take your needs into consideration. User to User we are in the business of providing solutions for each other. There are several ways to get this done but your needs may dictate which approach you want to take. You can have A:M open a default project. or You can have the students open a folder filled with shortcuts that each open a specific project. or You can have the students open up a webpage and click on a link to open a specific project. Lets try one? You can recreate a shortcut to Animation:Master and in the shortcut add the project you want A:M to open with. Example: "C:\Program Files\Hash Inc\V16.0\Master_64.exe" G:\AMFiles\Projects\ThomSetup.prj When clicking on the shortcut A:M will open with a project on the network drive G: in the folder AMFiles\Projects named ThomSetup.prj Once you've got that shortcut created you can move it to a specific folder or link it into a local webpage and your students are off and running. When considering files that may have gotten overwritten and making the files read only isn't an option you might consider the shortcut running a batch file that copies the original files over the files the students will open. Then it doesn't matter if the students change them or not... the files they open will be freshly copied. Of course the students should be directed to save their creations to their own private folder or else they will be overwritten. I'm not a fan of using read-only files as that can cause problems when the system tries to write to them.