Rodney
-
Posts
21,630 -
Joined
-
Last visited
-
Days Won
114
Content Type
Profiles
Forums
Events
Everything posted by Rodney
-
I seem to be relearning a lot today. When considering Ambiance it's best to avoid black *and* white as a base color as these colors override the ambiance effect. When adding color, a mid gray generally works best as a base color. As for streak and sprite glow I don't see any way to control that within the system/emitter as there is no place to set Ambiance or Ambiance Intensity. My memory says the Additive Color combined with Transparency should generate the closest 'in particle system' glow effect but I'm still looking into that. I still maintain that adding the glow effect in post will give you maximum control of the effect. I had a successful rendering but hardly worth sharing. Let's see what else I can come up with.
-
Hmm... not sure you can but I'll check. I was thinking more in terms of animating objects/patches instead of particles. I'll investigate. It should be noted here that it's good to have a target to shoot for when trying to recreate an effect. I'm not sure what that target looks like yet. There are a lot of glowing effects in games these days. The last time someone asked for a similar effect it took awhile but eventually we discovered it was sword slashing circular effect. Added: If you cannot get the glow effect applied to a particle stream then you can surely add the glow in post. - Render out the particles/streaks normally first (use a white color for your test). - Apply the rendered image sequence to a single patch image and place that model in your Choreography (place the corners of the model at the corners of the Camera cut off) - Animate the Ambiance setting and color of the Image or Patch. - Adjust the Chor's glow as necessary. etc. Rerender to see the full glowing effect I don't think I still have the project file for it but the following is an example of one such effect where a small object (I think it was a single 5 point patch) is applied to a path: zapz.mov
-
Very impressive Stian. I hope to improve my understanding of HDRI images and your site is sure to help me with that. Thanks!
-
Glow in A:M is primarily controlled by Ambiance Color and Intensity. Glow can be turned on in any Surface property. The global intensity of the glow can be further controlled within the Choreography environmental settings. So any object (not just streaks) can be set to glow. I'm sure the image here doesn't represent the effect you are going for but it's an example of glow being used in several ways. As I recall, there are no lights in the image as all surfaces are glowing to some extent. To ensure your surface will glow make sure the color you use is not set to black. Of course, if you wish to dampen the effect of the glow on some select surfaces while others are effected you may want to set the Ambiance color of those areas to black.

-
Impressive work. It's amazing the difference the change in camera angle makes.
-
I want to make a suggestion outside of my last post because I believe it'll benefit others here in the forum the most. I am reminded of the story of Grim Natwick who after retiring had moved to a small town in Missouri. Those around him little idea he was a legend... and the creator of Betty Boop... and the industry at that time had little interest in such the old animator. But found by others who wanted to learn the old ways from him and he went on to inspire a who new generation of animators before he celebrated his 100th birthday. The world of animation is better for it. Seek out those in your community with experience in animation. Find those familiarity with the classical hand drawn approach before they are gone and you can only read about their stories. Some wonderful artisans of animation (young and old) may being living in a community near you.
-
There is a third element that is driving animation education that makes this period of time something of a major crossroads; traditional hand drawn animators out of work and/or retiring. At a glance this would seem to fit your second bullet but in this case the need for money isn't the motivator. This 'retiring' aspect creates something of a two edged sword when it comes to animation education. One the one hand we are seeing a whole of folks teaching animation. On the other there is less incentive for the most gifted animators to teach because of the number of courses available. The one thing that does seem to be holding for now is the cost of attending these courses (although one could argue the price is falling). The internet is filtering a good deal of this education out as more and more students learn animation... I would say inversely proportional to the number of jobs available. Here is where a second blade appears to spring forth. For now the need for high quality animation is holding but the number of people vying for the same job is continually rising. This will lead more and more artists to break away from the Pro shops and strike out on their own. Some teaching, some producing some animating in little corners of the world far far away from California. Education rising to meet and mingle with Quality as it falls. My sense is that like water, this flow is going to seek equilibrium across the board and the underlying art of animation is going to bring a lot of this 'expertise' into homes around the world. But what to do though with commercial products when personal expression becomes the new outsourcing norm? One thought would be to simply work for yourself, assuming you can afford it. It's the old 'If you can join them... beat them at their own game' axiom. This is where we come full circle back to the learning centers such as 'Animation Collaborative'. There is and will be a growing interest in learning animation because the dimensions it encompasses are so broad. How to apply the principles of animation to one's own stories remains at the heart of it all. Interestingly, I've considered moving to California with the prime reason not to get a good job but to take advantage of these learning opportunities. But... that's rather silly. In animation, no matter where we are, we are always learning.
-
There's been more branching out of animators and instructors... this one directly across the street from PIXAR studios in California. The plan is to open with an 8 week summer session starting this month (July). Beginning Instructors include: Andrew Gordon, Michal Makarewicz, Rob Thompson and Aaron Hartline. Most are affiliated with Splinedoctors where you can find a FAQ: http://splinedoctors.com/anim-c/ Also from the Splinedoctors blog is a breakdown of the course/price: I mention this primarily to keep the cost of the going rate for an education in CG animation in perspective. Their site doesn't appear to be fully live yet: http://www.animationcollaborative.com/ At this time, it appears this'll mostly be an option for those who live in the immediate area but I'm willing to bet there will be some online resources offered. Rather than speculate further (which is always fun) I'll let everyone read for themselves and formulate their opinions. If I had to sum up my general thoughts I'd say that ultimately, I am just happy to see more information and instruction on animation getting out into the wild. Being that close to PIXAR with many of the instructors already working inside I'd guess a few other animators, TDs and lecturers might drop by.
-
Jeff, At a quick glance I'd say you've got the forehead/top of head too high in comparison to the face. If the standard head places the nose roughly half way between the top and the bottom you've got this one at about 1/3 of the way up from there. Somewhere between 1/2 and 2/3 of what you have should work well for you. If that top of the head will fill hair space... then disregard. At a guess that might be why it looks just a little off however. My immediate thought on the situation.
-
Looking very good! It's great to have you back Jeff.
-
Very impressive Matt! I've always wanted to do something like that with a large city but could never muster the patience for it. Your hard work is on full display here. Most excellent. Note: Perhaps one way to defeat the flickering bickus-dickus would be to render significant portions of the sequence out as a still frame (for those areas where the camera will allow it) and run your camera work on that still frame. It'd be a bit like animating from Pose to Pose to Pose with a whole lot of Inbetweens where your key buildings are the main objects being inbetweened. Think in terms of the old Multiplane camera technique where the background can rotate and pan as the camera moves in. When and where appropriate switch to high speed (blurred or denoised?) 3D. Now that I think about it... this might be a great opportunity to push the frames out on 2s where each image is repeated. That's a guess.. but it might be enough to break the sequence out of the standard CG feel while avoiding the FBD.
-
Here's an oldy but goody... from way back in 2007 (from Animation Mentor's Shawn Kelly): While it's focus is on spine reversals please note the little illustration that demonstrates the three storytelling drawings. That's really at the heart of my thoughts on focusing on a minimum of clearly readible poses to tell the tale. http://www.animationmentor.com/newsletter/...k.html#tipTrick
-
Is it possible that GIFs could be making a comeback? I wish! Way to exploit classic technology Bobby and Jost! (Pretty intense story there Jost!)
-
Now you've got me curious... If you could chose only three poses from your entire animation to tell your story, what would they be? Note: One useful exercise might be to consider how you would tell your story in the least amount of Poses: 1 Pose (as in a comic book panel) - Perhaps Gunny getting blow back in mid explosion 2 Poses (flip book) - Before and After 3 Poses (1 second sequence on 8s) Before and After with an Anticipatory Breakdown to sell the effect 4 Poses (1 second sequence on 6s) 5 or 6 Poses (1 second sequence on 4s... give or take a few padded frames) A Pose for each beat or contact in the movement (I haven't counted those but I'll guess... 12) I suggest a minimum of three Poses because that seems optimum for establishing the Anticipation, Action and Reaction or Beginning (1st Key/Extreme), Middle (BreakDown) and End (2nd Key/Extreme). From there the computer could then roughly interpolate the middle frame but by choosing only those three Poses we completely control and interpret that essential Breakdown/Inbetween. Added: One of my favorite online artists is Rad Sechrist. I especially like his analysis of form and flow. Today he posted some of his little doodles that I love to collect. It just so happens that one of mentions 'Three drawings for a movement'. It's part of an ongoing lecture that doesn't accompany his doodles... boy I'd love to attend one of his lectures! There's a lot of these little doodles on his blog (and at The Art Center) but here is the one that validates my general thoughts of today: Three Drawings for a Movement
-
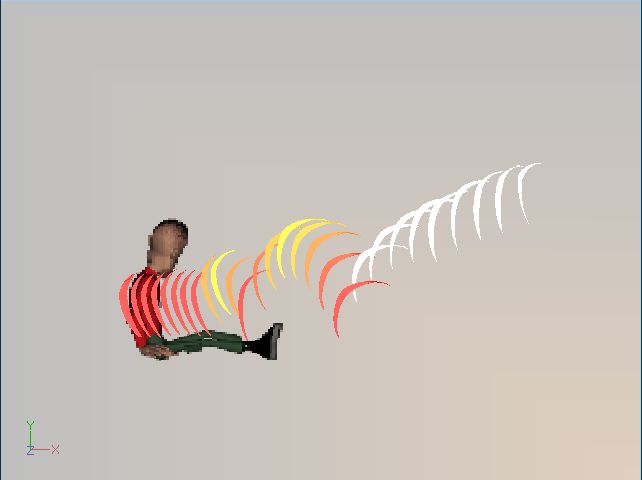
There is much improved in this last update. I'm going to regress back to the fall and bounce a little because I think there is something important missing in there. This example will look a lot like Roberts tracking but whereas his attacked the Arcs and Spacing of the fall my purpose is to target something else; Reverse Curves. Note that what I'm tracking here is Gunny's spine. One of the best places of all to take advantage of reversing a curve in animation is in a character's spine. In your case this is especially important because that will drive the Secondary Action that follows the movement of the Torso which is controlled by the spine. The red indicates contact with the ground. Note that throughout the animation there is really only one curvature of the Gunny's spine? As the essence of animation is change there is an important opportunity to take advantage of the reversal of the curve of the spine. My thought: Where the curvature of the spine in now fully forward I believe it should reverse (after the contact) and then (somewhat like a whip because of the muscles of the spine) recover to the forward position before the final fall. Hope this makes sense. If not I'll be happy to share some drawings. More change (and reversal of curves) means more will register and sink in with the audience. Perhaps what may be in order is one really solid Breakdown Pose that cements the contact and triggers the reversal of the spine?
-
When I think any project ahead of me that requires high production value, quality and detail in computer modeling... you are my inspiration David. I don't say it often for fear you'll get too use to the praise, but... your work is and remains meticulously impressive.
-
Ah yes, Ye 'ol enlightened marketing guy and Mac fanatics' friend. Hope your day was a happy one Ken!
-
Rodger said: Robert said: For those looking in, it may be worth noting the difference between these two methods (Flattening and Baking of Textures). - With Flattening, a human readable image is created that can be edited in most image editors - With Baking, a complex grid of images is created that is not designed for use with most image editors There are Pros and Cons to both methods but if planning to edit or paint onto the texture in a standard image editor Baking will only work if you've got a program that will properly interpret where all the grid shapes are suppose to reconnect. 3D paint programs like A:M Paint for instance. In the case of these textures, if the material is applied to a one patch grid the results should be pretty much the same.
-
I most definitely prefer the enhanced versions with more contrast. I've a preference for adding some post effects to any rendering that comes straight out of a renderer because inevitably the images have a computer-rendered feeling to them. It's the subtle blurring, smudging, tinting or otherwise 'degrading' of the image that seems to sell the image for me. It s perhaps an odd thing to say but images straight out of a renderer often seem too perfect and that detracts from our ability to suspend our belief enough to get past the artificiality and enter into the scene. The enhanced images you are showing here seem to have a much better sense of depth. Your color correcting (as in the last image) really helps us see the characters.
-
Happy Birthday Fuchur! Have a wonderful day!
-
From the looks of your recently posted animation I'd say you figured out what was causing those lines? Not sure but if you did I'd love to know what it was. You might want to remember what creates those lines. It's a pretty neat effect.
-
I'm liking that a lot. Very nice!
-
Nice update Phil. I hope you are having as much fun animating this as I am watching. I'm still looking at your latest updates but thought I'd add this while it was fresh in my mind... Near the end when the Character (we need a name for him Phil!) raises his hand to his head there is a really nice opportunity for Layering of your key actions. I believe this is important enough to consider because it'll get you some nice Overlapping Action. Consider: When the Hand is at the Head there is no Inciting Incident that triggers the Hand return (via gravity) to the ground but very easily there could be if the triggering moment for his hand to fall is the same as the one that has his Eyes rolling back into his head. This moment is the signal that clues us in the audience into the fact that this Guy is passing out. Further, it's our chance to Anticipate what is about to happen with the Hand and the Head... which will terminate in his whole body slumping to the ground. So, as a recommendation, I will suggest that it may be appropriate for the Hand to begin falling at the same time that the Eyes begin to move. In execution this should create something of a beat to the contacts on the ground (Hand... flump... Head... thump... Torso... DA... Head (bounce).. bump) There is room to vary that beat accordingly but yeah... basically; "flumpthumpDAbump"! While I'm here... You mentioned you were thinking about changing something at the very beginning? I expect that as you continue you'll want to add an Anticipation just as he realizes the explosion has gone off. As this will require a whole new set of Poses I shouldn't go into much more except to say that I believe we'll read his Anticipation of (or Reaction to) the Explosion by what we see happening with his Eyes and his Mouth. My general thought is that if he is holding a package at Chest level and he KNOWS its about to go off, he might scrunch his eyes closed in Anticipation of it going off. If its more of a suprise and he has little or no idea it is going to go off his Eyes might open wide (to signal his surprise). More fodder for thought.
-

Gnome-a-Bonga! It's Happy Tinking Day
Rodney replied to NancyGormezano's topic in General Announcements
Happy Birthday Tinkering Gnome! -
Another thought... From the side view it seems his hands should 'try' to stay in place at the beginning and be pulled via a chain reaction. There appears to be two possibilities here. - The blast could push the appendages farther and faster than the Torso - The blast could push the Torso primarily which in turn would pull the rest of the body with it A the blast seems somewhat confined, I believe the Hand should be more or less stationary unless or until pulled by: - The Forearm which is pulled by: -- The Upper Arm which is pulled by: --- The Shoulder which is pulled by: --- The Torso As it appears now the Elbow seems to indicate the character he is moving his arms backward consciously during the detonation.