Search the Community
Showing results for 'project'.
-
Well for school weve got to do a title page i thought well how bout this!!!

-
Hi All, This is the start of a work in progress. I have been posting in the wrong forum, so I am putting those links here to start. The Carousel House I am making http://www.hash.com/forums/index.php?showtopic=20719 Subproject to Carousel "Light bulbs" http://www.hash.com/forums/index.php?showtopic=20799 Technodandy
-
I need help...I'm pretty new to hash and I'm trying to figure out just how to change someone's clothes...for example Tarzan...What if he had a complete loin cloth instead of just a skirt...How do I do it...or make uniforms such as Fantastic Four....How would I go about making those and applying them? Any good tutorials or ideas? your help is appreciated.. thanks
-
 [attachmentid=21054] This test constrained to path, lens flares, toonation xray material, and simple expression causing random light flashes. [attachmentid=21055] TG a_test14.mov test1.zip
 -
I am trying to put together a simple animation. I posted this character a little while ago and asked about rigging it. Anyway I have it rigged enough to test a simple walk test. The character is far from done but just asking for comments so far, tried some simple dynamic constraints also. Thanks Johnl3d [attachmentid=20218] piga2.mov
-
[attachmentid=15531] project v12t [attachmentid=15532] did a quick tut will be in tutorial section for link Nice title John go to bed decal.mov posedecal.zip
-
Here is the link to my new page showing my future project... I have modeled Dino... and Bo is a "nude" Harold !!! Bo & Dino The project will (or would) be an educational one with a flipping book (pictures + text) and small games along the adventure of Bo.
-
Hi I am making many models in the same project. How do you combine them borrow a group from one and apply it to another? Technodandy
-
old original 8.5 project [attachmentid=12470] [attachmentid=12471] newguy.mov anewguy.zip
-
well im underway with TAoAM V12 Yeti and reading the book and watching the videos, i have come to realize something. watching the web videos i see that in the project workspace eg: model, there is an arrow next to it that you click and the properties for this item drops down under the item. but in my Yeti v12 the properties opens up in another window like it use to be in V7 that i was using. so did they revert back to the old way or is there an option that causes the properties to pop down from the workplace items? cheers
-
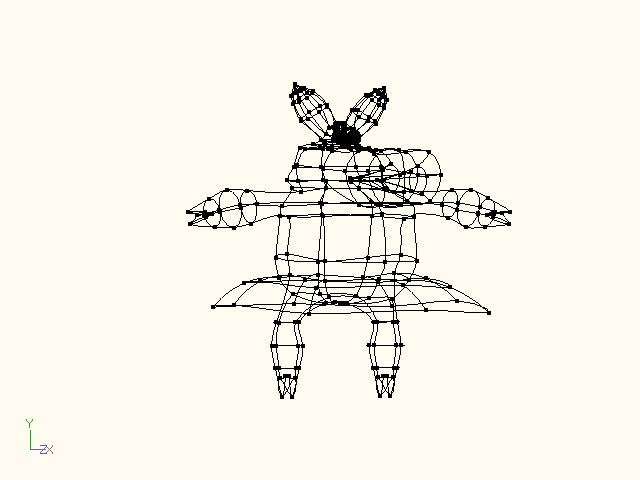
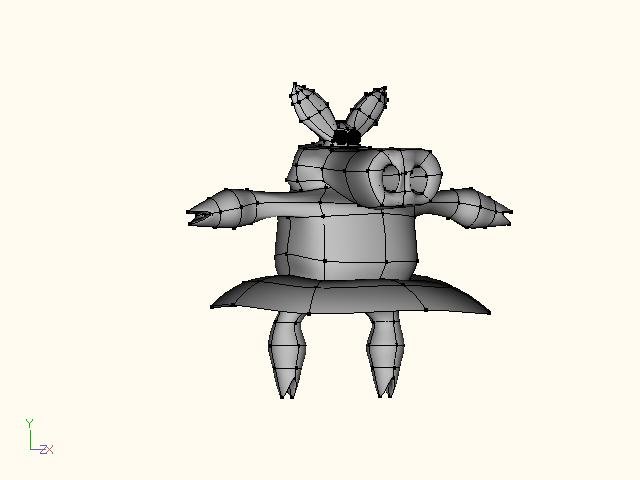
Trying something I usually don't do and that is modeling. I am posting a wireframe and shaded wireframe to help with my questions. This model will be animated and I was wondering if the normal rigs will work when there are no hand or mainly feet. And any potential trouble with the model ..I noticed that the arms could use another ring or two of splines....There will be no mouth only implied by the bouncing of the nose. And I have to add a tail. The skirt will be cloth. [attachmentid=18162] [attachmentid=18163] Thanks Johnl3d
-
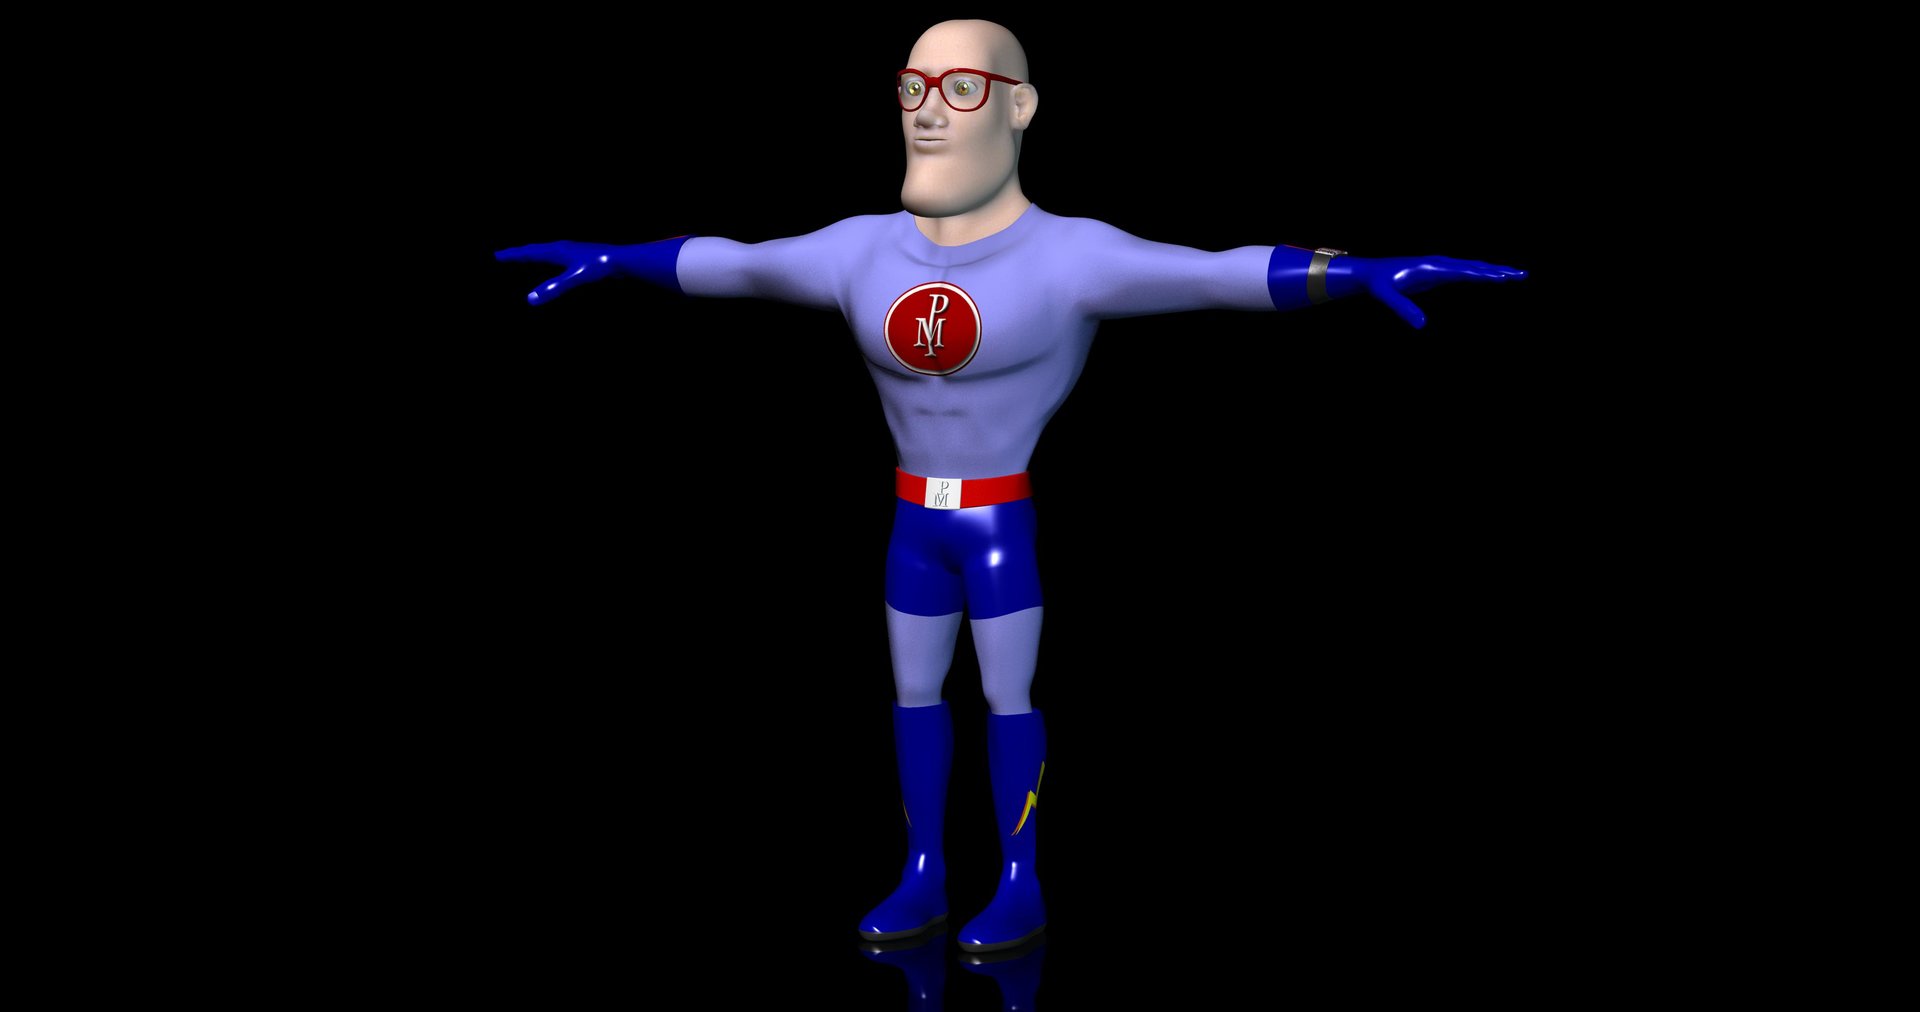
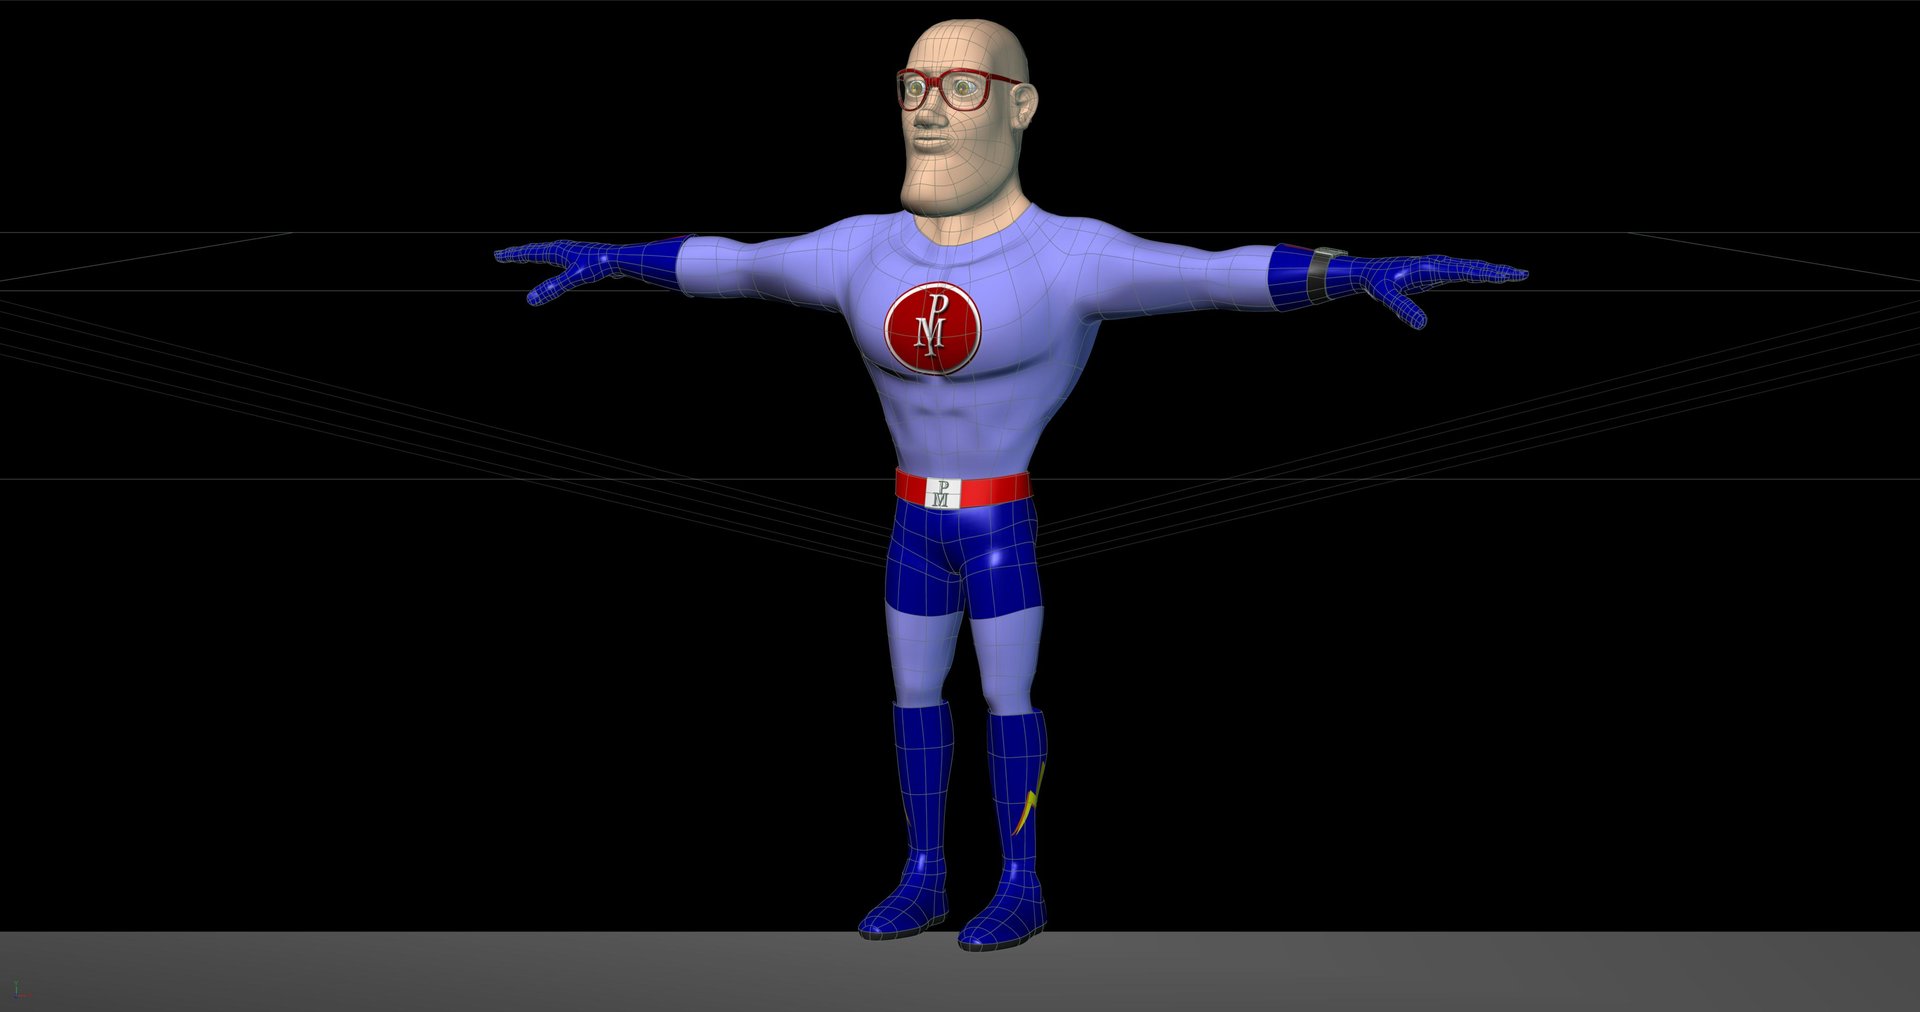
I have been busy working on a project and have not uploaded anything in a year in this year. That project is nearing completion and with the my retirement after 35 years of work I will have more time for the things I love. I built this character 11 years ago. A lot has happened in those 11 years. I was never happy with the geometry of the PM's face. So this past weekend I completely re did the head, shoulders bicep, and stomach areas. Here is a quick rendering of the PM2. I have included a new wire frame as well. The old PM was rigged with the 2008 rig by Mark. I am rigging the new PM2 with a cross of Zundel-TSM2-Robert Holmen-Steve Shelton rig with a little bit of the Saucy Rig. I have the geometry in and now completing the control portion and will work on the poses. I hope to have him finished in the near future.
-
Yes, I have plans for a long term project, perhaps changing the version while the project is in progress. There may be a problem, and another reason I don't have a credit card, it's not easy to shop online often, I want to be able to Transfer funds directly to Hash, Inc.'s account and scan the transfer document. Can be confirmed through this forum, it will be another convenient way. thank you with high regards Bobby
-
Here is the project file for my Shaggy and Scooby. I couldn't include the chor because of the size of the file. Shaggy is rigged, but there is a problem with the contraints on one of the right hand fingers. No smartskin. SHaggy's hair isn't finished. There's a few basic bones in Scooby for the tail and ears. If anyone uses these just let me know what you used them for and post it here so we can all see it . These models were built quickly for the contest, so they are probably no good for animation. If someone does get a decent rig and animation with these guys let us know that too. I also did a quick toon render of them in the model window. I didn't do my contest in toon because the last time I did that everyone thought I drew it and cheated the contest. Here's the link to that one: http://www.hash.com/stills/displayimage.php?album=11&pos=13 Here's the project file Scooby.zip
-
I have made the models and the actions and now in the chroeography I am putting together my movie. But when I want to add a new model in the middle of my action, say at about the 5 sec spot, the item I add then flys in off the side and moves around during the first part of the movie where I don't want it. How do I add something later in the footage without it being in the first part. Thanks for any help. Lucine
-
Where are the project files placed? Netrender will not share the project files (or textures, etc.) over the network or something. It needs to be accessable by every computer in your network by itself best by using the same network drive letter or you have to replace the path-string "c:/project/myproject/" by "g:/project/myproject/" or something like that. See 6.) for where to do that. Or can you already access it like that on your windows file explorer using the same path and it can not access that? Best regards *Fuchur*
-
Hi Robert, a good starting point might be that: It is a shame, that the pdfs are not available anymore here, but there is still nice information in there. And here the PDFs are still available: Important: All computers need to be in the same network of cause! It is very helpful, if you have the render-data at a place where every computer can access it. Best is a NAS or another type of network drive. If you do not have something like that, you can still copy the data (A:M files, textures, etc.) over to each computer on the same position like for instance "C:/am_project/my_project.prj". Important: Do not copy it on your desktop, since the path will vary from computer to computer if the computer user name is different(!). In general it is pretty easy: 1.) Start RenderServer_64.exe on one of your computers. Make sure it has at least one Core assigned, which is not occupied by a Messenger/Slave. Theoretically it is not necessary, but I think it is the best option. 2.) Now you should read out the IP-address and Port of this computer / the Render Server. You should be able to see that by going to "Tools > Options > Connection". 3.) You can use the other cores of the computer (renderserver) to render too. 4.) Double-Click on RenderMessenger_64.exe in the A:M folder and use the wizard. There your NetRender Server should be automatically set to the IP address you got from step 2. If not, put it in. Same with the port. 5.) On "User defined data" you do not have to put something in, but it is a good idea to write something in that helps you to identify the computer with. That makes it easy to find out, if something is happening with that computer (this is not very hard to guess if you have only 1 or 2 computers in use, but I did it with 12 computers before and than this is really helpful). 6.) If the path of the project files (etc.) is different for the computers (so you could not use a NAS / network drive with the same letter (P:/, etc.) on the computers or you could not copy the files to the same position, the next step can help you. I would try to avoid it, but you can try it out here. 7.) Now start the next computer and install A:M on it. You do not need an own license for that computer or something. After install, just click on "RenderMessenger_64.exe" and follow the Wizard here too. Be sure to put in the right IP and Port of the RenderServer now. 8.) Check the connection of the Rendermessenger. You can see that, in the task bar (next to the clock on Windows). If the icon shows a connection (both "lines are next to eachother without a gab inbetween). If that worked, go back to the Renderserver and have a look. In the lower area of the RenderServer-Window you should now see the other computer-Netrenderslaves and the one of your own computer. 9.) If that is the case, the connection is working and you should be pretty ready to go :). After that just open Render Messenger on both computers as often as you've got cores (or virtual cores if you use HT/SMT). Only on the Netserver computer leave one to the server. So if you have a 4 core computer with HyperThreading (HT, Intel) or Simultaneous Multithreading(SMT, AMD) you can use 8 instances on the other computer and 7 on the the server (if the server is a 4 core too). 10.) Now on the Render Server go to "File > New". This will open a new window (Pool1 or something like that). In that at the top right-click and choose "New Job". A wizard will pop up. Give it a name (this is only for you if you render a couple of different jobs in a row for instance you can see what you do there... for instance "Peter's day out - Walk animation Scene 01 - Take 01" or something like that is a good idea, especially since I leave the jobs in there in general even if they have finished. Browse for the project-file (or chor) on the next button. Be sure, that the path is available on all computers in the same way (or use the option of 6.). Select which camera and chor in the project you want to use below that. In general you can leave OpenMP off and GPU is only needed if you use for instance FakeAO/SSAO or something like that. But first I would just try it with an very easy project. 11.) Next put in the render settings you want or use a preset. At the path at "Filename" make sure that the path is available for any computer. You can render to your own c:/ or a net-drive. For the net drive be sure you can access that from any computer. Anything else should be clear. It is mostly the normal render settings you already should know. 12.) After that the new job should be available in the Pool1-Wndows. Now save the job on the server somewhere. (or a net drive... this does not need to be available to other computers) 13.) Now drag and drop the Instances in the lower area of the Window to the lower part of the Pool1 window. After that, the Netmessengers on the computers should start Renderslaves and render the things. You should be able to watch that on the computer displays and you should be able to see that on the REnder Server too. It refreshes every few settings. If something is not working, you should get an information about errors and so on. If you get some, check what it might be on the computer or by having a look at the render server. Notice: In the Pool1 Window the right mouse button is key. There are a couple of different options there which are really helpful (and pretty straight forward). I hope I could help a little. If you have any kind of question or problems let us know. Best regards *Fuchur* PS: And this might be interesting for a lot of cores too: https://www.patchwork3d.de/start-am-netrender-185-en
-
Well, im back to teaching Martial arts and personal training. My master is putting together a fight choreography scene for a internet movie, and I though I take the time to mess with Hash again. See if I can put together a fight scene in 3D. So I still need more time to polish the model and tweak the bump map on the torso. More nurnnys on the sword. Been awhile, and rehashing the things I know about hash. So this is my spare model that I am redoing, I have another I want to use, but using this one to figure my way around. If anyone remember my old project will remember Erica, I haven't given her new hair yet, thats next.

-
Cool Thanx. Next... What's the 'secret' to getting the right picture to show up in the projects menu for each project. I have a situation where I have a folder with a .prj file and a .jpg file, of the same name. I have the .lbr file with the correct path pointing to the project. In the library when A:M is open, I see a graphic of the 'bowling ally' and the correct name of my project. When I double click on the project, the correct project opens. Where's the bowling ally thumbnail coming from?
-

Stalled Trek: The City on the Edge of Foreclosure
largento replied to largento's topic in The Wannabe Way
Just a post to close out this project! After much longer than expected and many, many obstacles, Stalled Trek: The City on the Edge of Foreclosure was completed on April 10, 2021! As you can see from the poster, I ended up going back to an updated version of the original character designs from Amutt Time. I resisted it for as long as I could, but since I had to remodel everything in a new application, I gave in. I'm glad I did. I think they're funnier that way and even though this one and Amutt Time look different, it's good that the characters aren't too dissimilar. This was easily the most difficult project I've ever completed! I knew it would be tough, but I wasn't prepared for it! Amutt Time was a breeze compared to this one. So many speed bumps: a new full-time job, learning new software, health problems, and a world-wide pandemic! So many setbacks, but I kept at it and finally reached the finish line. The hard work was worth it, though. I'm really proud of this one. Hopefully this will be some encouragement to all the people who are struggling with their own films. There's a light at the end of the tunnel! I should be getting the blu-rays back from the duplicators in the next couple of weeks and I've already started submitting it to a few film festivals. With the pandemic, many film festivals are still shut down, but I hope to be able to see it screened with an audience.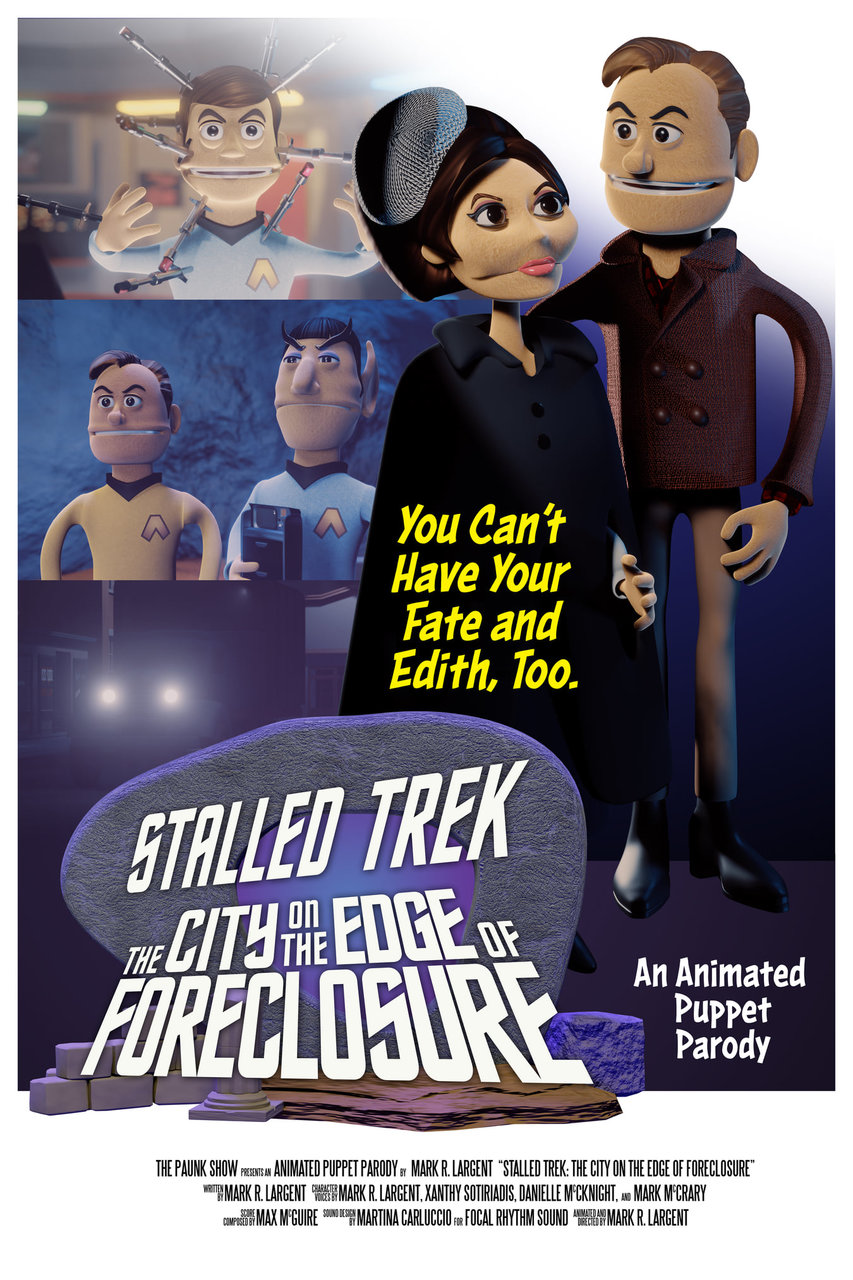
-
HAIR - No specular effects [solved-ish]
Douglas Ferrin replied to Douglas Ferrin's topic in A:M Rendering
Rob, OK, bringing the model into a new project worked. Hooray. I need to tweak the settings - I'll have a look at the tutorial you sent - but anyway it's working. Thank you so much again for your help! All my best, Doug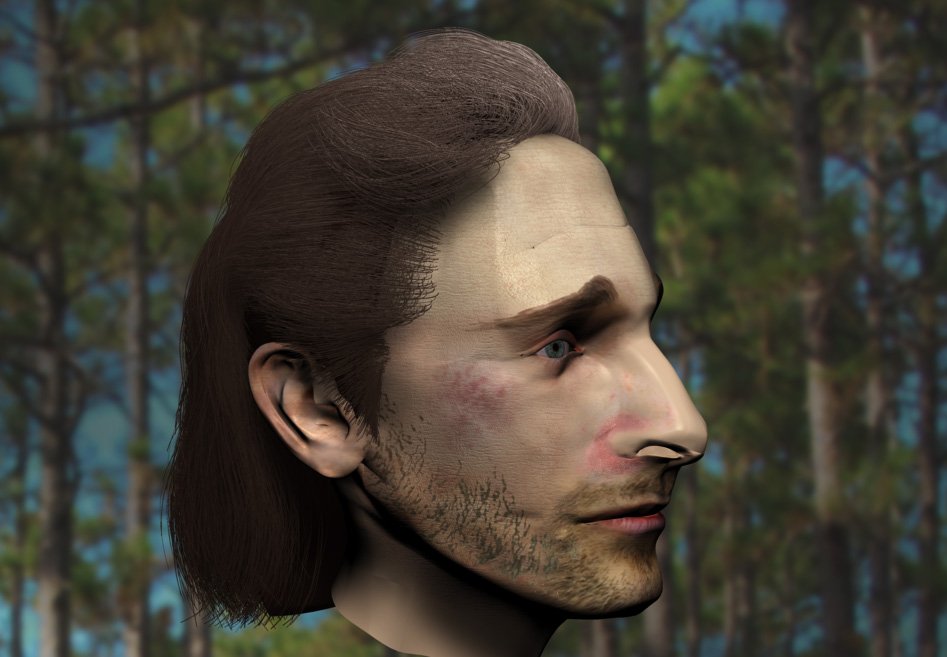
-
Hey all, Remember this Guy (note thicker hands :))? Well he and his growing cast of cohorts are getting ready to become mobile soon, but they could all use a bit of dressing up. To that end the Super Secret Project Crew™ is looking to add a new member, specifically a texture artist. (not only for the characters, the sets modeling will start soon and will also need texturing.) So if you fancy yourself as such or would just like to give it a shot please email me at [email=david@am-guide.com]david@am-guide.com[/email]. As an "audition" of sorts I will send out the model file for this character to all who email me. This is a volunteer project but I am holding it up to a certain level of quality. To any budding texture artists out there you might consider this a good way to get some material for your portfolio. If you have a few extra hours a week that you feel could be dedicated to something of this nature I encourage you to give it a shot. The production is pretty relaxed, but I will ask all applicants to agree to some basic terms of confidentiality. I am not necessarily looking for professional quality here, in fact if you show promise on the test and are willing to endure some critique that would almost be better, since i would feel less like a free loader on someone's talent :). All members of the project so far have been hand picked by myself and this is the first open call to any outside source. primarily because I know how collaborative projects can fall apart if there isn't some form of bond between the members of the team. In a sense I'm looking to this to see if it is possible to assemble a team just from the list/forum members. If anyone has questions about me, the current crew, or just wants to know a little more about the project feel free to email me directly.[email=david@am-guide.com]david@am-guide.com[/email] Thanks for your time, -David Rogers

-
Looks like I landed another animation/automation project. This new one is for a $500K Automation project. The company doing the proposal is having a hard time conveying the concept to the customer (that's where I come in). I'll animate the proposed line. Wish me luck, I'm goin in. David
-
Well I've had AM for 4 months and done too much goofing around. The ol' saying is writer's WRITE, so I guess animators ANIMATE! I've been so busy tweaking characters to be better than the previous version and worrying about rigging and things I can't do that it paralyzed me from doing much. So I decided to just rig something (since I have TSM2 anyway) and jump in and do something, so here's the start. I'm animating this as I go, but consider this version a kind of blocking, because I intend to go back and put in all the detail. Right now I want to get the short story down. It's been fun since it has been fairly quick to do to get it this far, maybe a few hours. So keep in mind with your C&C, there is not really any follow through yet, not much squetch or really anything other than the basics. Not much of a story, no real title yet. Essentially they are supposed to be leaving and they will kind of walk off into the distance after I finish whatever action will happen. I wanted to just jump in and get experience animating and not worry about making a perfect first project. So far it's been really worthwhile, I think I'm learning quite a bit about animating in A:M and some things have gotten clearer (so if you are hesitating, jump in!) Just a shaded render, 20 seconds. Note the camera movement is not good, working on it. EDITS: Latest version at the bottom!. http://www.pixelmech.com/movies/rr24.mov http://www.pixelmech.com/movies/rr25.mov http://www.pixelmech.com/movies/rr34.mov http://www.pixelmech.com/movies/rr40.mov http://www.pixelmech.com/movies/rr42.mov http://www.pixelmech.com/movies/test1.mov http://www.pixelmech.com/movies/rr54.mov http://www.pixelmech.com/movies/rr55.mov
-
I recently started a small project with a puppit I made of some garden strings and velvet. They were a bit moveable, but I had no idea to set it up with the right stability to make a movie of it. Then I reminded the one_frame_button of my Cad camera. So I made some surounding and tried some pictures. My first attempts were a bit fraggy, as I had no idea to make the puppit straight for a longer period. Then I found some small magnets, and used coins to move the feet as parts for the walk trace. It all looks a bit chunky, as I had hardly an idea how much frames needed a walk pose, or a still. This was made with a range of 600 frames. 😏 pino.avi