Pengy
-
Posts
441 -
Joined
-
Last visited
Content Type
Profiles
Forums
Events
Everything posted by Pengy
-
here's the first of probably many places I'll need help. The back hip area collapses in when i rotate it. The front is fairly smooth but this looks like he has some serious medical condition. Should I use some kind of fan bone or...?

-
Thanks guys, I'll be posting pics for help soon There's quite a few "tough" areas on this guy that aren't working right with my limited rigging knowledge. The short is going to be an intro for my "studio". The way I picture it is ala roadrunner/coyote. This guy is the foil for my penguin. It starts off with a marble sign with my logo on it being lifted up. Then the constr. guy enters looking for all the workers. Noticing no one is around he sees a button marked Don't touch on the construction site fence. Since he's the foreman no one is going to tell him what to do so he goes over and pushes the button.At this point the marble sign falls and squashes him. My penguin in side the logo goes from 2d to 3d (another thing I'll need help figuring out), jumps down off the sign walks towards camera. As he's doing this we see the costr. guy slide out from under the sign and waddle off camera. The penguin then starts doing a goofy dance:)Just a simple little thing that at this point is way out of my talent. I was also thinking these two would be good to tell other stories with but that's too far down the line to think about.Enough typing for now since i've used up most of my vocabulary
-
Hello all: you might remember this fella from previous posts. I took some time away to enter some contest but now i'm at the rigging stage with him. first time trying to rig and while i can theoretically understand it putting it to practice is something else So I thought I'd start a thread to keep me motivated and maybe have a place to look for help. P.S. I "borrowed" the t-shirt saying from someones forum tag:)
-
is there a material on the exhaust pipes?
-
1 question, where do you put the groceries? Excellent job, I have to agree with everyone else that the render is too dark. You have a great model, put some lights on the bugger and show it off.
-
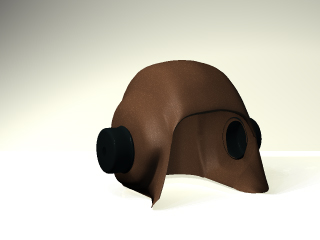
Thanks you Vern I think that's exactly what I was looking for. My plan for the helmet other than learning is to use it for a not so realistic character. But, that being said it would be nice to have it as "realistic" as possible, ya never know when these things might come in handy
-
Thanks Doug: I'm glad you think so. At this point it's all hit and miss, so many different aspects to concentrate on. If you mean the metal ear pieces I haven't messed with them at all yet. It is definately serving it's purpose as a teaching aid. Vern was totally right as usual, just taking my roto and using it to help decal would have been alot easier Ah well never hurts to have more options available.
-
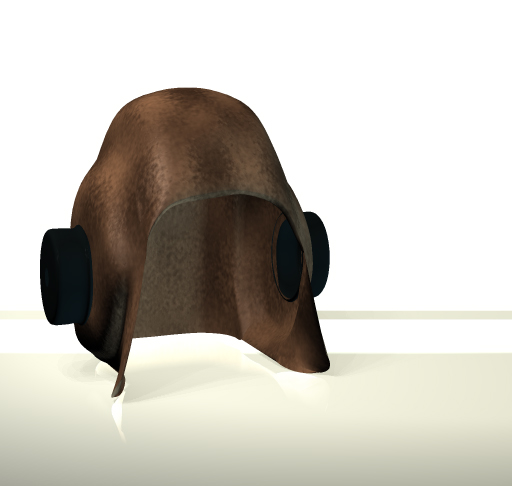
finally broke down and painted a bump map forthe cracks Also started my attempt at making the seams as you can see it was a failed attempt. I'm all ears if anyone has suggestions on how to make them better.
-
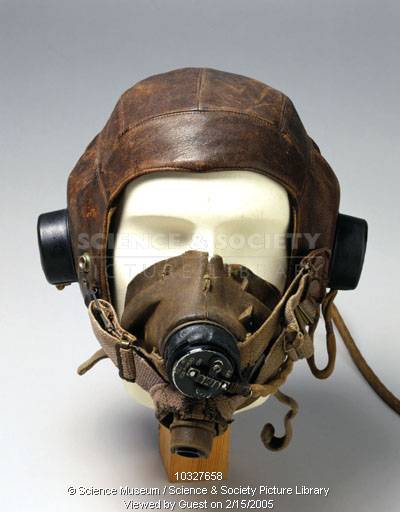
This is the image I'm using as a roto. Is there a way with bump maps and decals, without adding geometry to create the seams?
-
added another bump to try for the lines.mine's not quite as cracked as Vern's.
-
check under the latest info section Dimos.
-
hehe I'm going to have to remember this line next time I'm out bar hoping. Awesome work as always Jim!
-
Not bad Vern I'd like to see how you set up the material please.
-
Thanks Vern. I was just going to decal a bump for the wrinkles but if I can use all materials for the skin that'd be great. I really like the colouring on this 1. The other one had smaller specks and wasn't as noticeable. I'd look forward to seeing what you'd come up with.
-
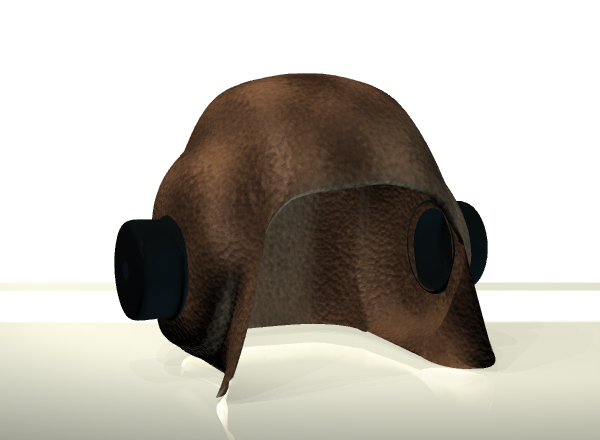
Still Plugging away..redid the material again. I also applied a second instance of it as a bump.
-
Thanks for the input guys. I'm actually going to do it the hard way and work on the material. I've gone the decal route and this time, since there's no time limit, I thought I'd push myself to learn how to use Master's materials better.
-
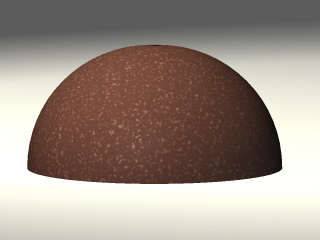
Thanks for the advice Kyle that was just a half a sphere I used to check the material. I changed the colours of the material(funny how thinks get clearer after you step away for a while. Started working on the helmet..loads to do still
-
Nope it fully loaded then played.
-
Seems clear enough if maybe a little long. But I guess if its going to be shown at fund-raising events the length won't bother people when theyre eating their chicken. I did notice on your date titles at 2001,2003 there is some kind of blue thingy above and to the left of the date as it grows and at the 2004 date there are artifact lines on my player but that could be on my end. You can definitely tell you've put long hours into it good work
-
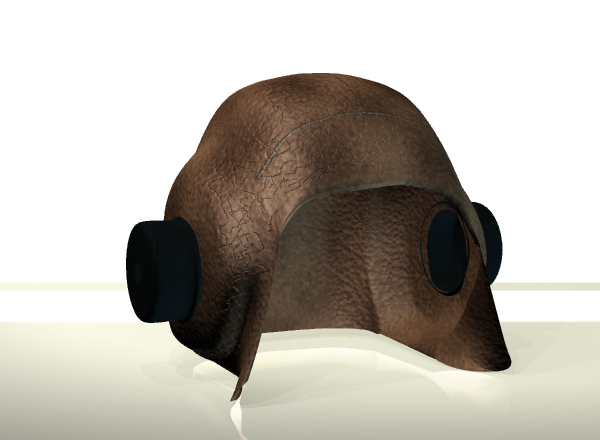
Hello all: I'm trying to come up with an old leather material for a pilots helmet and bomber jacket I'm working on. This is what I have so far I think its pretty close but any suggestions would be greatly appreciated.
-
i think you have the M upside down
-
Heya, the series is still happening. The only problem is talented people are ususally very busy people It comes down to contacting them arranging a date,time etc. So stay tuned
-
hehe good job John..Only one critic the river should be dirtier no
-
I'm close..but not so close about an hour away from Windsor.
-
just thought Id say please keep tinkering john..I don't know how many times over my last couple years on the mailing list and here Ive seen someone ask a question and the response has been "I think JohnL did something like that" The usefullness of your experiments is only limited by people imaginations.