robcat2075
-
Posts
28,236 -
Joined
-
Last visited
-
Days Won
399
Content Type
Profiles
Forums
Events
Everything posted by robcat2075
-
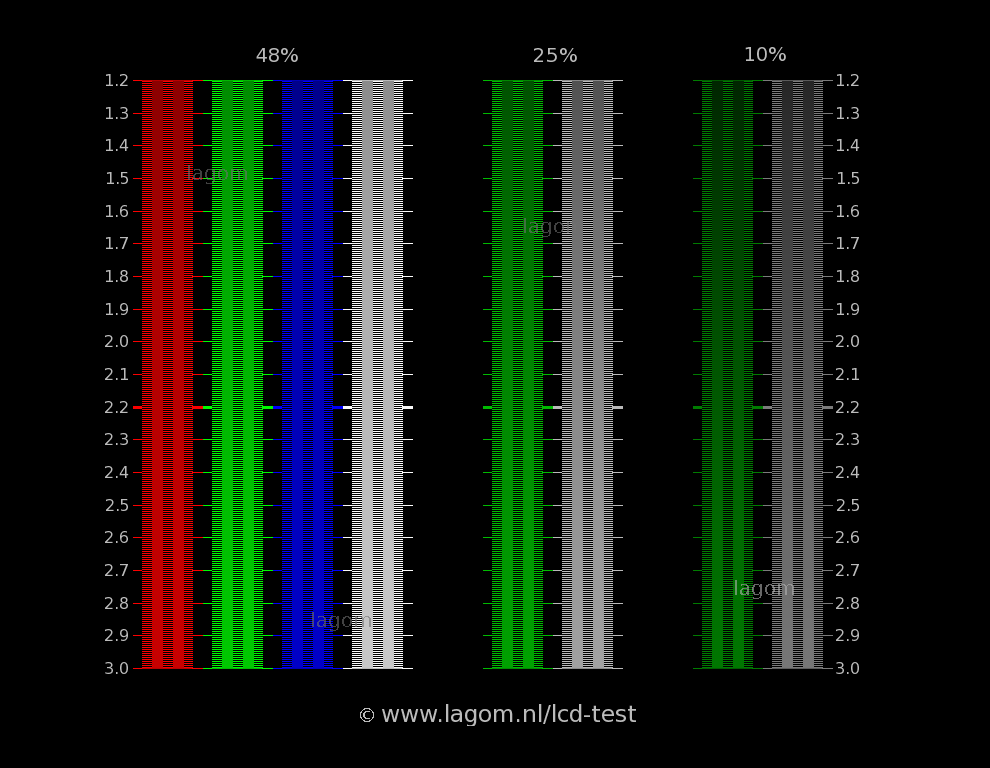
I like this gamma test because it is easy. Adjust your gamma until the vertical bars in each color appear same-value at the desired gamma (2.2 typically). However... DON'T view it in a browser. Browsers seem to alter the gamma of this image. Load it into a paint program that does no color management and make sure it is sized to 100%

-
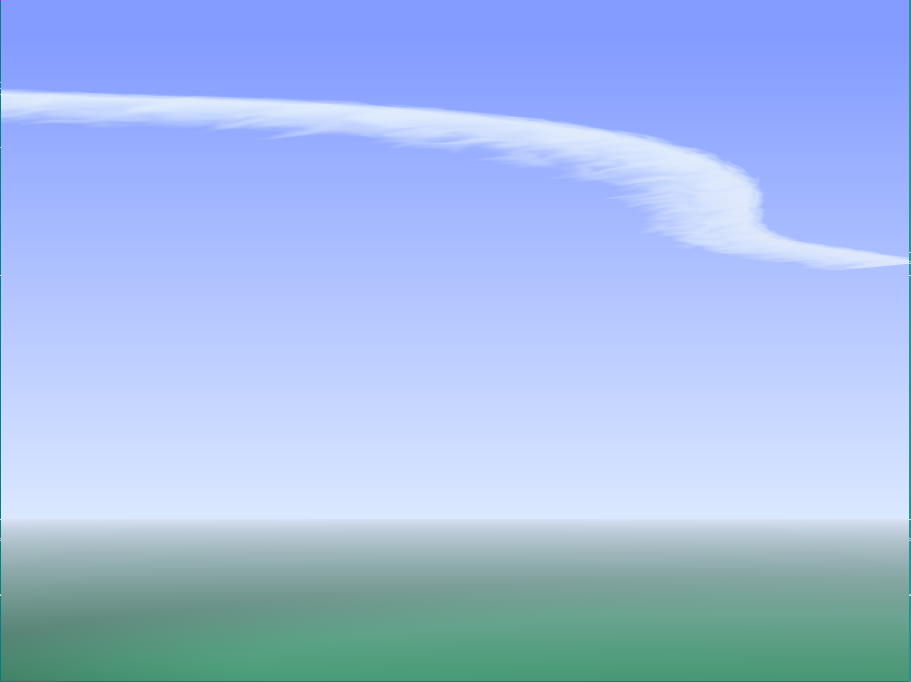
Hi, Tom. It goes something like this... The Material is a Gradient combiner that increases transparency vertically from 0% at the Start to 100% at the End. It also has a Turbulence on it to make the increase look mottled The cloud is modeled as a long V-shaped channel The Material was dropped on the cloud model (no groups needed) to color the whole model. The material makes the bottom of the V-channel opaque and fade to transparent at the upper edges. In the Chor, the turbulence can be keyframed to move vertically so that the mottled effect of the transparency appears to move up the sides of the V. This is how my Fire! is animated. https://forums.hash.com/topic/49678-fire/ However, the model has a pose slider (Pose 2) that flattens the V-shape so that all the CPs are level with the bottom CPs. This Pose is set to 100% in the Chor. The material, applied on the model, is unaware of this shape change so the animated mottling is still moving up the sides of the V, but the sides are now horizontal because of the Pose slider. The mottling appears to move from the middle of the cloud shape (originally the bottom of the V channel) to the front and trailing edges.
-
I am still wondering about your monitor gamma. When I view this as posted, almost all the detail of the clothing and tail is lost in black.
-
Hey, Tom, you gave me an idea! Birth of a Condensation... Stratus007f2_h2500.mp4
-
I have added it to the post with that movie.
-
Here is a version that has both 1 and 2 "octaves" together... CellMat004_h1500.mov
-
I added the PRJ to the top post if you want to mess with it. Note that the model itself is stationary. The materials on it are keyframed to rotate.
-
Thanks for all your work, Jason. I hope you are on the mend soon!
-
the Cellular-Webbed turbulence combiner rotated within a cube of patches... CellMat003_H1500.mp4 PRJ... CellMAts003.prj
-
these are made with the "cellular" noise combiner. cloud12f_h2000.mp4
-
Thanks, guys! The ones that are primarily a material effect have have the most potential i think... (full screen it) Cirrus7d_h2000.mov PRJ: StratusCloud007d.prj (set your Options>Rendering to "Use settings from the Camera")
-
-
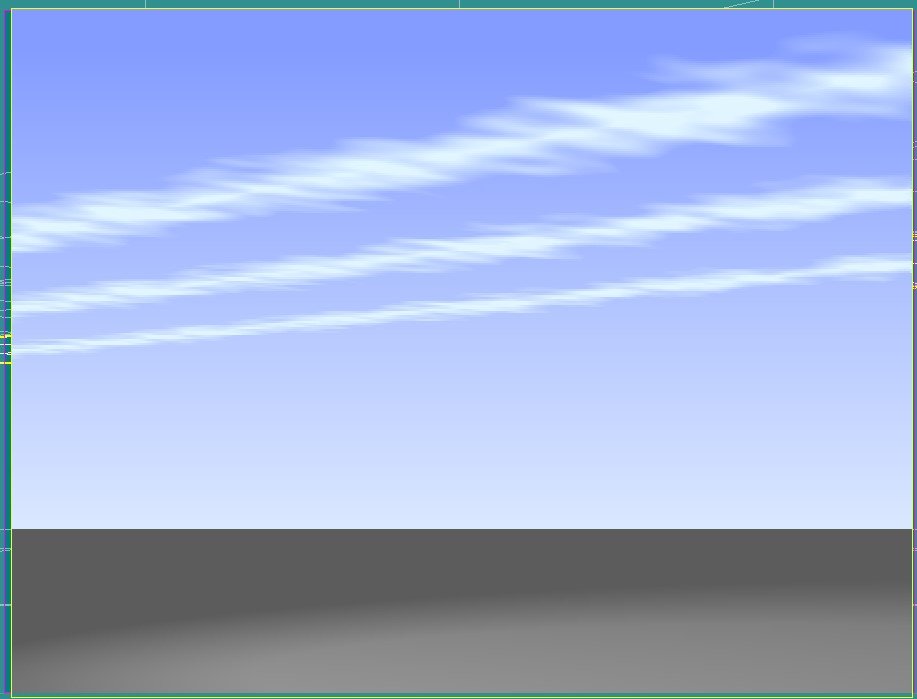
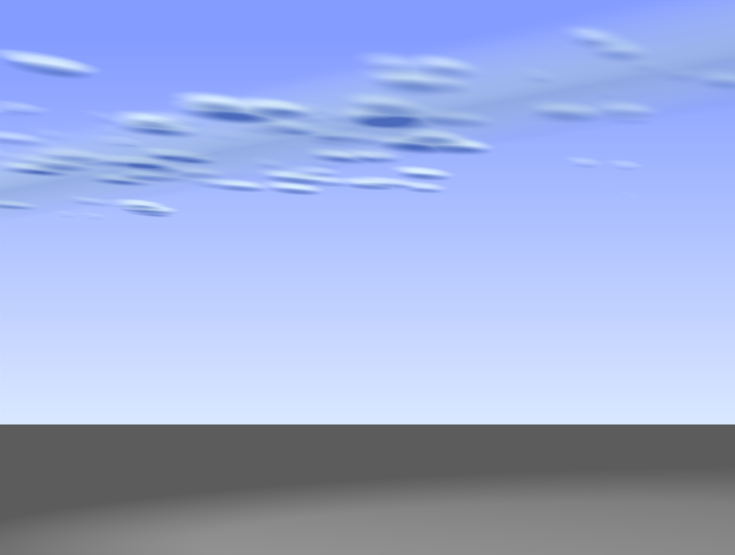
A bit more cloud experimentation. I think these are Cirrus clouds... "Lenticular" clouds, that people often mistake for flying saucers...
-
Update... you can now do Likes, Yays, and Ecstatic clapping. Thank you, Rodney!
-
I guess, "likes" are not quite back. We have "Thanks" and "Ha-ha" but no simple "like" yet. I guess we'll have to express our likes in written form! For your consideration, these emoticons continue to be available (you have to scroll way down the emoticon menu)...
-
Thanks! Here's a brief one... https://forums.hash.com/topic/49685-using-the-onion-skin-toolbar/
-
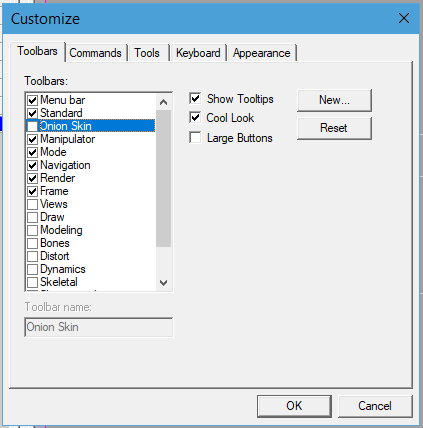
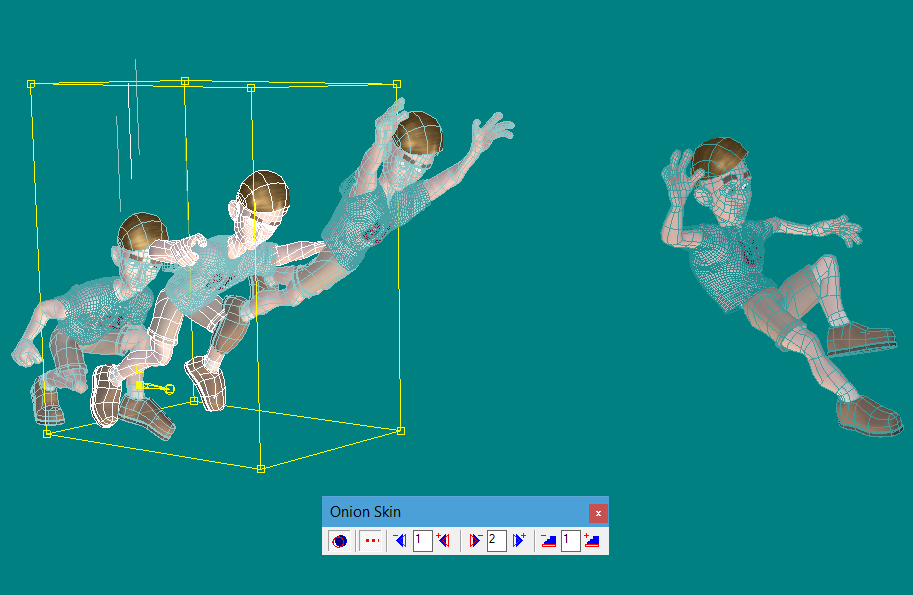
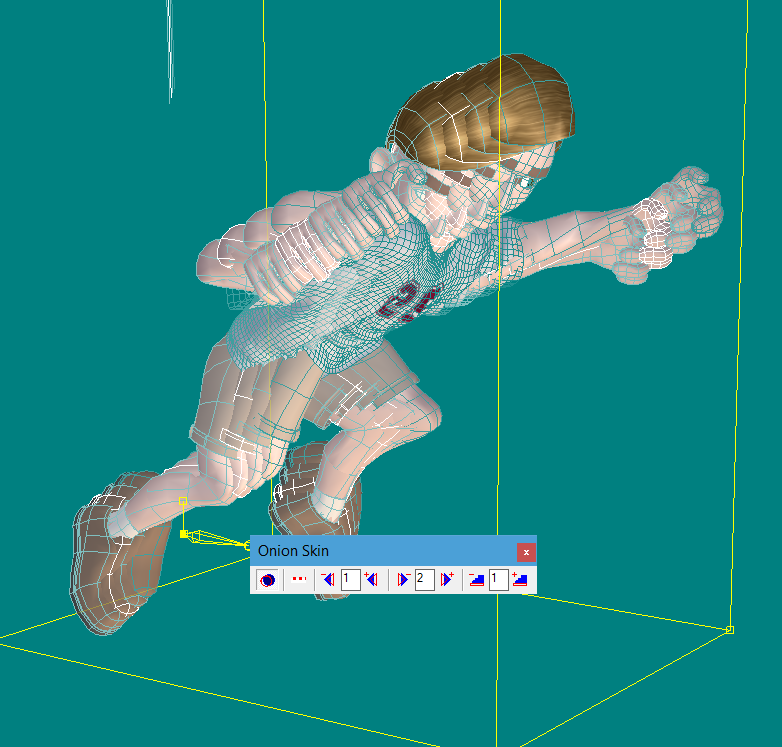
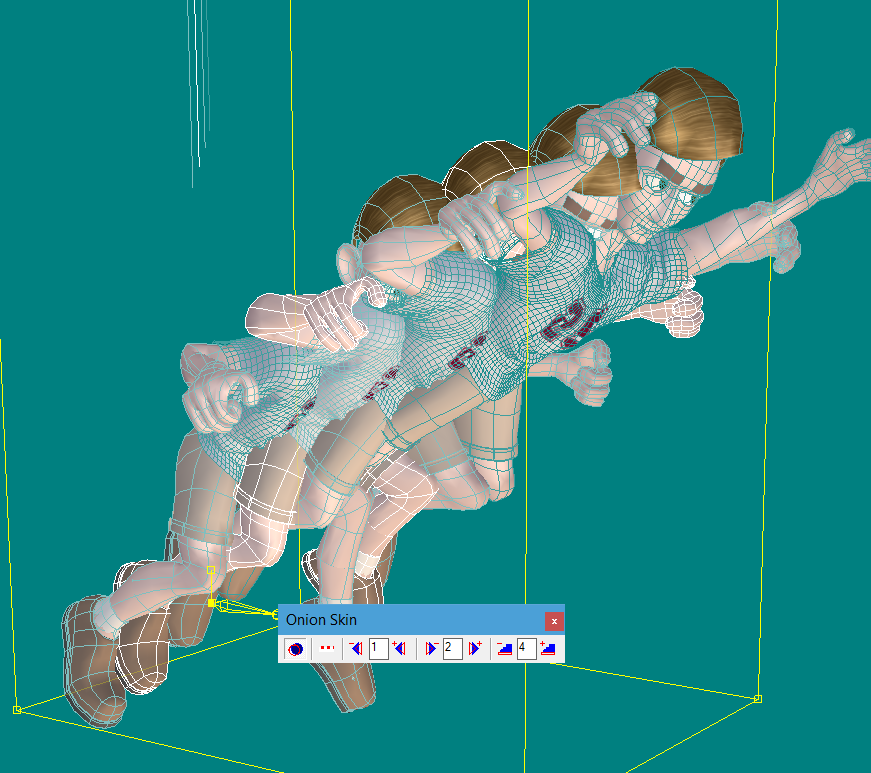
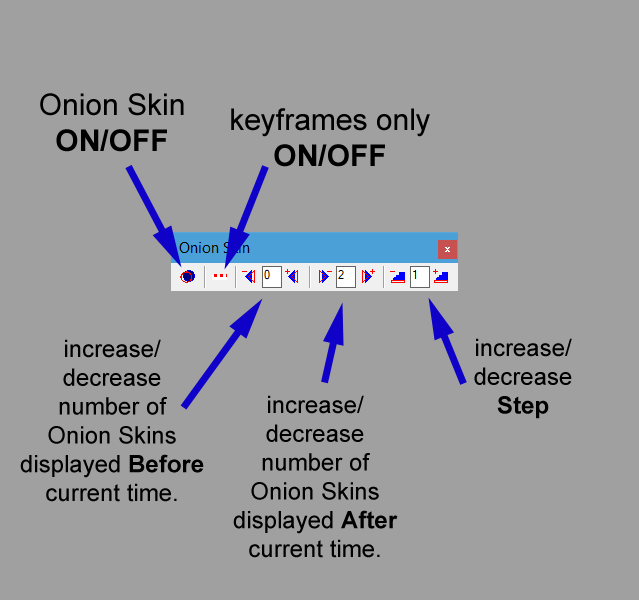
An Onion Skin toolbar has been added to A:M so that you don't have to return to the Options>Onion Skin panel whenever you need to change the most commonly used settings. To enable the Onion Skin Toolbar go to Tools>Customize>Toolbars and check "Onion Skin" The Toolbar has five controls Onion Skin Mode ON/OFF (default keyboard shortcut: SHIFT+5) Keyframe Mode ON/OFF. ON shows only onion skins at the time of keyframes of the currently selected object*&^. OFF shows onion skins in normal time increments (every frame if Step is set to 1) (a keyboard shortcut for this can be defined in Tools>Customize>Keyboard "Onion Toggle Mode") increase/decrease onion skins drawn Before current time. increase/decrease onion skins drawn After current time increase/decrease Step. Step is an increment between drawn onion skins. Larger numbers skip more frames before drawing another onion skin Like all toolbars, Onion Skin can be dragged to any convenient location. In this view, with Keyframe Mode ON, A:M draws one keyframed pose of the character before the current time and two keyframed poses after. (The model with the white wireframe lines is at the current time) With Keyframe Mode OFF Onion Skin draws in regular frame increments, observing the specified limits of one before and two after... In this view, Step has been increased to 4. A:M draws onion skins in 4-frame increments... Note that keyframe filters have an effect on what A:M regards as a keyframe for this purpose. If you had only the "Key Rotation" filter enabled while Onion skin was ON and in Keyframe Mode, it would only consider keyframes that contained Rotation keys for drawing onion skins and ignore any that had only Translation or Scaling keys.
-
- 1
-

-
Happy Spring Forward Day!
-
Friction, Stiffness, Air drag and particle mass are things where higher values make it harder to solve cloth. Basically anything that resists the free movement of the mesh makes it more difficult. Collision Tolerance is a distance in cm. It is really the distance the mesh has to stay away from other mesh. Lower values make it easier to solve. You probably don't need "Stretch/Shear" for Stretch type for this purpose. That attempts to simulate the way that cloth can stretch on the diagonal more than the "warp" and "weft" I have had much better success with cloth in challenging situations after upping the Substeps and Adaptive subdivisions. 20, 40, 80... Those are typical Substep starting points for me. 3 is just about the least that works at all for the simplest demo. I have several cloth bugs reported that will be fixed in v19k , things that indeed worked in v19h but not later.
-
I'd be curious to see your settings.
-
those look quite good! Does your cloth simulation start with each piece of cloth distant from each other? Have you made a bug report of that?
-
So those are "locks" of cloth... that looks promising. Any motion experiments yet?
-
Thank you, John. I've discovered something experimenting with this... If you want the sprites to not fall through the floor before their "life" expires you have to explicitly set "bounce". It has a default setting of 10% but you have to manually put a number in there to stop the fall-through. I don't know if that default behavior is intended or not. Bug or feature?
-
If you can post that I'd be curious to run it longer and see why some flip at the last moment
-
I'm not well-versed in the Saucy rig, but Mirror Bones is something I've always used in the model window.