robcat2075
-
Posts
28,280 -
Joined
-
Last visited
-
Days Won
407
Content Type
Profiles
Forums
Events
Everything posted by robcat2075
-
Hi Myron, If you want your PNG to have background transparency and want the transparency to be included in the file, set... Buffers>Alpha to ON Buffers>Save Buffers to OFF "Alpha" decides if you get transparency "Save Buffers" decides if it is saved separately. "Save with unpremultiplied alpha channel" only decides how semi-transparent pixels are colored. OFF is usually normal. Ask again if that doesn't solve your problem.

-
I'm not sure what you mean. Yes. In most environments the 1, 2 and 3 keys (not the ones on the number pad) will constrain motion to x, y or z. They can be used in combinationn to move on a plane. If you have the World Space button (the Earth icon on your toolbar) ON those motions will be in world space. If it is OFF the motion will be in Object space. I've never had to do that. Do you have "Radiosity" ON in the Chor Properties? Turn if OFF. To get reflections you should only need to have a reflective surface and "Reflections" ON in the Render settings.
-
I brought it up with Steffen. It seems there is no way write an OBJ that uses cylinder mapping the way A:M does. However, it should be possible to make a Photoshop "Action" that would automatically triple the original Cylinder map, as above, for use with the OBJ and another Photoshop Action that could un-triple it all back into one square, after painting externally, for use in A:M. I like cylinder map because it doesn't force separate tiles for each patch, there's just one seam in the back of the model. The cylinder map is easy to work on in a 2D paint program.
-
I will add that most Constraints can have "offsets". Offsets will be made automatically when "Compensate Mode" is on. Compensate Mode is turned on by default when you begin to make most constraints. So, with Compensate Mode ON, if you Translate constrain Bone A to Bone B while it is 5cm away from Bone B, Bone A will follow Bone B... and always maintain that original distance relative to Bone B. An example use is when a character has to pick up some object. The model bone of a hammer doesn't need to be Translated exactly to some bone inside the character's hand, causing a pass-through. The hammer can be moved so it looks like it is touching the hand, then the Translate and (Orient Like) constraint is made, and the hammer will maintain the appropriate distance (and rotation) relative to the hand. Similarly, bones do not need to be physically attached to another bone to be a child of it. They only need to be a child of the bone in the PWS hierarchy and they will follow from any distance. Note that while constraints can be turned ON and OFF during an animation, parent/child relationships can not.
-
Here is a complication for the external painting workflow If I export a model that used Cylinder mapping to apply the decal, the OBJ can not reproduce that correctly. This has something to do with A:M using a 3x repeat on cylindrical decals. If I take the exported map into Photoshop and 3x the "canvas" width, with the original image in the center, the OBJ can use that and it looks correct except for a portion missing on the back If I tile the original image 3X we can see that the missing portion gets its imagery from one of the extra side images... I presume that if this were used for painting in 3DCoat, as Gerald describes, not all the paint would land on the center tile. Some way would be needed to compile all the paint back into the center tile for use in A:M.
-
Come and get it, Ladies!
-
I Deepl-ed the notes at 6973.... If converting the whole process to double precision float is undesireable, how about if the OBJ exporter created a temporary duplicate of the model, did a normal A:M scale on the duplicate and then performed the normal export on the duplicate? Then throw the duplicate away. That would be transparent to the user.
-
So... really a factor of 10x, right? If the model was 20cm wide it should be made 10x20cm... or 200cm?
-
It's at AM Reports https://reports.hash.com/view.php?id=6973 You may need to register for a username a password, it won't be the same as the forum and since that is a v19 beta issue it may not be publicly visible anyway.
-
I presume by "factor 1000" you mean 100000% That does work. Here is a 64 export.
-
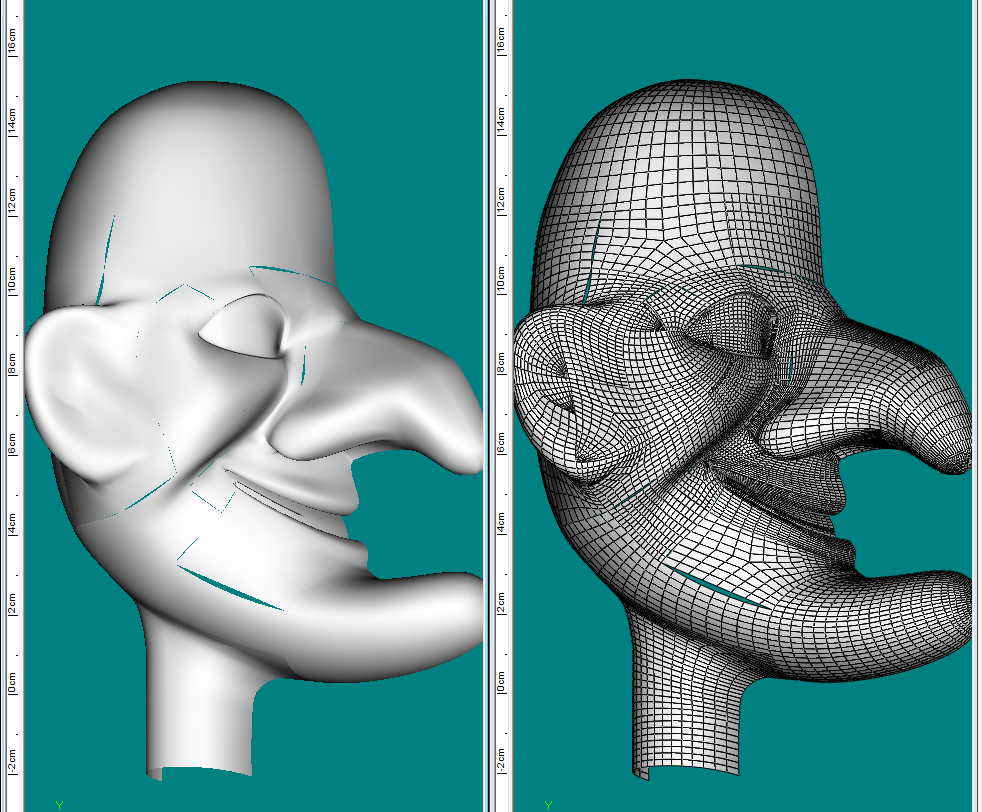
Here is a 16 exported from v18. This version has all the edges properly meeting. However, with a 64 the gaps are back.
-
More subdivisions doesn't solve the problem. The problem is that 5pointers are exported with only straight edges and more polygons doesn't make them any less straigth. This 256 has all the same gaps in the same places and the same sizes. And there seems to be a problem with corrupted polygons in the middle of each 5 pointer.
-
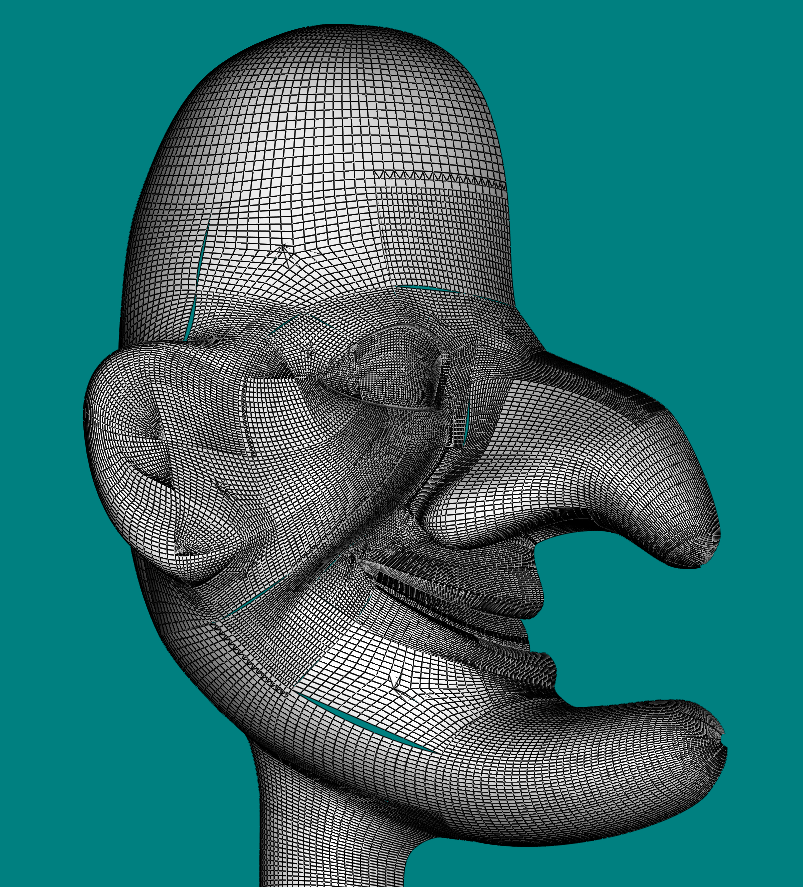
@Fuchur Something is wrong with OBJ exporting. When I export to OBJ there are always gaps or overlaps at the edges of 5-point patches. It's not supposed to be that way, is it? You wouldn't be reliably able to paint on that.
-
TSM2 rig test...
-

Darrin's image contest WIP
robcat2075 replied to Darrin_in_Meadville's topic in Work In Progress / Sweatbox
Some of those are bit busy for my taste but you can enter whatever suits your taste and fits the rules... -
He's got FINgers...
-
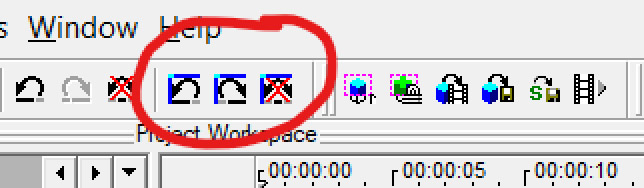
How many times has this happened to you? You line up the perfect Birds Eye View to move that spline or rotate that bone and then you realize you need to go to a different Birds Eye View to hide some mesh first... and then you'll need to refind your current view! D'oh! Or maybe you sneeze while you're Turning the view and everything spins away to who-knows-where! Gah! If only you could get your view back! When you are in a standard Orthogonal view the Numberpad 7 key will take you back to the last-used Birds Eye View... but that doesn't work when you're already in a Birds Eye View! You need the amazing Birds Eye View Queue! With Birds Eye View Queue you can click back through any of your previous views and click forward again to your more recent views. Birds Eye View Queue has three buttons on your interface... View Undo, View Redo, and Clear View Undo Stack They have Keyboard shortcuts... View Undo: ALT+SHIFT+Z View Redo: ALT+SHIFT+Y ... but you can customize those at Tools>Customize>Keyboard>View Birds Eye View Queue is one of the hot new features of v19. Save yourself time! Spare yourself frustration! Start using Birds Eye View Queue Today! Many thanks to Steffen Gross for implementing this feature!
- 1 reply
-
- 1
-

-
I look forward to seeing your entry!
-
That is news to me! I didn't know anyone had gotten that working. I'll give their 30 day trial a trial when I have time.
-
Here is a quick overview of using Cylinder mapping on a more complex shape... Here is the PRJ if you want to look at the Pose sliders and stuff... PunchMapping-->E--->_BI_Projects-->hash 2-->SockPuppet-->Punch PunchMapping.zip
-
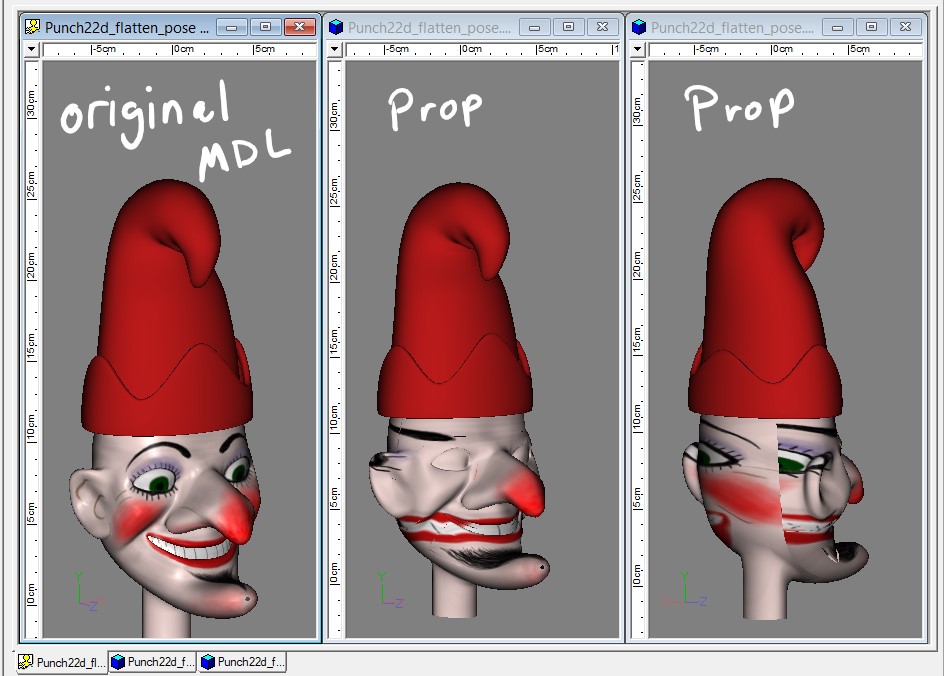
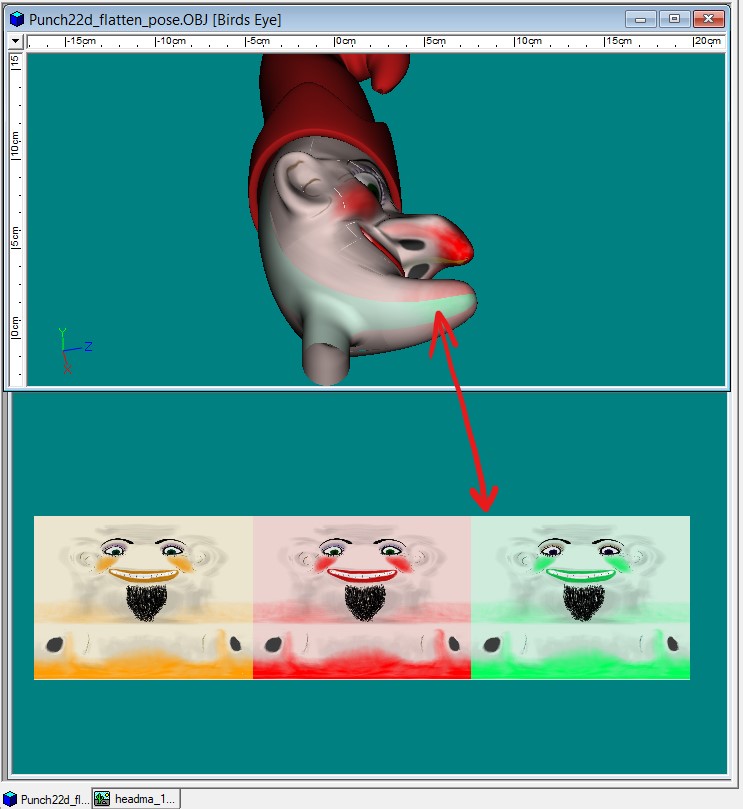
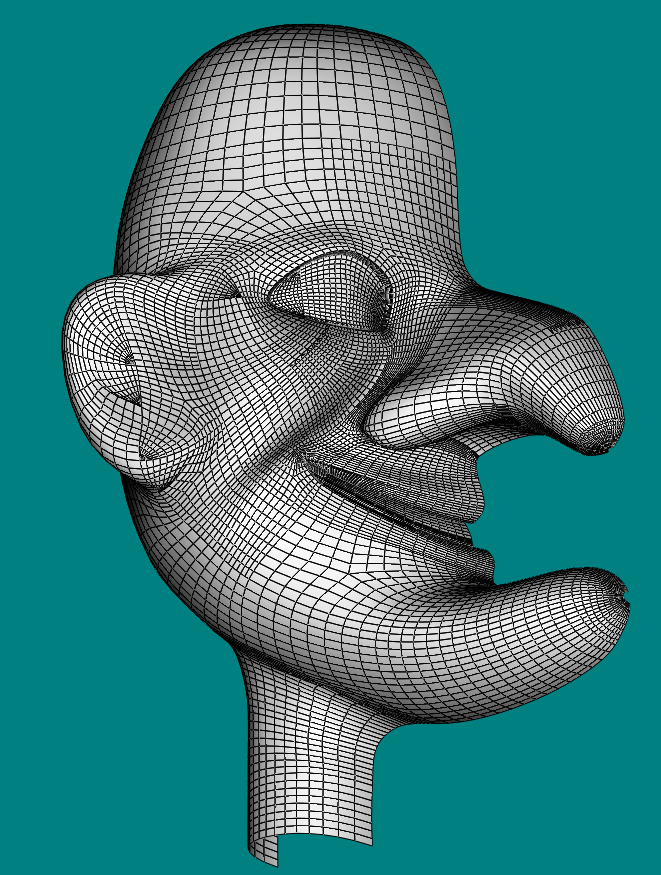
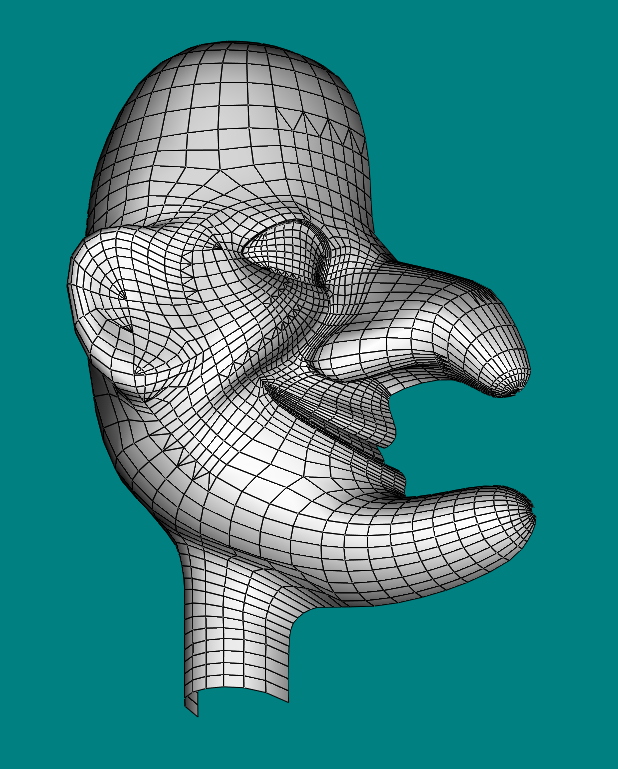
Gerald, is there a tut on how to get the 3DCoat painting back in to A:M? Because splines are continuous across CPs, and the shape on one side depends on what the shape is on the other side It is not practical to make a split between patches and spread them apart. Try this: Lathe a vase. Make a Pose slider for it. In the Pose, go to Muscle mode. With the Pose slider at 100%, do a "Flatten". Now slide the Pose slider from 0% (original shape) to 100% ("Flattened"). VaseFlatten.prj You can see that Flatten does a good job of unwrapping most of the mesh around the vertical axis but one set of patches at the back have to be stretched way, way, way out for the rest of them to get flat. That stretching also distorts the splines of their neighbor patches. The Flatten method is good for decaling the patches that are not the very stretched patches or their immediate neighbors. So, yes, with Flatten you would need at least two decals, one for your flattened front and another for your flattened back. You could include some patches in both and use an alpha channel to fade between them. I like to use Cylinder mapping instead of flatten. If a shape can be arranged around the vertical axis, cylinder mapping lets you cover all of it with one decal and just one seam at the back. I'm not sure what this is asking.
-
Examples and Context. the red ones are the most important. Kinematic - makes the end of a chain of bones seek a target (without having to pose all the bones in the chain). Legs are the most common use Aim at - knee and elbow pointers are the most common use. You could control two eyeballs at once by making them aim at a common target null or bone. See "Simplest IK Leg" and "Adding an IK Leg" on my Tutorials page for examples of Kinematic and Aim At use. Orient Like - The most common use is for "fan" bones. You can see an example of a fan bone in" CP Weighting vs. Fan-Boning" Translate to - A bone that is a child of another bone will inherit both Translation and Rotation from its parent. A Translate To constraint is a way of making a bone get only translation from another bone. A head that is on the top of a spine could follow the spine without having to rotate like it. Roll Like - useful for creating partial rotation. When your hand turns (as if it were turning a door knob), the skin by your wrist turns the most, the skin by your elbow not much and the skin in the middle about half way in between. Putting the CPs for the middle skin on a bone that is constrained to Roll Like the hand, but only 50%, will simulate that... without following any of the hand rotation on other axes. Aim Roll (Handle) At - permits a target to influence only the Z-axis roll of a Bone. "Gas Pump Hose" on my Tutorials page uses Aim Roll At to keep all the bones in a chain aligned. Path - Often seen in tutorials where you animate a walk "cycle" and make a waling character follow a path. A more practical use is to make chains of bones conform to curvy paths. See BasicWormCrawl in https://forums.hash.com/topic/45166-path-constraint-for-a-bone-chain/?tab=comments#comment-387426 Surface Constraint creation example. Euler, Spherical and Translate Limits are rarely used in characters. Group is like a Translate To Constraint to make a bone follow a Group of CPs rather than a bone. I use this to attach buttons to groups in simulated cloth see Chicago Bears fan in simcloth Hawaiian shirt with buttons and collar
-
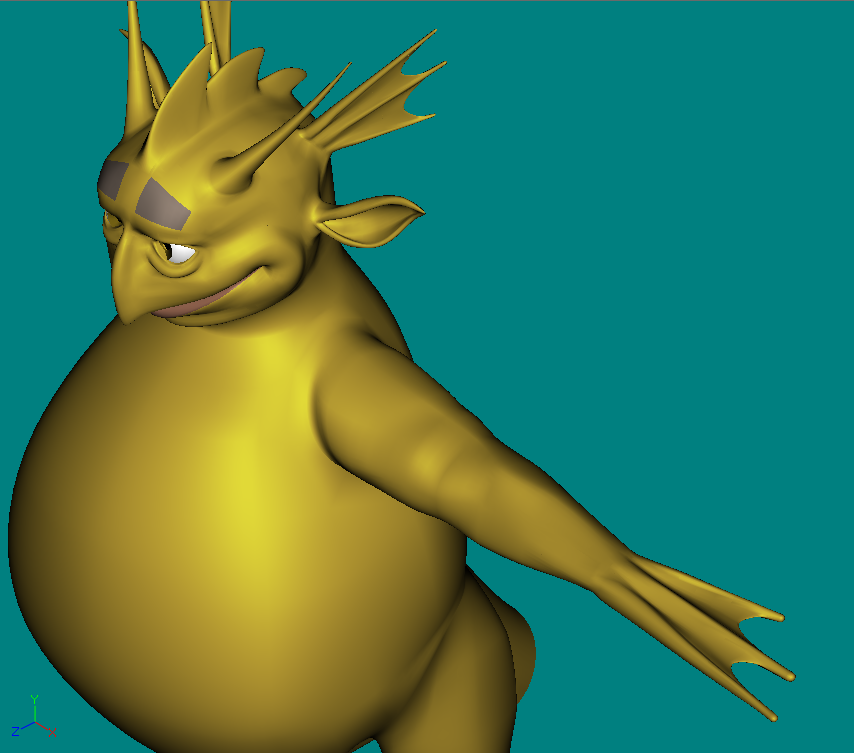
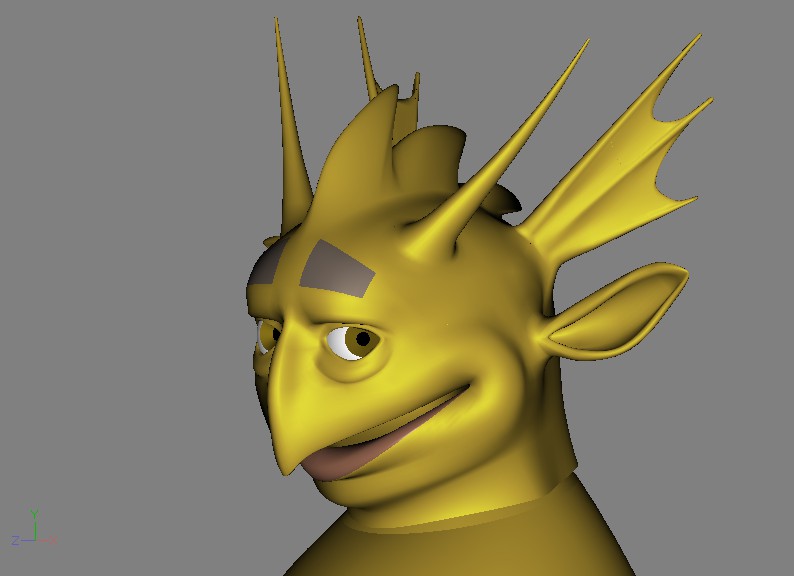
Further adornments... Inserting the head ornaments...
-
I appreciate your persistence!
-
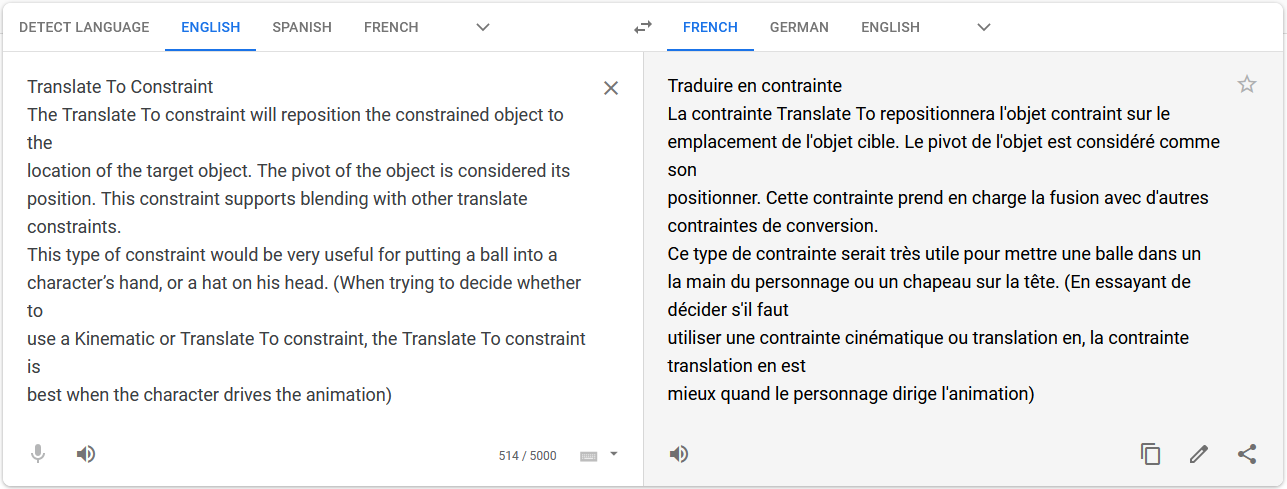
Je regrette il ñ'y a pas une édition Français! Does this make any sense? I copied a paragraph from the PDF into Google Translate. I don't think it understands the CG meaning of "translate to" (to move something from one point to another point) but it looks serviceable otherwise.