-
Posts
28,276 -
Joined
-
Last visited
-
Days Won
406
Content Type
Profiles
Forums
Events
Everything posted by robcat2075
-

Bitmap Plus materials working with imported props!
robcat2075 replied to NancyGormezano's topic in Animation:Master
I think most of that is indeed new, recently added by Steffen. -
For almost all walks it's really easier to animate each step directly rather than try to make a walk cycle work. Especially true for odd walks.
-
About the dance step... the foot lifting will look better if the toe comes off the floor a hair later than the heel, and there needs to be a longer instant where both feet stay on the ground before the next one lifts off. If one foot leaves the ground the same instant that the other one landed it starts to look like someone pedaling a bicycle.
-
Basic problem, the beginning and end don't match. Remember my video on using walk cycles, where it talked about adjusting "crop range"? Try that first. If that doesn't work i can look at it.
-
I forget exactly but the instruction video had an answer on that
-
I just tried it in V15 (PC version) and it did work the first time but with a few differences... -after I added the Tint to the composite project the default "Black and White" effect was in effect immediately, I didn't have to re-pick it from the drop-down menu. -the Percentage property worked properly and made keys in the time line when i changed the value.
-
The most annoying bugs in A:M are the ones that happen the first time I try something and then never happen again. It makes me feel like Gladys Kravitz on Bewitched. "But Abner, I swear there was an elephant in the Stephens' living room just five minutes ago!"
-
I'm confused about what we are confused about. You're saying the effect shows up exactly as expected except in the render? And then some shows and some not? the tonal walk clip had no effects that I could see. Suggestion... make sure there are full quote and unquote tags on the parts you quote from other posts, otherwise it gets very confusing about who is saying what.
-
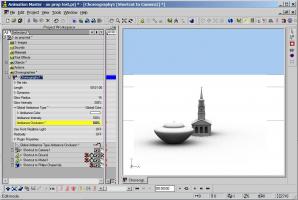
AO on props is actually new in v17 but it worked here in my quick test: Remember to set the Global Ambiance stuff in the Chor settings. I have a slightly later beta than the release v17. It's POSSIBLE it has some fix not in your version, but AO wasn't mentioned as an issue so I doubt it. Does it always crash for you?
-
Here's a simple composite project started from your TonalWalk footage. I had to try this twice for it to work, I don't know what i did wrong the first time. SimpleCompositeProject.mov In my first test, the "Percentage" value seemed not to work. that will have to be investigated further. I just noticed you are in v15. It should work the same, but i did this in v17. Let me know if it doesn't. Search Tags: Simple Composite Project Tint
-
The problem was that the motion per frame became greater with greater FPS settings. Setting the FPS slower does get slower particle motion per frame but other aspects of the particle motion are skewed by this too. Getting it right won't be as simple as I thought. You can experiment with it... Vortex02_slower.prj
-
Pretty danged cool, Rob. Did you try 'upping' your project FPS to some ridiculous amount, like 400 ? For some reason that made them go faster
-
I tried some streaks in a Vortex and negative Fan but it's hard to get the particles to move slowly... Vortex.mov
-
As an experiment, try setting your chor length to some short length like 1 second and try baking again and see what you get.
-
Yes it is available. "Negative" is done with the "Tint" post effect. You can key the two colors of the tint effect to change its effect over time, OR... turn its "Active ON/OFF.
-
Baking files are saved to where the PRJ is saved. For Rear Window we've been only been saving Chors. After you load your Chor, save a PRJ to the same location, then bake. Then when you want to render, load that PRJ again and see if it locates your baking files.
-
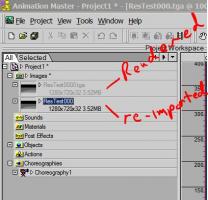
I just did a test and when I rendered at 1280x720, the image was still 1280x720 when i imported it back into A:M. there must be some other complication at work...
-
You set the codec in your render settings under "set". For AVI, "Uncompressed" is the only standard one that works with A:M. My preference for making video is to render to a JPG or Targa sequence (or AVI if i need sound) and recompress it with Quicktime Pro. In 32-bit A:M (you can have this installed also with your license) you can load an image sequence into your images folder and "Save AS" as a quicktime movie and choose compression settings there. Quicktime Pro is much better since it gives you access to the audio compression as well.
-
Welcome back to the forum! Would you believe i haven't done an actual "animation preview" since 1998? I forgot that existed! hmmm.. that error message makes me think that it's having trouble with the codec that is selected for "AVI". I'm not sure where you set that for Animation Previews" if it isn't the regular render panel in the Options tab. The other possibility is that thats' a non-existent path on your PC... but it's making a file in that location , right?
-

Problems with a tiled texture using cubes next to each other
robcat2075 replied to Cloister's topic in New Users
A:M tried to smooth over the jaggies in bitmaps and that's probably what it is trying to do to those single pixels. Take it into a paint program and stretch it without any interpolation blurring (Photoshop calls the "nearest pixel) to something maybe 8 ro 16 times bigger and swap that into your project. You won't need to reapply it just change the link in the Images folder. -
Good looking sets! You've been busy! Nancy has some good questions. Bulb lights will always be ray traced lights. I think well-placed kleig lights can help you out substantially.
-

Problems with a tiled texture using cubes next to each other
robcat2075 replied to Cloister's topic in New Users
How big is the original texture? in pixels? -
Hair can be time consuming I believe the Baked property gets set to "ON" by A:M after you have baked. I'm not sure if setting it to OFF permanently discards your baking or just temporarily ignores it. The promise of Baking is that you can resume later without a glitch.
-
Yes, we may want to investigate what is causing that to take so long to render.


