JohnArtbox
-
Posts
1,303 -
Joined
-
Last visited
Content Type
Profiles
Forums
Events
Everything posted by JohnArtbox
-
Funky Model Javier. Lots of character and a very nice design. Congratulations on your logos too, I thought they were fantastic. Now I'm going to look at your website
-
Hey Rodney, have you done that many comics? There's some great character designs in there( Dr D & Mega Team Matchstick are cool). Why not introduce some graphics into your front page?
-
"fish is only one of the things I've laid on my scanner." In the search for textures I've scanned ox hearts and steaks for medical jobs, leaves, fish and feathers, buttocks... no wait, that was for the Christmas party . Seriously it can be a great way to get a texture, and doesn't produce lots light cues like digital photos. If you are after a realistic finish, this is the easiest way to get it. You get all the natural imperfections and details that exist in reality. Just make sure you gladwrap the scanner And claim the meal on tax. And don't forget to delete the buttocks photo before posting your textures on the web
-
Thanks guys, slight slowdown because I have to earn a living Dearmad: Looking forward to seeing more stuff from your short, it looks brilliant. Ross, Zach & Tony:Aww shucks Rodney: I use the setup machine when I'm using a conventional setup, but I also rig my own stuff if I need something different.
-
solder=soldier? hard to criticise the model, she looks great. If she's to be a soldier she needs some props(a gun, helmet etc) to communicate it. And I'd maybe change the shoes to something more functional.
-
Coming along nicely Ross, have you thought about photographing a fish, or scanning an image, for the scale texture? The texture you have at the moment is very regular, contributing to the sequin feeling. And seafood's good for brain development too
-
Good shot Matthew. The walk of the demon needs something though, perhaps some extra time at moments of extension to break the cycle a bit, and some rotation at the hips and shoulders to increase the dynamism. He looks a bit stiff at the moment. Looks great
-
Looks great for a first. Spline heavy, but the fact that you've come from a tradional art background has given you a great start Welcome
-
Looks great Mark. A nice clean simple mesh. Do you have bevells on the surface edges? It doesn't look like they're modelled, but it's hard to tell if you've used lowered magnitudes. What sort of job is it for?
-

[Showcase] "March of the Rubber Duckies"
JohnArtbox replied to animaster's topic in Work In Progress / Sweatbox
my renderfarm had a seizure just watching it. what was the render time? Looks good -
Thanks Ross. I use the Skycast rig. skycast.artboxanimation.com It's a stuttered light rig which uses one or two lights to create a skydome. I designed it as a sort of poor man's hdri, and I use it, or a variation in almost every render I do now. There's a basic explanation of how it's achieved on the site. The main advantage it has over conventional spinning light rigs is that the stuttering is designed to minimise motion blur artifacts, and it utilises an image to alter the colour of the lights as they spin. Fats rides on the side platform, but if he wants to ride in the car he gets to ride in the car.
-
Great second model. He has lots of character. Like Ken H says we'd need to see a wireframe to know how he'd animate. Looking at the model he probably needs a few extra judiciously placed splines to animate easily.
-
And here's the third gangster. . I'm not completely happy with the hands but I think they'll do. The shoes are another thing entirely, I've got a bit of tweaking before they approach being acceptable. I also need to adjust the jacket collars so they are not as "puffy" looking. Still it is what it is, I'm going to press on with other characters because otherwise I'll never manage to finish this thing. The great thing is that I can always refine my characters further down the track without needing to reanimate. I think Darklimit and I are competing for the longest WIP threads ever.

-
Very nice...Are you saying you did the whole commercial in 1 month? 'cause if you did I'm packing up my crayons and taking up fishing I though I was pretty fast. Great little commercial, It was only when I went back a second time that I saw how simple a lot of the background was.
-
Current Gangster shot -I've left hair off because I'm still not sure whether I'll use version 11 hair or go for a helmet head look. Three Gangster designs left. Sometimes I think I'm mad considering they only appear for 10 to 15 seconds in the script.
-
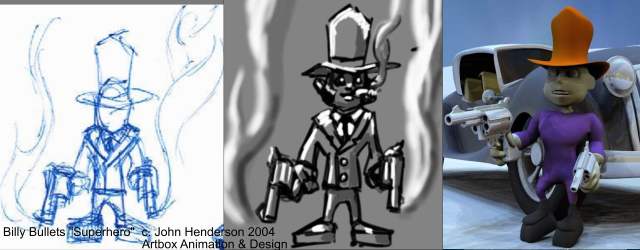
Thanks Zach and Javier. Javier: No environment maps, just a sphere with one of the skycast environment maps decalled on it. I prefer no to use environment maps combined with reflections because they muddy each other. Giving AM a physical model to reflect works better and is not too bad a render hit Here's the first stage of Billy Bullets, from thumbnail sketch to elaboration to roughout model.
-
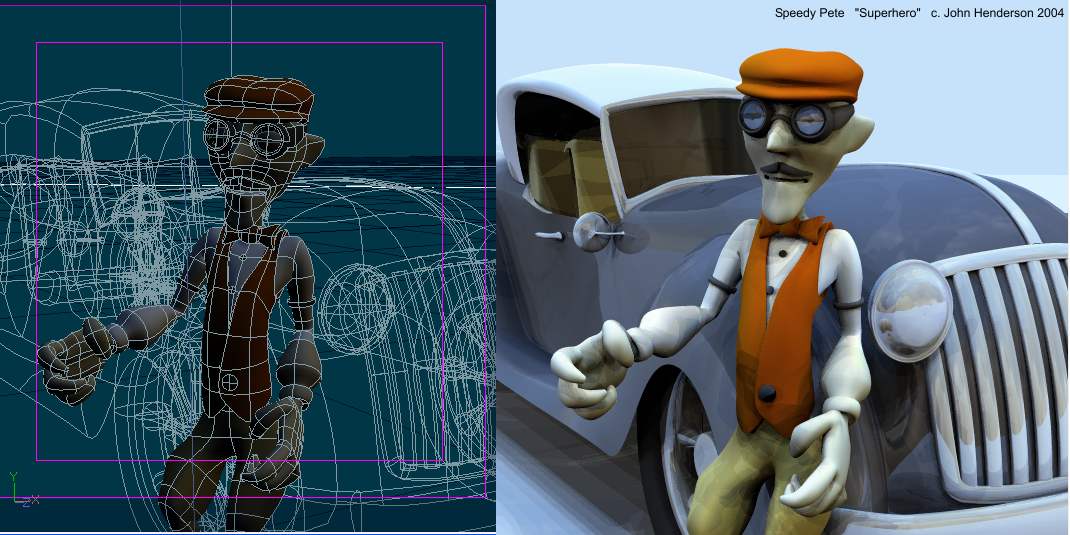
Here's the mostly finished Gangster driver "Speedy Pete" He's a background character so there's not that much detail. Total build time was about 2 and a half hours. I haven't modified his lower body because he's not going to get out of the car. MirrorSplines is a plugin by Masashi Watanabe. It takes one half of a model and compares it to the other half. Both halves have to have the some basic spline makeup eg created by copy flip attach or modelled symmetrically. Then it will take one half of the model and move the other half to match perfectly, including moving bones. It's great for reshaping models by moving bones which is almost impossible to do normally, and is much better than mirrored points at ensuring a symmetrical model. It's one of my "must have" plugins.
-
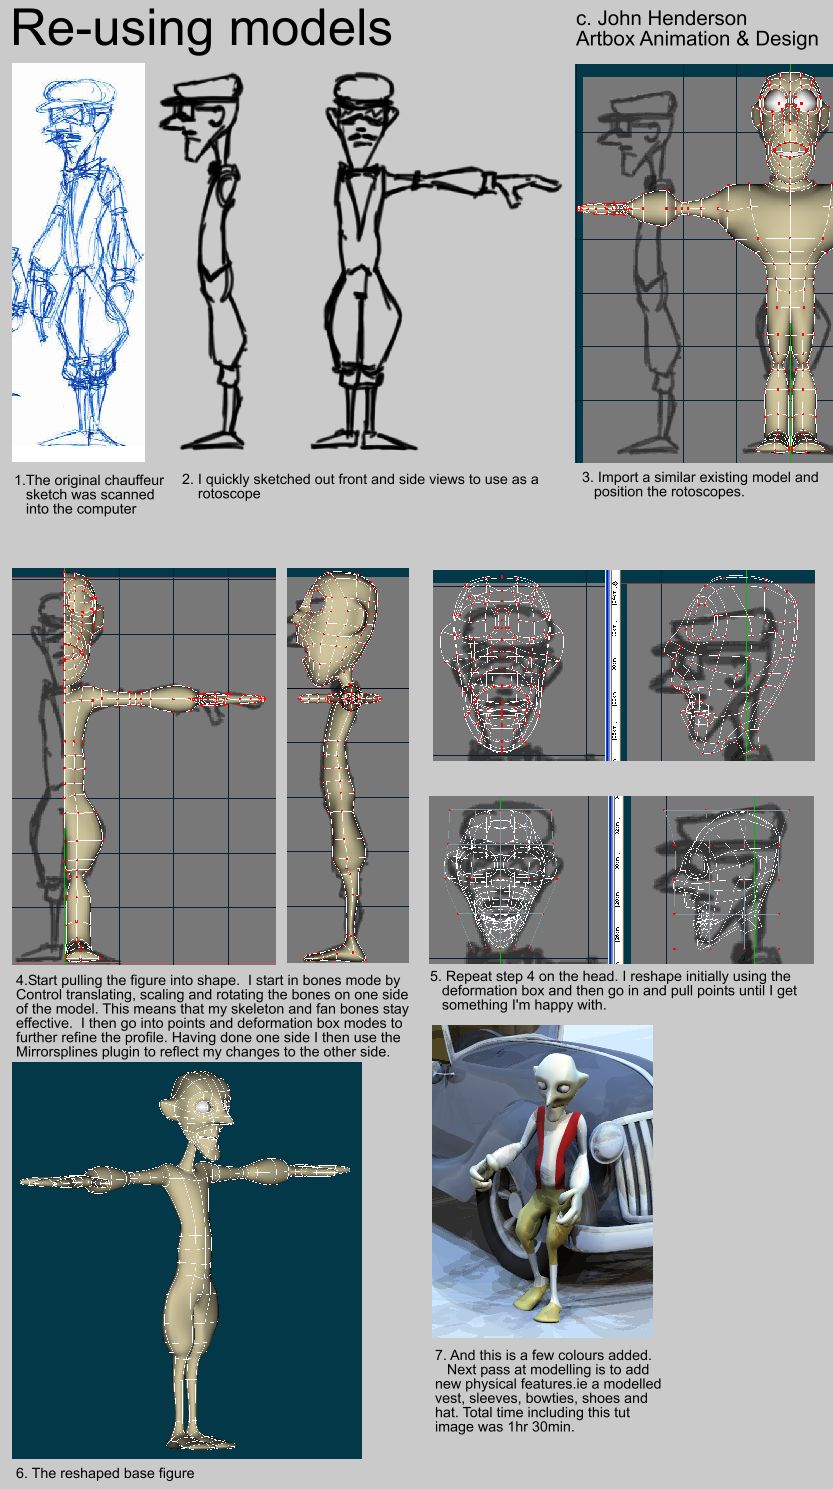
A few people have emailed me about modelling and methodology. My deadline got extended because the client decided to change the entire concept. So I started on another character and did this diagram of how I reuse and reshape models. Part 2 will come later, depending on the deadline
-
Animation Showdown Entry - "Where is it?"
JohnArtbox replied to robcat2075's topic in WIP (Archives)
Good work for four hours. Also sounds like an ideal place to sell AM to the greater world. Do you time yourself or do I have to drag myself out of bed at some godforsaken time to compete? It sounds like fun. -
Rodney and Robert expressed it pretty well. But I'm procrastinating on my work so I thought I do a quick suggestion sketch. Here's a few ideas. If the character has horns try different sorts, antlers, spiral, but I'd suggest bigger than current. Giving him a physical trident is much stronger than using a decal. Try pulling out the ends of the fingers to suggest talons. Add a tail. try gradiant materials.swtich to unibody design. .....or ignore me totally and go your own way it's a good start. Now I need to get back to my deadlline,
-
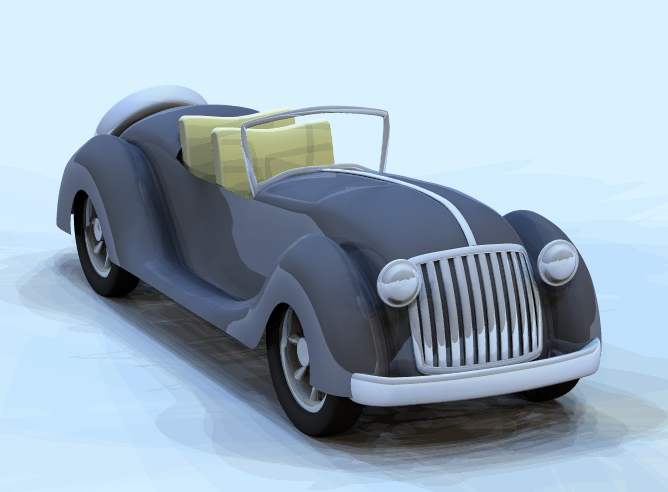
Managed to squeeze in another 20min on the car.
-
Tried to download 3 or 4 times with no success it sounds good
-
Thanks Robert. Joe: I'll document it sometime next week when I get some spare time. Basically I use the x y and z axis smartskins instead of sliders eg for the mouth x motion makes the mouth narrower or wider, y motion opens and closes the mouth and roll pulls upand pushes down the corners(happy / unhappy). Another bones adds 8 different morph targets depending on the direction you pull the bone to further modify the mouth.
-
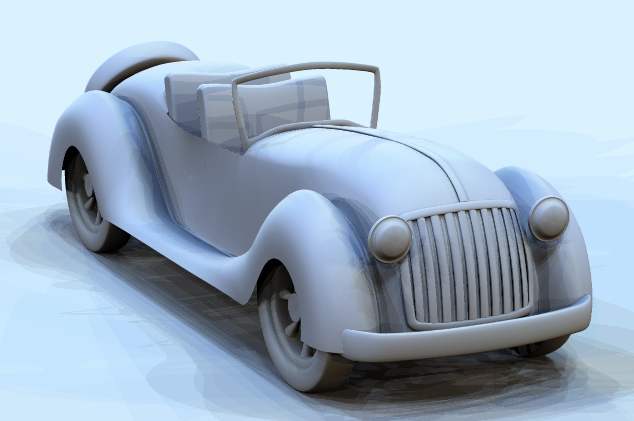
Add some quick surfaces. don't like the bumper bar either
-
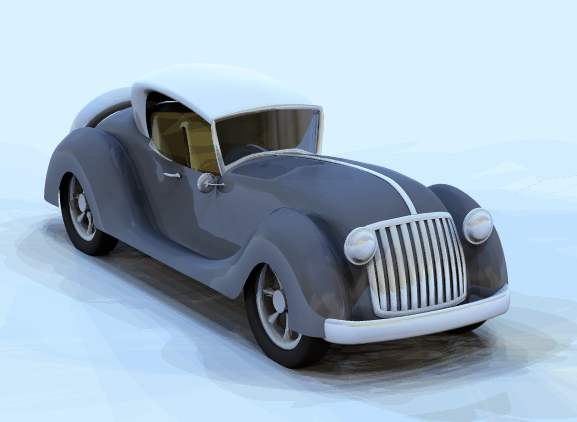
Thanks all. Got a little bit further with the car. I hate the seats and it's not quite what I want, but I'll persevere for a while longer. I should have been more thorough with the designs I need to add thickness to the shell, add windows and roof, create a boot and hood that'll open and add details like mirrors and indicators. Lots still to go but I've just been given a deadline that will knock this on the head for a couple of weeks. That and it's my daughter's first day at school tomorrow ). Rodney: I'm pretty systematic. Pretty much all of these development images go into a design record folder on my hardrive with logical names. That folder sits next to my design sketches folder. Here's my process. 1. get idea 2. write script, sketch images & designs 3. storyboard, record audio 4. create animatic with rough audio track 5. start modelling(we are here ) although i haven't recorded final audio. 6.animate and insert images into animatic 7. composite and post work. When I get around to rendering I name the animations according to the scene number, the pass type(ambient, highlight, depth, normal etc) and the level(I sometimes render foreground, background and middleground seperately). All of my models and textures wind up in a network accessable resources folder with a makeup similar to the data section of the AM disk. Don't worry about being nosy.......if I was worried about that this thread wouldn't exist.