JohnArtbox
-
Posts
1,303 -
Joined
-
Last visited
Content Type
Profiles
Forums
Events
Everything posted by JohnArtbox
-
inspired work Chad. Not really anything there to criticise. I'll sit wait and watch the outcome. And I'm sure you'll be pushing out amazing stuff in AM in no time
-
Couple of questions Ken)I apologise if they're basic, I just want to cover bases): did the model look correct before displacement? Are all the normals facing the correct way? Is the displacement map criented correctly(I do a flip vertical on impot and export)
-
Awaiting comment on the last render, so I started on the poolside unit. Very early days (hours) but I'm happy with the progress.

-
Ken, I don't import Zbrush objects, I use it for painting my am built models. If you're importing the zbrush models then I would assume that theimport function had problems creating continuous splines at join areas and that these then carried down the splines. Here's my workflow 1.build in AM and assign a decal so that it covers the entire model(to setup UV's) 2.Export the model to an AVA file 3. Import the AVA file to create a new model (Steps 2&3 give you a cleaner obj export by getting rid of 5 point patches) 4.export an obj file. 5. Load the object into zbrush and asign the original object as a morph target 6. Paint textures and displacements (refer zbrush docs) 7 export the displacement and colour textures. (it may be better to export an obj because of some of the cleanup features, I'm still exploring this) 8. import the generated textures into you original AM model and adjust settings. Questions welcome
-
Another zb painting test. I modelled the zpiral pattern onto the zb model and then generated a displacement map for use in AM. Because of the detail i added it in AM as a bump over the top of the previous displacement.
-
Hi Parlo looking good, I agree with the change back to the first version of looking left and around the door. My only suggestion would be to get his head inside the door before the last line requesting coffee. The lines almost an aside so I'd be tempted to leave the body forward and angle the head into the room instead. Also if you let his right hand drop from the doorframe it would make it more like he was preparing to leave, then turned back, then left. Of course that's all interpretation.
-
Quick answers Nerrazzi: There's not a rubber stamp tool but you can do similar things, You could 3d copy by placing your model on top of an image or you can paint with a texture There's a free demo which will let you experiment. If you want you can send me a model file and I'll convertin into a ztool so you can work with it in the demo. (Note the demos 1.55, z2 is much better) Michael>What Rodney said by converting the model file to get 4 point patches the exported obj file is much cleaner. Zaryin>displacement works well if you can avoid using it on 5 point patches and hooks, and it can save a ton of modelling time. More stuff later in the week, I'm going back to dinner now
-
I then did some very quick texturing and modelling in ZBrush. Using displacement painting I added breasts and stomache detail, plus some hair bumps, at the same time adding skin and hair textures. I then used the displacement map export to export the added detail as a displacement map. I placed the colour and displacement map back over the original model. Once again 5 point patches were the main offender, causing creasing artifacts, but otherwise the process works well. If 5 point patches can be exported correctly and react cleanly to displacement a lot of models will be easier and less time consuming to create.
-
ZBrush 2 has arrived and AM has gone through so major alterations so I'm re documenting my AM to ZB and back pipeline. I've received a lot of queries about this so I thought I'd document it here. I'm going to check all of the asumptions I made when I originally mapped out the process a year and a half ago. 5 point patches are not particularly well handled in the obj exporter of the current version. I used to go back to version 8.5(which has a great obj exporter) but this afternoon I had an epiphany. By exporting to AVA and reimporting the model AM will maintain UV's while creating two 4 point patches wherever there are 5 point patches. You can then export the AVA based model without problems. The image shows several different export options. The AVA is the only exported model which didn't created holes when subdivided(RHS image in each case).
-
Good start Jeff, can already see the character
-
Thanks Ken Zaryin: I just name the target group foliage, then after I've run the TreeZ plugin I select the group and hit delete.
-
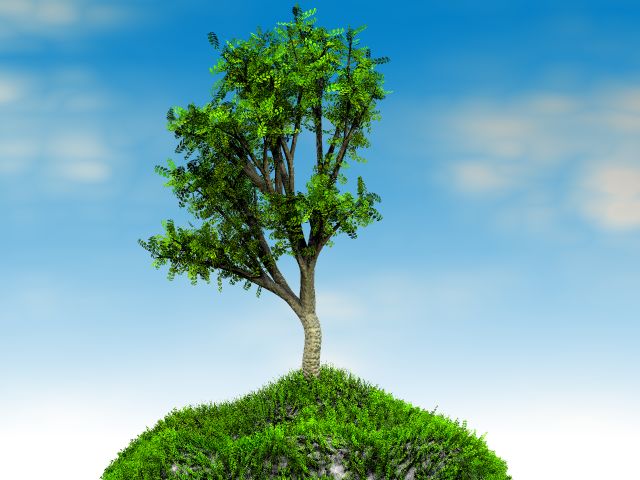
Just another TreeZ pic.
-
Well I discovered why it was so washed out, somehow scaling the lights caused them to go whacko. I actually almost doubled the previous light settings for this render(once I'd removed the scaling on the lights). Lot's of treeZ's and new fur foliage. Next is the grass, some stepping stones and lights, plus a bit more playing around with materials and lighting
-
Very nice Mr Mac Can't wait to see the end result...
-
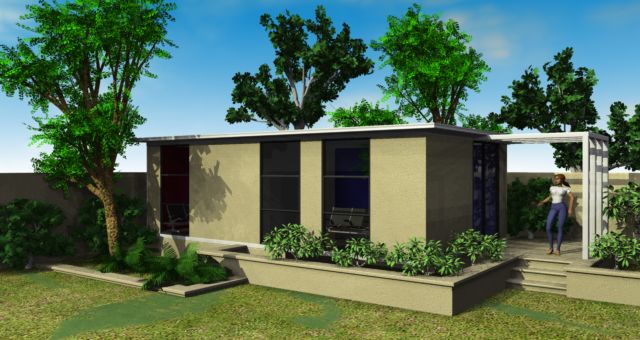
http://www.hash.com/forums/index.php?act=A...e=post&id=24474 Rendered in Beta 1....tomorrow...when I can think straight...I'll work out the lighting saturation Thanks to Jim Talbot for the Jane character on the CD which I modified
-
and the exterior with a modified Jane model(thanks Jim) and treeZ's added. I don't know why it's so washed out (total light is well under 100) but it's 1.30am(2.30 to my bodyclock because I haven't got over daylight saving ( ) and I'm too tired to think straight.
-
bits.... plan views ... the lighting needs to be altered but here is where they are.
-
Hi two things make the effect of lightning. One it occurs virtually instantaneously - it's there and then it's not, it doesn't grow down, and the biggest visual cue is the lighting flash that accompanies it, creating a stark bright illumination of the clouds and ground, also you probably want to add glow.
-
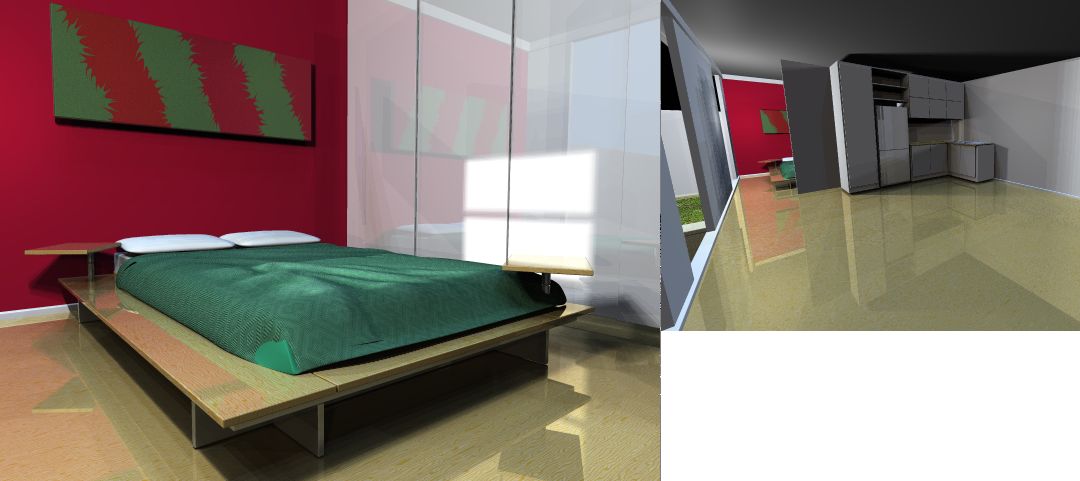
Thanks guys: Sam... theyr'e just quick mockups to check material settings. I threw a skycast in for quick ambience(which is causing the murkiness because it's an inside setting) but I'll switch it to a "room light" setup before I render a final. Room lights are a variation on a SkyCast where i create an action which moves the light around them room surfaces, while changing it's colour(if I have time). basically I use this 1 light to behave as multiple bounce lights. Rodney...I occasionally run off to my kitchen to get accurate bench heights, and I called a furniture store to get the measurements of a double bed. for reference I flick through interior design and architectural magazines until something clicks, and then I do quick sketches. I don't need to redesign reality, and it would be cost prohibitive to design everything, so I maintain a fairly large library/ image morgue.
-
Update
-
Thanks Marcel....it's all good ..can we download the new version yet? Looks like 2004 has all the makings of a hallmark year.
-
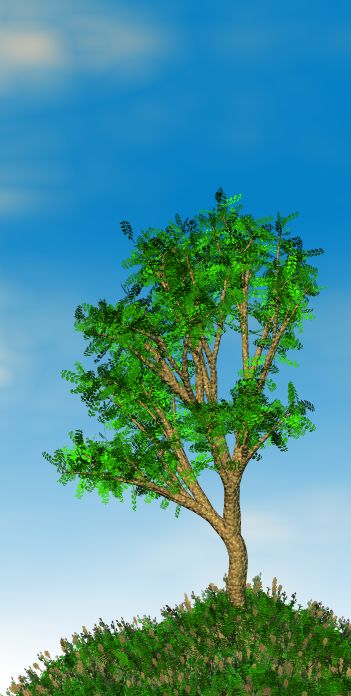
I rolled back to Beta1 to get shadows The trunk texture sucks but I like the rest. RodneyI'm guessing canopy objects beneath the base . I found I got better results by doing two trees, flipping one vertically and then joining them. If we could set the roll orientation on flat fur, it might make it easier get rid of some of the dark foliage in the tree that looks out of place.
-
Here's some leaves. Australian groundcovers...but apart from that I'm botanically ignorant I've scanned a lot more and i'll matte them as I get time. The fact that I'm doing some architectural stuff means I can call this work http://www.artboxanimation.com/AmStuff/leaves.zip Saved as tga's with alphas on a green BG , and rotated to orient correctly
-
When can we see/download the new features Marcel? This is fun
-
How's the total of cool images coming? Created this while awaiting my unlock codes to www.3d.sk ( a cool site for reference of the human body) Marcel: why is it that I can't grab the bottom ring and extrude it down after I have created the tree?