JohnArtbox
-
Posts
1,303 -
Joined
-
Last visited
Content Type
Profiles
Forums
Events
Everything posted by JohnArtbox
-
I have a brute force approach to getting rid of spline creasing. I obey all the hash guidlines - even the ones you can sometimes get around. The 5 point patches are fairly large and adjoining. If you add a four point patch between the 5 point patches a lot of the mesh will smooth out automatically.You can end the extra splines with hooks put in on a four point patch. If the hooks crease disconnect them and carry them a patch further to see if it makes a difference. Areas where this would make a difference on the shark are around the eyes, the mouth and at the connection of the fins. After that, depending on the look you're after, you might try porcelain. Good luck

-
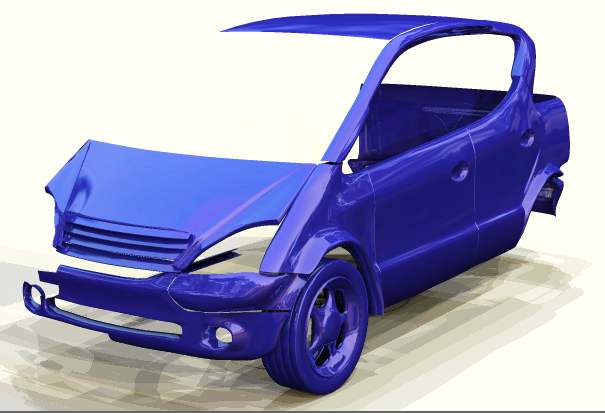
Nice car, can we have a look at the mesh.? It looks like it would be very clean.
-
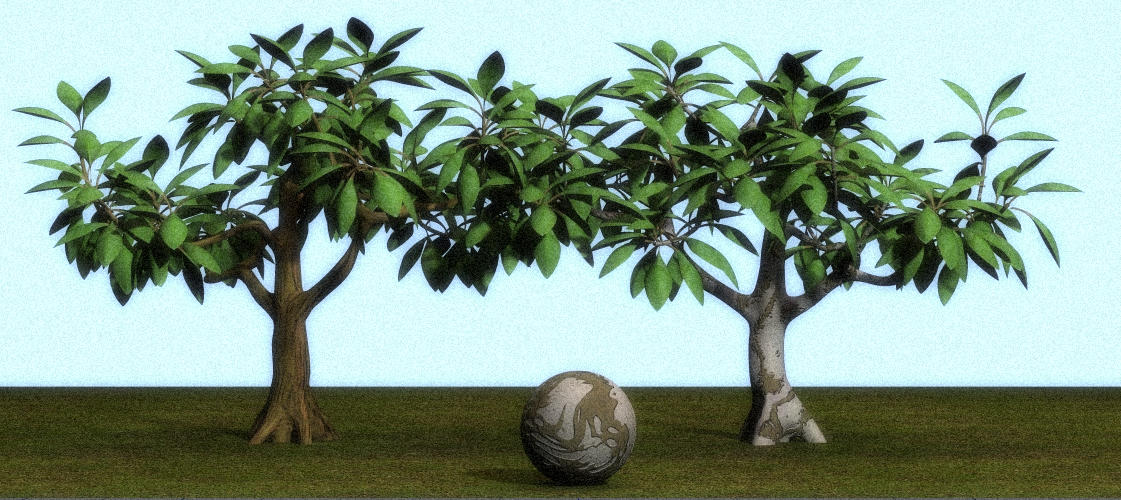
Hi all Just to illustrate the tree trunk material thread I rendered this. These are old 8.5 trees. They render really quickly but after playing with the AM11 fur for leaves their time is limited The models and textures are part of the bonus collection you get with Skycast
-
This is a cool little model. You posted the images a while ago , didn't you? One of the best car images I've seen in AM. Any chance of a mesh shot? being in the middle of a car model I'm curious as to how others get around the topography.
-
I hate to leave something half done, but it'll be a while before I get a chance to get back to this. It was started for some Skycast tests and tutorials. There has to be a better way to build a car.
-
congrats Zach very cool. Great idea, great animation and the sound works really well.
-
Nice character - It's hard to critique when you don't know the overall style of the piece. Technically it seems every bit as good as I would expect from you. One suggestion I do have is the hands are very human and I wonder if you've considered hands like leaves.
-
That's cute, expecially when the monkey and your daughter are bouncing in time. The animation's a bit floaty and could do with some more definite keys and fine tuning on the ease. You can see how much better it is when it is moving quickly. Also adding a simple blink to the monkey's eyes will increase the expression incredibly. But all this is being very picky for a home vid introduction. Very cool, I'm gonna show my kids.
-
Nope, I haven't given up or been hit by a bus. I've been working on the control systems and since these fail to make exciting posts, I haven't been doing frequent updates. I've also been delayed while waiting for mirror splines to allow me to copy half body setups. Anyway,I have three tips(Two mundane and the third pretty cool) and a progress report, I've added teeth and I've coloured pupils although the spherical eyes will be replaced by more anatomically correct eyes. most of the expressions are done although I'm waiting for mirrorsplines to copy some fairly complicated rigs and groups. Tip One To create a duplicate bone or set of bones In the PWS select the bone/s and press the control key while dragging and dropping the bones. This will create a duplicate set which can be renamed and or rescaled. Tip 2 To scale a series of bones insert a temporary parent bone and use the control key while the scale, translate, rotate gyro is active. Tip 3 And this is the one that took me a while to work out. Top create an auto eye rig you can use smartskin create eyelids that deform according to the direction of the pupil. To negate this smartskin for when you want to oipen and close the eyes you create an anti smartskin. Add a bone beneath the eye and call it something descriptive like "LeftEyeReverseSmartskin". Add a new smartskin to it and create keys at the same angle as the eyelid smartskin but with negative values. This creates a bone which when rotated to the same direction as the pupil cancels out the eyelid smartskin so you can easily blink, or soften the effect of the smartskin. Then create a slider which contains an orient like on the "LeftEyeReverseSmartskin" to orient like the Left eye bone. Switch the strength to Linear interpolation and as you move the slider up it will decrease the smartskin. I spent all day working this out. Twelve hours of butt your head against the wall and feel stupid, followed by 10 minutes of clarity. I must have rebuilt the eye controls a dozen different ways, but it works. Ciao.
-
Smudge I dowloaded this a while ago and didn't get around to watching it. It's a lovely little short, a few shortcomings in the pacing and sound areas which I'm sure your aware of, but I love the watercolour look. I've gotta admire anyone who gets any short completed, and a good short even more so.
-
It's your model. If you add an extra spline down the side(easy) or tweak your bias(much harder) you can pull the side into more of a curve and soften the transition into shadow. Or as ZachBG said you can soften the transition through lighting.
-
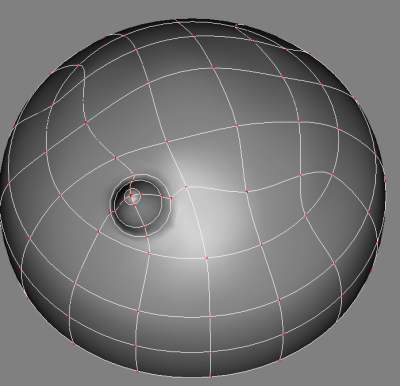
I cap a lot of my cylindrical heads with grids so that the distribution on the top of the head is more even. The patch is one I did to illustrate Victor Navone's thread Basically I create my heads with cylinders and then cap them with grids. To reproduce the curve easily I : lock off all points but the grid; switch to magnet mode and change the diameter of the magnet to the objects top ring diameter; select the centre of the grid(in this case four points) and push it upwards: and then I tweak the points. The first two steps do 90 percent of the work. I also use magnet mode to rough out most of my poses
-
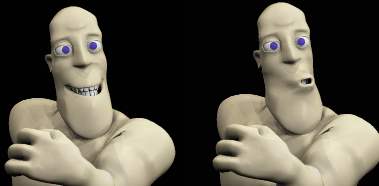
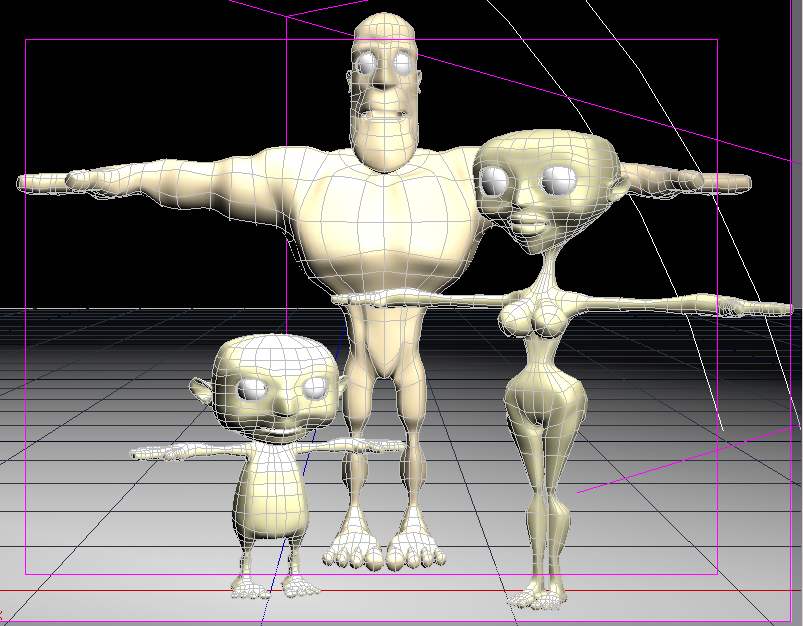
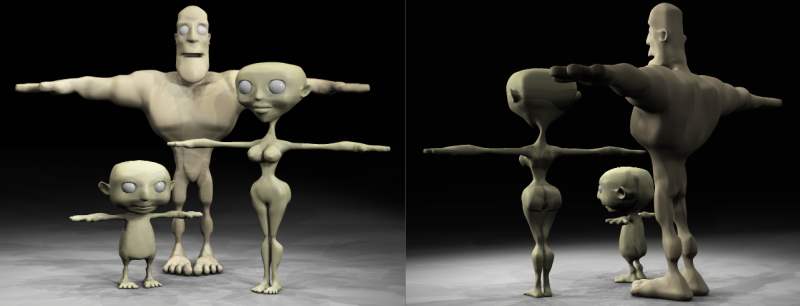
Hi All Another day down the track. Mega..I'll give you some shots later too tired to do anything else at the moment but they'll be here soon. Zach.. Where is the Define Relationship button? Mike..I'll use Zbrush and Painter to texture him, probably hand painted textures with the aim of having him look like a stop motion puppet, but I'm not sure. Before I get to that I have to build props for him. Finished adding extra splinage this morning before I had to leave the island to pickup my replacement laptop. Since getting back I've started on Pose sliders. Where possible I'm using -100 to +100 sliders and trying to get two expressions onto each slider with left and right seperation. The face seems to be holding up pretty well and the light topology makes it quick to sculpt new poses. I've got a few more characters to model but I'll leave those until later, the three finished give me my main cast, and I want to try out some new ideas. This thread is acting like a personal trainer, I want to post a new image/stage each time so it's forcing me to keep everything moving. As always criticism and questions are welcome. G'nite PS we need animator smilies, I want an exhausted smilie with a strong black coffee.
-
very nice model, and the skylight lighting looks great.
-
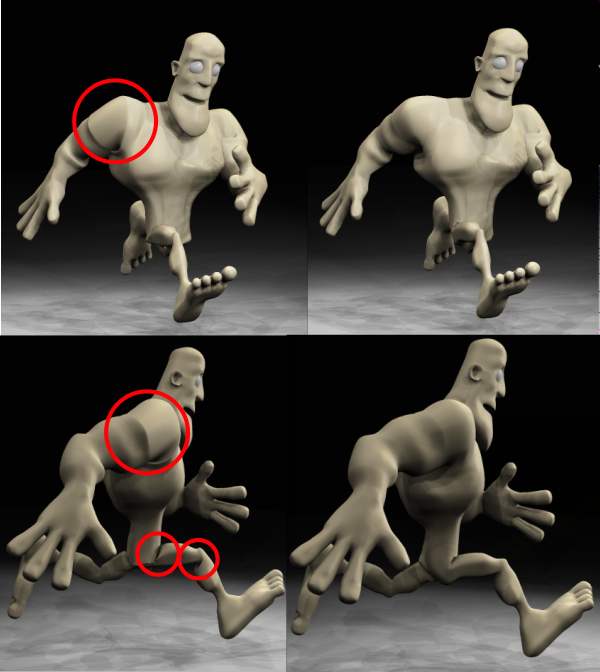
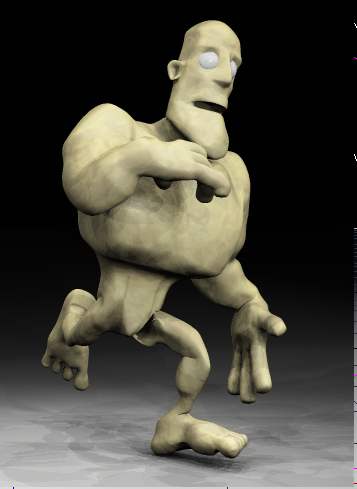
Mega: the patch was distorted splinage. Slight slowdown in progress as I discover that the courier company delivering my laptop from warranty servicing lost it. Several arguments later I'm getting a new one, which is annoying as all hell because it'll take all day to reinstall software. Learnt a lot about joints as I rigged my hero "primitive". Because of the width of his limbs I had to add splines for a lot of the joints.The shoulder, elbow, knee and thighs all got extra splines and fan bones. Although not a perfect result I figure I'll be able to cleanup the result with smartskin. I also tried to do the joints in smartskin without fan bones but found that dificult to control. Thanks to David Rogers for his information on how to access Smartskin keyframes. Tip: To look at the effect of my fan bones in the smartskin window, I added all of my fan bones into a constraints pose. I then turned the constraints pose on in the smartskin window, adjusted my smartskin , and deleted the constraints pose from the smartskin entry under the PWS. The journey continues.
-
ZachBG: Yup the splinage is light but I did a few quick tests(stills only) and it seemed to work fine. Mega :Skycast is done except for some tutorials(which will grow out of this project) and me getting my act together for the webpage. I'll add more rigs as I need them for our productions and will look at Skycast users requests. The Update Anyway the image front is a bit quiet as I add bones and Ik to the models. Thank goodness for the Setup Machine. I'm using fan bones to shape the transition areas. As you can see there are some problems with the shoulder, thigh and knee joints. I'm pretty sure they'll be easy to resolve.
-
Nice Design DarkLimit, Is the top one the skeleton for the bottom fish? I really like the evil cartoony feel. I wouldn't be so happy to live on an island if I had to deal with these fish on a daily basis.
-
That was cool. Naive, charming and a lot of fun. Might try that with my kids.
-
Hi All, thanks for the comments. Zach, I spent a few hours trying to decrease the evil halfling factor and I'm pretty happy at the moment. I took him into the Alpha and quickly added hair which made a huge difference. Smudge / Raytracer aaw shucks, thanks. Mega : she had an oval face in some of my earlier sketches, but the triangular shape creates a more definite silhouete contrast with Timmy on head shots. I did about 8 different designs and the triangular face just sort of clicked for me. ....and criticism is always welcome. I may not take your advice, but I'll think about it and I appreciate that you've taken enough time to write down your viewpoint. Here's a mesh shot. They're built very simply, mainly just extrusions from a central chest. While in some ways it's satisfying to build a detailed and complex model, if I did I'd probably never finish. Hopefully they'll be as easy to rig as they were to build. Back to work now. ciao
-
Great Bug Andrew. To render a wireframe just set the quality to wireframe and output a targa. Or if your one of the unlucky few with videocard driver issues(can't render to realtime) then use screencapture. On a pc press the printscreen button on the keyboard with a paint program open in the bg, then paste the capture into the paint program.
-
Bedtime now. Here's the end of day 4, not bad considering I took the weekend off. Tomorrow I'll do the props and backgrounds for the first scene and try to get one or two of the characters rigged. While there are still a lot of imperfections and some creasing in the models, I'm pressing onwards with the sure knowledge that any more than basic fine tuning will not allow me to finish the short on schedule. G'nite.
-
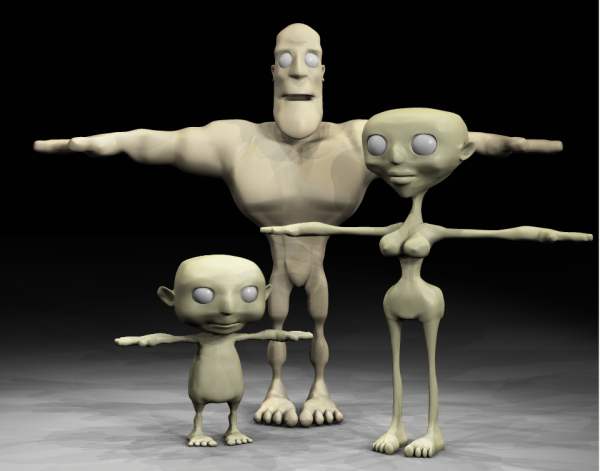
Time for another update. And for those who thought the hero's legs were twigs here's a female character. Just kidding, her legs aren't modelled yet, although I do like how she looks now, maybe I'll keep her for another time or secondary character. I'm thinking of using the alpha 11 hair, which is why they're all bald. And Mega, they're primitives for a superhero short film. Within the week I'll connect the electrodes, and thunderstorm permitting they'll be alive. Thanks for all the comments, hopefully your not getting bored.
-
Thanks for posting the Dark, Dark images. They looks great.
-
Hi Bjorn, looking at your spline view the collar aberation is almost certainly Porcelain at work. Setting normal weight to a low amount might help, adding another spline certainly will. For eyes, I find that building a more physically correct eye is the way to get correct highlights. A concave pupil covered by a convex lense works wonders and because it's only a small section of your render the speed hit is negligible ciao JohnArtbox
-
Hi, modelling a clock as light release? Clocks good so far. Do we get a sneak peak at Dark Dark? It sounds interesting. Are you hand modelling the cogs? Or using the AI wizard?