-
Posts
7,863 -
Joined
-
Last visited
-
Days Won
15
Content Type
Profiles
Forums
Events
Everything posted by NancyGormezano
-
You must use both "translate to" AND "orient like" -
-
I don't know actually if it makes a difference with them being included in the alpha channel. Try it. I baked the particles because it's easier to manuever in the chor for further animating. Once particles are baked, they are not recomputed. So then one can jump to frames or scrub thru the timeline without having to watch and wait for "computing particles or dynamics" to finish. When you go to render - you must have alpha buffer = ON (output/buffers/alpha=ON), and you must render to tga format (or png I think is ok too). Rendering with the alpha channel (the data included in the alpha buffer) - makes it easier to use imagery to composite, manipulate later To stop sprites emitting: On the frame you want them to stop, set the rate of emission = 0.
-
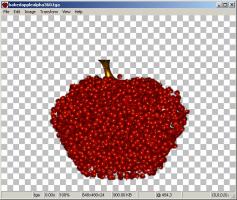
Particles are included in the alpha channel - ver 15e (don't know about other versions). This is screen capture of tga file straight out of A:M. The particles had been baked.
-
That is a terrific character. Great style! Will be a kick (and challenge) to see those muscles flex, assuming he can even bend those arms.
-
Right Click on the model in the PWS - Plugins/export/ Whether those formats that come up - will work - don't know.
-
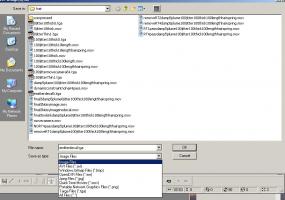
Do you change the option under "format", or do you put ".jpg" or ".tga" or whatever in the title? Either way, after this is done, can I actually load the file into Paint or Photoshop or whatever? Yes you should be able to load this image file into photoshop (I don't know which image formats Paint handles). when you click on the filename in the render to file dialog, the standard windows dialog box will come up - when you set your filename there - you will see options for what type of file you can render - you set the filename & type there just as you would for any other windows program. If you are on a mac - then I have no idea, but would assume something similar happens. If you know how to use photoshop - then you know how to save and set filenames and types EDIT - when you return from the windows dialog - make sure the A:M dialog box reflects the correct filename and type. You can always then change the type in the A:M dialog - by clicking on format
-
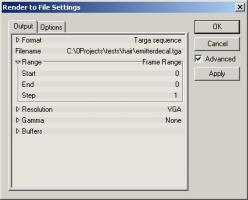
set your start frame and end frame numbers to be the same and make sure you are rendering to a file format that is not a quicktime .mov or .avi. For a still you would render to yourfilename.tga, .jpg, or .png
-
Your image will render at whatever size (resolution) you have set in the render to file dialog - presumably that will be the same as what is currently set for your camera in the chor In the chor - go to camera/output/resolution - set the image size in pixels when you go to render to file - check that the resolution is set to be the same - also check your frame ranges - make sure it is set to just render 1 frame or a range of frames - depending on your needs.
-
It's png
-
looks like the guide hair is near a 5 point patch - that's been reported as a problem - not sure its still a problem in 15. But if you can't comb it out, ie do some additional combing in that area to hide anomaly - I say live with it. Teddy Bears get mussed as they age - and since this bear is 3?4?100? years old - it makes it more valuable for collectors. How's that for a cop out? Cute bear!
-
Recent jobs done with A:M
NancyGormezano replied to John Bigboote's topic in Work In Progress / Sweatbox
perhaps it was this? - OLD OLD Tutorial (ver 8?) - but still has relevance - Babbage Patch Water Nice looking stuff John! -
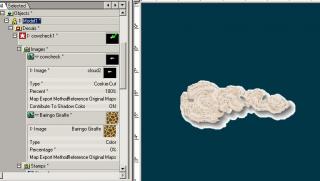
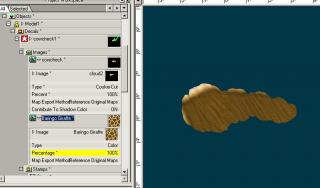
3D painter probably knows about transparency maps, or cookie cut maps - but I prefer to work with color maps in painter and then bring them back into A:M and switch the type in A:M. You may prefer to work with them as cookie cut or transparency in painter. Regardless - you need to create FIRST the decal in A:M and give it a type (color or cookie cut or transparency or bump etc) What I would do to create an image in 3Dpainter to be used as cookie cut map : 1) decal model in A:M with any ol' blank.tga (white) or otherwise image - make it a color type 2) go into 3d painter - edit this decal/image - but change brush tool to ADD transparency (from standard brush) where you want the cutout (transparent part) to be. Use REMOVE transparency to correct, use Standard to add color, etc 3) EXPORT the map to new name - call it something like Cookie.tga (must be tga type for alpha channel). I prefer to export - rather than save, as I don't like to destroy versions, in case I need to go back to them 4) return to A:M - import cookie.tga 5) switch in the model's decal container where you had blank.tga to point to cookie.tga. 6) Change the type to cookie cut. If I were making a transparency map in 3D painter I would 1) do same as 1) above - make a color map - white, black doesn't matter 2) go into painter - and paint with varying shades of gray 3) bring image into A:M - switch type to transparency
-
hee hee - This is a tough one - to shorten or not - as the characters preliminary actions have the viewer wondering what's going on, so that the eventual outcome is a BIG surprise. Made me laugh. You could "purty up" the setting some. Or add some other elements to the scene? maybe?
-
You will have to coordinate moving the hand (forearm, bicep) closer to Nigel's head,face, whatever, along with moving his body parts. Perhaps you can get away with just moving the arm/hand closer to Nigel - which is more likely to happen, rather than moving body closer to hand. I am also making an assumption that the ball is constrained to the hand in some way, and the camera is set to aim at the ball, and is coordinated with the movement of the NULL of which you speak
-
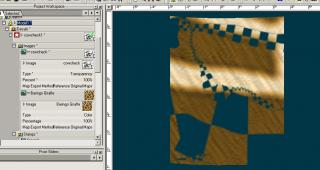
I'm not exactly sure what you are asking but I think you want to apply the decal as a cookie-cut type instead of color. The alpha channel will define the shape cutout - and will also give it the color as defined in the alpha channel. In addition, you can combine a cookie cut map with a color map and the cut-out shape will take on the coloring of the color map. If you are wanting to define varying levels of transparency - then you would use a "grey toned" image, without an alpha channel, applied as transparency map - where black = 100% transparent, white = 100% opaque. You would probably also use a color map, along with transparency map (if you wanted something different than surface color) Try a simple test - with a simple image. Have you tried something and it didn't work? EDIT: Robcat beat me to it! he's a fast little devil. Image 1 - uses transparency map (black & white - no alpha) & color map Image 2 - transparency - shades of grey & color Image 3 - cookie cut - image with alpha channel - no color decal Image 4 - cookie cut with a color map
-

I'm having some hair/fur trouble
NancyGormezano replied to chris's topic in Work In Progress / Sweatbox
Looks to me like you don't have specularity set somewhere - either in the hair shader (if using something other than normal), lights, hair emitter, etc Show us the settings you are using for the hair material as well as the render with render settings. -
Tools/Customize/Appearance/background
-
HAPPY BIRTHDAY!!! (Hope you can you see that without your reading glasses..)
-
Nice plane - nice image (Is it missing it's props? I expect to see some sort of a radial whir/blur at the nose - or do my brain/eyes/screen need cleaning?)
-
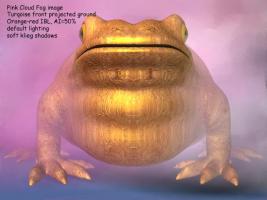
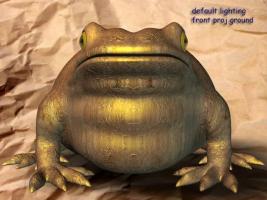
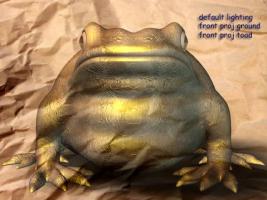
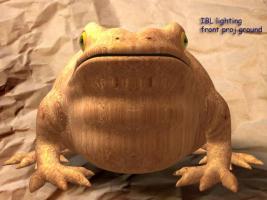
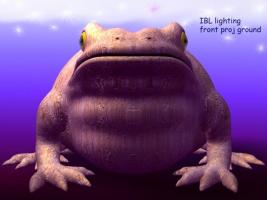
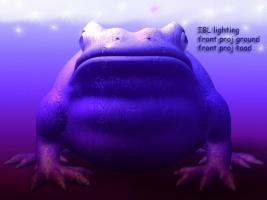
Yup - Serendipity has struck again - I just learned about FOG IMAGES from the Vern-o-matic Newtonian Katchibells Logo Extravaganza Fiesta used a Pink Cloudy image for Fog (fog range set to clip frog in front), with a camera roto = turquoise mottled image, front projected onto ground only. Using an Orange-red mottled Image for IBL, with AI=50%, AO= 0%. Scene also has A:M default lighting, but changed klieg (rim light) shadows to 100% soft, - Ye olde Golden Toade
-
Looking good Vern - Kettlebells ? - Do they taste good? - Do you get a lifetime supply? FOG IMAGE??? yikes - where have I been for the last 10 years? Amazing. (you know what that means - One pink cloud fogged, turquoise front projected, orange-reddish IBL-ed, Golden frog coming up)
-
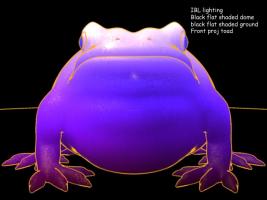
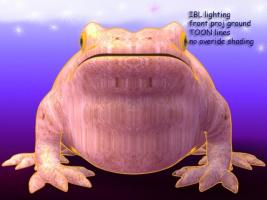
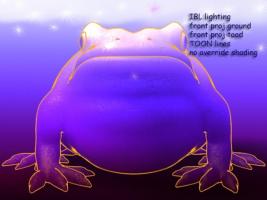
But he is there! Set your model to be front projected, when you go to render - turn on toon render for the scene - set override lines on. Lots of interesting possibilities - if one hides the background with a dome - EDIT: I'm not sure the IBL lighting is having any influence - I take it back - yes it is - because the rotoscope does not look like what is being rendered on the toad
-
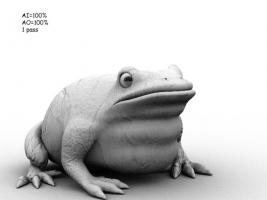
Spurred on by "White Render" thread that got so off topic (I don't do white real well) - I started experimenting some more with IBL, front projection, and added in some Toon rendering - Toad (modeled by Ken Heslip? rigged by Holmes Bryant) is textured simply as Goldenish as in first image - variations are produced only by changing rotoscope - which is used for IBL, and the background and for front projecting.


