-
Posts
7,863 -
Joined
-
Last visited
-
Days Won
15
Content Type
Profiles
Forums
Events
Everything posted by NancyGormezano
-
I don't know why the flock elements would be getting further and further away, but I believe "flocks" was designed specifically so that the elements would not collide. Flocks are tricky to work with in terms of controlling precise movement. Springs is also something that I believe currently isn't quite working (fully implemented or supported) in current versions of A:M. Or more precisely, I've never been successful in recent versions of A:M of getting springs to work. What acts similar to "flocks" and what you are describing might be done with applying "translate to" and "orient like" constraints with lag (of 1-3 frames). This animation test (done in 2009) uses constraints with lag. Not quite what you are describing, but parts of each model are constrained with lag to follow other parts of its model. Or even perhaps what you need is something using a dynamic constraint? Or perhaps some sort of Newton simulation? Without seeing an example, it sounds like you are describing something that is done with Flash, where elements follow the cursor? or links/nodes presented graphically look like they are held together with "strings" TheEnd3movh264.mov
-
I have noticed that the more CP's, the more work at weighting, regardless of rig. And if it's David doing the weighting, you can bet that each and every CP is weighted individually, to at least 2, maybe 3 bones, to precisely determined 2 decimal places.
-

Image Contest: "Anything Goes"
NancyGormezano replied to Jason Simonds's topic in Contests/Challenges
Is that 1440 in either dimension? ie. width or height? -
yay! Glad that helped.
-
I have found that the quickest, easiest way to delete bones from a model is to create an empty model window and shift drag the top level bone of the unwanted hierarchy from the PWS into the window of the empty model So now that I am remembering correctly (hah hah), my procedure has been to ctrl drag to duplicate the hierarchy and then shift drag the unwanted bones into the empty model window (no need to expand with *, the children bones will be deleted as well).
-
Ack. You are right! I should have tried it first. I was going on memory. Not a good thing to do. Thanks for letting me know.
-
Drag the bone out of (i.e, above) hierarchy, then ctrl drag it to duplicate it, then drag the original bone back to it's place, and the duplicate bone to wherever you want it in the hierarchy. I am not aware of a key+bone sequence to isolate duplicating just 1 bone. Maybe someone else is.
-
Or hasn't yet recovered from most recent "cosmetic" surgery? Is it my imagination or do they jes' keep getting bigga and bigga? Cute animation and gif. In a tastefully trashy sorta way. Did the clouds go away because of an A:M glitch? or were they accidently not active when rendered? They must love you at work.
-
Ah yes, indeedy...as I said above: Roozle still needs work. So does Nummi. I had created Nummi in 2011, shown here with Mary Agnes & the Hickenloopers band. I have some other new/old quirky characters in mind to create/revive/modify, that could also potentially show up.
-
Uh...he?...Ruzzlelini...ahem...is...um..ah...a She. And she's supposed to be a raccoony-ish type. A master gardener, opera star and flamenco dancer on the side. The middle character Nummi (a he), is supposed to be a hedgehoggy doofus. Smitten by Roozle. Anyhow that lets me know that Roozle needs more work to make it obvious that she is a raccoonette. She's still in progress. Thanks for the feedback, it's good to have fresh eyes...
-
After a long dry spell, I have finally gotten back to A:M'ing. Not sure where this is going. Lothario & Nummi meet the Great Louisa Ruzzlelini (Roozle to her friends)
-
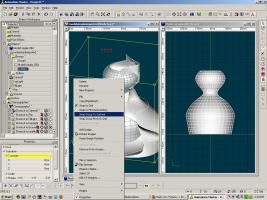
Ah Yes - true. I'm not finding I need anything denser So, for my purposes, I am finding that it is just simply easier to create a new spline model with both the chor and model windows open, and not necessarily always use the snap to surface tool. I would only use it when it helps, and primarily in chor. What I am finding easiest (and probably, maybe, the way others have been doing it before): 1) Start new chor. Delete everything. Drag/Import the 3D mesh that is to serve as a template into the blank chor (as a prop if .obj) or as a simple primitive model if created in A:M. 2) Start a new blank model, drag into chor. 3) Make the 3D template model unpickable in chor. Optionally make it a color, with transparency. Make it display either as shaded or shaded with wireframe. Make the new model display as wireframe (or whatever), different color. Select the blank model in chor. Go into modeling mode (F5). 4) Open the window for the new blank model. With both model window & chor window open (alt V), start laying down new splines in chor window and model window (thus having access to all tools), and observe in chor window how it conforms to the 3D template. If I want to use the snap to surface feature, then I do it in the chor window and simultaneously observe what's happening in model window.
-
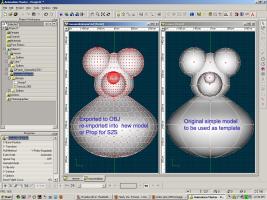
Thanks Gerry, I already have some high density .obj models from other programs. I'm not necessarily interested in recreating them in A:M. However I have also found it is easy to export a normally low patch model in A:M (eg collection of spheres) to obj format using 16 polys/patch to get a stupidly dense model to practice on. And if one imports that stupid model into a blank model and reexports it, I suspect it could get even stupiderly denser! In my first post here, I exported a simple lathed model made in A:M to obj format for practice. Here's another ridiculous example. In this case, it might be easier to generate 2D rotos from the simple model and use those for splining in A:M
-
Thanks MattBoote & Gerald! Yes, lock and hide will help some. And probably using partial (1/4) models as templates: eg, right front, right back, would help make the snap more controllable. And modeling in chor may just be the way for now. I was testing this feature to see if using a 3D template/rotoscope made with "A:M primitive shapes" (spheres, cubes, etc), would be easier than splining without a 3D template. I will fiddle some more. Unlike others here, I have yet to have a need for resplining a dense model from other 3D packages.
-
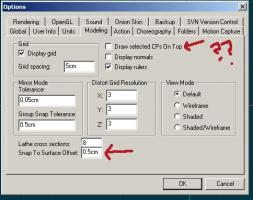
The video was great, thank you, thank you! And yes I was more successful with modeling and using S2S in the chor using an obj model as the template, based on what you demonstrated in your video. However, it seems like not all modeling functions are available - particularly "y" to add a cp to a selected spline, or to "drag selection" in the chor (must click on lasso first instead). So, I again tryed to model in modeling window with snap to surface (offset=.5 cm - the default) - I had an awful time trying to get the CP's to snap to the front surface - almost impossible (was not successful ever). It keeps snapping to the furthest surface - the projection of new CP's onto the surface seems weirdly wrong, regardless of any changes in offset value or if I have the option to "draw selected cps on top" checked or not. I also experienced crashes. Not sure what I did. How do you keep the new cps, or when moving the new cps, from snapping to the furthest (screen space) surface?
-
Ahhhh - great! I am starting to view this now and can see already what I am not doing correctly. I will finish watching - and get back to you! Thanks.
-
Thanks Matt - I had looked at your thread already to get me started - however what TOOL? are you talking about? I seem to have the same icons in play, however when I add CP's in the chor - I get a path object, and nothing snaps to nuthin'.
-
I am not understanding how to use the snap to surface feature? This is my first time trying it. Can someone walk me thru the steps to get started, please. I have made a SIMPLE obj in A:M (model exported as obj) I imported that obj 1) as a prop, and 2) imported that obj into a blank model. I have tried to use the snap to surface feature both in model window, as well as in chor (with prop) If I try to do it in the chor, and use the Add cp's - I get a path object If I try to create CP's in model that has prop imported in it (used plugin - import, obj) - I can't seem to control how the cps snap to surface. No comprendo. Que pasa?
-

SSS faster now. Give your old PRJS a test (v17)
NancyGormezano replied to robcat2075's topic in Animation:Master
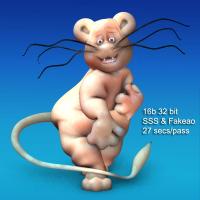
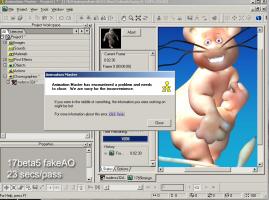
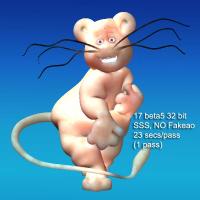
Hmmmm...I crash (17 beta5 32bit) every time I try my 16b project with SSS and FakeAoCpu (works in 16b). It will render all passes but then crashes. I do not think fakeAo plugin is working in 32bit? I am also noticing other crashes when I am trying to isolate problem. Started new chor, with simple lathe object, added fakeao, did onscreen render (Q) - crash boom bang. (doesn't crash in 16b) HOWEVER on the good side, before crashing, 17beta5 was running 23 seconds/pass versus 27 secs/pass for 16b -
you should have the icon already on one of your toolbars - however if not, then it can be added by going to: Tools/customize/commands/manipulator
-

The Passing of a Titan (Paul Forwood)
NancyGormezano replied to Paul Forwood's topic in General Announcements
Rest in peace Paul. I am honored to have known you here. I am deeply saddened. My sincerest condolences to your family. -
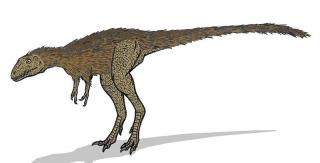
Or as some others speculate - Look at birds for references (from the wiki ): With those short front legs, others have also speculated T-rex was an ancestor of birds. However, others dispute the methodology and analysis of the soft tissue Goes without saying: your guess is as good as anyone else's.
-
Oh yes. definitely evolving into a fire breathing puddy-eating tweety-bird So cute. Me guste.
-
Awwww...he's a happy little guy.
-
More wonderfulness!


