Scottj3d
-
Posts
485 -
Joined
-
Last visited
Content Type
Profiles
Forums
Events
Everything posted by Scottj3d
-
Find the file where you saved it to then right click it and you will get the option to send/ to zipped folder.

-
Try right clicking (if you're running windows XP) the file and send it to a zip folder. You should then be able to upload the zipped folder..
-
At 299.00 it's an excellent purchase. You have to learn to think in splines but as far as the softwares modelling capability there is nothing that you cannot make with AM. It takes time to learn. I bought AM to learn to model in 3d with no previous experience and that's mainly what I do with it but it has alot more power than I am even coming close to using. I consider it one of the best investment's I ever made and I'm sure once you buy it and begin to learn to use the tools provided you will agree. And as luckbat said you have free 24-7 support here on the forum which will aid you well in the learning process. Have Fun!
-
Here's an update on the engine. I'll be smoothing out that crease in the front of the block if it doesn't elude me again to do so. Still working on lighting. I plan to use bumpmaps for added details.
-
Thank's David. Here's what I see so far. No chrome or detail yet. Still figuring out how to bend the exhaust right before I start the blower,waterpump etc. A little more "tricky than I figured it would be to get the shape but with a little tweaking I think it'll work. Oakchas I hope you like it....That "yikes" inspired me.
-
Thank's Oakchas, you're right! I didn't notice it till you mentioned it. I had a couple cp's out of place, musta hit something on the roa...er uh bumped them while modelling. I'll be getting the roof tied in soon. Just got a couple of pieces to model in to complete that area then finish the rear of the car and tweak it in for the final copyflip. The engine prolly wont be as detailed as the pics but it shouldn't be too bad.....Should it? LOL
-
You're welcome to modify this if it isn't quite what you are looking for. Part of a project I still haven't completed. Had trouble getting it to work quite right. This ones not rigged but the groups are ready to make rigging easier. Entity that's a really nice wing! I'll have to try that with the hair. Wing.zip
-
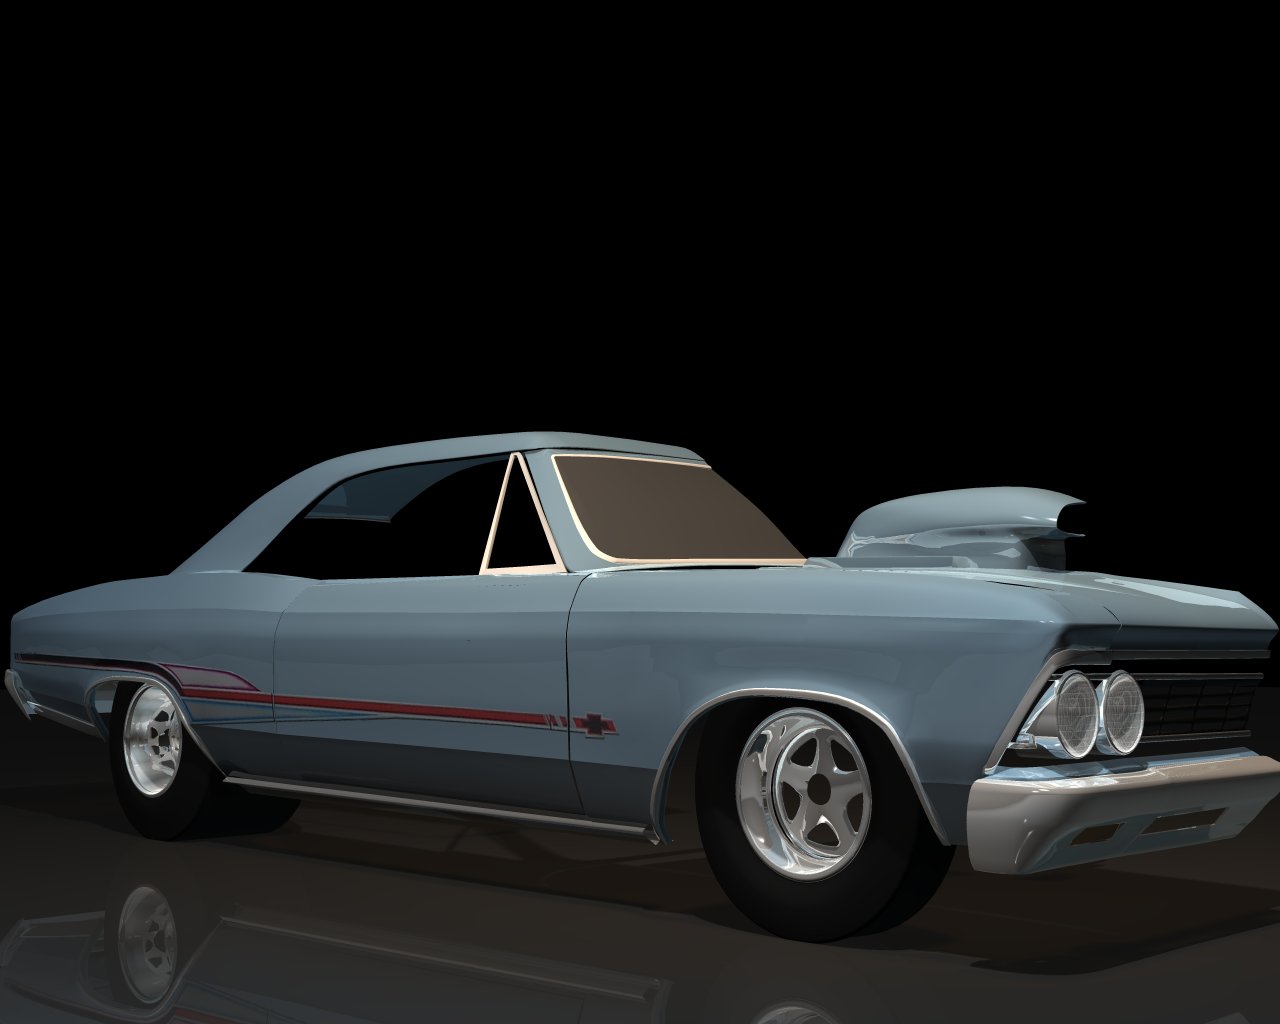
Here's a little update. Did some modifications to the grill and added a few things. Still working on the stripes. Here they are just cut from the picture of the car but since (I'm guessing) I didn't repaint them in paint shop they dont apply right as a cookie cut (outlines). I'm going to repaint them and see if it looks better then.
-
[quote Very nice looking ride. Are you going to model the 327, 396, 402 or 427 for this ride. I'd love to see that engine!! (I had an Impala SS growing up) David Thanks David. It's got a blown 396 over bored to I believe 402 0r 3. I'll have to check with Gordon the owner/builder of the car. Yeah I have always liked the old chevy's. For a while this was looking more like an impala than a chevelle. Here's a reference pic of the "real" engine which I plan to model as well. I just hope the model doesn't get too heavy to work with once I get all the other pieces in place.
-
Thanks Nixie Yes I plan to build the chassis and suspension and rig it so that the suspension appears to be working should the front tires leave the ground ( wheelstand etc.) and to be able to turn the front wheels for still shots of it turning with the body tilting with gravity. Not too sure as to animating it. Most of my ability is in the modelling window but you never know.
-
Here's another recent shot. I have a couple splines around the rear wheel well that I keep budging but haven't hit the right balance yet. It shows best in the render so it's a slow process to get them.
-
Thank's Dan, I'm watching that WIP I haven't had any input (nice car, WOW nice paint! Shiney!)as the setups for paint and lighting are over my head at this time (I'm studying!). I tend to freehand most of my model's but having good roto images for reference on an exhisting vehicle really helps. In the case of this carI'm using 3 shots front,side and rear and it hasn't been too difficult so far. I was slightly above the car when I took the front and rear pics so they dont match up perfectly in the modelling window but being able to have the car's owner go shoot some different angles at close range of critical areas and email them to me really is helping me "tweak" it in. I'm at the point now where I added the decal's to the headlight's and have had to go back to V10.5 to apply the decals as V12.0 wont let me apply them. I flatten in my pose then position and apply but as soon as I stop positioning they are gone. In short though in the process I lost the roto's and did this latest tweak just minimizing AM and using the reference pic's since the basic model is close enough at this point. I hope I get the finish on the car and the lighting to compliment the model as your's does on the Retro. The way I see it I might be ready to play with that once I get the interior and engine in.
-
Thank's Oakchas, I figure I'll get the body tweaked in then work my way in for the interior. Right now I'm using stealth technology for the dash and floor, actually I'm not sure weather to go ahead and get the body copied and attached then build the chassis (and rigging it?) and interior after or what but it will come. I think I can pull it off though as long as my mind doesn't prematurely think of something else it want's to try building (bad habit). I'm hoping to mod a copy of this later and have it in red primer with rust and dent's and have some fun with it.
-
Well my friend sent me some pic's of angles I did not have when I shot the car. He's not liking the idea of me cutting his car in half so often! I cut it and have been making some adjustment's. It's getting smoother and the lines are improving. I'm not too confident in the lighting area but I think I did a bit better here.
-
Here's a couple of updates. This one I didn't quite get the same angle. I wanted to compare it with the shot of the real car but it's close enough to check the accuracy. Still have alot to do! I'm also rigging as I go. Can't wait to get into the engine but you have to "pop" the hood to see it so I'm rigging all the door's ect. as I go. A problem I am having is that the bones move in all directions and I am not sure how to constrain them so that for example the hood doesn't move side to side as well as up and down. And just the opposite for the door's.
-
Thank's Jay, yeah I worked in auto parts for year's and our machinist was building it. I used to look at it (even before it was painted) and druel. I had plastic model's of them as a teen and never thought I would one day be doing airbrush work on one. The car (real one) has a fiberglass hood and rather than cut holes for the cowl induction he had me paint them on and put a Ratfink on the back of the hood scoop. It's gonna be much easier to do on the model but I am going for acuracy here so my model will have them as well.
-
Yeah I figured I would start with what I see while modelling. Actually it is a bit wide. I did a quick copy paste to check proportions so it will get a bit skinnier before I am ready for the final copy paste with better lighting. And heres also a wireframe as requested. I feel it's still a bit spline heavy but the plan is to get it built first and then see where I can cut the splinage. Still alot to get worked out at this point. Thanks for the replies,guy's.
-
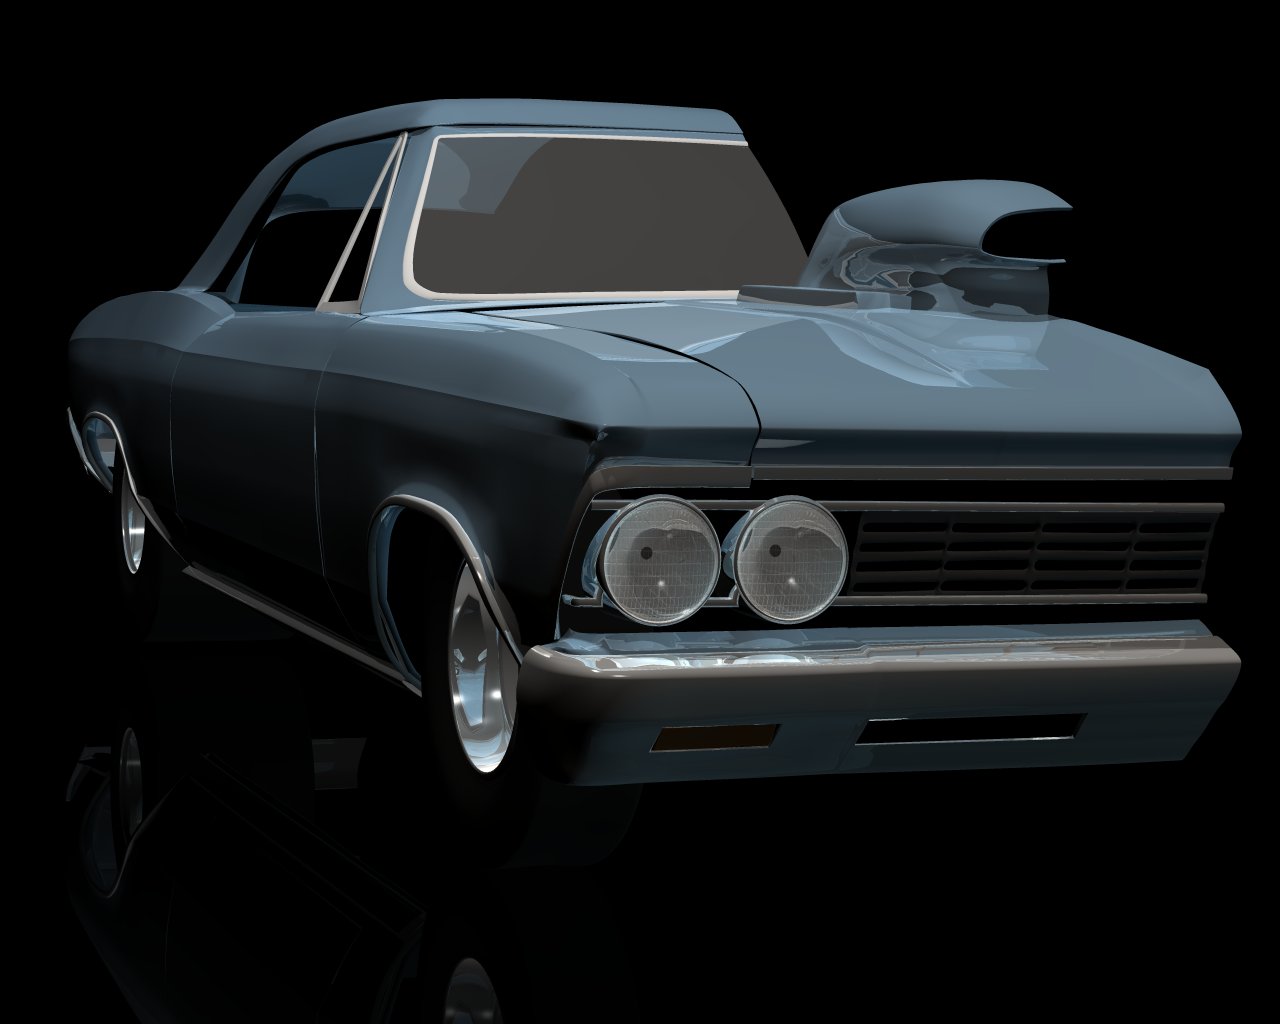
Just got V12.0 AM 2006 today and thought I'd see ii it feels any different than V11 2004. Modelling feels about the same but so far no gliches. I had out of memory issues with 11 so have been using 10.5. V12 appears to be a bit more comfortable although I have had no bad experiences with modelling in the earlier versions. I decided for my 1st model I would try to build my friends car. A 66 Malibu SS which I took pic's of for roto's about a year ago and also did some airbrush work on the car when he built it. Lot's of tweaking and fabricating to go as I plan to build the complete car and haven't done much mechanical modelling. I've seen some really nice car's built in this section so I thought I would give it a go. Crits and advice are welcome. I stayed with the default lighting here as I haven't much experience with different lighting or lighting setup. Here's the actual car for reference. It's also the pic I used for the side roto.
-
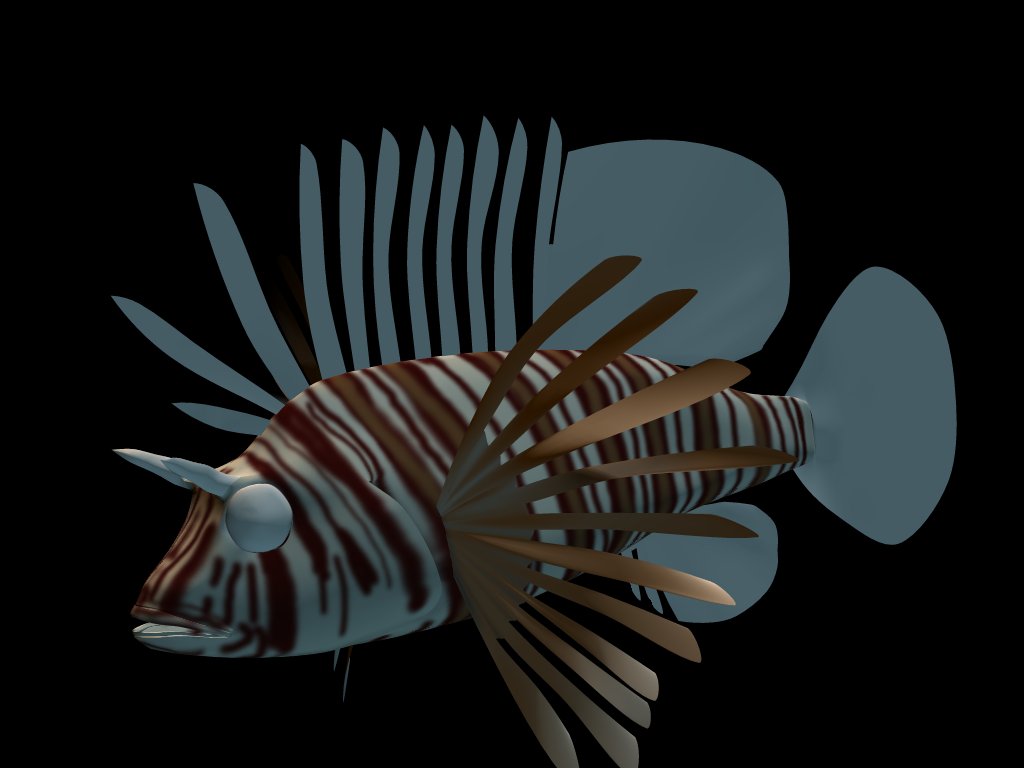
that's an amazing fish model. are you unraping the fish to do the decaling? looks real good scott Thank's Dan and everbody. I'm currently using V10.5 and I have created groups for the right and left sides and I flatten them manually in a pose (as per Jim Talbot's tutorial's) I have group's for the body and so far the dorsal fin and a decal for each. I select the right body group, hide everything else and apply a decal then the left and restamp the same applied decal. Just repeating it for the fins but the nice thing about the fins is I only have to stamp once and the decal shows on both sides. I'm hoping the fin ray's and scale's can be done with a bump decal.
-
Here's a little update. I'm modifiying the pectoral fins and should have an update with them decaled soon. The dorsal fin will be modified to make the transparent areas at the rear of the fin soon. This is about 5 evolutions of the decal here.
-
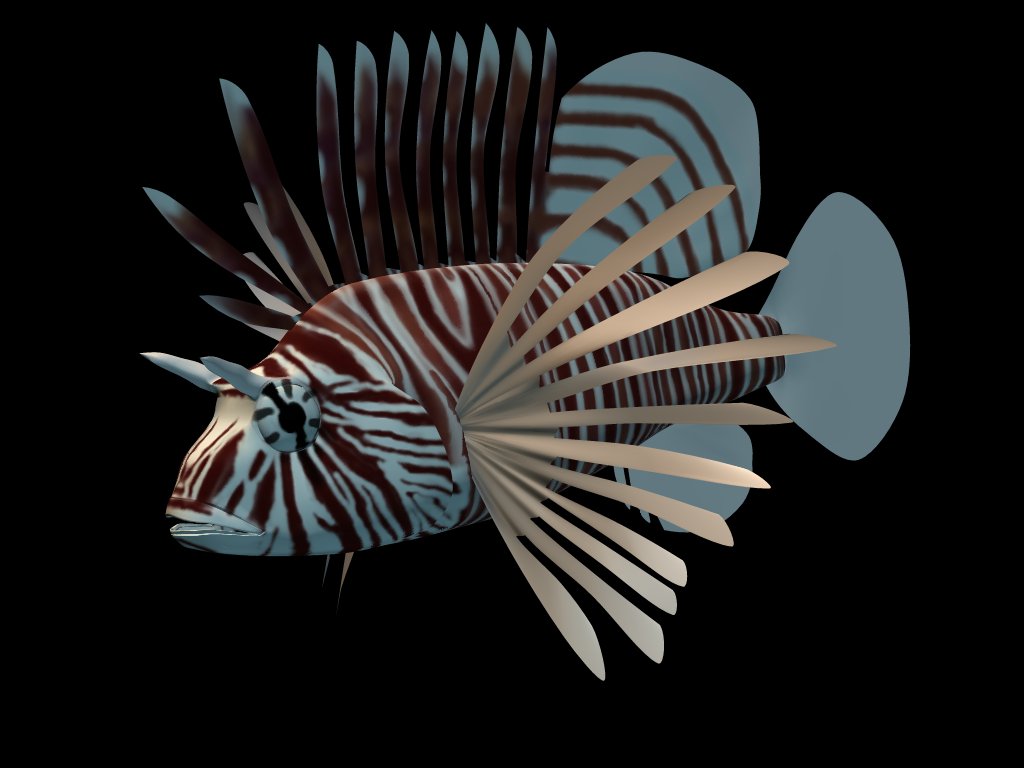
Heres the first color decal test for the body. Definately need's improvement. I kinda whiped it together just to see if it would take ok(got alot of fold's around the gill's and lip's). I'll redo it and use selections to get better detail for the stripes. I plan to use cookie cut's for part's of the finnage. thank's for the tip's on the adjustment's for the hair Nancy! I'll give that a shot as soon as I get V11 in this PC.
-
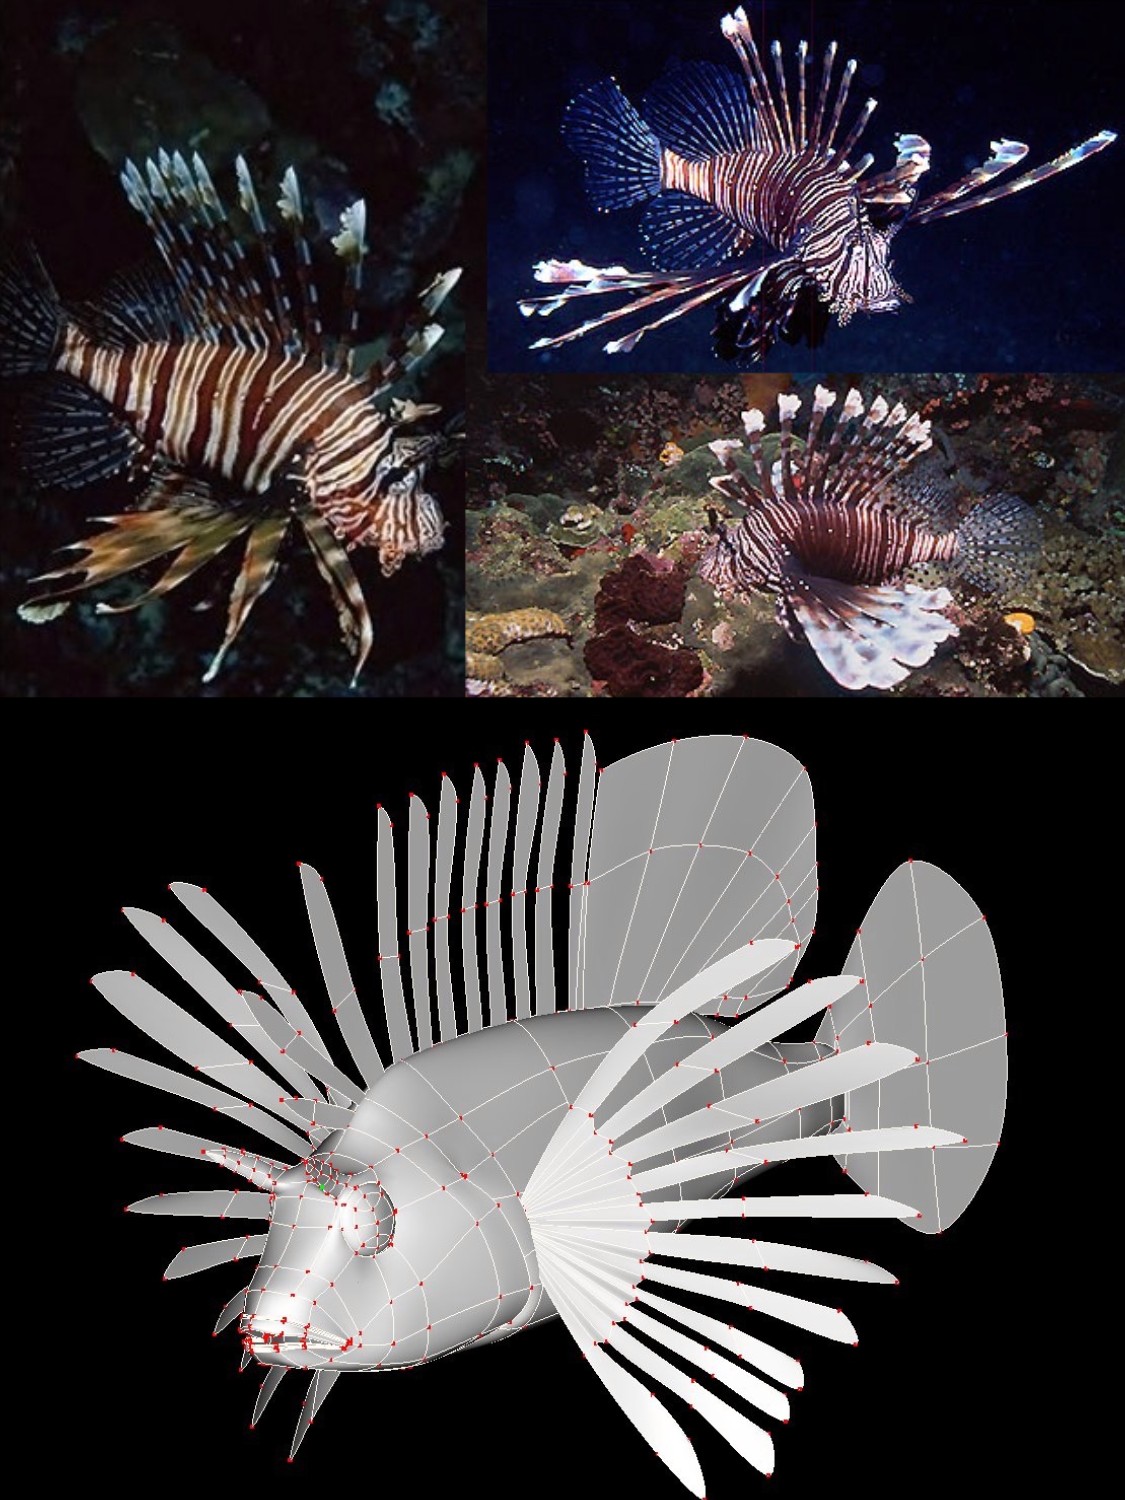
I haven't been splining for a while so last night I decided to get some practice in. My motherboard on my modelling PC went south but I was able to salvage my model files by slaving the harddrive to my internet PC. I have been wanting to make a virtual reef aquarium. I made this lionfish in a few hour's but still have some tweaking to do as well as decaling. I thought it looked pretty good so far so I decided to start this thread and get some feedback. The color pics are mostly for reference and are what I could find on the web. And an anemone using an image file with hair. Can't seem to figure out how to get the tentacles (hair) to taper towards the tip like they should. I went with hair for the tentacles for the ease of getting a good quantity of them without having to model them. I'll try modelling them as soon as I finish transferring the vidcard ect. to this PC. Dont think my 64 meg gforce4 is up to the task as I am used to my 6800gt.
-

Suddenly the model is all angles...
Scottj3d replied to Kelley's topic in Work In Progress / Sweatbox
I agree with Nancy. I have accidentally done the same thing. It took me longer to un-peak everything than it did to peak the whole model but that's what I think you did. You can round them back out using the o letter key but when I did this I had to go 1 cp at a time. -
I hope this will help. I have been making some space ships for a friend and ran into a similar prob. My solution was to create the lines on a transparent layer then once you have them worked out how you want them make a copy of that layer on top of the original then apply a gaussian (spellcheck that) blur to the underlying duplicate. My prob I assumed was antialiasing but it this technique made much smoother lines and I had no prob lining them up from left to right. I did also flatten the fuselage in a pose before applying the decals. Here's the result. Sorry I cant show the whole ship but I promised not to let the cat out of the bag.
-
He still kinda looks like the original King Kong:)