Scottj3d
-
Posts
485 -
Joined
-
Last visited
Content Type
Profiles
Forums
Events
Everything posted by Scottj3d
-
Jason you are too kind! I'm really just a modeller who enjoy's working with splines. We need to work on connecting that head. And you're welcome glad i could help:)
-
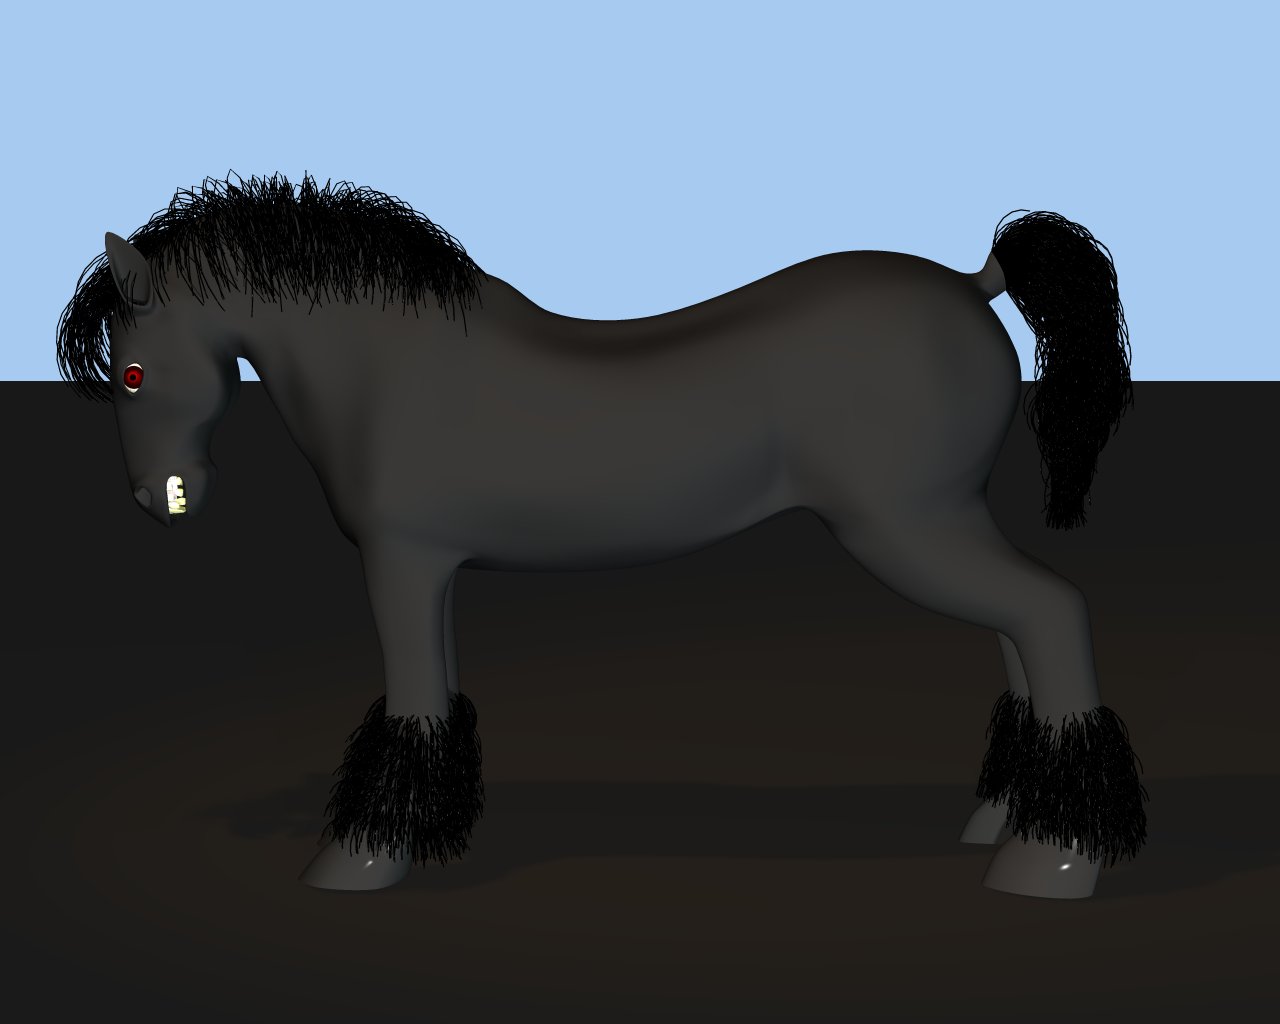
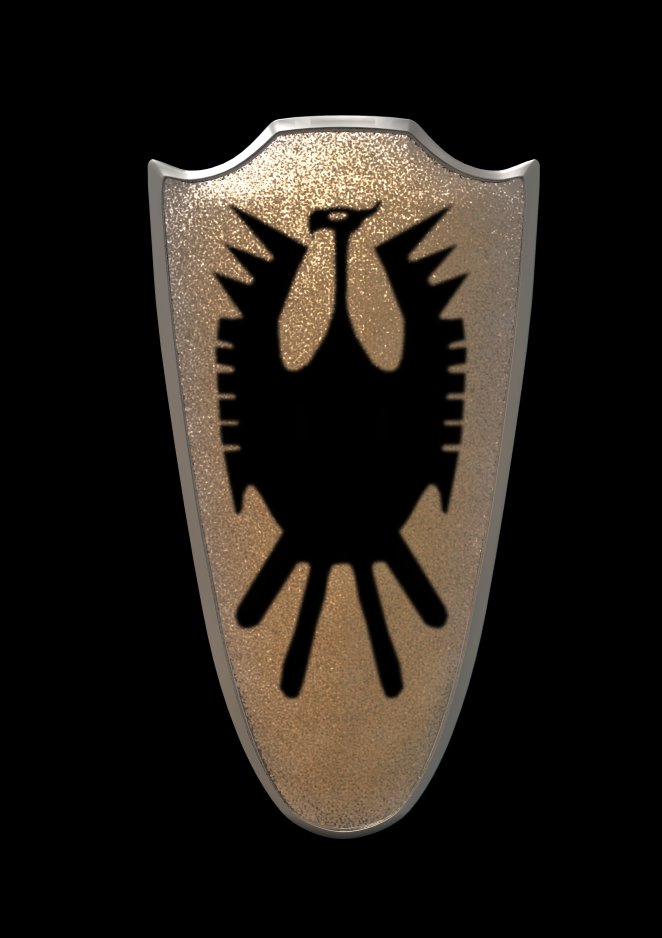
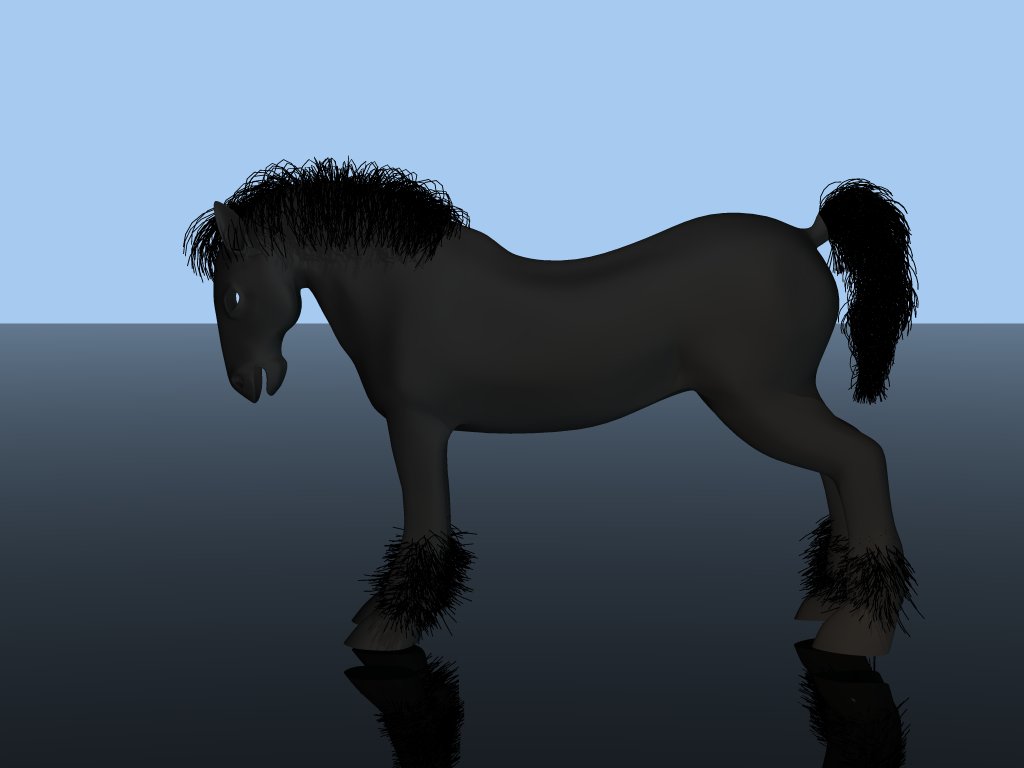
Thank's Ruscular! Yeah I'm getting close on the horse. He'll have a bump when I get to it and I plan to give him the same musculature and blood vessels as the portrait has. I just started putting the saddle on him the other night. He was whole but I have split him to add a few splines on the legs and around the eyes and match his stance to Zev's horse and as soon as I am happy with the changes I'll copy paste and decal him. I have added similar decals to the axe and shield minus the hammer finish but so far only rendered the upgraded helmet.
-
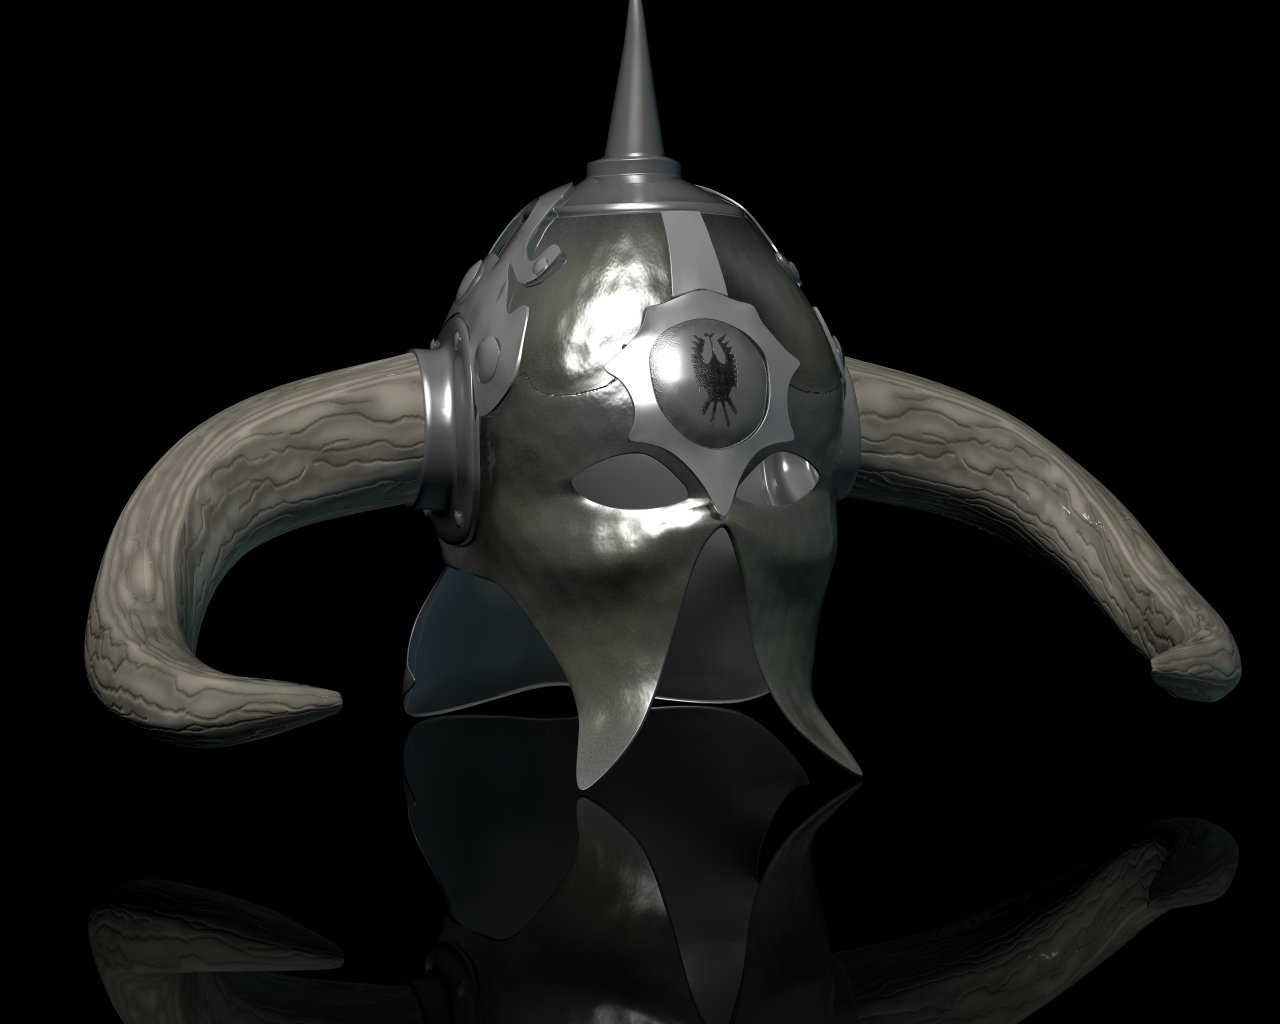
Little update on the helmet. Still hav'nt got scratches down yet but heres my 1st attempt at hammering the finish and some dinge. Just a couple more rivets and decal the back and at least the hard stuff's done.

-
Look's good. Could use a few spline rings at the base for control where it flares out. Almost a bevel but not as tight.
-
I agree. Smooth too!
-
The feet look great! As for the anatomically correctness. If he runs around naked I suppose having it would not raise the question of "how does he pee?" or "is it male or female?". I dont think it's offensive but you would probably want a lion cloth or something if he were used in an other than adult viewed animation. I think it's a matter of choice.
-
I think even with all that you say needs to be done it's fantastic work! You should already be proud of it. The misic is very nice as well.
-
No crit's here! He looks like he could get into some trouble real easy:)
-
I honestly don't know. I always thought he was cool. I know it (the image) was the cover of a Molly Hatchet album and of course a ticket stubb that I sketched onto paper and later took a digital camera pic of to "paint" it in my computer. He's called the Death Dealer by Frank Frazetta but thats all I know at this time. Greg knew the artists name and posted some links earlier in this thread to some excellent references. (Thank's Greg, the halloween link is where I got the pics to use as roto's) I had seen a book of his work but did not remember the name. That must be why I liked Jims Leopard Queen so much. I'll have to find out.
-
I hope I copied and pasted this link right. Compliments of Greg. http://frazetta.ragnarok.no/images/frazetta01.jpg
-
Thanks Ben! I'm practicing with materials but it still sounds a bit deep for me. I finally got the hair to behave. I had these "hairballs" in the ankles and my realtime settings needed to be cut back. The hairballs were being caused by the normals in the legs. They were all pointing into the center of the mesh. I selected and flipped them and it grooms really nice now although I still need to get the thickness and density right. I'm gonna have to add some geometry to the eyesockets to fit them properly to the eye and maybe darken the decal. Then (Zev) I can add that image as a roto and make the adjustments to those legs. Prolly cut him in half and work from there.
-
Thank's Chris, I'm still trying to find the information on how to make grunge maps so I can dirty it up a bit. Not having any luck finding it. I must be using the wrong keywords. I can add some scratches using bumpmaps but still need that dinge on top of everything. This started out as just the horse but grew into a bigger challenge to re-create the scene of the original painting in 3d. I want to get back to getting the horse done but am still drawn to the helmet when I want to play with AM. (prolly cuz the helmet loads when I start the software) Almost there... just a bit more...ok just a little more...ooh gotta fix that. It never end's (LOL).
-
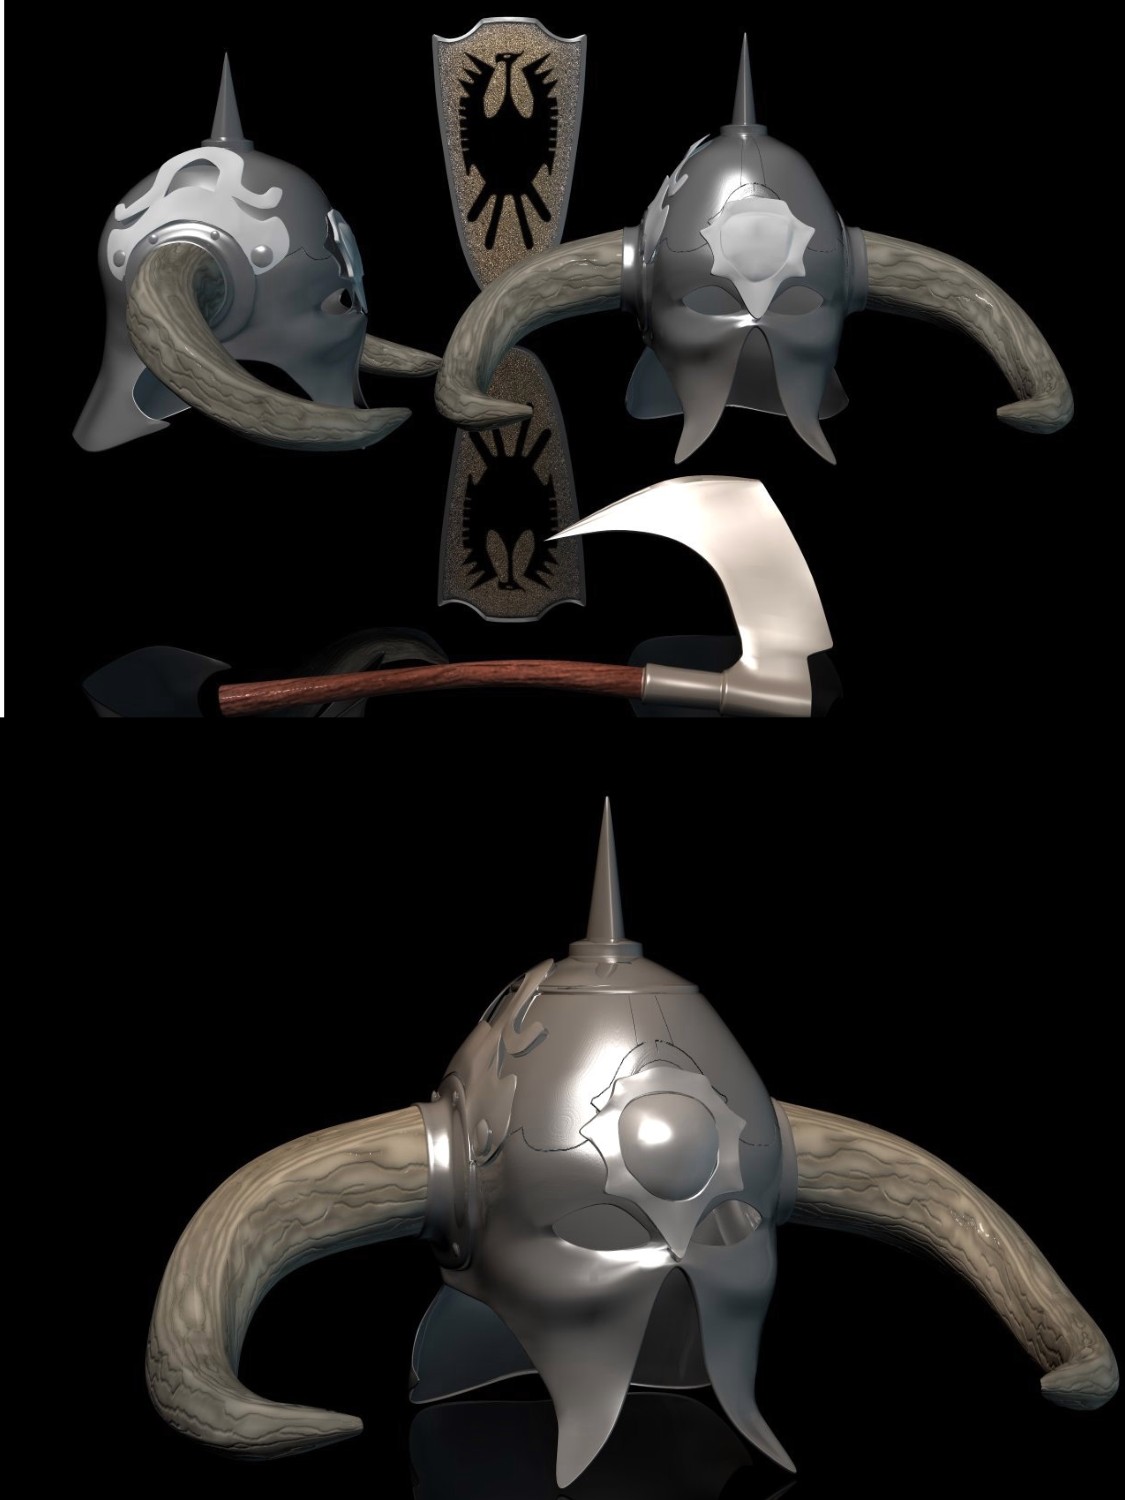
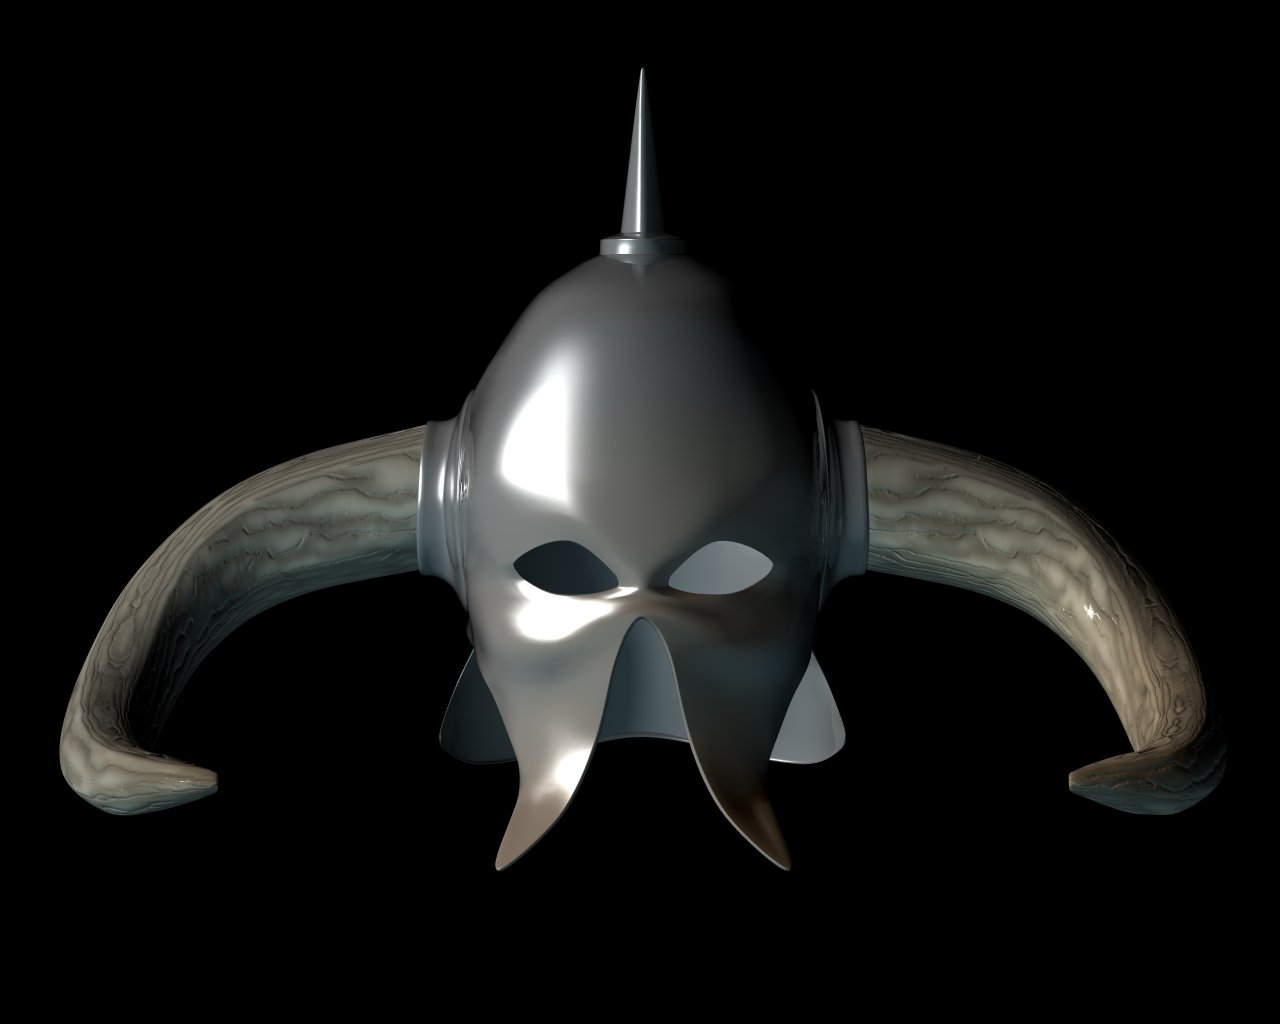
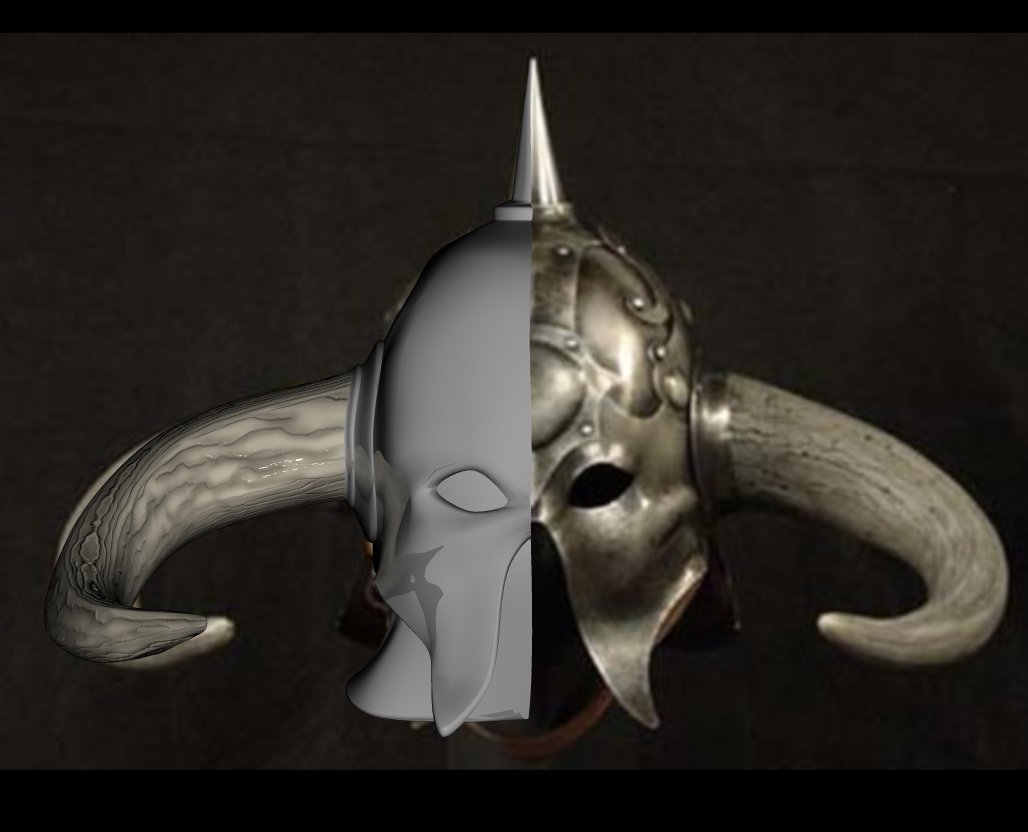
Well I had hoped to get the details on the helmet done with decals but it just wasnt working. So I decided to use geometry for the layers of decorative steel as well as the rivets on the outside of the helmet. The upper image I was just messin in the chor tuesday to show the pieces I added and the improved edge on he axe. The lower is almost ready to call finished as far as modelling but I still need to tweak it smooth and copy the detail over the right horn to the left. Beveling is tedious. I left one of my attempted decals on the forehead to show how much better the geometry looks compared to the bump map. Tried using it as a displacement but had horrible results. Perhaps I can get back to the horse soon hehe!
-
Nice detail in the musculature! Are the ribs modelled or is that a decal?
-
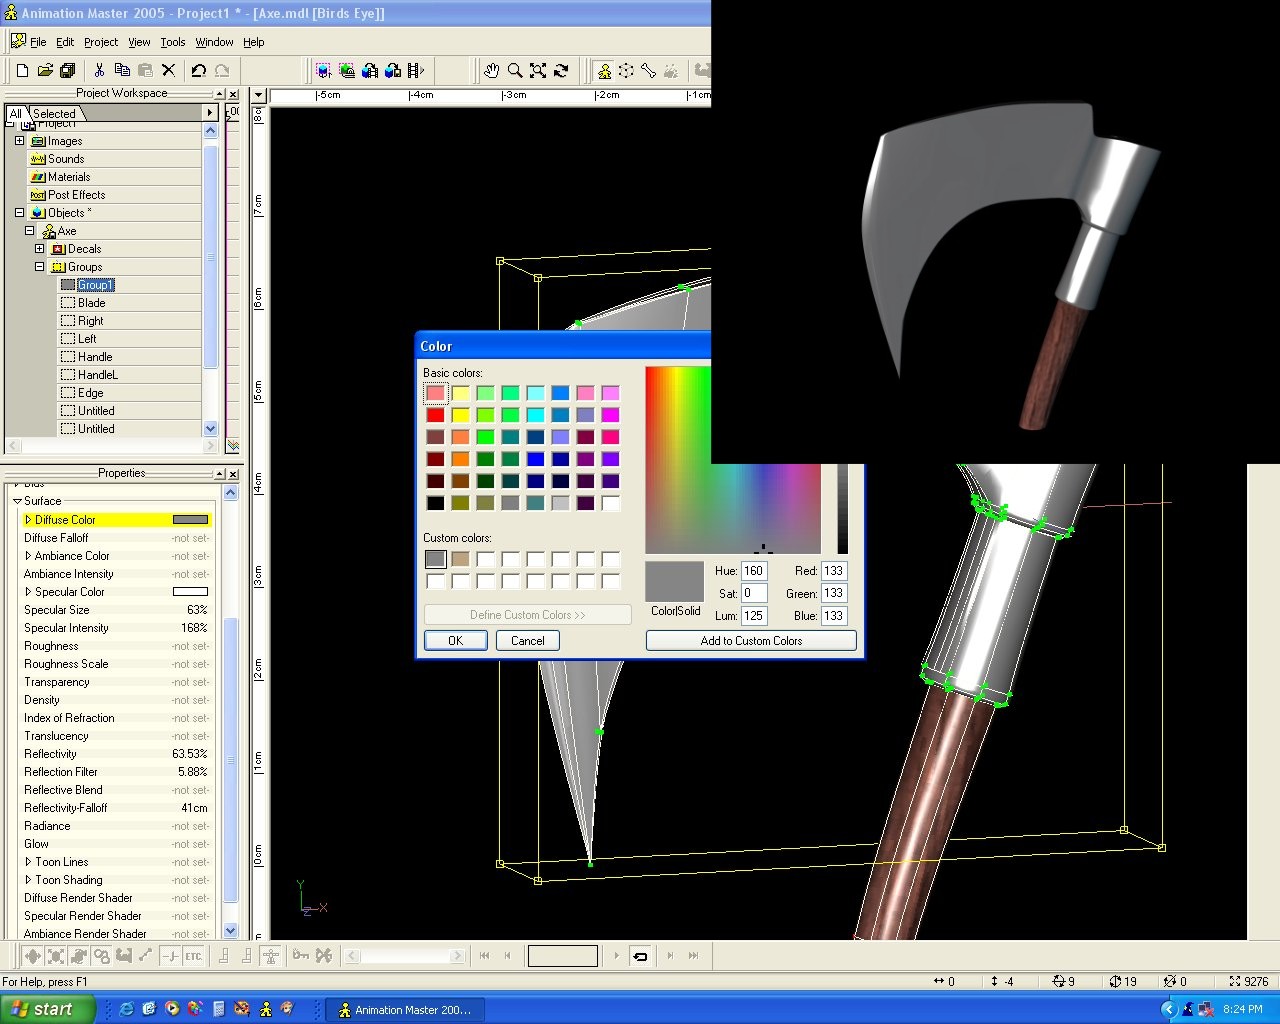
Heres the settings and a render of my axe using diffuse colors and properties settings only. You can play with the settings and get varying result's. Not sure what other settings you should tweak but this was what I came up with playing with the properties. If it needs to be blue you can just use the RGB and HSL you currently have and still look metallic.
-
Ha-Ha, Me too! I don't feel so bad now!
-
Ok one more for the weekend. Still no bumpmap but I'm pretty happy with this. I'll add the same color decal for the rim minus the roughness settings, finish the bumpmap and get rid of the creases at the top and his battle equiptment is done.
-
I gave the horns some shininess just for the effect of the light playing off of them enough to show the bumpmap working. I believe through reading the UV tute I know how to solve the seam problem. Hair still scares me but as with modelling the more I play with it the more comfortable it get's to use. Teeth and eyes next for the horse after I finish the shield. Still gotta get the worn look on the steel and some details on the helmet (rivets etc.) I'll post more soon.
-
Status of the helmet. My first render larger than 1024x768. I think I like big renders.
-
First shot at hair, actually 3rd model with it but first for this one. Not too sure about my settings yet. Slows the pc down a bit so I may try with cookie cuts. I cant seem to get control at the ankles. Zev I'm fixing to add that roto and tweak the legs and raise the head.
-
He replies "yes" in the most envious way!
-
Thank's Charlie. I've been trying to absorb that tute for some time. I was thinking about it as I noticed the horns are almost identicle in shape. I just don't get the part about using the blank image and replacing it with the higher rez version later. I guess I'll have to try it step by step as I am working on it. It would be nice to get all my flattened stamps on one "sheet" like that. And perhaps that will alleviate the stretching where the front and rear decals meet. It was really bad on the 1st stamping (even with the horn straight)but not so bad (but still there and bugging the crap out of me) on the current stamp. Compared to the 1st one I can live with it at a distance but it will prolly force me to get that tute down and rid myself of the "block"I have on it! Best part is I can keep building and do the tute on the completed model.
-
A little better decal and a bent horn.
-
Thanks Zev. That'll be very helpful. And thanks for the comments Joakim I had a feeling you'd like the axe. I still need to dirty up the blade!
-
Thanks Ben! The "material" is actually a decal applied as a bump map front and back. (I'm an idiot when it comes to materials) I used a driftwood texture in PSP and applied some blur to it. That's the part I'm still working on. I want a bit more detail so I'm enhancing the grain to make the valley's deeper. You just bump up the percentage on the properties for the decal once it is applied.I usually save decaling for last but the horns will only be bent from this point so I applied the decal ahead of time and if I am careful, it will still be intact after I complete the modelling. Once the bump is worked out I'll make the color decal and apply it.