goodguy20k
-
Posts
508 -
Joined
-
Last visited
Content Type
Profiles
Forums
Events
Everything posted by goodguy20k
-
THANK YOU THANK YOU THANK YOU! I'm going to install this as soon as possible! (I'm running Alpha, so that might be tomorrow, if I can. Minus TWO time...)
-
Next version of AM? Of version 13? I'm highly tempted to rerig PB...
-
I've done 2001 rigs for a few models now. I tried to do a Squetchy on PB, but wasn't ready for the installation methods (yet). It's really NOT that hard to install a 2001 rig, and fingers are all there. Just find them in the bone hierarchy and unhide them. :-) I've created a few "custom rigs", but mostly in an effort to learn how bones work. Fiddling around with them helps me know how to work with the 2001/Squetchy rigs, and if need be, modify them. Biggest tip: Save multiple copies. One before installation, a few during, and one after.
-
Ignore the v11 incompatibility thingy, as far as I know, it's a bug. I've worked around it just fine. As to doing the deed, I know, there are a lot of options, and it gets confusing, especially your first time out. (But you'll be glad of the extra options when you find you need them. ) Here's the basic sequence of actions: 1) Create a new composite. 2) Import your front image/animation. 3) Import your back image/animation. 3.5) Double click the composite to view it. 4) There's a little plus next to each image/animation, click it. You should see a XXX Color Alpha item under it. 5) Drag the Color Alpha of the background into the composite. This should add a few items, including a Post-Effects folder with the Color Alpha inside it. 6) Right click the Color Alpha under the Post-Effects folder and select "Insert Post Effect"->"Hash Inc"->"Over". This adds a overlay in, bumping the back Color Alpha to be it's child (under it and further right). 7) Drag the Color Alpha of your foreground onto the Over effect. You should see it added below the background Color Alpha. 8) You MIGHT have to "refresh" the view. If you click the blue circle next to the Over effect, it will just draw that effect and it's children. You can then click back on the (now empty) circle next to the Composite title. Save the composite as an animation and you should be good to go!
-
'Tis here.
-
Scratch that, found the tutorial online, too! http://www.hash.com/am2005/Composite/tutorial.htm Yes, you can composite still. (Sorry for not making that clear.) You do it exactly as you mentioned. Render the background, then render the foreground, and stamp together. The reason I mentioned the compositing as I did is that it would save render time. Render 1 frame for the background, instead of many. But this still works! Multi-pass rendering DOES take more time. It also makes it look better, too! (Usually.) For example, most the time I render 1 pass multi-pass (turns off Anti-Aliasing, "blurring the lines", as I like to call it.) But, that gives me sharp edges, right? So if I don't want sharp edges, I either need to alias, or I can add another pass. With the additional pass added to the first, it gives it a slight blur. The more passes, the better the blur. For my scene, if you haven't seen it, take a look, I'm using depth of field. It performs badly with AA, but with Multi-passing on, it looks much better! For what you're doing, I don't think you need multi-pass. For me, PB's fur couldn't live without it.
-
One, do you have your extra's CD? There's a tutorial on compositing on there. (Just found that last night, actually. ) Two, you're not going to get HD quality off of your DVD. DVDs are what, 720X480, for the cinematic ratio? Unless you can burn Blue-ray or HD-DVD discs, and have a player that can read those, you're not going to reach HD res. (720p/I, 1080p/I) VGA connections are the best way to go for viewing HD resolutions, for now. I render at 1080I just so that I have great quality for future format changes. (I.e. When/if I get a Blue-ray/HD-DVD burner/player, I'll be able to burn full res.) Also, when I convert from format to format, I have a LOT of data to work off of, causing less degrading over conversions (if done properly). Still, you need to know what your target format is. If it's regular DVD, why pay for extra render time when you don't/won't need it? The film competition I'm fixin' to enter requires submission on miniDV tapes. That's like a DVD on tape. So, I can either shoot for my target, or shoot for a future target, or even hit somewhere in the middle. Three, if you composite, you won't have to worry about the grass. Just render one grass frame and use it throughout (unless the camera moves. *tries to remember if it does*) Four, awesome looking!
-
That's really well modelled! I prefer the regular render.
-
I think that's because of the fur settings... I've been... Hesitant to tamper with the fur after I finally got it to where it is. But I should adjust the settings.
-
Just thought I'd throw out a frame from one of my renders. What do y'all think of the lighting? C&C greatly welcomed!
-
Write up some quick contracts that lock all work to Dusan, and I'll sign and render for him. That type of work just... NEEDS to be rendered!
-
Fog is done in the camera. Lights can have volumetrics, but I've never used the two together. Once you turn on fog rendering, you should see two additional rectangles on the camera path. These are the thickest points of fog (farthest from the camera), and the thinnest point of fog (nearer to the camera). Move these back and forth to adjust the density. In your bridge scene, you could move the densest slider toward the camera a bit more to make it... Denser.
-
Beautiful! Is that a really well done blend of surface attributes plus great textures? Or something even cooler? Wireframe?
-
Ok, you got me to press my nose up really close to check... Guess not. The left (upper) eye shades like transparency at the top... No shadows are cast, though, so I guess not. Hmm.... What could cast a shadow on the top side like that? Oh... They're inverted. Ha! I get it... I've been on the computer too long... ::Slaps self::
-
Transparent eyeballs?! Wow... I don't wanna know how that happened. Cool work!
-

Need a push in the right direction for a Topographical Map
goodguy20k replied to BrianJG's topic in New Users
We all start with silly questions... And keep it up, too! Well, if you have a image that shows the topological colors, you could simply stamp it as a decal. -
Sweet! Nice work! How'd you do the motion blur? There's blur or glow in there that just... Intriques me, but confuses me. This isn't my wallet either! I never had one! Do now, though... Coolness!
-
"Little Ditty" ... New Animation
goodguy20k replied to wedgeeguy's topic in Work In Progress / Sweatbox
Great work! -
Beautiful method, Glenn! Everything except to the point of rendering out all the frames into a stacked animated displacement map... As you have to drag each frame in one at a time... And then set the activation for each... 8-| But I now have beautiful alpha-ed footprints! Now I just need to put them together. (Oh, and I'm having trouble with the gradient a little... It's coming out VERY white, and very little gray. I keep adjusting the start and end values, but not having a whole lot of luck. If you have any more tips with that, I'd love to hear them. ) Thanks! walk1.mov
-
Very nice! Cool collection! Let's see more work added, man!
-
Yep, actual model up there walking on it. It's actually a double of the "actor", except with different materials applied (for the displacement work). I like the thought of a boolean... Didn't think of that. Please, share all thoughts!
-
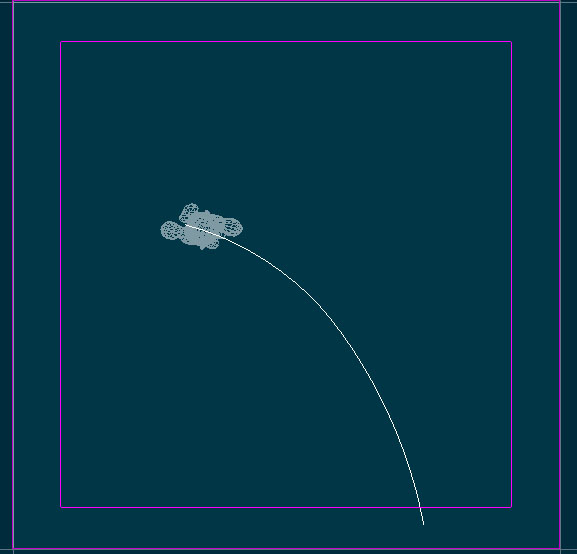
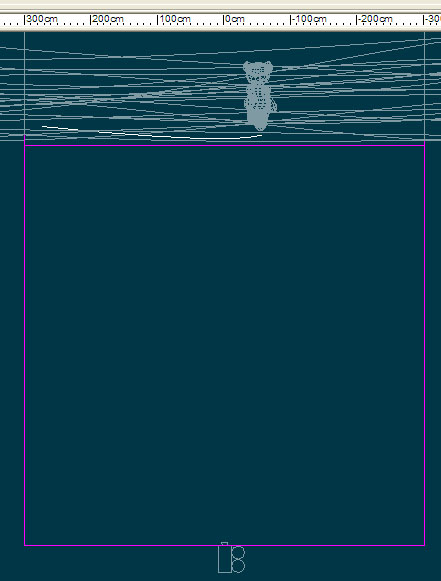
Here's the reason alpha doesn't work. (I think. If I'm wrong, I would be SO glad to hear it! ) I have the camera under the ground mesh, right? That gives me a shot of everything coming through the floor: Problem is, it also sees the floor. The floor blocks it from "seeing" the full alpha, and you get no alpha. Here's the video of the footprints: walk1.mov And yes, the floor is gray to "avoid" displacement. The feet are too gray in the preview, but render black.

-
Ok, I'm trying, but it's not working... Transparency route, that is. Croping, etc., sounds like what I'm going to have to do... I'll see what I can do with GIMP, and see if I can't provide a nice script for everyone. P.S. The reason I require such automation is that I'm talking a LOT of footprints! Like, over 50 per scene, by guestimation. Add that up, and you get a LOT of footprints for the final animation. (Yes, they stay throughout the short. ) I think I calculated over 10,000 footprints by the time this is all said and done...
-
I have the footprint frames... No problem there. (I have it rigged up much like you mentioned.) I'll try the rotoscoping... Haven't played with that much. The problem I have is that the frames are all white, except where the foot protrudes. That means no alpha channel. I'm worried that if I "unhide" one frame on the next, it will cover the previous. Maybe I could crop the frame?
-
Interesting thought, but still back to the, how do you combine them in the first place? (I mean, I could copy and paste from each frame, but... ::shudder: