Rodney
-
Posts
21,649 -
Joined
-
Last visited
-
Days Won
119
Content Type
Profiles
Forums
Events
Everything posted by Rodney
-
Yes, definitely ping jason: jason@hash.com He was out SuperBowling at the time you put in your customer support query. (He hasn't been seen in the wild since so... hope he is recovering.)
-
I'm posting this mainly as a reminder to follow up on this. Attached is a comparison of two sound files. On the bottom, the original "I've got a Secret" audio and (above) a quickly edited version that accomplishes a few things: 1) Removal of unwanted noise 2) Adjusted timing 3) Adjusted volume* 4) Separation, removal of sound/sound bytes on a frame by frame basis 5) Keyframe and Spline-based refinement (Free!) *Appeared to work well but need more testing. Not yet explored in any depth but available for use: - Automatic Time Stretching (All or by Selection) - Integration with Papagayo and Magpie Pro Also attached are the original and updated wav files. asecret_old.wav asecret_new.wav

-
Impressive results. That looks a lot like hand drawn outlining and shading.
-

Generating proper normal maps from any surface
Rodney replied to R Reynolds's topic in Animation:Master
Simon, There are a lot of resources but here's one that covers normal maps while comparing to other mapping techniques (bump, displacement) although primarily for gaming: https://www.youtube.com/watch?v=SQrHkKnSBcA Normals indicate the direction of a surface. Normal maps that capture this directional information adjusting the surface characteristics of an object at render time. This data can then generate surface and lighting effects. In this way a flat 2D plane can appear to have shape/depth in 3D space because of how normal maps adjust color and shading. Normal Maps can be rendered directly in A:M by using the Normal Buffer. While not required, using a image format like .EXR can be beneficial because it can store data that other image formats cannot. Technical aside: Normal maps can be used with A:M particle hair to orient entire areas and even individual strands in desired directions. In Rodger's case he mostly uses Normal Maps to gain additional definition and detail that would take a considerable amount of splines to display. A metal panel with thousands of rivets might be a very dense mesh if every rivet was modeled but if each of the rivets is created via a Normal Map then all thousand rivets can be displayed on a single patch. -
Ah! Thanks for that! I will try to digest that and put it to good use. S'funny, I was just going through your list of video tutorials, posts and experimentations and didn't see that one.
-
Because this may need a little research and I don't want to waste live-Live Answer Time-time resources I'm posting this here. I may ask this or related question during a future sessions unless I stumble upon proper solutions before then. The setup: Randomizing an initial setting Given a model placed in a choreography that moves from left to right (in simplest manner possible for demo purposes): How do we setup the model so it will appear at a random height each time the cycle repeats? - The model should begin at the random (seeded) height then move at that same height/trajectory horizontally - When the cycle begins again the model should appear at a new random height and move horizontally at that height. Note: I attempt to use an expression for the random height as that is the only way I know to introduce randomness. For illustrative purpose success might be demonstrated by a Gopher (single model) who randomly pops its head up through a number of holes in the ground; appearing in a random hole each time the animation cycles. This would be easy enough to animate manually but for our purpose can narrow the scope of experimentation. I am guessing that rather than see this randomness reset 'live' with each cycle it will be best to extend the length of the sequence to account for the number of 'random' appearances and then key the random element... but that isn't the imagined 'best case' scenario. Need a different (perhaps slightly simpler) scenario to consider? How about a bullet casing (single model) that randomly appears at the ejection port of a gun and spins outward from there making long cycles of the animation appear to eject dozens/hundreds of bullet casings outward. I realize here we may be approaching a solution where particle images (displaying a sequence of images... the bullet spinning) might work well. In the case (pun intended) of the bullets, the origin/location of initial appearance of the casing is only slightly offset/random. This randomness could easily be achieved by animating the location of the bullet/model at the start of each cycle. This forms an acceptable solution, i.e. hey, works for me! At any rate, perhaps something to consider.
-
Nice!!! I think that may be the version I saw demo'd at Las Vegas (NAB computer show) by the Hash Inc crew that convinced me that I wanted A:M. Grabbed a demo video (VHS) instead and watched and watched that thing until it almost fell apart.. It'd be another four/five years before I actually bought the program which sounds about right ('98). .
-
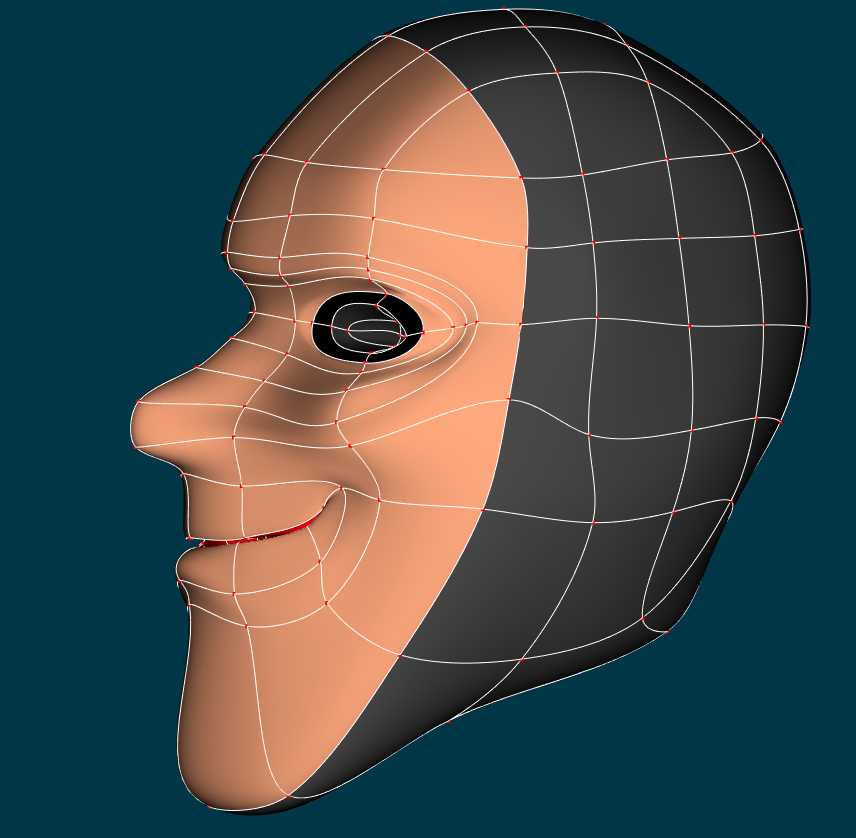
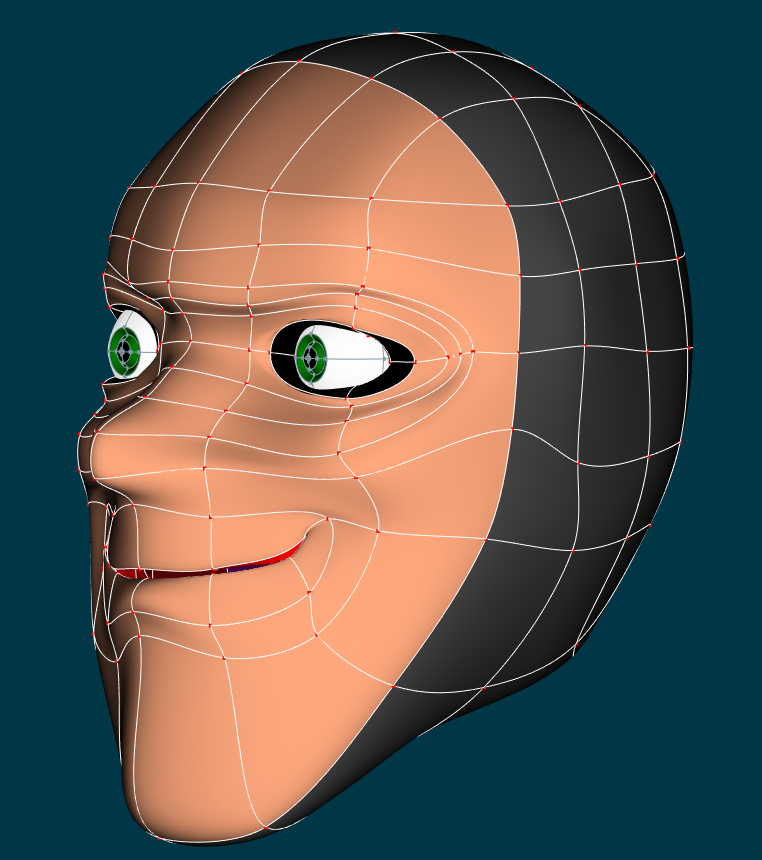
Done. Link to this topic posted in the CQ Models section. I did a little stop-mo-type animation with the face I built from the template. Wasn't sure it was worth posting but... it was a bit of fun creating so... here it is.
-
hehe. That definitely reads as Monty Python.
-
Gambate kudasai!
-
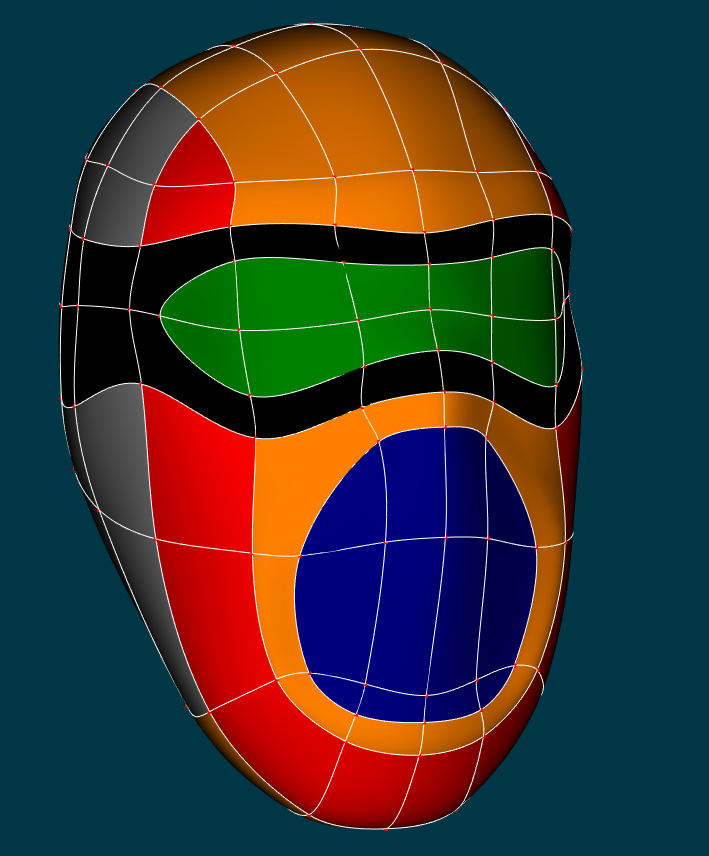
If we keep pressing in that general direction we might get something like this: (note: this is not unlike the Malo-method of subdivision)
-
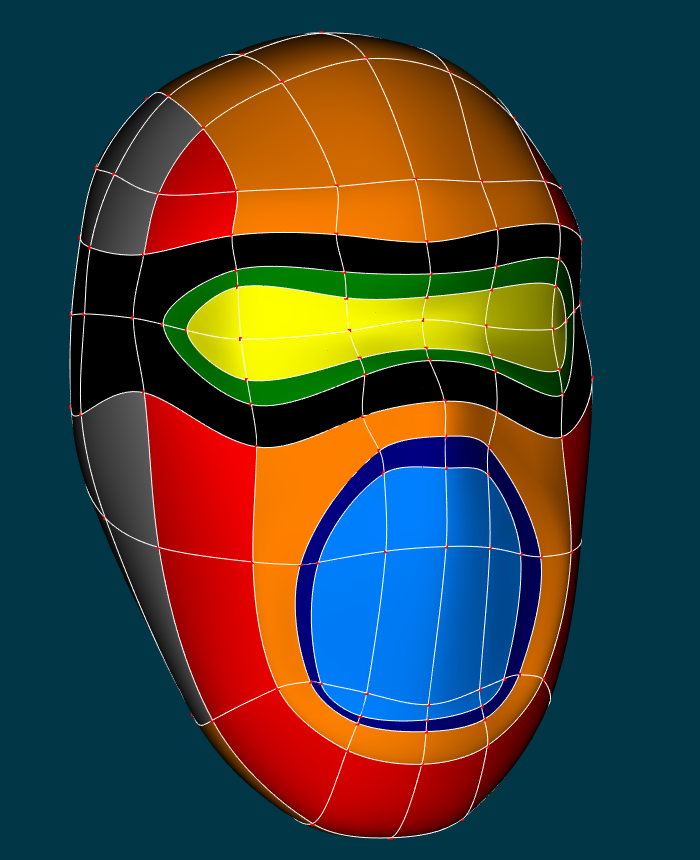
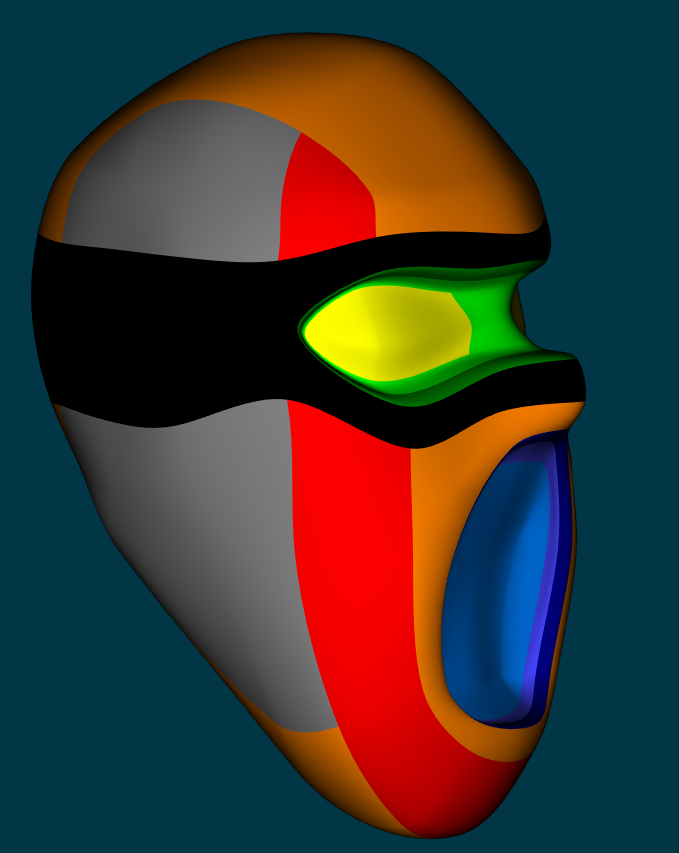
Here's a quick down and dirty A:M version of the OBJ. Added some color to differentiate some of the areas. Added a slightly more detailed mesh. And a third... just for the fun of it. HeadTemplate.mdl HeadTemplate2.mdl HeadTemplate3.mdl
-
Junyasan. Hagemamashite dozo yoroshiku! (Yes, I believe this is the first time I've officially met you) It's great to have you here in the forum. You may want to start a topic for your interests so that others can dig deep into information and provide feedback and examples. The one thing that pops into my head with regard to Surface Constraints is that we need a Bone to point at the object that exists on the opposite side of the surface.
-
I'm attaching a proof of concept that has a simple model with one light inside it. A Null is present (but separate) in the Choreography and the Light is then constrained to Aim At that Null. The Null could also be part of the Model with the Light but I find keeping the target/null separate sometimes helps. I will guess that you are planning to create an array of lights as seen at many sports arenas and race tracks. One of the nice things about having our lights as part of the model is that we don't have to constrain the individual lights to the target/null. We can constrain (Aim At) the entire model and when the model turns all the lights go with it. ModelwLight.prj
-
To quote myself: This will automatically constrain the light to the model because the light *is* part of the model. Wherever the model goes the light then follows. Everything I'm saying here you can do with the light separate from the model too, you just have to Right Click and Constrain to the model *in a pose or Action*. If you add the light to the model... no constraint required... except for... Aiming a light that is part of a model is similar to aiming one that is separate. You could just select and rotate the light... but nah... that's no fun. It'd be ideal to be able to place a 'x' on the point you want the light to aim at and then boom! The light follows that 'x' wherever you put it. This is usually accomplished by using a Null but it could be just about anything; another model for instance. The Null method is useful because it gives us a nice crosshair-type controller to grab and move to wherever we want. I will guess that you will want a Klieg light to act as a spotlight but given the bright lights at a racetrack you might want to use a combination of things including turning up the ambiance percentage of the light fixture's surface and perhaps even turning glow on (the power and radius of glow is controlled in the Choreography's main properties. The secret to getting the type of light you want is to go back in to the Light's properties and change the type to Klieg, Sun or Bulb as desired. I'll try to put together a short demo video of the two primary approaches. I'll add: When testing lights (in a Chor or Action) I recommend.turning off any lights that are present and working with one light at a time until you get the lighting effect you want for that light, then test it combined with another light... then another... until you've refined all your lights. .
-
Looking good Steve. It's great to see you back in action!
-
There is so much that could be said on this subject but I'm not sure what would be gained in the process outside of a better understanding of how people make decisions and how businesses work, for better or worse. This isn't to say I'm not interested! I just wrote a few paragraphs on the subject before deciding it's probably best for me not to go there. My thoughts and opinions would surely be misconstrued especially as my effort to be brief would miss the mark. I do often think of the influence A:M and its users have had on the industry and other software, most of it unacknowledged, marginalized and even usurped. Not that such has been exclusively a one way flow of ideas and innovations. A:M has also gained much by interpreting the world of graphics through its own unique approach. This is somewhat on topic to your thoughts relating to undisclosed 'proprietary software'. I'm a fan of Disney but recognize the underlying tragedy (can I use that word?) in the Disney purchase and jettison of Avalanche; Disney gained what they needed and once they had it moved on. The results of that gain can be seen in their latest works. This of course isn't to say Disney uses A:M... they certainly don't in any official capacity... but rather that the software they do use has undeniably benefited through it.
-
Good news Rodger. According to A:M Reports this reflectivity problem (report: #6781) has been addressed and is closed. The fix should be coming your way as of the next release.
-
Don't forget that we can render both Toon and nonToon characters/objects at the same time. I'll have to refresh my memory but I believe the trick is to set the value to zero in the toon line settings so that the Toon renderer renders standard style rendering. Then set your toon settings in the Model's surface (or material) and leave the Camera's toon setting on but otherwise unchanged. In this way you might be able to get away with no compositing.
-
Nice! That definitely gives the feel for racing.
-
You can and that may be the most common approach. My preferred approach is to add the lights to the model itself. When adding lights to a model the lights are treated as Bones and therefore must go into Bones Mode in order to adjust their position and orientation via mouse. The alternative would be to adjust the position and orientation by typing in the values via the PWS. For front lights it can be useful, in the same way as for the eyes of a character to place a Null in front of the vehicle and then point the Lights at that Null. Then if the lights need to be adjusted on the fly (say for artistic purposes) the Null can be moved and the lights will follow. I prefer to have the lights be part of the model because they will then automatically move with the model.
-
Here's another thought... Are you rendering out to a format like EXR first to gain the additional precision of that format? Once rendered the image (container) can be selected in the PWS and re-saved as another format via Right Click>Save As Animation (even if it's only one still image). I'm not sure this will make any difference but it might. Unrelated aside: To gain the look of black and white photo or film you might try the grayscale GPU post effect.
-
Avalanche Software that was shuttered by Disney after they closed their gaming divisions is back in business again under the Warner Brothers banner. Interestingly enough, their first major project is a Disney property; the 'Cars 3' game. http://www.polygon.com/2017/1/24/14371888/cars-3-video-game-avalanche-software-warner-bros I'm not surprised. Their breadth of experience and talent.is substantial and has been since their early days of using Animation:Master. The downside? If Avalanche at Disney had 300 employees they now have approx. 100 and while it can be assumed that some of the 200 stayed at Disney in some capacity most had to seek other opportunities.
-
I hope you put a note in the v19 listings (i.e. created a new report for v19) I doubt v17 get much attention any more. I don't see a report for v19 related to your issue so will guess not. It doesn't appear that older reports are editable to bring them forward (at least not with our permissions). As such I would suggest creating a new report for v19 that refers to the old. I was going to create a report on your behalf but I'm not entirely sure I'd be reporting it correctly. I'll see what I can do in referring 6493 for v17. Update: Reported on your behalf as #6781. Added: I'm curious about your surface's specularity settings as specularity size has some control over reflectivity. In other words (I think), make sure your specularity size is not zero. Here's the write up from Specularity in File Info Properties: