Rodney
-
Posts
21,649 -
Joined
-
Last visited
-
Days Won
119
Content Type
Profiles
Forums
Events
Everything posted by Rodney
-
Looking good Jali! Keep testing!
-
The entire project file has been added to the first post. I hope you'll check it out just for the fun ride. This project (circa v8.5) demonstrates how long A:M has been at the top of it's game and especially how splines and patches can generate shorts and feature films while maintaining small file sizes.. Attached is exactly what the user sees/gets with the project file. (Although the user does have to set the Global Ambiance color of the Chor to dark grey in order to get this particular toon style)

-
Next up is the Goof and his race car. It's interesting that recently I was thinking about how characters and props, or several characters, might work well as part of the same model. This is an example of that approach. I believe the author(s) of the project were some of the folks that worked for Saffire/Avalanche. Assuming that is the case I'd say... no wonder they ended up at Disney. Drive.zip
-
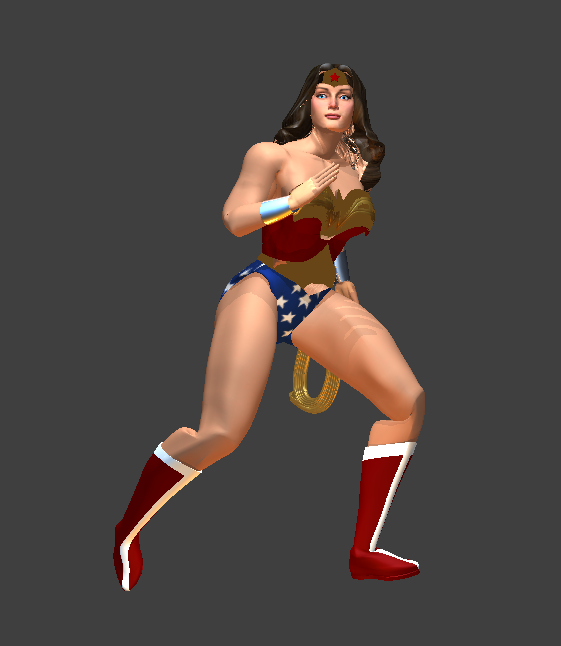
From the ever talented Jim Talbot... With her feature film about to be released into theaters it seems appropriate to get this model into circulation. WonderWoman_19.mdl WonderWoman.zip
-
Here's an old classic model from the Extras that I'm presently dusting off as I gear up for the A:M Exchange/Extras update I am reminded of why it can take time to update and document older models. Updating can be difficult. Documentation nigh impossible. With regard to the latter, please feel free to use this space to document any related information, stories of yore and observations of the character used. I once explored something similar with Keekat and got a whole lot of interesting information regarding the origin, character, rig, people and project involved. Jim_19.mdl
-
Tis the season to once again lament the loss of HAMR. This morning I've been playing with the standalone HAMR viewer and it still works amazingly wel... even with basic projects created in v19 Beta2. What a wonderful effort HAMR was... so far ahead of it's time. Aside: As for you Mac users that use Bootcamp to run PC programs... I'd love to know if you can run the HAMRviewer application. You should be able to. I still have high hopes that some of the code might someday be released so a standalone viewer for A:M files might be more readily distributed. In the meantime I will still explore what there is to explore via the viewer.
-
Darktrees haven't worked on the Mac platform for many years but they still work (on the PC). Here's a quick verification rendered in v19Beta2.
-
Here's a run with the ground plane having a big hole pushed out of it (and using a hull). Lest you think I simulated with the characters present... I cheated. I simulated with cubes like the purple one in the shot and then swapped out their shortcuts for the characters. There were a few pass throughs of arms and such so I just rotated the models slightly to alleviate that. I added a tile image to the ground/grid to show the density I used... I don't think we need that dense a mesh but... that's what I used.
-
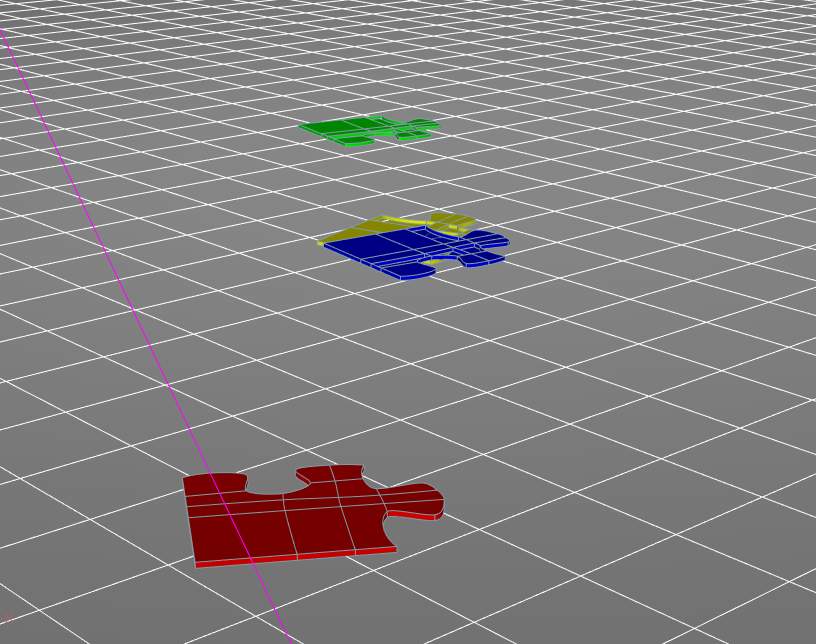
Yes, Matt's suggestion to create a denser ground plane should work. I took your project, added a 100x100 grid to the ground model (rotating it so that I could see it better), removed simulation data and then launched Bullet. Everything appears to work as required. Attached image is of final resting of puzzle pieces using your Project just with an additional grid added to the Ground model.
-
Recommend you ping jason@hash.com and let him know you put in a request to orders@hash.com
-
Here's a quick attempt at the Human Torch. I confess that I didn't think it'd turn out this good. I was expecting an unrecognizable mess. From start to finish about 30 minutes work with a couple 'errors' turning out to work out to be strengths. The particle fire is created using a single tiny orange rectangle.
-
And the obligatory fight between friends...
-
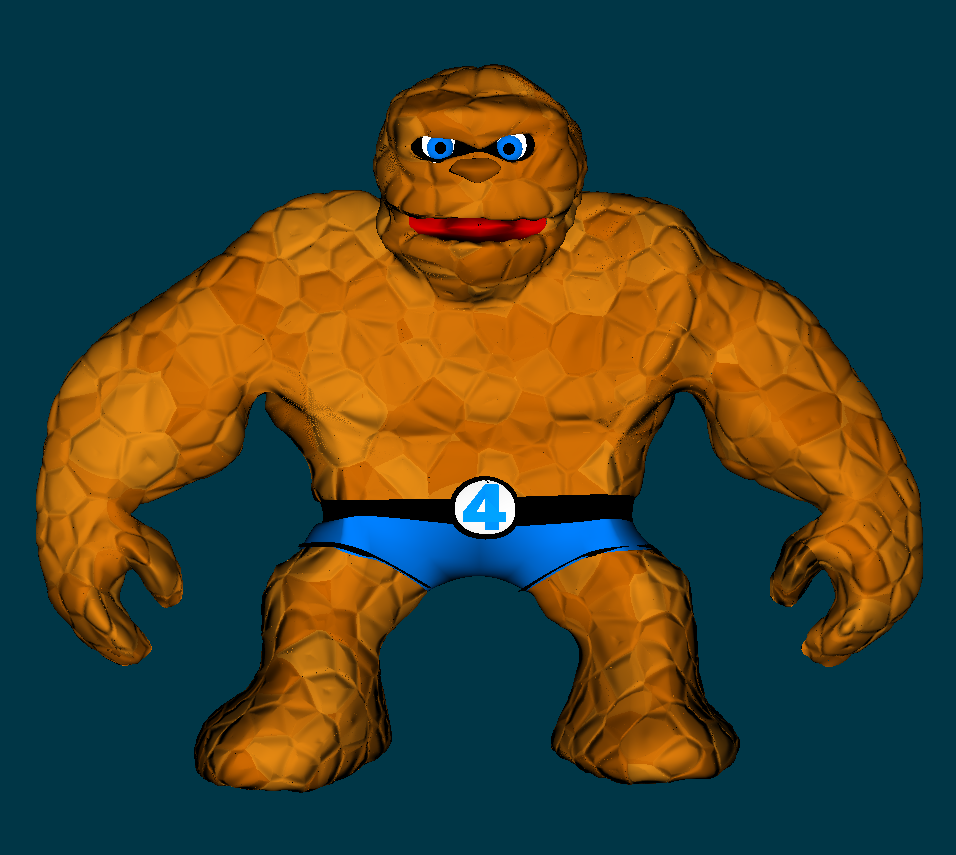
Last night I found myself contemplating that storyline a little more and even did a few quick pen doodles on paper to capture a few character moments (cues that might jog my memory if I ever decided to explore some more). Tonight I decided to see if I could put together a quick version of Aunt Petunia's favorite nephew; Benjamin Grimm: The rocks/plates were a hastily tossed in Cell Turb material. (You don't want to see this guy from side view but it looks a little like him from front view)
-
I just realized that contraption looks (somewhat) like a duck. Although why Mr. Fantastic is running forward to save a mecha-duck is unknown to me. If Mr. F's eyes were looking backward and we saw Galactus in a bath towel giving chase... that might explain something. (or not) Perhaps it's a Jack and the Beanstalk type story with the role of Jack being played by the fabulous four. And the duck... in the role of the golden goose. Hmmm.... something weird going on with the random ducks that sneak their way into my 3d doodles.
-
Thanks David! I definitely need to look into that Standalone Face rig.
-
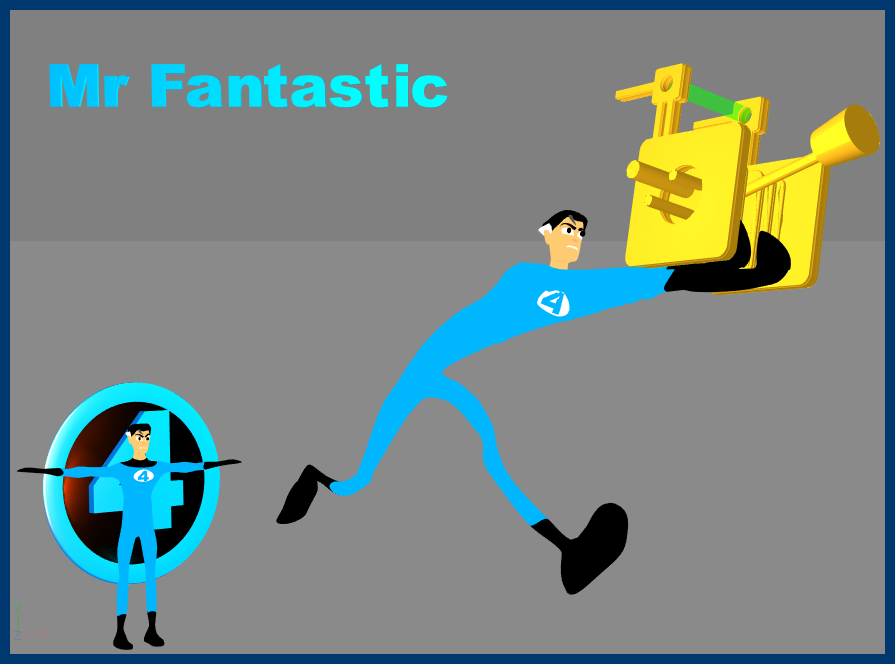
Random Mr. Fantastic I started modeling random legs (with no real target to hit) and the color I applied happened to be blue... That made me start to move in the direction of Fantastic Four characters. I was working my way from bottom to top and I got tired of the model about the time I got to the chest... but I'm glad I didn't give up at that point because those splines then started to turn into Mr. Fantastic and the little details kept me interested. Needs to look at least a little like Reed Richards... needs the chest logo.... needs the signature hair... hmmm... need to make sure he can stretch.... pose him in a Chor.... what the heck is he doing... need some kind of Kirby contraption.... how about a corner logo showing the unposed character... needs some kind of title/text.... Ultimate Nullifier thingy can be made with SVG importer with pieces assembled, modified and such in A:M. I didn't bother to model the hands. All in all a fun foray into trying to capture the sense of a character from memory. Edit: Added the Invisible Girl but shes a bit hard to see... 'cause she's invisible.
-
Nice. In first looking at your image I thought that was real equipment!
-
Thanks! I don't use volumetrics very often but I like them! I need to spend some time with them so I better understand how to use them. Up next... I revisited an old idea that I couldn't get to work a long time ago related to render passes and... it worked quite well. The basic idea: Create controllers (for this test I created Background, Middleground and Foreground controllers) Import models into Choreography and assign them to a controller (this is based on overlap... background objects will almost always have something that lies in front, middle ground objects will often have something in front of them and foreground objects rarely will have anything in front of them. Objects within each 'zone' can freely overlap. Turn controllers on/off in order to render out passes with nothing (only backdrop/camera color/alpha channel... as applicable), background zone only, background and middle ground zone only, all objects, middleground objects only and foreground objects only. The controllers use expressions to drive the Active property of models in a Chor. A handy trick to editing placement of objects in the scene according to their 'zones' is to move to a frame where the models are visible, turn off Animate Mode and adjust the models to get proper overlap over or behind objects in other zones. Then turn Animate Mode back on. In the animated screen shot (see attached) the colored squares in the lower left corner are the controllers. This relates a little to tests automating crowd control. Another related idea is to have objects/characters move out of the way automatically as another object/character approaches (i.e. objects/characters avoid a controller). I think that is what originally got me thinking about this approach to render passes when I saw Hash Inc's Tech Talk about dynamic objects. Steffen does have a Render Passes plugin that can assist in this manner but I don't think it directly manipulates transparency and doesn't use the Active property of models. In prior versions I think I set up the expression wrong or A:M wouldn't save the expression once created using the Active property (I can't quite recall). But it works great now!
-
Ah, understand! I ran across an old dongle for A:M the other day and it made me curious which version it was for as it's been so long ago that I've forgotten. It *could* be for v13 but I'm not sure. I need to investigate. I remember I purchased the dongle to get access to Netrender... which every A:M User gets these days. It certainly could be circa v13. Best of luck with your attempt to get up and running with bootcamp. From what I've heard that should work well for you.
-
Yet another reason to leave v13 behind. I'm glad we don't need a CD/DVD drive any more.
-
I"m hardly in a position to question that and yet... If you got that recommendation from Dylan he may be slightly influenced by someone who suggested v13 was the last release Martin wrote code on. Theoretically that alone would make it better... automatically! BUT there have been so many useful and production worthy improvements since v13 that I wouldn't want to use it instead of current releases. Not by any stretch of the imagination. Now, that does not invalidate the theory that v13 might be the most stable for production but there is surely a long list of criteria that would need to be checked off in order to make it true. I could certainly think of many reason why v13 would be on or near the top of the list and I can think of a few that have little to do with how stable the release is. I guess what I'm trying to say is that there are a lot of variables to consider but the statement alone suggests that a few definitions might need to be set and additional details examined before I'd even begin to consider v13 a more reliable release that those that came later built upon v13's very substantial foundation. But you've definitely got me curious. One question that immediately springs to mind: Is there even a 64bit version of v13? If not then.... 'tis mothballs for v13... and if 'yes' then the jury is still out with no estimate of time for release of a verdict. My memory seems to set the 64bit release circa v15. Hopefully someone in the know can confirm. (or I can stop being lazy and look it up) Update: It looks to me like v16 was the first to have 64bit so this makes me think v17g+ should be a very good candidate to start production testing (i.e. use as a yardstick to measure stablity and production readiness from). I will assume everything is plus or minus (more stable/less stable... more feature rich/less feature rich... faster/slower... etc. from that point of reference. Disclaimer: All my theorizing concerns only the PC as I don't have any reference point to draw informed opinion from for the Mac. One reference point: the only addition to v17g+ was to get v17g working on Mavericks when it was first released. That's the reason the 'plus' was added to the release. Of course, the most important thing will be how well A:M works for you on your current system(s). I just hate to see people miss out on six or more years of excellent productivity enhancements. That sounds like a great idea. .
-
Very interesting. It's nice to see your approach... and that approach looks like it's is working great.
-
There is a Cap Wizard but it's pretty basic and... out of circulation, although it is posted somewhere in the forum. I believe the author is/was Circus Media. A little more esoteric... Steffen created the Connect Plugin after I had posted my thoughts on drawing shapes in Coreldraw and then bring them into A:M (separately) but the magically combining them in A:M. The Connect plugin does a good job (it basically creates a CP for every place two spline cross) but it doesn't account for bias/curvature of splines. I suppose in a perfect world it might average them (?). I dunno. The Connect plugin comes standard with A:M. If you want to test out the Cap Wizard and we can't hunt it down in the forum let me know and I'll post it again. And... for those that like to spline strangely... there is yet another way to automatically close/cap splines. The method takes advantage of a quirk related to 5 point patches Normally... a five point patch cannot be created if all the CPs belong to the same spline BUT... if A:M has been used to create that string of 5 CPs then it can be closed via 5 point patch even if all the CPs are on the same spline. I use this method to cap the ends of cylinders (that are lathed with 5 cross sections and create 5 CP circles... that can be reshaped into other shapes... crazy stuff those 5 point patches. The downside is that decals and patch images often don't play nice with 5 point patches so some care needs to be taken to account for surfaces. THE TRICK to closing a spline that has 5 points on it is to use the comma key instead of the / key. Both select all the CPs but only the comma key method allows A:M to recognize the CPs as a valid candidate for a 5 point patch. Using the / key or selecting everything with the mouse often works too but it works 99.9999% of the time if the comma key is used. And... because we have a plugin that can resample splines we can resample a spline that has less or more than 5 CPs and create a 'cap' with 5 CPs that can be closed as a valid patch. This is pretty esoteric stuff so not many people are interested But if you want a demo of the methodology? Just ask and I'll put something together. And to keep this on topic--- related to Terry's post-- Here's me playing with the model he posted (basically just widening the shape to create depth and killing some splines (with K key)): Edit: Uploaded the model (which is basically just Terry's model). Test Model A 1a.mdl
-
I didn't quite follow all of that video and I assume the primary issue is that you cant get OpenGL to run (without failing). Assuming you can get OpenGL to run... one thing I would not do is switch back and forth between drivers with a project open and without a restart. In other words, start A:M, change Real Time Driver setting, close out of A:M and then restart. This closing and reopening is needed to close the loop and seat the change to the other driver. If we change the driver and then keep on working we (even PC users) risk embracing the desktop.
-
Nice test! One thing to consider when using the AI and SVG importers and going for precision is importing only the outline and then working from that. The reason for this is that the importers don't know where to optimally place CPs or connect splines**. By working with the outline we can add and move CPs around, extrude and finish the model optimally. An additional reason working from the outline can be ideal is that the drawing brought into A:M via the plugin is in 2D so it can't anticipate how that will project into depth (3D). So the outline gives the precision of the shape from one dimension and the artist provides the rest. Added: An alternative would be to bring in outlines from each view (top, bottom, right, left, front and back) but that makes for a whole lot of work prior to import that can likely be done just as easy if not easier inside of A:M as modelers work their magic.. The outline can be further optimized using the Resample Spline plugin but CPs are evenly spaced using the plugin and that can result in rounded corners that must be manually adjusted or inbetweened by inserting a CP or adjusting the spline's bias. **I should have said the importer doesn't know how to change the location of CPs to optimize the resulting geometry. It simply works with the location of the CPs from the bezier curves which may or may not be placed optimally. .