Search the Community
Showing results for 'snap to surface'.
-

HAIR - No specular effects [solved-ish]
robcat2075 replied to Douglas Ferrin's topic in A:M Rendering
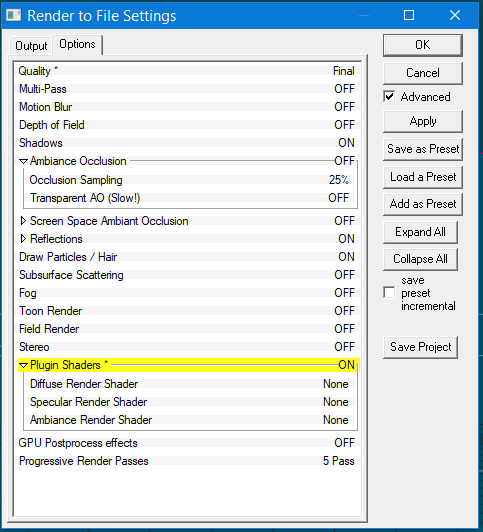
Doug, In the Render settings you just turn "Plug in Shaders" ON, you don't set any particular shader. The two hair shaders only appear as options in the Surface Properties of a Hair Emitter and must be set there.
-
HAIR - No specular effects [solved-ish]
robcat2075 replied to Douglas Ferrin's topic in A:M Rendering
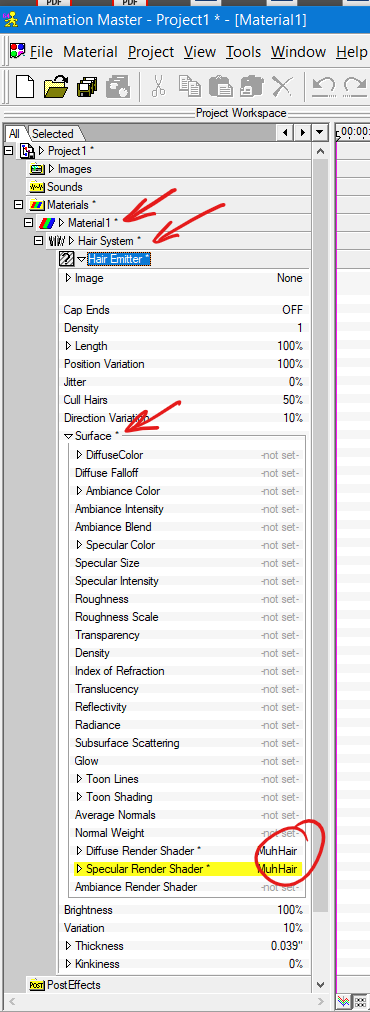
It's mentioned in this post... It's something you choose in Surface>Specual Render Shader -
This does show up in final render but haven't tried rendering out a whole sequence. This model is being saved to disk and the spacebar has no effect. This happens only in Action or Chor (haven't seen it in model mode) and seems to happen only after scrubbing/tweaking skeletal movement a lot. Seems ok after AM restart but will re-surface randomly.
-
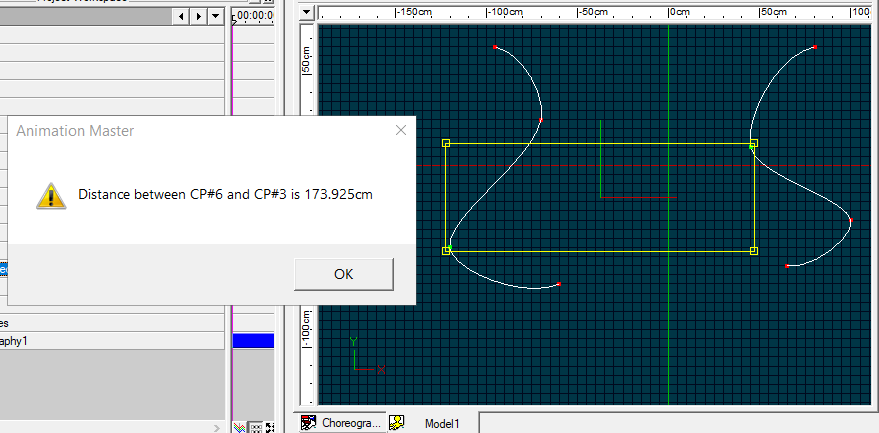
1-2-3... X-Y-Z 4... current spline tangent direction 5... tangent perpendicular to current spline tangent direction 6... perpendicular to patch surface
-
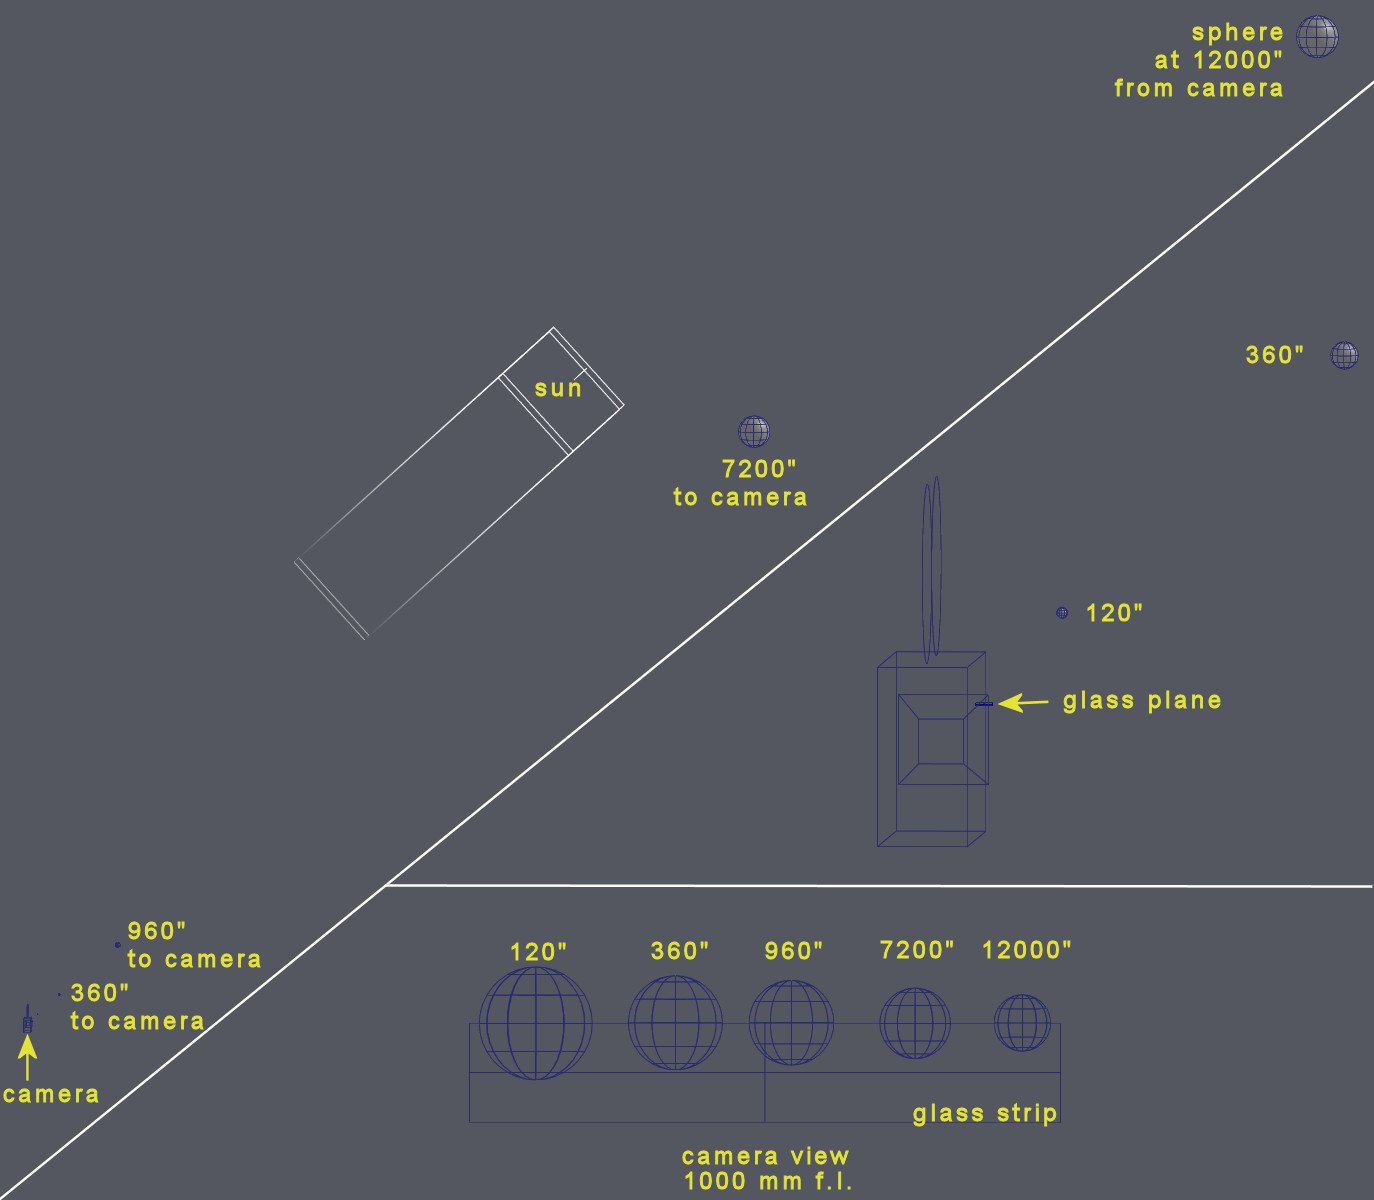
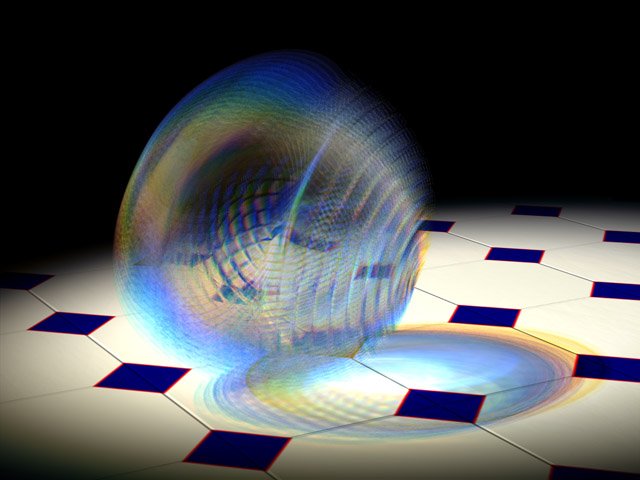
I've discovered a progressive render issue in v19.0p. While it's not a show stopper it's been annoying me for a long time and I've finally found the root cause. This image is an overview of the test chor. There's a camera with a 1000mm lens looking at five instances of a grey reference sphere, each at a different distance from the camera. The sphere instances are scaled in the chor as they get closer to the camera so that from the camera view they don't change too much in image size. They are positioned so the camera can see all five spheres side by side. Between the camera and the closest sphere is a slightly tinted, four patch plane that is a "glass sheet" with a transparency of 80%. It is positioned so that the camera only sees the lower half of the spheres through it. A simple sun light shines down from above and the chor has global ambience turned on with a white colour; intensity = 80% and occlusion = 100%. This image is the results of 5 pass prog renders and 9 pass full screen renders. The first two sphere rows are with no glass in the way while the last two rows have the glass turned on. For prog. renders through a transparent surface something strange happens as the surface gets farther from the camera. If you turn off ambience and leave in the glass slide this issue also goes away. Although it always happens in progressive renders, I have seen it occasionally in 9 pass full screen renders of an 80Mb project chor. So if Stefan does try to fix this issue he may want to look at both types of screen rendering. amb_occl_thru_glass_distant_embed.prj
-
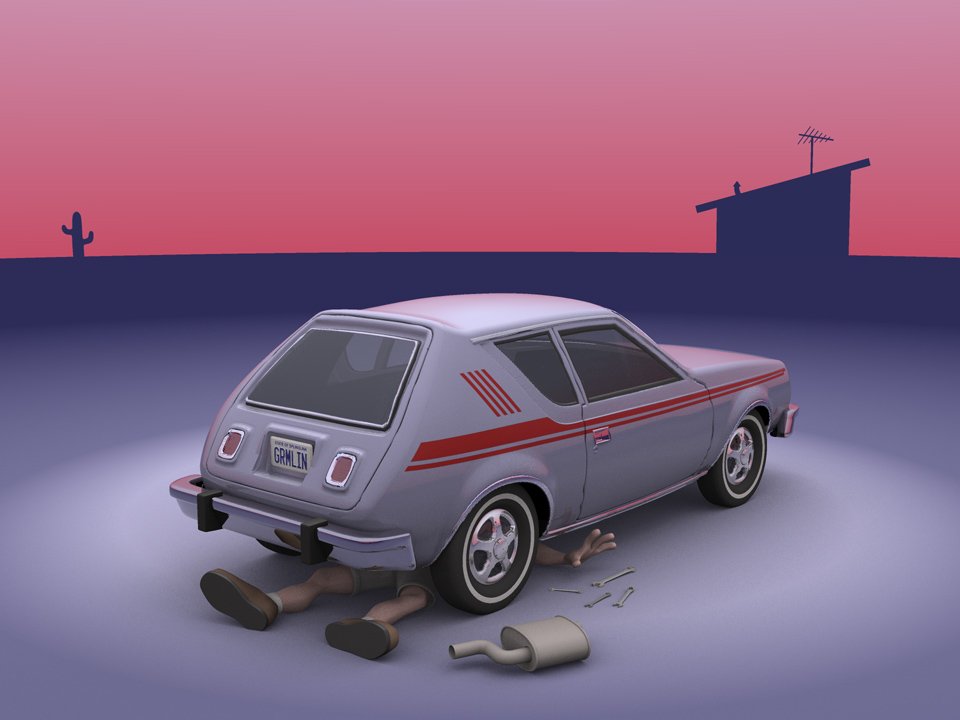
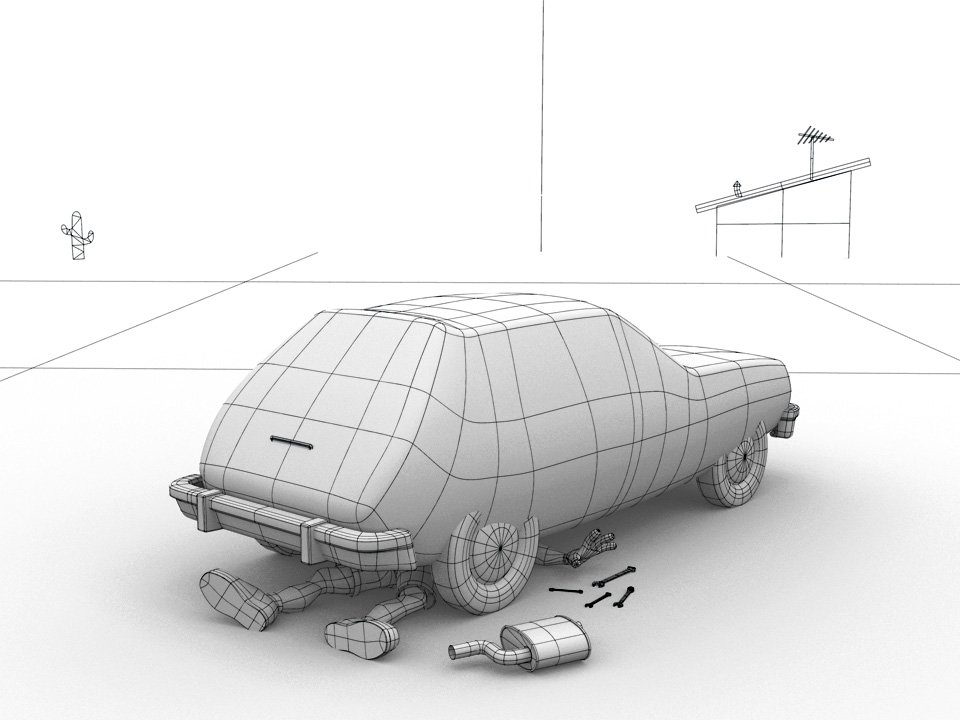
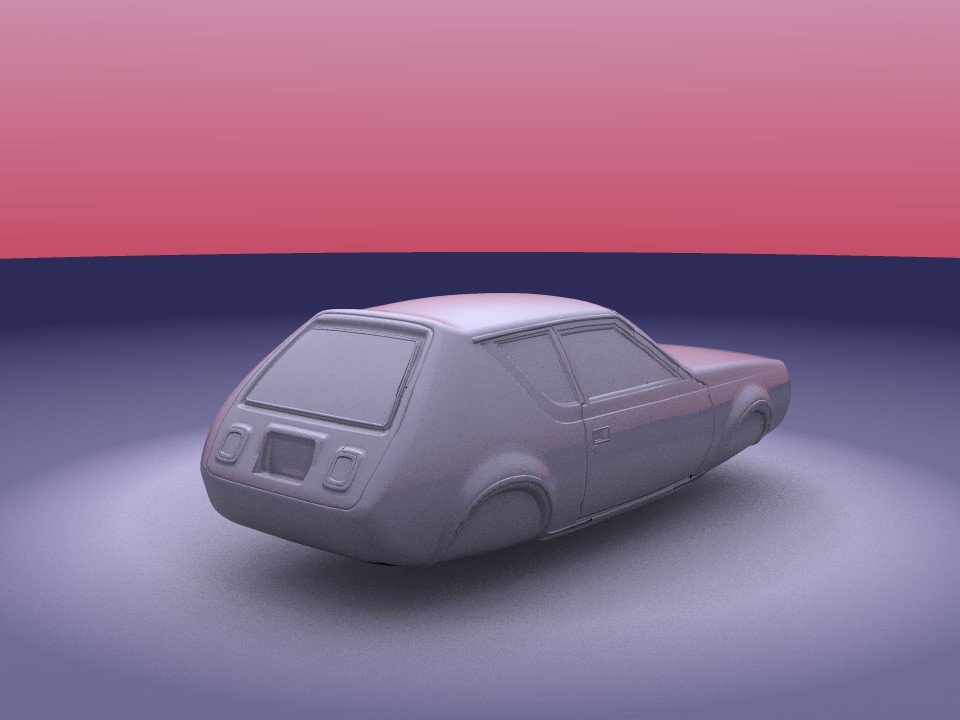
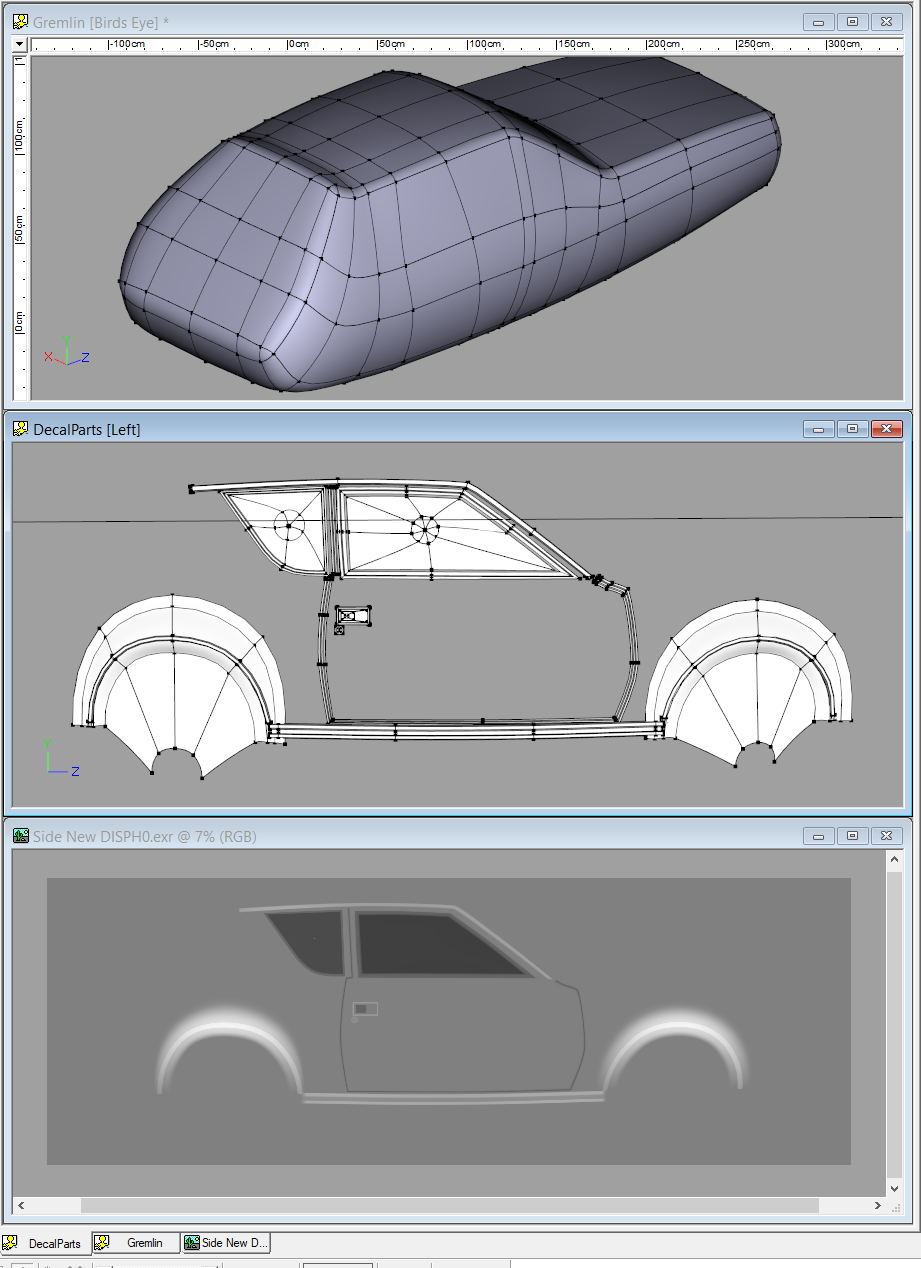
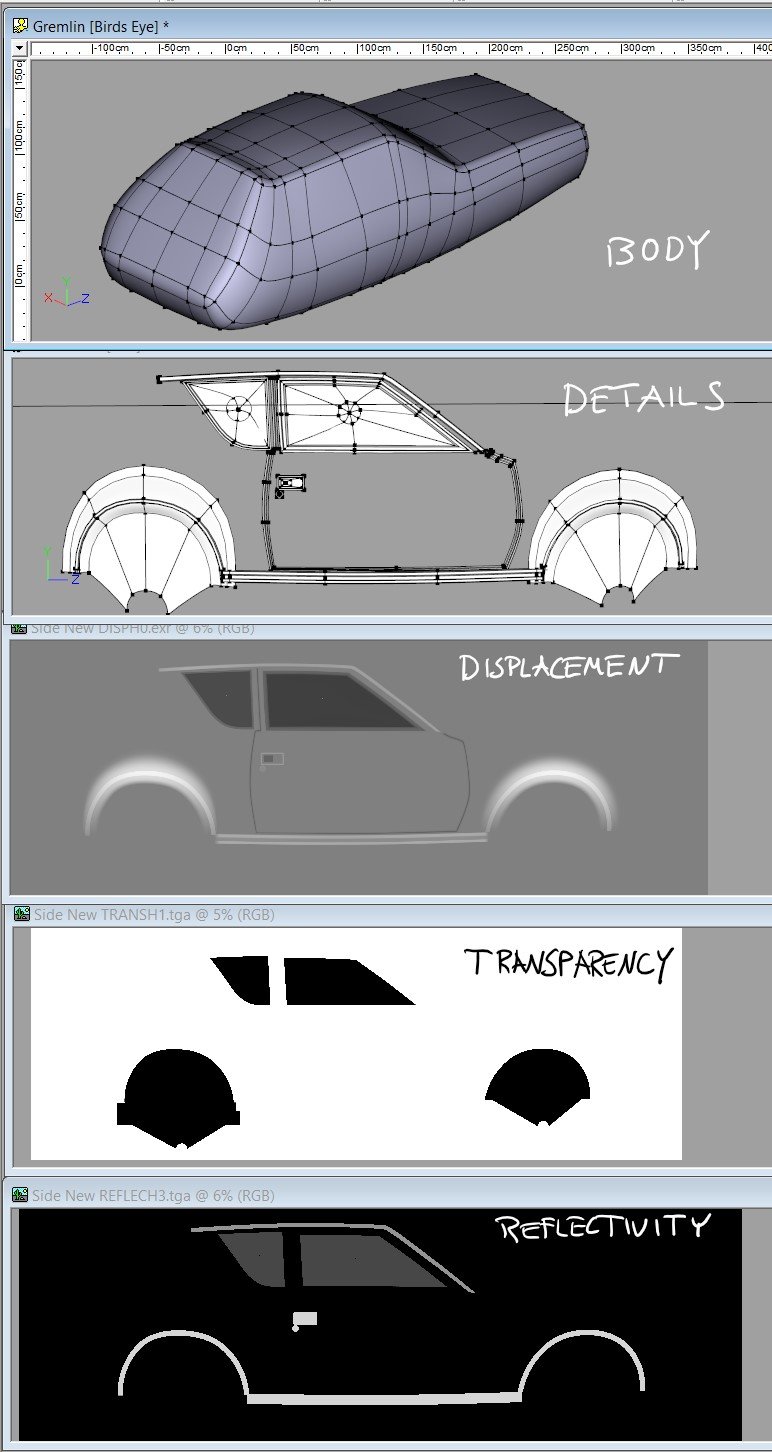
My "Planes Trains Automobiles" Contest entry was an experiment in displacement mapping... The body of the car is just a simple spline form... All the surface details... the doors, the handles, the windows, the rubber and chrome trim... that is all made with displacement maps. There isn't an easy way to manually paint such maps in a paint program but it was easy to model the shapes on a flat plane. I put a white-to-black gradient on them and shot the arrangement with an orthogonal camera. That render to OpenEXR format was applied to the body to be the displacement map. I made maps that way for the front and back details also... I recolored the patches of that details model with white, gray and black to render versions of the map for Transparency and Reflectivity... A turn-around of an earlier WIP version of the car... 155Lefts_3500.mp4
-
Further development of our live Answer Time discussion Saturday... these use a displacement map to create the surface detail. Whoops!
-
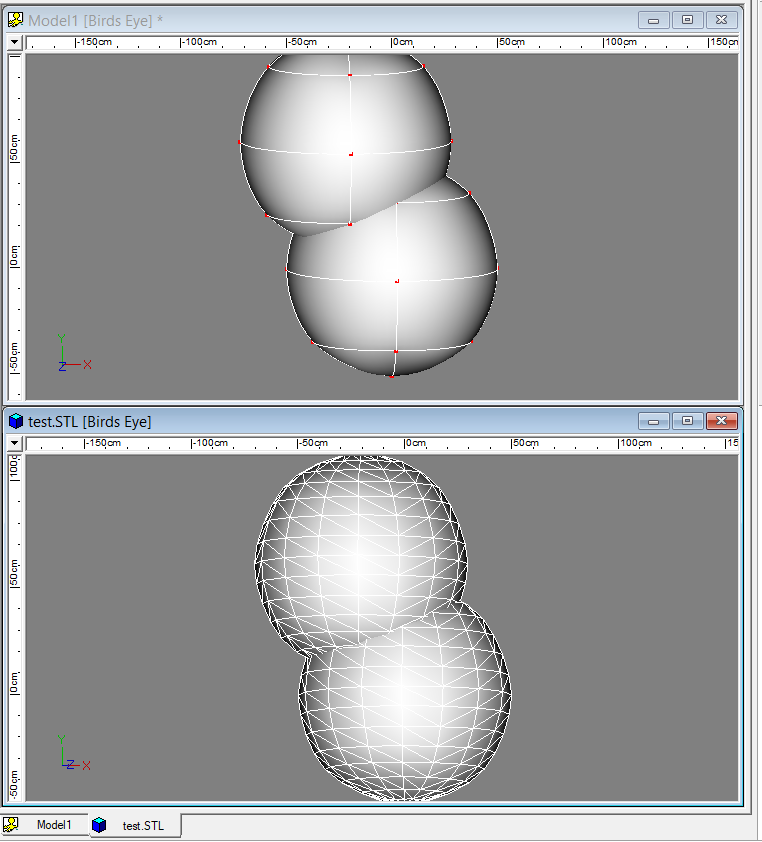
If I import an STL file I am getting a lot of surface artifacts where the surface is not smooth, and I have tried adjusting the peak angle. When I export I have no issues. Anyone have any ideas?
-
I've thought of one more mistake I made... At 4:51 we see the SHIFT options panel for Bake Surface. I should have set "margins" to 0 so that the tile for each patch wasn't padded with an extra pixel. One pixel wasn't highly noticeable, but zero would have been correct.
-
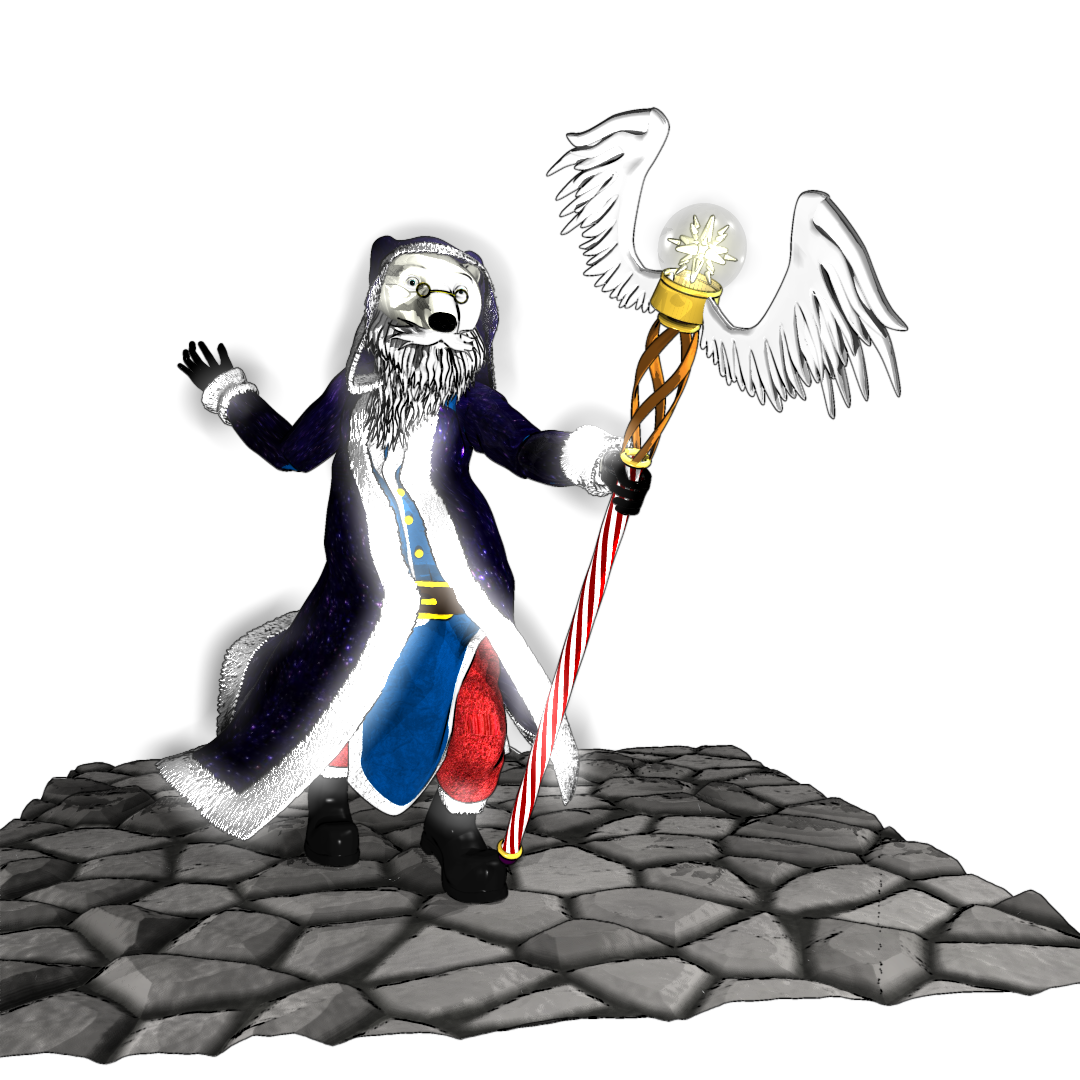
Done some more work on Ursa. Finished rigging his cloak (except the hood) and added his staff (The staff of the north). I set the star fragments in the end of the staff to glow and tried to do a render. But for some reason, even though the star is the only thing in the scene set to glow, A:M is making the fur trim of the cloak glow as well. I even went into the surface settings of the fur and set glow to off, and the group that the fur material is assigned to and set it's glow property to off and the fur is still glowing. Think it might be a bug.
-
I'm building a railroad indicator lamp, essentially a red/green traffic light. I wanted to simulate the look of the optics of these lights which were designed by mounting an incandescent lamp at the focal length of a coloured glass fresnel lens (like in a lighthouse) such that its light is only visible when viewed almost on-axis as one would from a long distance. I think I've come up with a believable result using a hierarchical klieg light mounted inside the enclosure. It's aimed to shine inside the case and illuminate a small internal disc, standing-in for the lamp filament, sitting near the focal length of the lens. Viewing the indicator while it turns in front of you produces a result I'm satisfied with. semaphore_test.mp4 The problem is that, as far as I can tell, hierarchical lights (sun, bulb or klieg) do not handle well the shadows of other parts of the model. I set up a test model that's similar to my indicator lamp. Inside the open sided box is a klieg light aimed at a target disc that in this case has a hole in its centre. In any render from the modeling window there are no shadows generated by any surface regardless of whether the shadows are ray-traced or Z-buffered. Strangely a chor render does have translucent ray-traced shadows but the light still passes through the entire model and falls on an external model. My work around was to make an inside screen that was totally black so the light hitting the rear of the case is absorbed and only the target disc is illuminated. As for the light leaving the back of the enclosure, I'm fortunate that there will be about 4 ft. (1.2 m) between the rear of my indicator lamps and the nearest surface so I should be able to set a fall-off value that minimizes the spill. I suppose since hierarchical lights are typically used for things like automobile headlights this has never been an issue before. However you'd quickly notice this glitch if you were trying to shooting a night scene using the dome light of car as illumination. The passengers would have shadows while the other parts of the car would not. Obviously the ultimate work-around would be to add the lights in the chor but it would be nice to have this convenient feature work.
-
Hello AM, I explore AM's extremely efficient and powerful mapping system ! I have a question about surface displacement : The definition is not excellent and we often end up with a rather coarse physical aliasing if we approach the 3D model. Is there an option to achieve progressive aliasing depending on the distance to the camera? thanks in advance greetings
-
I guess you are stuck. Since no program presents everything you want and since you have to make some accommodation for what it doesn't, you will have to choose the one with the work-arounds you can live with having to do. The grid in the modeler can be set and re-set to any increment you want for precise CP placements with Snap to Grid. The "Measure Distance" menu option finds the distance between any two CPs.
-
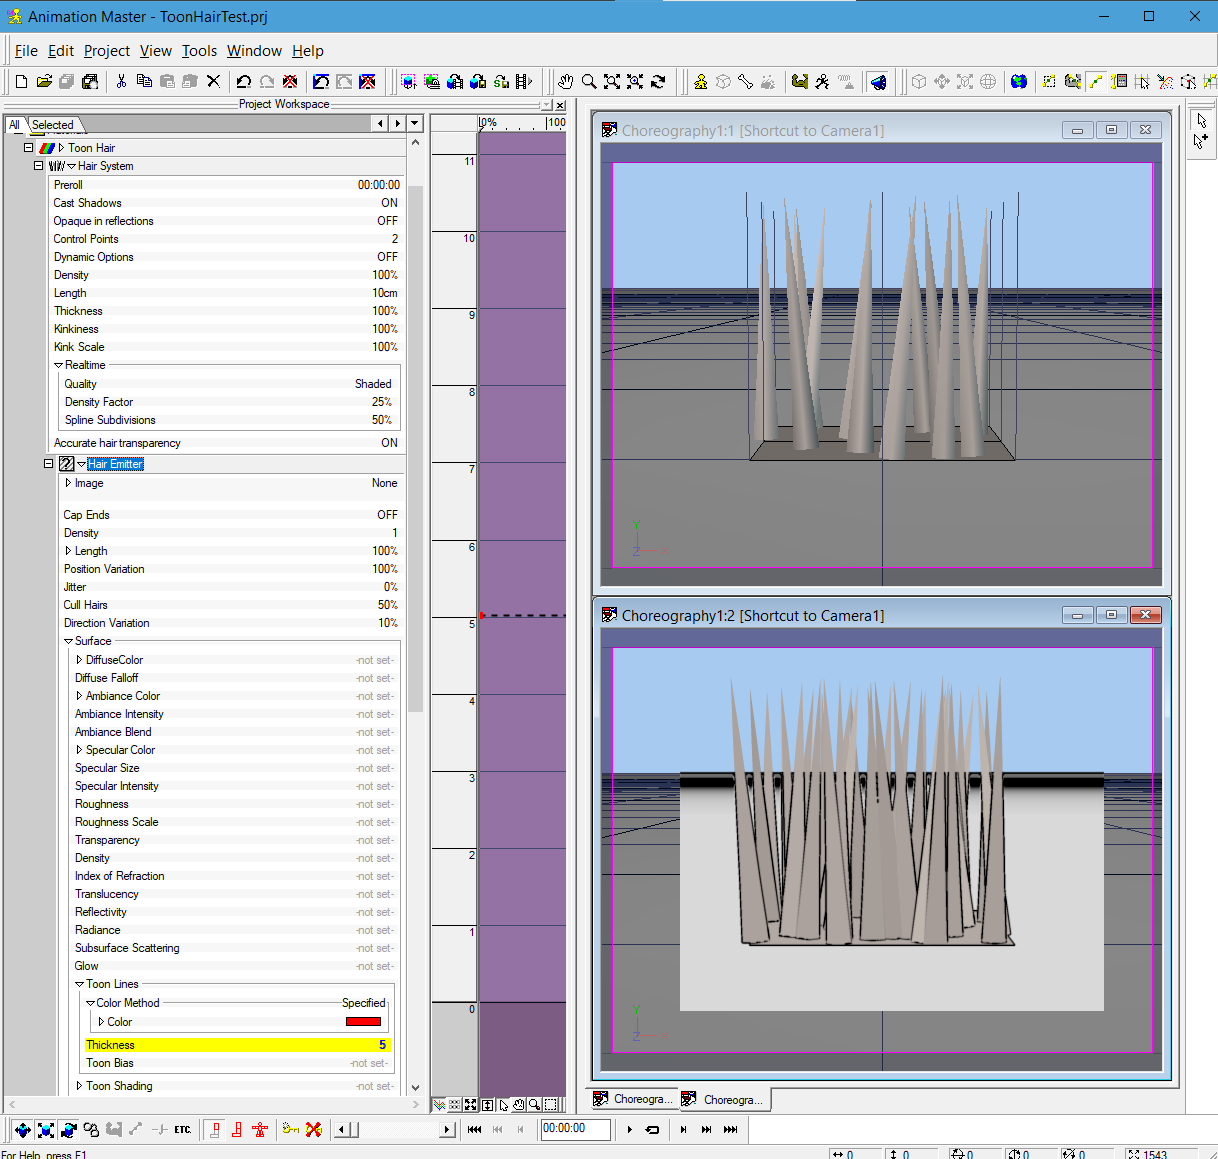
By "particles" you mean hair? I can get hair toon lines by setting Toon in the Hair surface props. It doesn't seem to obey color and thickness unless those are set in the render settings. (Notice that toon lines only render if they have patches behind them.)
-
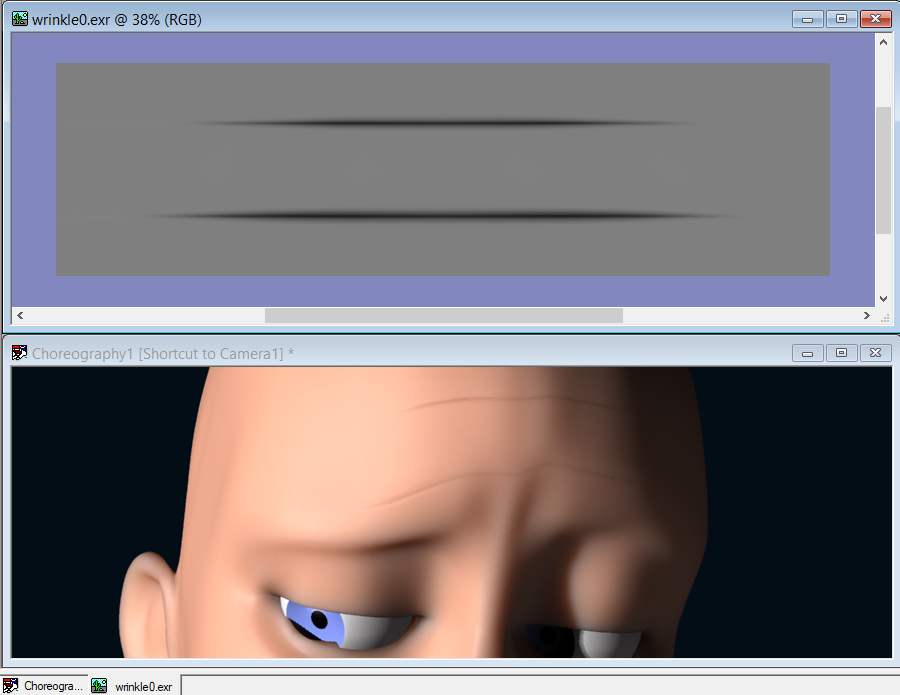
If I craft a displacement map for a wrinkle line it has an unappealing grayness to it on an SSS surface
-
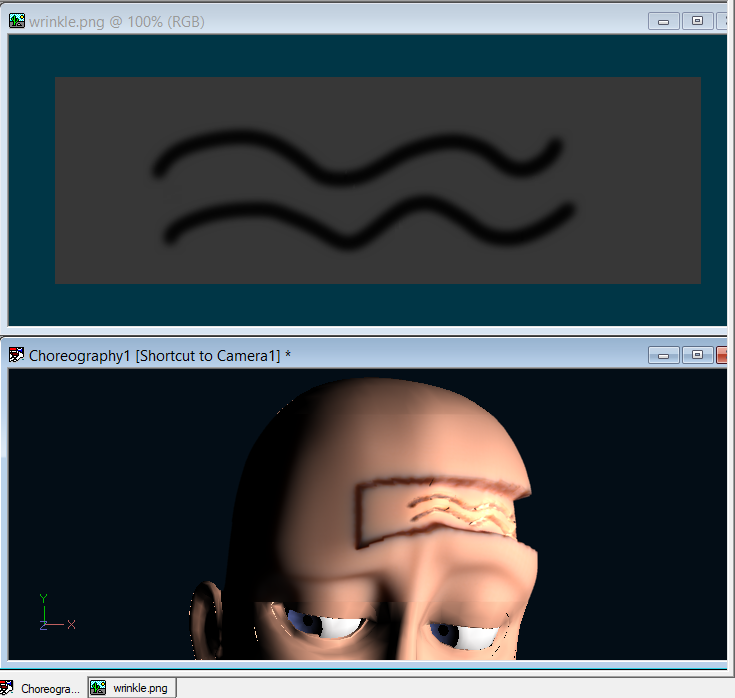
I don't think Displacement maps work right in SSS. When this rectangular map is applied to a surface it seems that the 50% gray is being interpreted as negative displacement instead of zero. Ouch! Edit: this appears to be problem even without SSS Edit edit: It's a problem with PNG! If that decal is saved as a JPG the 50% displacement works correctly. Must be something to do with the weird way PNG makes its alpha channel.
-
I was aware that that is the case for quick renders, but I haven't seen it in a full render. I also haven't checked earlier versions for quite a while. Here are some quotes from Yves from this post. I'm not sure if anything changed following that post. Considering the skin texture would be different on the lips, decals for the actual texture and one Group for the surface settings (SSS, etc) would be the way to go. I got some (what I think are) improvements by dinking with a few things. Here are some settings I've tried: Specular size: 3000 Specular intensity: 30 SSS: 3.9, 2.55, 1.68 (Skin1 settings multiplied by 3) I'm currently doing some flattening in order to paint the textures (I've been messing with 3DPaint and Krita along with a drawing tablet) and I've made the eyebrows sub-dermal. Hopefully, I'll have an improved render in a day or two.
-
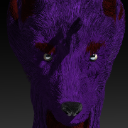
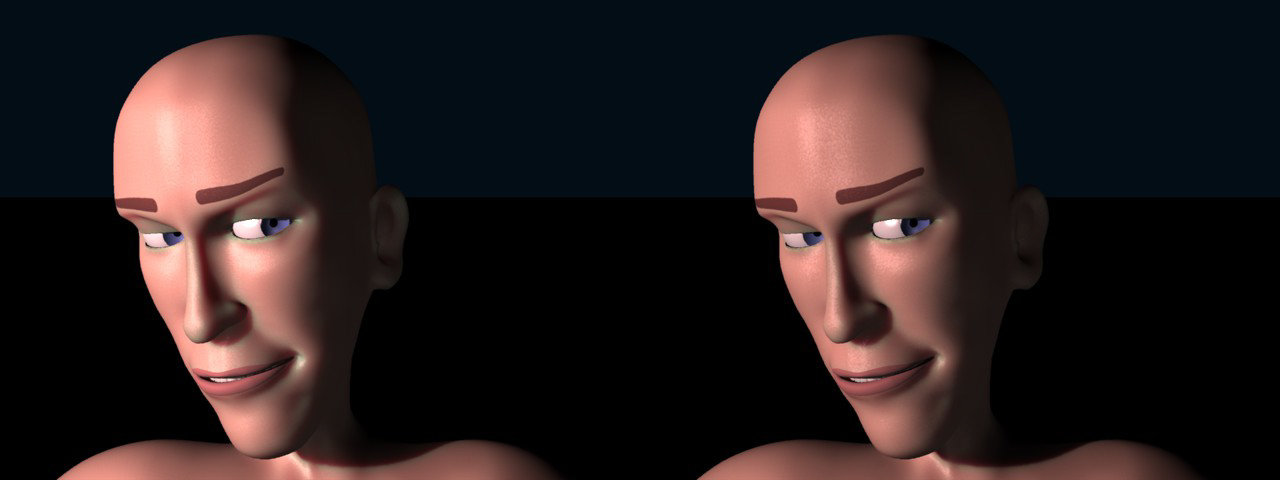
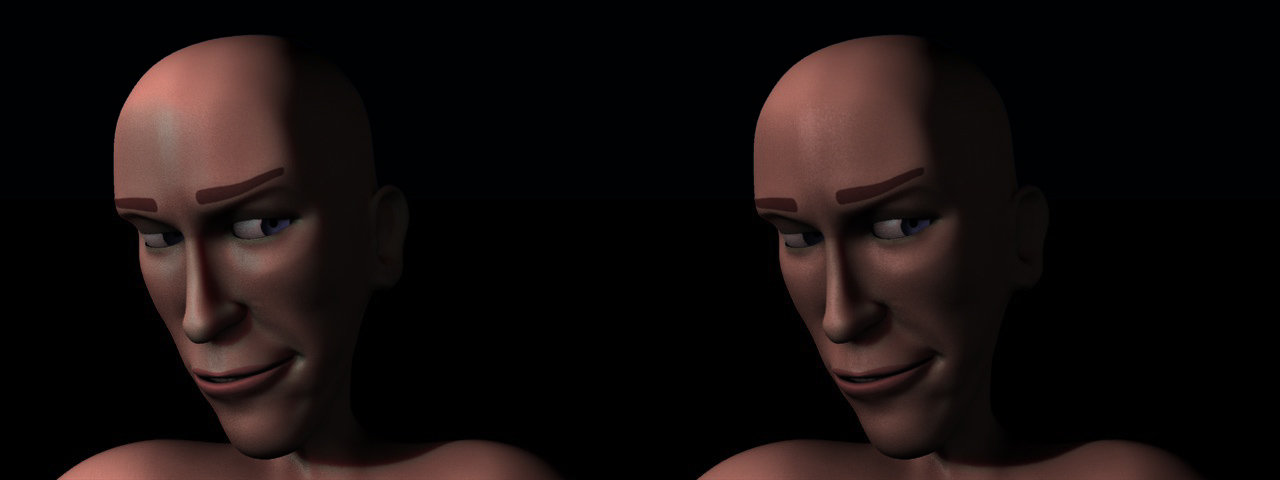
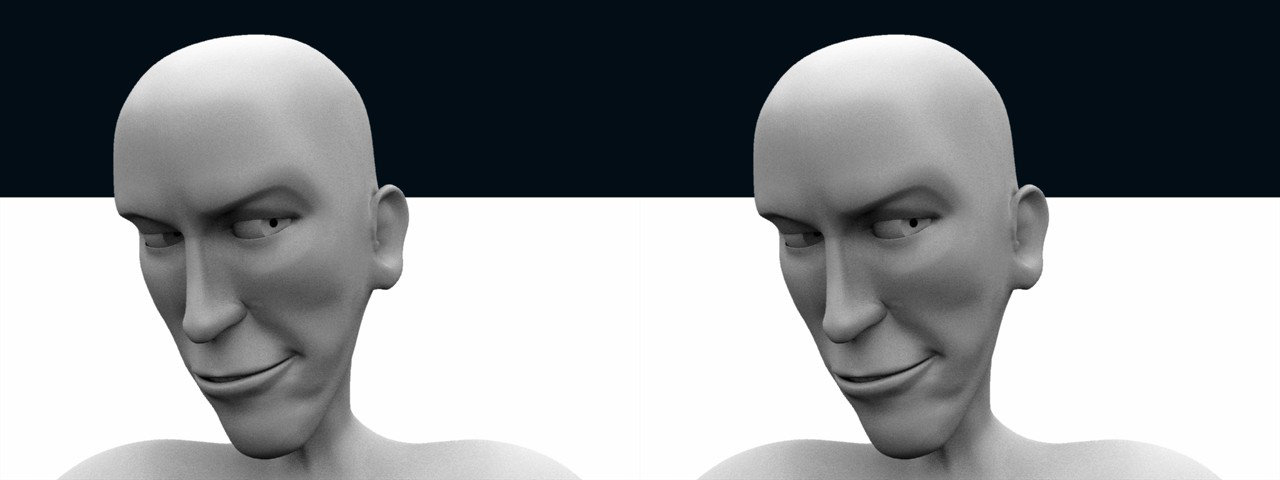
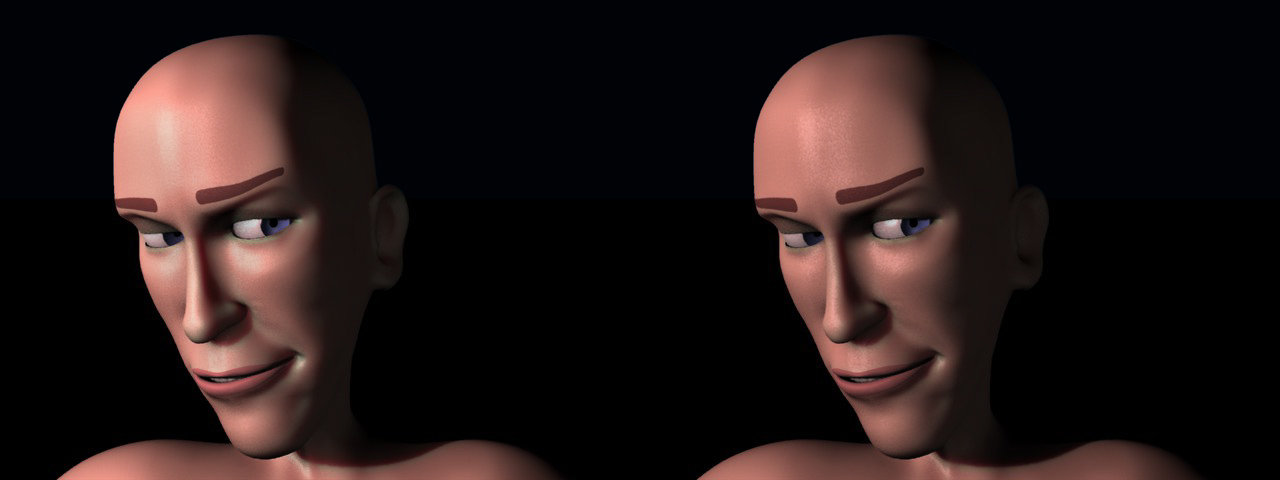
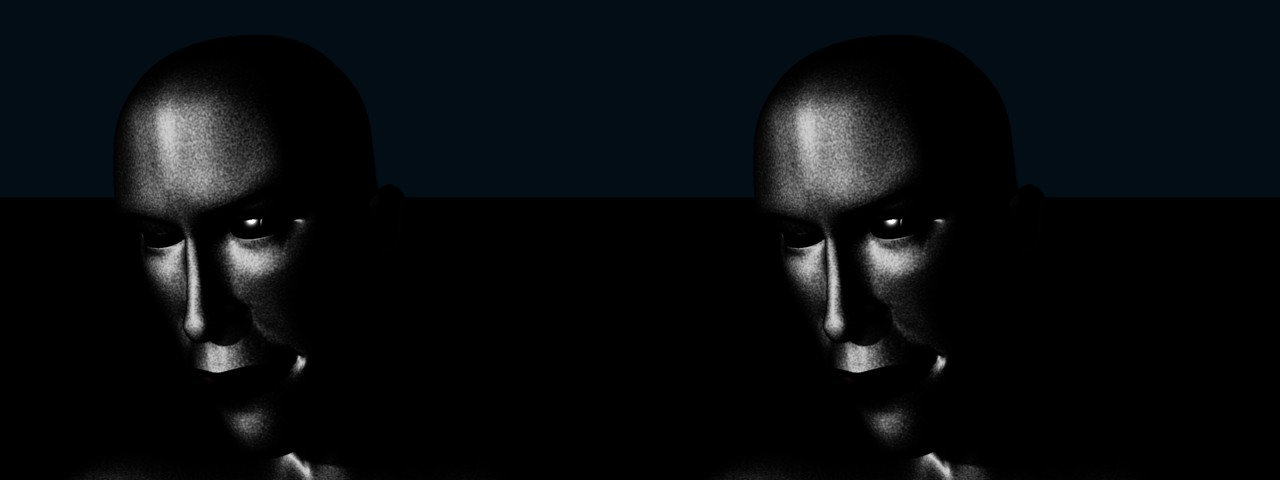
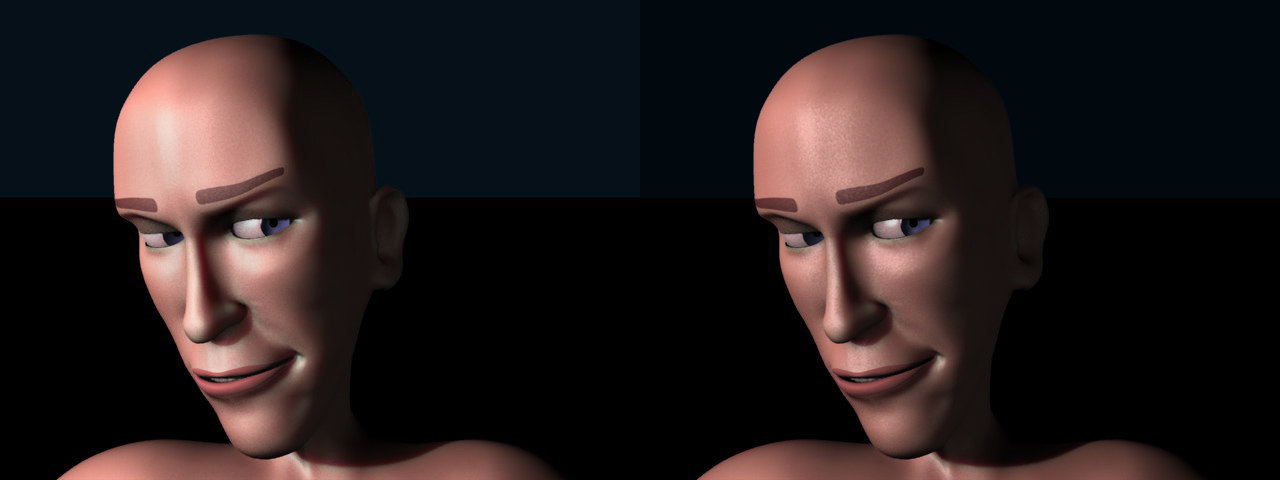
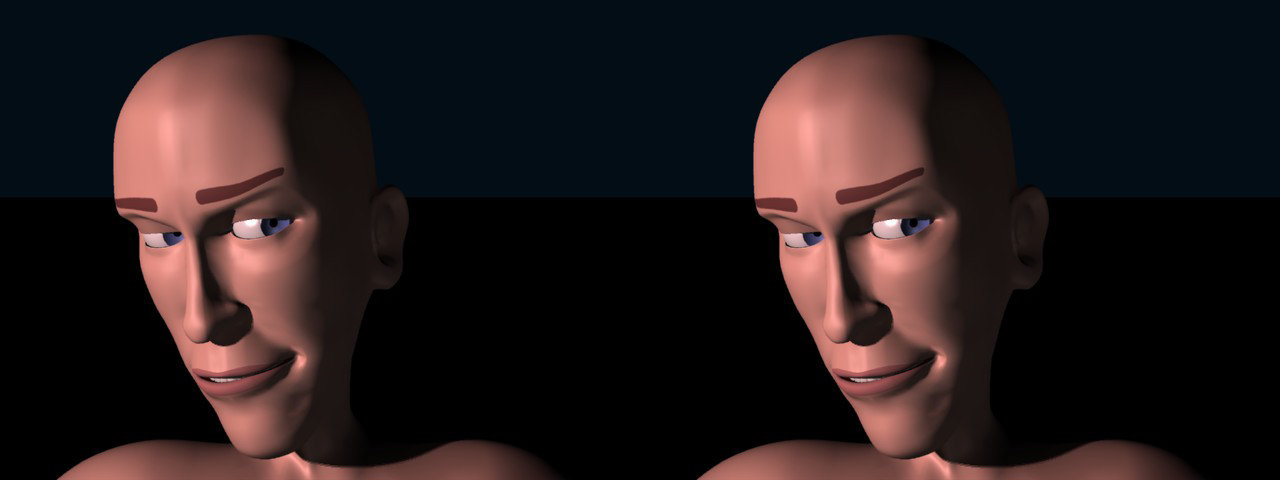
A few experiments toward getting a nice human Sub Surface Scattering result. "Loyd" model by Steve Shelton. Default surface (no SSS) render... Sub Surface Scattering renders. Pink and less pink... I've turned on some Surface "noise" to suggest the pores in the skin. SSS with Ambient Occlusion... Separate AO render... Curve-Adjusted AO... SSS render composited with adjusted AO... Separate specular render... Composited SSS+ AO +Specular...
-
The ALT snap bias aim feature is such a pleasure to use, I've regained my enthusiasm for an architectural model I set aside in 2009. It's my version of a Hollywood set of the grand old Pennsylvania Station built in New York in 1910 and demolished in 1963. I'm calling it a Hollywood version for three reasons. 1. Since my reference images from books and the Net only have a few readable dimensions I have to make a lot of "looks good to me" guesses. 2. The amount of detailing required for a 100% accurate copy is too staggering so I've simplified it while trying maintain a similar look. 3. The section of the building where people board a train is called the Concourse. While it was a spectacular work of architecture, it was essentially a large room where passengers would congregate before descending down stairs to tunnels in the lowest level to board coaches pulled by electric locomotives. To me that's a subway station not a rail station. So my Concourse will be a complete fiction but it will have steam locomotives. Here's four views of the real thing.
-
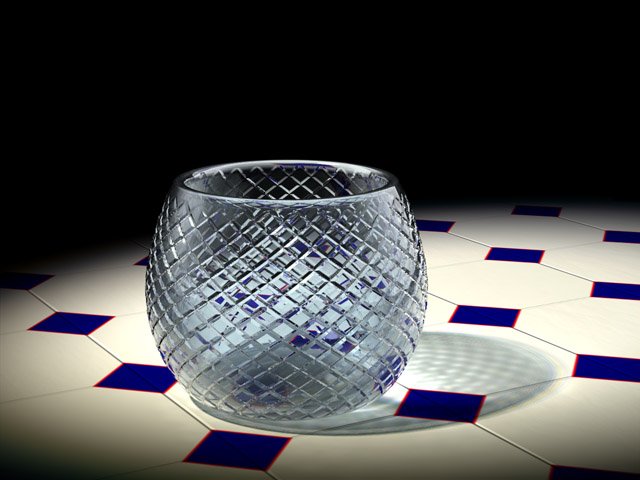
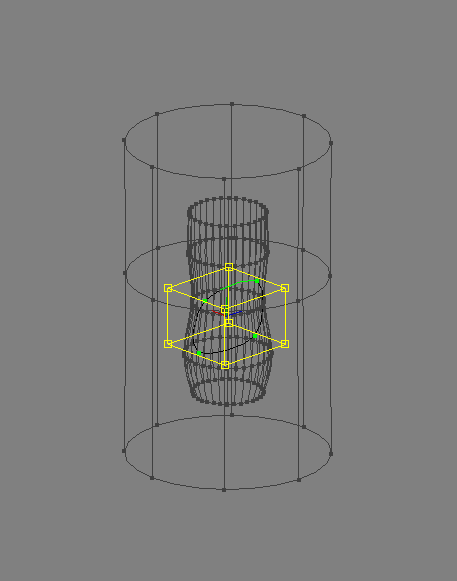
Here's a clue... If I add another surface (the large cylinder) outside the surface I want to target (the vase shape), the CPs I select and move (the 4 point ring) will go to the intended surface and properly slide on it when i move them. It is as if it always ignores the first surface it encounters and goes to the second surface. snap Test002.prj
-
When I test with a simple Prop it works as I would expect. I can draw a new spline and it is created on the front surface. I can slide points I have made on the surface and they remain on the front surface. But if my target surface is a regular MDL only the first creation works. if I touch them after that, they either go to a far surface or some place that is not either surface. That happens in both the modeler and in Model Mode in the Chor.
-
There have been attempts by Steffen to solve that I think, but in the end: If you can, hide the other side of the surface. If it is a prop, move the point after you have put it in. In most cases it jumps to the right one. It might have to do with normals, but I am not sure about it. Best regards *Fuchur*
-
Is there a way to keep Snap to Surface from jumping point to the opposite side of a model?
-
Excellent suggestion! Attached are three sets of four images with descriptive names for clarity. 9x9_noblur are the originals; 9x9 oversampling with no motion blur 9x9_blur are the same oversampling but with 100% motion blur 16x16_blur are sampled at 16x16 with 100% motion blur It certainly helps the chaos in the reflections but ultimately these grazing angled reflections of closely spaced vertical lines in a very wavy surface will be pretty noisy. That chaos is a good simulation of reality. If I really want less noise, I need to reduce the bumps in the sheet metal material. As for replacing the normal map with a bump map, also a great suggestion since it's trivial to generate and replace with no re-modeling required. I'll just have to get over my obsession with the improved (IMO) look of a normal map. Thanks, Robert. piggyback_walkaround_9x9_noblur_00.tga piggyback_walkaround_9x9_noblur_01.tga piggyback_walkaround_9x9_noblur_02.tga piggyback_walkaround_9x9_noblur_03.tga piggyback_walkaround_9x9_blur_00.tga piggyback_walkaround_9x9_blur_01.tga piggyback_walkaround_9x9_blur_02.tga piggyback_walkaround_9x9_blur_03.tga piggyback_walkaround_16x16_blur_00.tga piggyback_walkaround_16x16_blur_01.tga piggyback_walkaround_16x16_blur_02.tga piggyback_walkaround_16x16_blur_03.tga
-
Model looks fine in HASH, export to OBJ and everything is wrong!
robcat2075 replied to Mikal's topic in Open Forum
If I export a model that is not a single surface to STL and import that STL as a prop it is definitely not a single surface.