Search the Community
Showing results for 'project'.
-
a pen-paper drawing of mine is on my website of the actual finished product, or at least what it SHOULD look like. and various other project.My Webpage
-
I think "balance" is going to be an issue for any martial arts topic. Tony Lower-Basch started a great set of martial arts related motion tuts at his Dojo Project. Rigs have advanced some since he wrote them but the things he says about motion still apply today. Give them a look!
-
Hi Guys! I finished the first parts of my project, ... This movie will presents some aikido technics and etiquets! But just I can upload this in more parts! Sorry! This are first parts: Part 1 (This is required divx 5.03) Part 2 and I'm waiting your opinion! Sharky
-
Darklimit, No specularity. Caterpillars, like this one seems to be based on, are very soft, velvety, dry. There are some different species that have that ..moist... appearence of course. It may have to do with it being a future moth or butterfly. This one looks like it might become a type of swallowtail. There might be some specularity (always makes me think of "hilarity) on the "hard" surfaces like the tiny head at the tip or on the "sticky" feet (I have that problem too). Shaun! This thing is gorgeous! I need to revisit my monarch caterpillar project! I did it ages ago before wieghted bones came along!! I used fan bones and was not happy with the results. Should have used smart skin but I think I had about twice as many "segments" as yours does. Have you thought about how it will "walk"? that was one of my problems. Coming up with a way to have each set of feet "stick" to the ground while the others moved and the body sort of ripples. Probably some sort of constraint system that you turn on and off maybe? That would really interest me. Vernon "Sticky Feet" Zehr
-
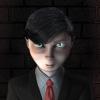
Oh no! You saw through my facade. I guess I was desperate for someone to help me. I feel better now. And to show my appreciation, here's a project with the lighting set up as I would do it for a character. Actually it's the set up for the Abe image. It's nothing fancy. Just 3 instances of the same bulb light. One used as a slightly warm main spot light, one a cool edge light and the other a dull warm fill light from below. You will need to move them around slightly according to which direction your model faces, how high his head is lifted, how dep his eyes are. You don't want to lose important features in the shadows. Jim SAMPLE_LIGHTING.prj
-
Hi Guys! I finished the first parts of my project, ... This movie will presents some aikido technics and etiquets This are first parts: Part 1 Part 2 and I'm waiting your opinion! Sharky
-
The gig is up already Mr. D. It is the same image. Okay? You understand right? You understand that the 2 images are i-d-e-n-t-i c-a-l in every aspect? Unless you have another story? I am willing to listen. I have the patience of Job. Tell us about this program you used. p.s. You said "we" previously? Can you explain? Is this a team project? I am not angry. Just curious. Vern Z.
-
No, i am not Shi Kai Wang. And it was based on the original Master Chief for Project "Halo" that's why i'll and more too it, and take away some. and the reason it looks the same, is because we used to same program to make it. pretty simple design, actually. I dunno why they didn't use the original master cheif as opposed to the one they use in the game!
-
If people are interested I've posted some stuff on the latest model I have created for my short film project. Click here to have a look at the model and download a short test animation Any thoughts or comments would be welcome!
-
This belongs on the painting in zbrush WIP as well. Here's the beginning of texturing with basic displacement and colour. It's been a while because of work committments, but the project is still slowly happening. I try not to post unless there's something to look at. Displacements are back Thanks Hash dudes. Ross: I think I can make it work we'll know soon enough. King & Rod Thanks Matt Good to hear from you man, island living is good Update as ordered

-
Doug and Rodney, thanks for the comments! We do have a black and white "ashcan" of issue #1 and if I knew which box they were in I'd send you one. We're in transition and most of our stuff is still packed up. I had a plan to really publish a couple of years ago but the money and logistics of distribution quickly get huge, so that's on hold. Even the basic work was a major project, as the color files I created for the web comic need to be completely recreated: super high res for the line art, separate black plate, cmyk... There was nothing from the web comic I could repurpose for print. I would have had to do everything twice. All things considered, I'd rather be working in A:M!
-

WIP| Space (my, what a narrow topic!)
omoanime replied to VeridisQuo567's topic in Work In Progress / Sweatbox
Mike, Nice drawing. You have two options. Option 1 - Model from scratch It would be easier if you had a head on and side view but not completely necessary. If your character is never going to get out of his/her suit, then you can model them as the form itself (no body inside) Option 2 - Cloth a model Either clothe an existing model, like those that come on the Hash disc or make your own model and then clothe them. In either case, use the rotoscope function to import your drawing and start splining away! Awhile ago, Frank (I think it was Frank. My apologies if my addled brain got it wrong) started a project where he was modeling resources for people to use for free. I recall seeing a military helmet in the group of stuff. You may want to search the list for that post and take a look and see if it is either just what you need or simply a starting point (you could modified that model to become your helmet.) Who knows? Perhaps they would help you model most of your stuff in exchange for those elements (ammo belt, boots, etc) becoming part of the free resource library. Good luck, Paul -
sorry, i didn't save the project or choreography, i just did it to do it. It'll allll come back to me ....someday
-
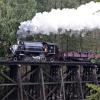
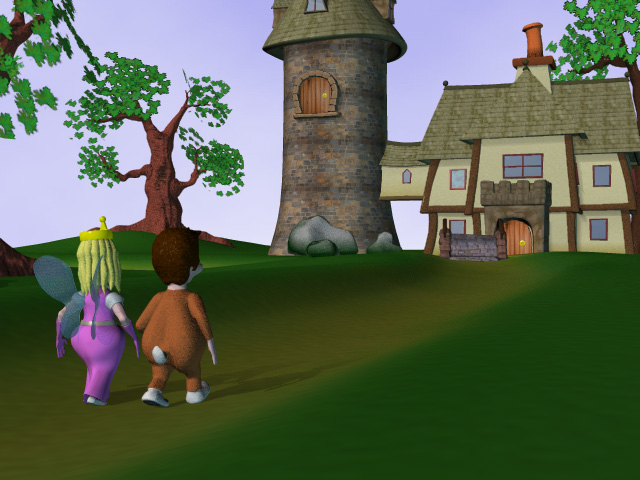
Thanks for the comments everyone. TheOdfellow - The sky will be composited later as I want to have clouds drifting on seperate layers. VeridisQuo567 - Thanks, I wanted it to be more cartoony than `real` looking (I hate straight lines ) and the project is for kids so, Hammer Film fan that I am, I have to restrain myself! The entire model is quite large as the house stand atop a hill with a path winding round which leads to the spooky forest I`ve posted previously. Thanks again for taking time to reply, Dale.
-
Very nice "spooky" ambiance... this has a lot of potential. Cant wait to see how this image/project progresses, especially with a dark creepy night sky behind (?)
-
Gaggle of A:M'ers, As I'm nearing the end of a different project I just had to start something new. Let's just call it "nearing end of project A.D.D". Anyhow attached is my latest - just a start for your impressions. Thanks. Doug
-
Congratulations on achieving this. Several months ago I asked if I could drop a day at work and was refused. (Obviously I didn`t tell them it was mainly to work on my own projects ) No, I`m not bitter Animation is a slow process isn`t it. I am lucky to have others working with me but they are getting up to speed with the software at the moment. I am just slightly ahead of them. Lighting - I purchased the book that David Rogers mentioned. Digital lighting and rendering by Jeremy Birn. It`s excellent and covers more than just lighting. Texturing and compositing etc are also featured. I really wish you well with your project. Every time you post it just looks better and better. I think it`s going to be really impressive by the time of completion. Dale.
-
Robcat, Not sure about the external file thing... sorry... All, JohnL3D posted a project file not unlike the effect above some time ago. I think he plans to keep it on his site for awhile... At least I hope so... Since it's version 10 he may get rid of it to make room for new stuff. So, get it while you can. Link: http://johnl.inform.net/pages/10material18.htm
-
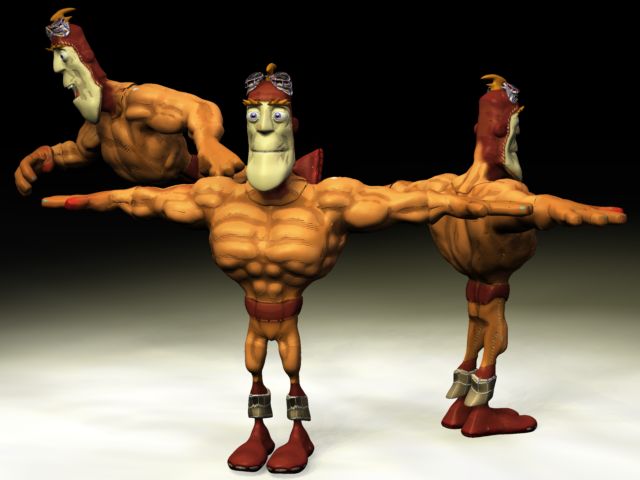
Very nice work! Can you show us more of the characters, wireframes and just more... glad to see you are working on your pet project. I am also working on one too. Your pic is really pumping me up to continue with my pet project. Keep us posted with your progress!
-
Hey, your project's really coming along. Nice.
-
Windows versions can be found here: 2004 CDROM (Orangutan) dongle (HASP) Version Multi-User Dongle Version Beta FTP area V11.0 Features V11.0 Online Technical Reference V11.0 Beta now requires dongles to be programmed for year 2004. If you receive a hasp or "No Authorization" error you will need to have your dongle upgraded for the 2004 subscription. Contact upgrades@hash.com for more info. Run the RUS Utility to get your HASP ID#. After receiving an update code from support@hash.com you can use this utility to flash the HASP. ----- Fixes since last Beta version. Fixed problems shift clicking points to add them to group (duplicate cps added) {Ken Heslip} Fixed problems selecting splines Added option to turn off Smart Force Keyframe on tools:options:action tab, and fixed prev key interpolation. Fixed items modeled along y or z axis being clipped when zooming or turning {David R. Britton Jr.} Fixed models whose model bone is translated being clipped {Mike Kalton} Using Pick Patch to add to a group updates patches with group color right Fixed picking cps from the back side of the model in shaded wireframe mode sometimes Fixed group's pivot property not updating etc when clicking between cps {Jeff Lee} New Feature, Embedd All from the project's context menu Fixed copy paste patches with group images or decals {Jeff Lee, Ken Heslip} Fixed crash when private chatting in community Rarely used menu items when used now appear visible better.
-
Gee fanx Guys. I must admit I am buzzin' with this project at the moment. i just keep thinking up stories and ideas but I ain't got the technical ability to pull them off - yet At the moment I am concentrating on producing a stroyboard lke the last story, but once that is done I will go back and add more detail, texture and my worst ability - lighting. Then, maybe, I will animate a little section... that will be fun! Now I only work four days a week (Hooray) I will have more time to craft me project - YUMMIE Thanks again chaps
-
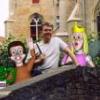
Oh I am so pleased! I have finally refurbished my office and got back into my pet project and got the first frame done. So couldn't resist sharing it with you all. Unleash you comments please…
-
Hi doug ... until 2010 i finish this project hey you Elm .... i didnt use the YP´s dome yet in this project , in the internal picture i used this cho (attached) ... in external picture i used only 1 sun lght widht=5000 / Rays = 30 / BIAS=.1 thx for your comments cho.zip
-
Yeah, I knew you were going to get weird artifacts around the decal given your prior image. There currently is a problem with alpha channels on transparency maps only trimming the areas that are pure black. You could have made a gray scale image and done a semi-hack to make the black look more like the underling material, but the problem will go away all together when the alpha problem gets fixed. (And yes for any one wondering the problem was reported with a sample project)