Search the Community
Showing results for 'project'.
-
FINALLY I started a new semi-time taking project rather than a bunch of one hour mini projects . Here are some sneek peeks of it: No particles and water (9 min @ 3000x1500) Particles on no reflections (Kill render time) Everything on(Raytraced took 1hour45min for this half of the image so I downcroped it to look nice) I've been working on it for about a day now. The grass is just a simple imageplane on a hair emitter same with the branches and leafs in the trees. The atmosphere is a skydome with global lighting at 50% and a sun with shadows at 50%. C&C welcome Photoman


-
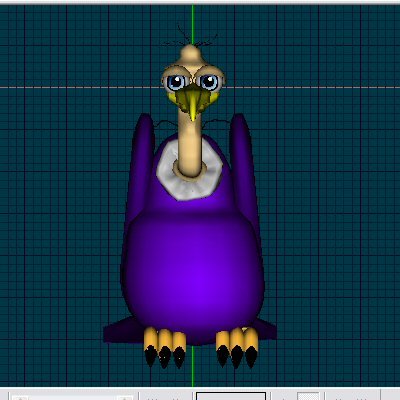
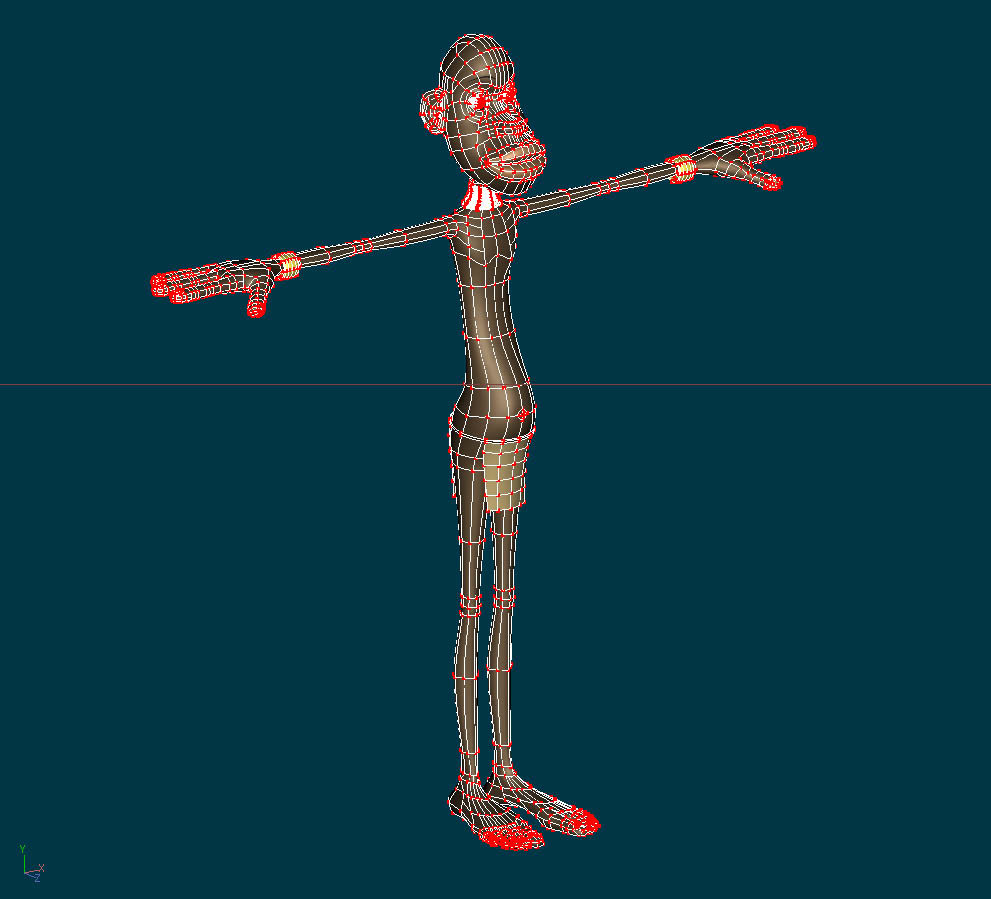
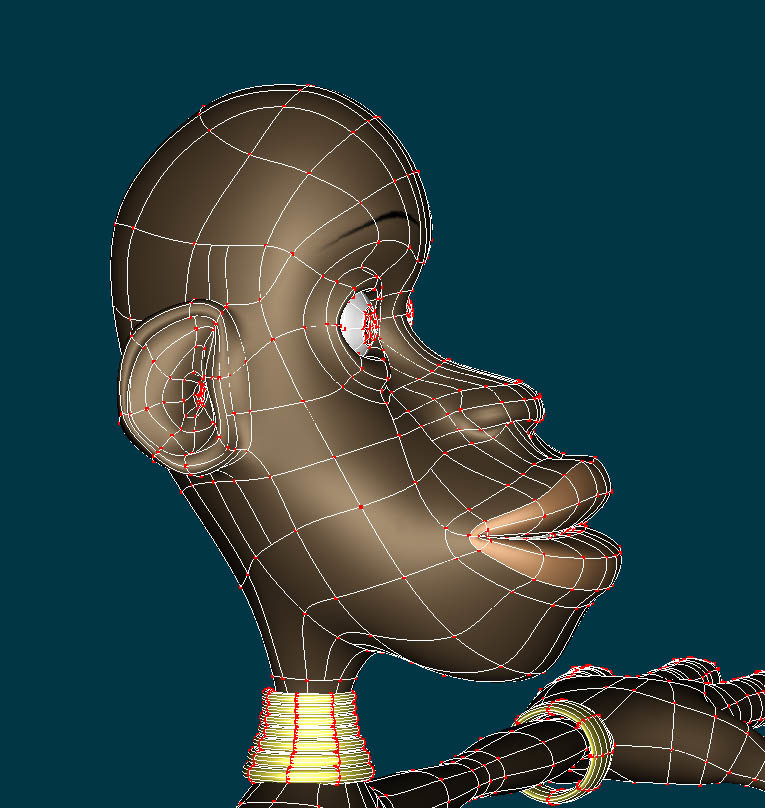
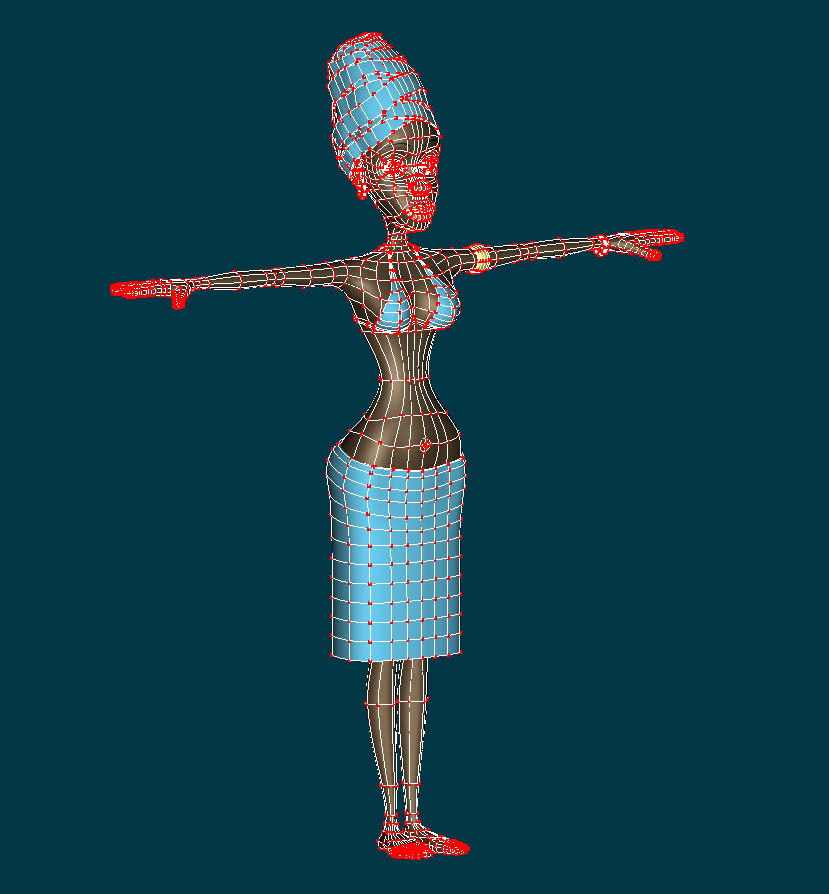
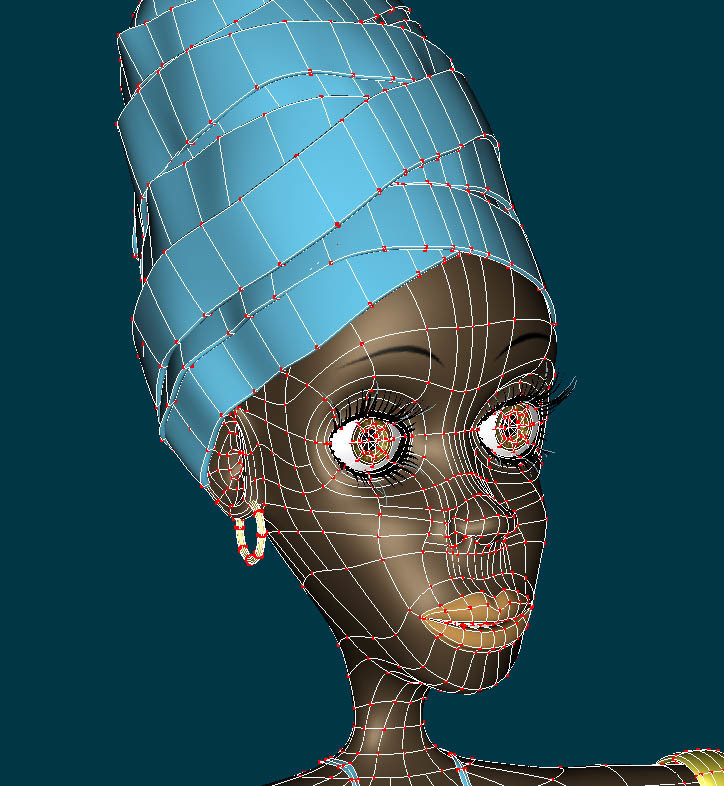
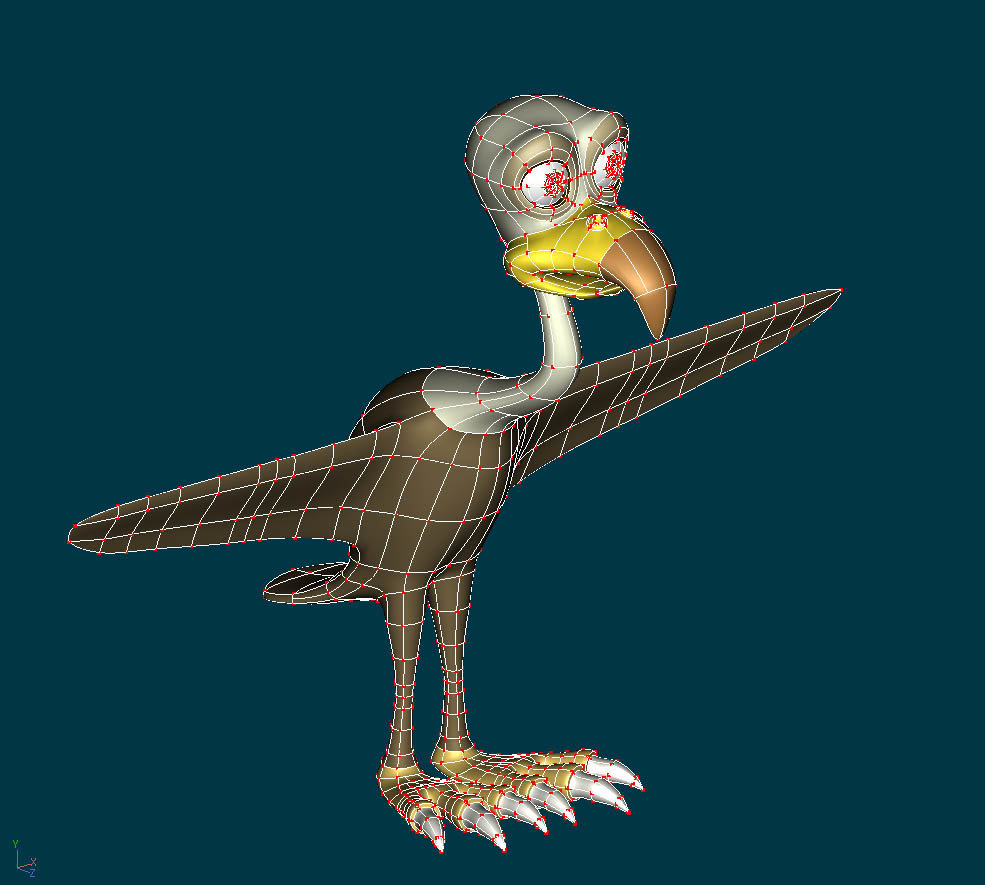
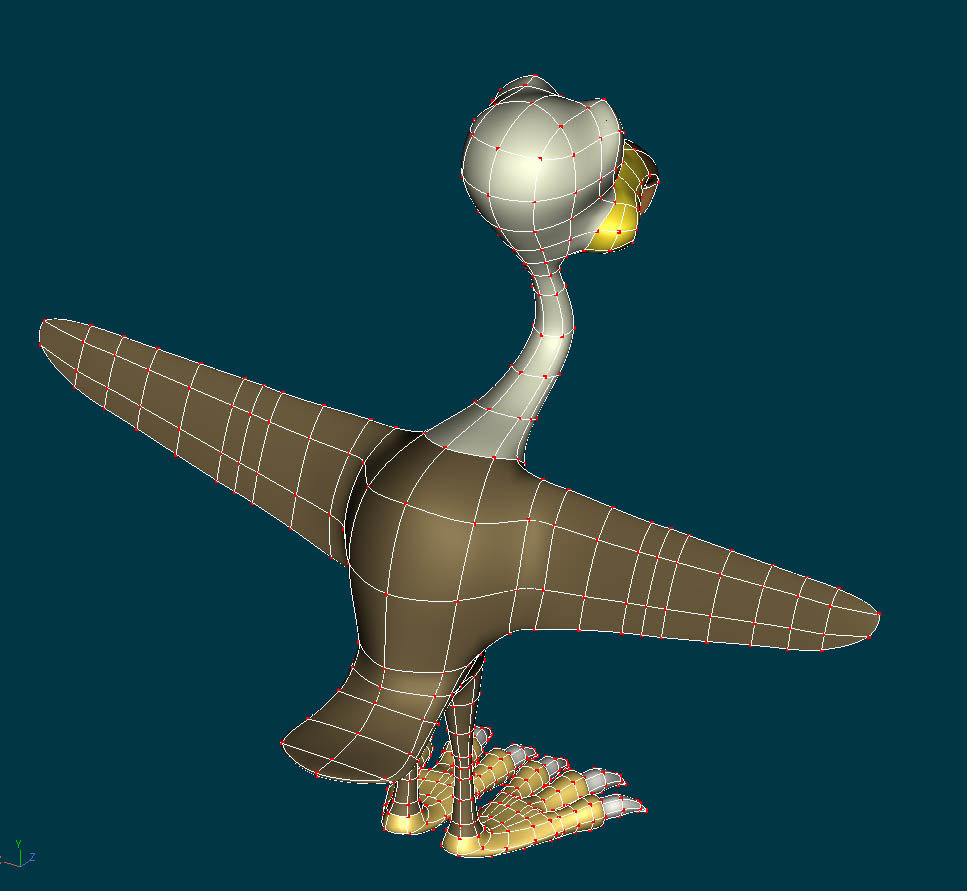
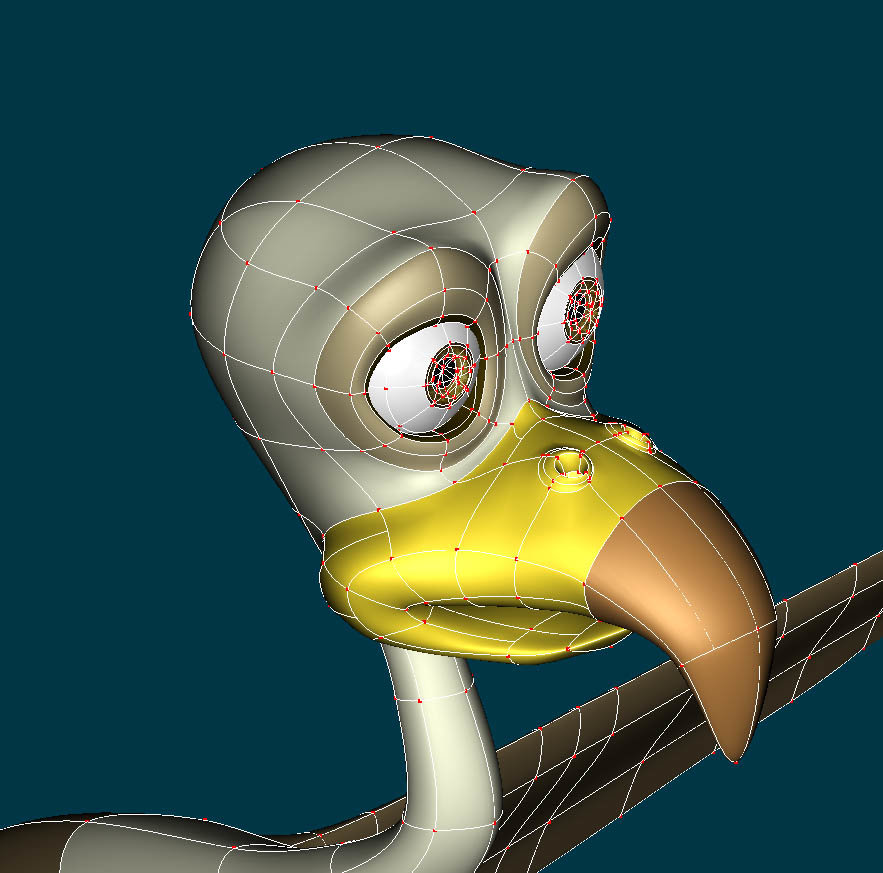
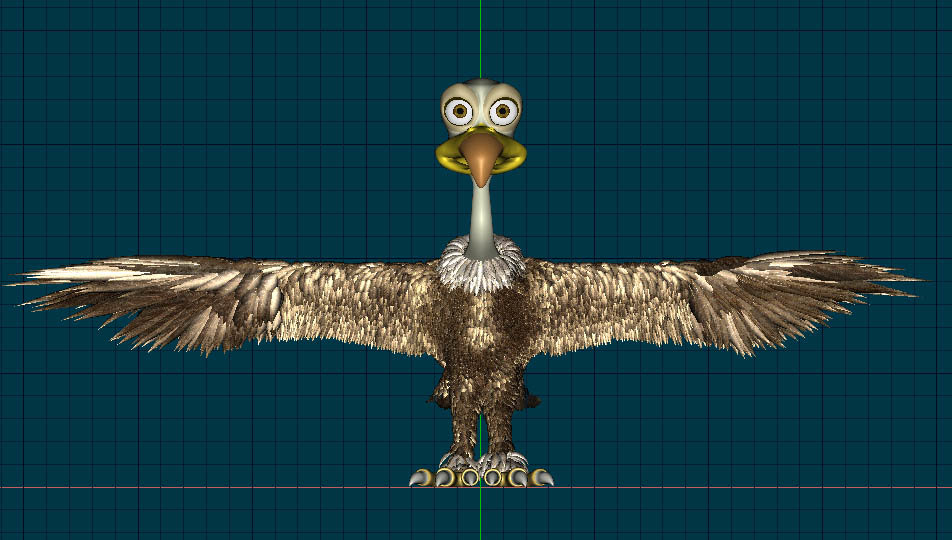
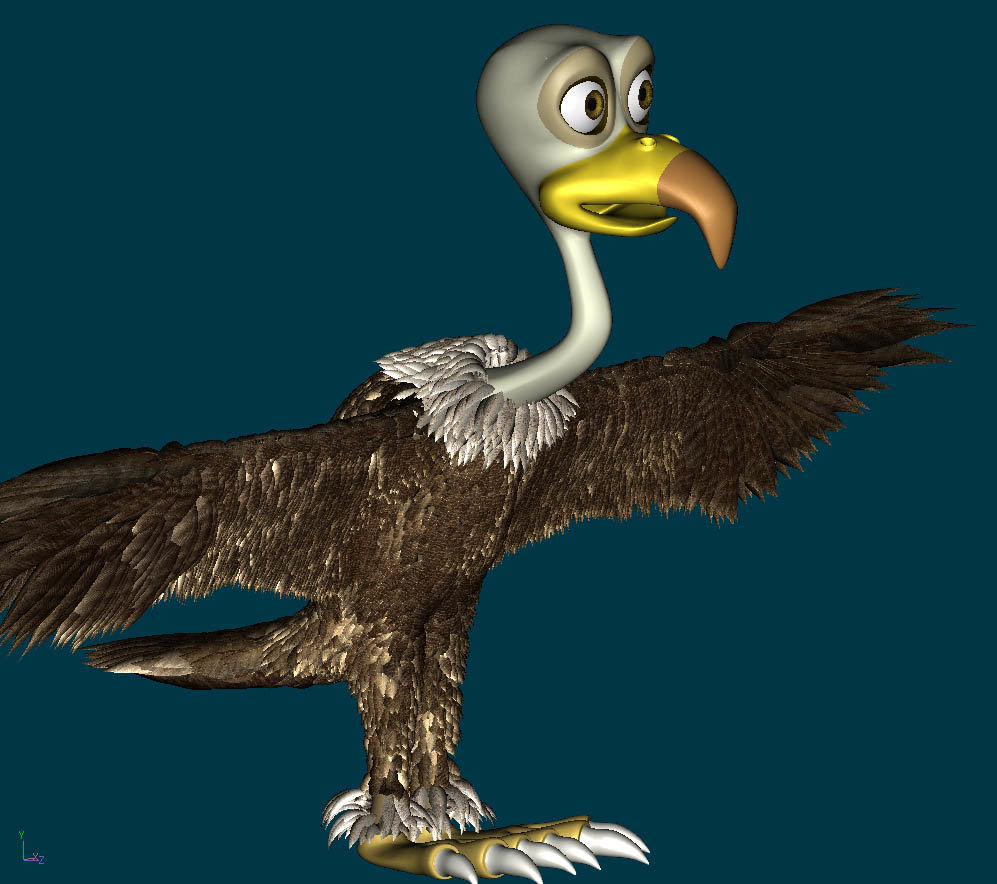
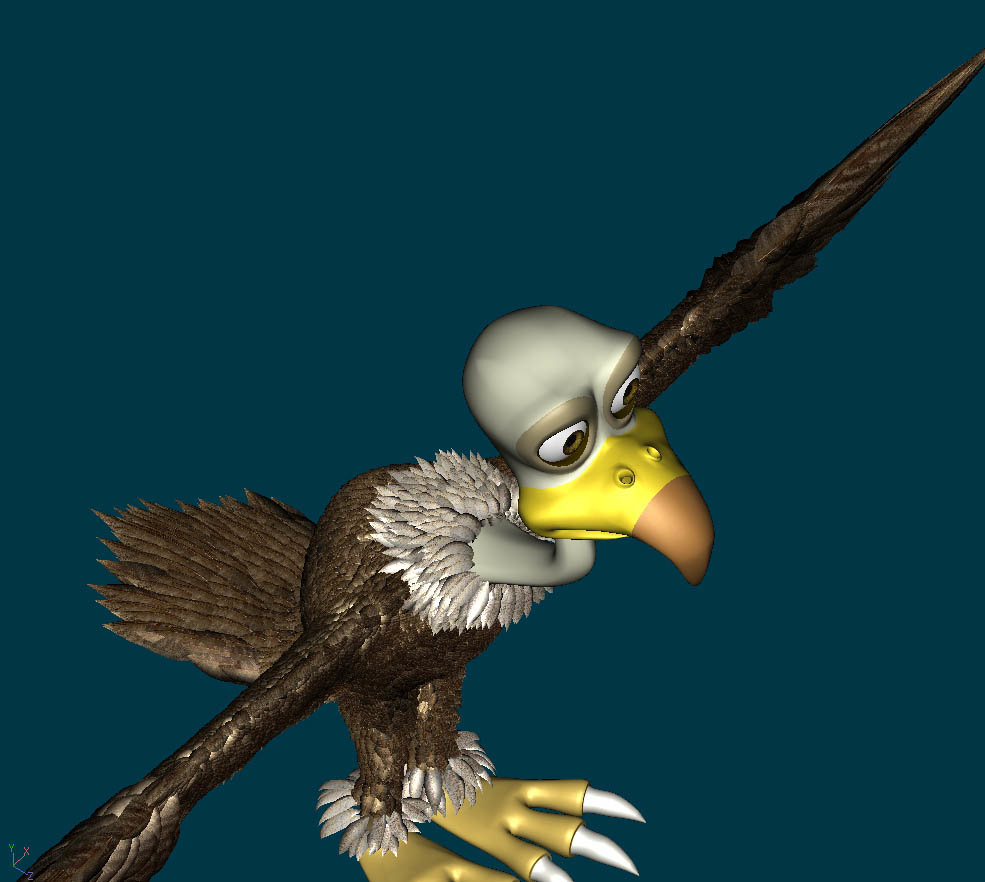
Starting a new project and need many new characters for it. This is the first one, I am not happy with the color scheme right now so may change it.


-
Hey- I've been really busy lately... Recent animation for a local Tire chain that sponsors the 'Grand Rapids (MI) Griffins' minor league hockey team. The animation will run on the scoreboard at center ice during intermissions. I had always wanted to do one of these types of cartoons, and had fun doing it. I'm always amazed at sporting events how these mindless cartoons get BIG audience response... I hope mine does. Sorry about the big files sizes. Each is 1 minute long and there are 3 outcomes, and all share a common 1st half. This project took one week to complete, as the main character was already modeled and rigged and I just needed to make 2 other versions of him. Oh yeah--- that is the 'BensLens' fisheye being used on the 'behind the net' scene... AND Thom and his family make a cameo... There is no audio, the in-house announcer will have fun adding live V/O and the in-house DJ music. BT_GR_Blue_winsSM.mov BT_GR_Red_winsSM.mov BT_GR_White_winsSM.mov
-
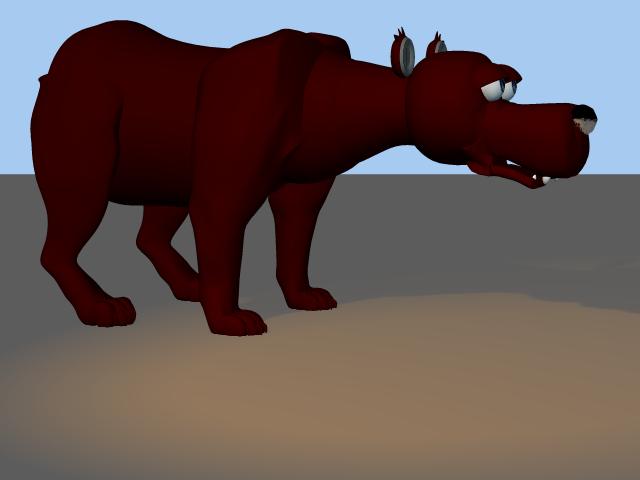
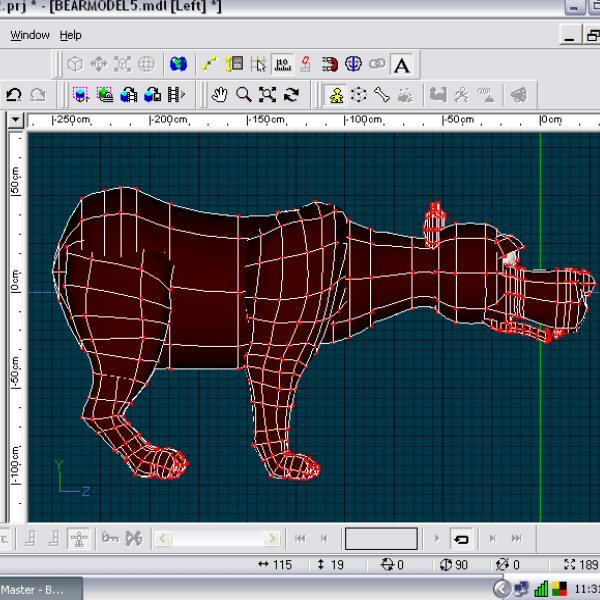
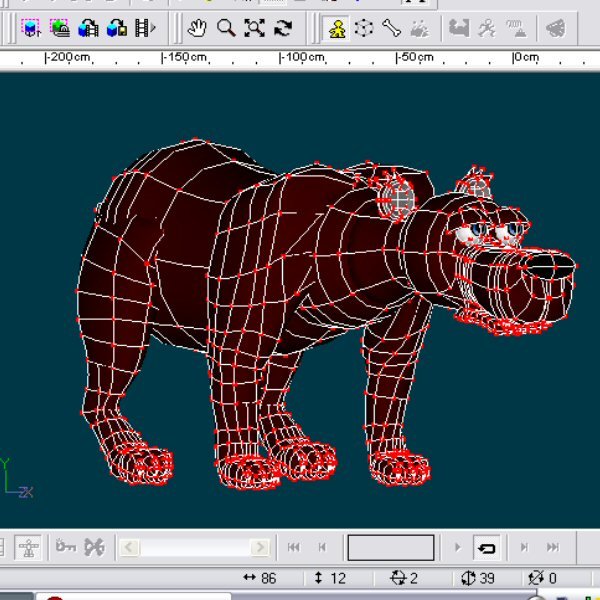
I am doing a personal project, nothing important but something I want to do. one of the main characters is a Bear. I been up since lastnight making the bear and I am actually quite pleased so far. I know how to rig a person but I am kinda lost on where to start with this dagnabit bear! I really want to do it right the first time so if anyone would please give me your ideas on rigging him I would be very grateful. I am not asking a full tutorial LOL. Just some ideas and maybe a basic layout I can begin with. I just dont want to rig him all up and then have to redo the whole dagnabit bear. any other creative ideas are welcome too. I respect all the talent in these forums and that is why I ask your opinions as I grow in skill. I will have less questions as I learn. Thanks!

-
Exactly, can it be fixed? Or is it one of those things that you can't and just have to fuss over?
-
Hi - I have a Dentist client that wants a 3D animated illustration of the teeth being grinded down a bit and Veneers being placed on... should be a fun project. I got the mouth and teeth modeled. Need to get some advice on how to show particles of teeth grinding off w/ the drill. I'll post in the Newbies. Thanks, Eric
-
I posted awhile back on a project for a client trying to find out if fluids would work in this animated pooring bottle. It turns out doing the fluid portion of it in flash worked well. The two bottle were modeled and animated in AM and it turned out pretty good. Just thought I would post if anyone was interested in seeing the finished project. Also, wanted to thank everyone who answered my posted questions. Tip and Measure: Multidose Bottle Tip and Measure: Exactdose Bottle Thanks Eric
-
I was bored and threw this together. Hope you enjoy it. http://www.youtube.com/watch?v=aDVcovGPb4g
-
suppose im working on a project and its got or some obscene number like 200 models in the coreography is their a way to organize the models in the coreography, like group them together, or place them into folders?
-
My third video complete http://www.youtube.com/watch?v=hlVbKv27w_4
-
Well I have always liked airplanes. Military planes by far being my favorite. And growing up with my dad telling me stories about the F4 phantoms from Vietnam, I knew one day I would build one. Anyway here is an early screen shot of the model. I have about 3 hours into the project and I'm starting to see potential. Hope you guys enjoy.
-
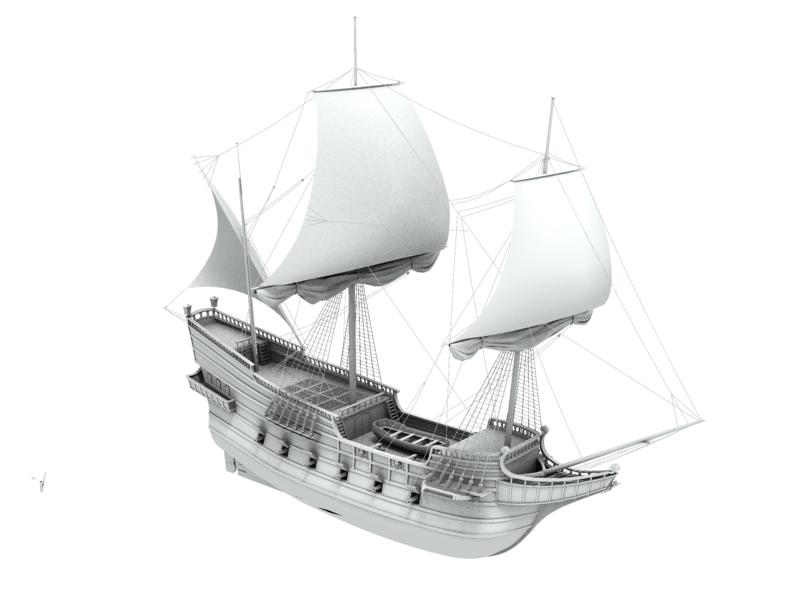
Last year I modeled a toy boat, the Santa Maria. Ever since then I had the itch to create a fairly realistic Pirate Galleon. It's almost finished, but I thought I'd share before heavy texturing starts. This project is for my portfolio. Thanks for looking... Eric

-
I ran across several things related to some of the above musings and want to add one here because it's trivial enough that I'm sure to forget it. The thought is that now that A:M is set (by default) to save a Project just prior to rendering... It could (at least theoretically) be made to compare that saved Project to a Previously saved Project. The difference between those two Projects could therefore inform the renderer if anything of significance has changed. Some classifications and tests would need to be trialed but this coupled with channel data could narrow the field considerably with regard to the emphasis needed for the renderer. I'm trying to imagine what success might look like and I confess I'm not seeing that clearly. I suppose we could start with a dumb user like me who just simply forgot he just rendered a Project and tried to render it again. This might be Class 0 where nothing has changed and since nothing has changed the previous render is fetched and presented. I will admit that case would be very rare. But Case 1 might be where only one thing has changed... say... last time I rendered out to TGA quality but this time I want to render out to VGA. So, although no data in the Project itself has changed the renderer's requirement has changed. The renderer, knowing that only the desired resolution has changed might prefetch the previous render to display as a preview and update that upon the completion of each newly rendered frame. A tagline would let the user know the image being displayed wasn't final. Would such a thing be worthy of code? Probably not without many other optimizations thrown in for free. But this suggests three basic categories of interest with regard to change optimized renderings: 1. Iterative Changes: The Project File differences (current and previous... for additional optimization the user can overwrite what is considered previous) 2. Internal Changes: Change occurring in Time and Space within the Project itself. The renderer knows that of 15 objects in the scene in front of the camera only one object is recording any movement therefore that object and what it interacts with receives the priority. 3. Renderer changes: In this category data is collected and improved upon with every rendering. Two primary values are recorded prior to rendering and those values are weighted after the render. The first value is determined (in boolean fashion) by what options are selected for rendering. Let's say that all of the values of the settings equate to 128 because almost all are turned off. This then is the ID of the underlying settings that drove the renderer. Subsequent renders are then compared first to other renderings with an ID of 128 and then to the those of other IDs. The second value is the weighted value that can be changed by other factors to include data derived from Cateogries 1 and 2 as well as results such as average render time per frame and over all render time. One of the things this approach can inform is that of determining a desired render time before launching a render. Let's say I want A:M to spend all of its resources for the next five minutes to render my scene. Using the data collected from previous rendering it can suggest settings that will be optimal for me. I can overwrite those but that weighting would have to be balanced somewhere else... or I'd have to increase my estimated time for the rendering. And this is also where composting and masking might can come into play as well as split rendering where I choose what objects in the scene are truly necessary. As I (optimally) want the results of my rendering back in 1 second per frame this time around.. I'm willing to sacrifice a few things. And oh by the way... I know for a fact that these five frames are going to be exactly the same so... I'll indicate that as well via the enhanced Stepping options. Okay, I'll stop there. I was only planning on writing two sentences. And I'm not sure I go those in... .
-
this is my first finished project with hash i've been learning the program for about 3 months now and im fairly glad with my personal prgress

-
Hello all, I started a new project with my friend. (I have a lot of WIPs going on don't I? Oh well.) I'm going to make a sonic animation. I know, I can't come up with any of my own ideas. I started the face but I need an opinion about the eyes. I can't decide if I should use one sphere, or two spheres. EDIT: I did not make this one:

-
It is the first time I get this far in a 3d project. Actually, it is done but these is a problem with the camera, you will see that it does a 360. Is there any way to prevent this? the project was proposed to me by a friend promothing sciences to high school students. He needed visual support. thanks for comments! btw, I didn't waste time animating the character to open door... tido fus_e.wmv
-
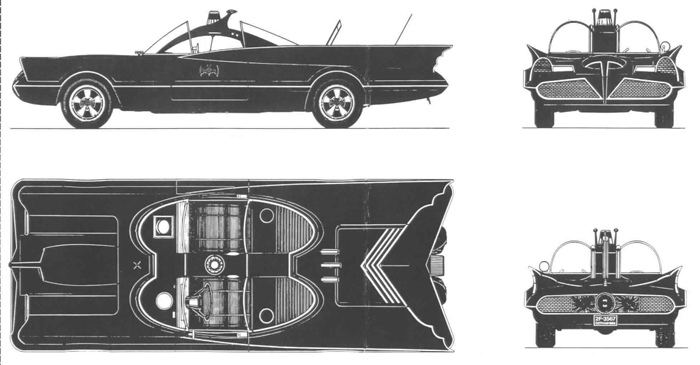
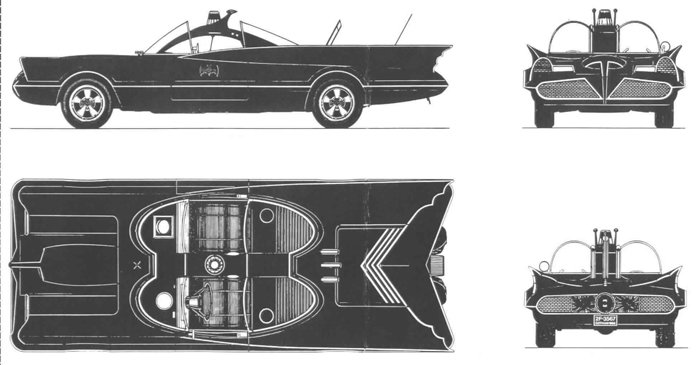
This topic will contain the modeling efforts of T-Dogg and oakchas on an old style Batmobile. Basis for the project: T-Dogg is new to A:M, having learned some 3D in another (ecch! polygons) program. oakchas has used A:M off and on for years, but is trying to rebuild his skills. We'll be doing this in ver 12 as Charlie (oakchas) hasn't yet upgraded to V 13 But, I will before this project is complete, so maybe we can light it using AO, and use some of the cooler new features in v13, too. T-Dogg chose the subject, the vintage Batmobile. So, let's get started. Here's the roto that T-Dogg supplied: [attachmentid=17111] First thing I'm gonna do is make a new directory in my hard drive and label it Batmobile project. Then I'm gonna copy this pic to it. Then I'll split the graphic into equal sized views in a photo program to import into A:M. All progress shots and details having to do with the creation of this model will be posted here. T-Dogg don't forget... if you save the model in V13 I can't work on it... 12 is forward compatible, but 13 is not backward compatible! And heeere we go!
-
Hello Hashers- Doing a simple "cookie cut" mapping effect and it is not responding like it should. Instead of clean cutting it has a bizarre transparency effect whereby it chunks up the grid (see photo). I have embedded the simple project if anyone would like to test it. Also attached is the tga image used for mapping in the event it wasn't embedded along with the project. Thanks for any insights! Tom whitee0.tga CookieTest.prj

-
A bit bored this morning went onto google images and got inspired to make a pic after seeing a couple of Ansel Adams. Here it is: Took about 5min to render with 4passes at 1200x1800. The dirt is a Darktree The road is a off (Texture wise and Model wise). Used AM Hair for cactus spikes and tumble weeds. PLEASE CRITIQUE! I want to make it better if I can. Tips on the road would greatly help! Thanks -Photoman
-
Just an idea ..thought I'd lighten the mood smile.mov smile.zip another 1.98 project ...found out I will be working new shift next week so I should have more AM time
-
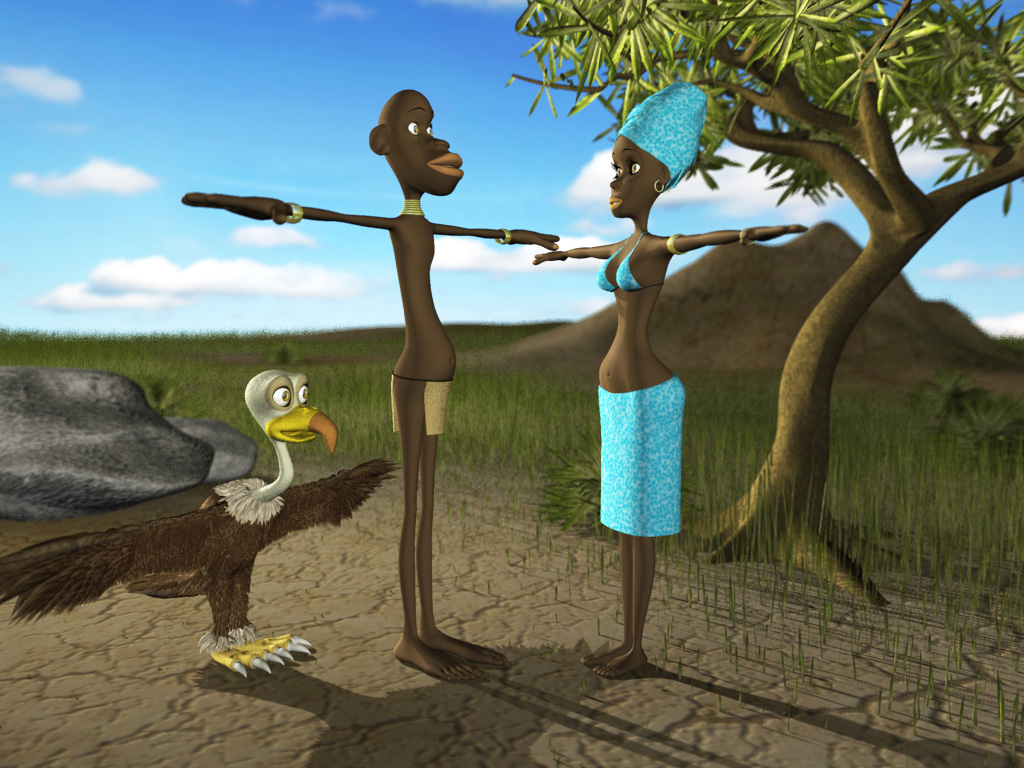
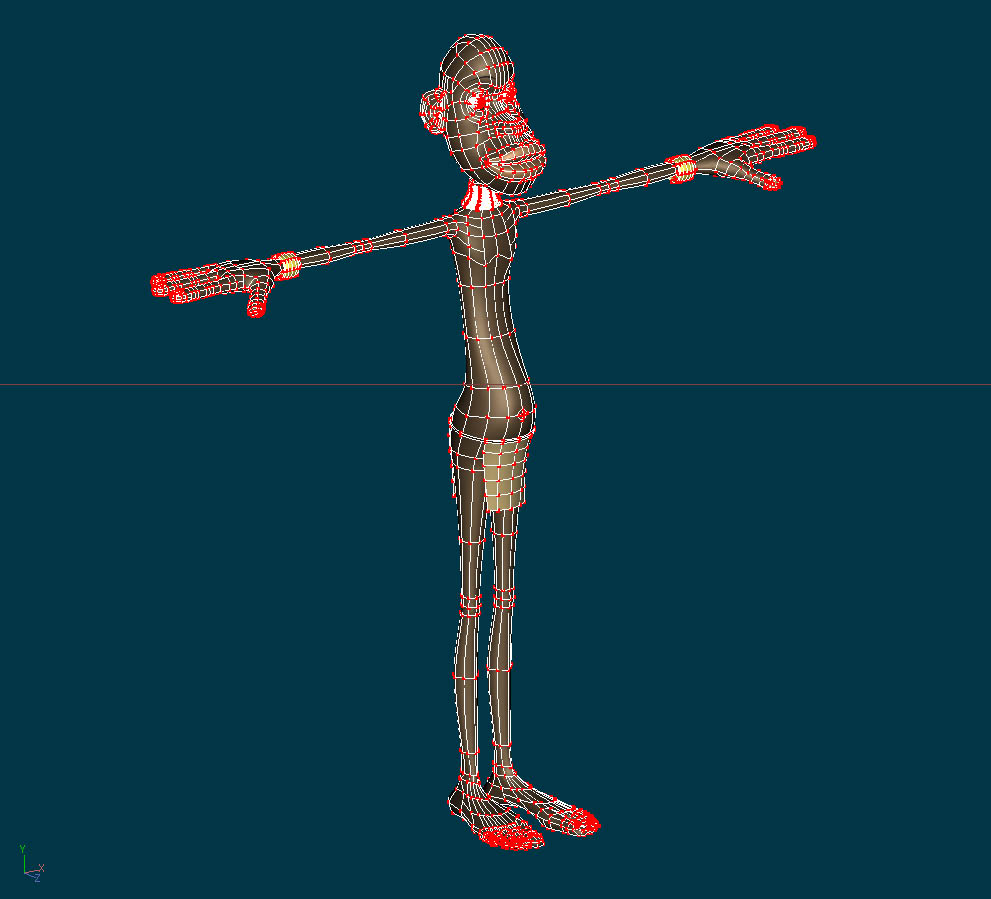
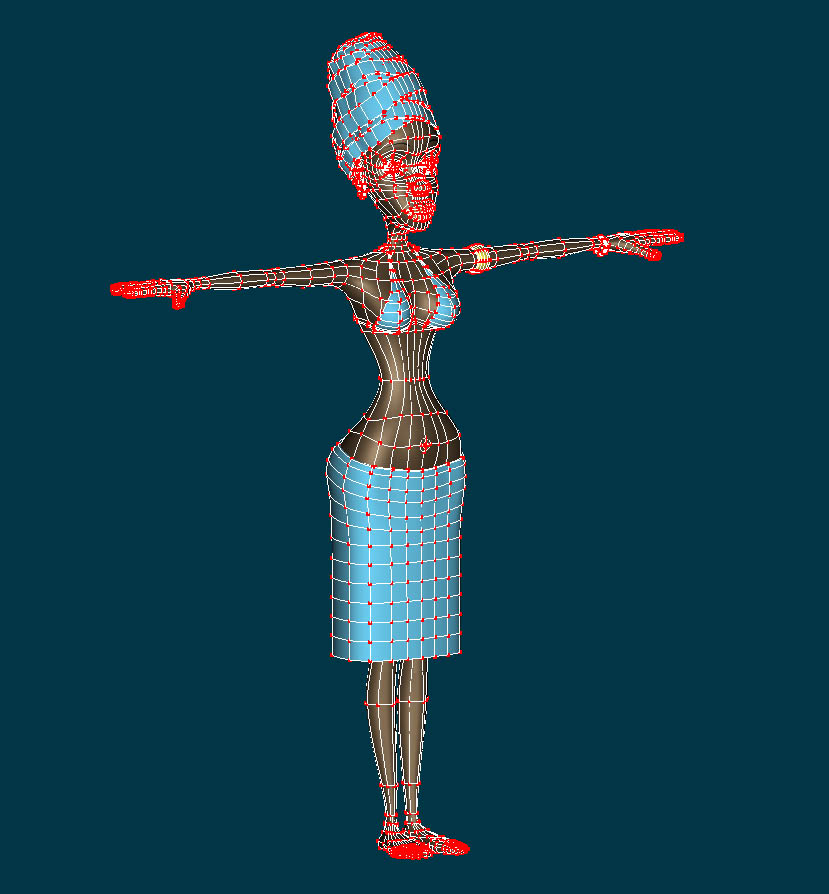
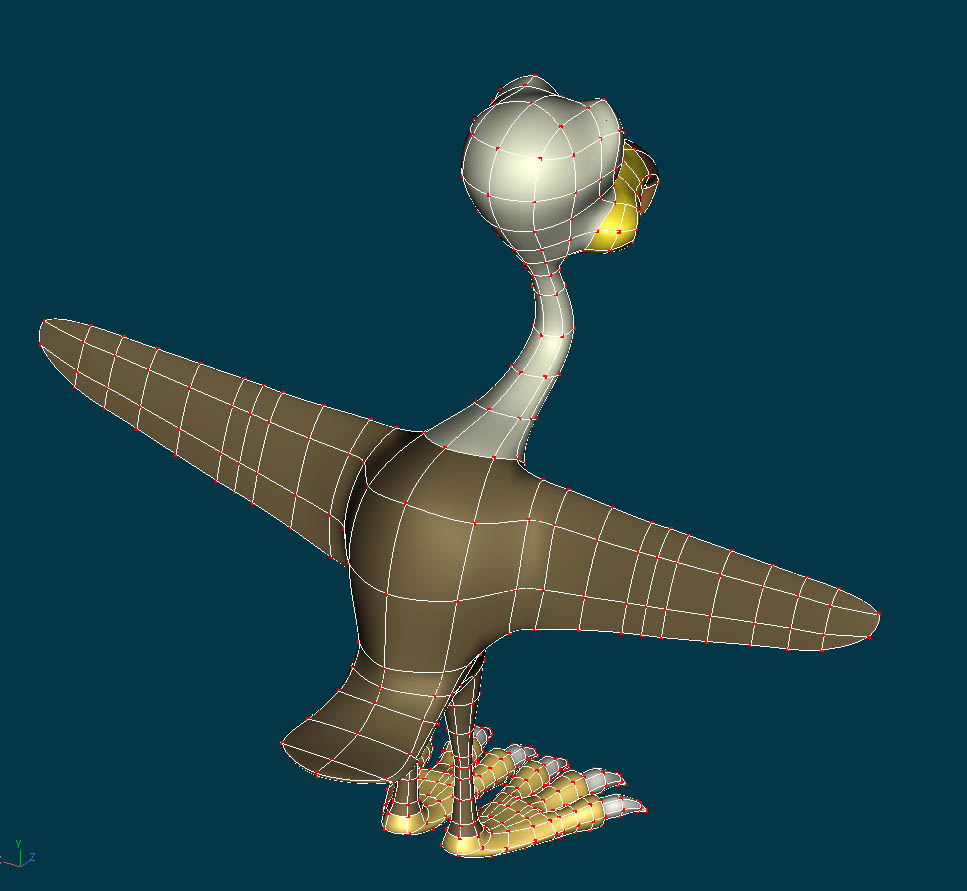
hi @ all, here are some screenshots, renderings and a short qt-movie from the actual project i´m working on. please tell me what you think about the characters, lightning, etc, i´m sure you can find some critical points i haven´t thought of yet. i have a few questions: 1. the forces setting: i want to have a slow breeze flowing through the grass and the tree... the movie is my very first attempt with forces, i know it´s much much too fast etc... but i was wondering if anyone of you could give ma advice about the settings on the force and the hair-materials. sure, i could figure it out by try and error, but maybe some of you guys figured some good settings out for the effect i want to achieve and i can save some hours of my precious time ... 2. rigging: i want to rig the characters with the squetchrig (would be my 2nd try, the first one didn´t really work out ) the question is if you guys who have experience with the squetchrig see any problems with the splineage of my characters, maybe there´s a splinering too much or too less to get good results... 3. the terrain: at the moment the terrain is´n very big (it seems bigger than it really is in the rendering), but i need to get it bigger. problem is that the grass population slows down my rendertimes enormous, the picture you see here took about 17 minutes (big render, 1024x768 with 16pass... think that´s ok, but if the terrain get´s much bigger it will be much slower too...) does anyone have some tips and tricks to improve the render times on big grass-populated landscapes? 4. dust on the ground: i tried to add some dust to the ground, that it looks more like a real savanna, i tried volumetrics (experimented with dust and mist, but couldn´t get them look good), i also tried out sprite-emitters, but i couldn´t get them slow enough in the movement... how would you do that? i can´t get no sleep anymore because of all this questions in my head, night by night im sitting on my couch with my macbook thinking: "let´s quickly try this one out before you go to sleep", and then i look at the time and it´s 4.30 am.... dammit! so pleeeease help me! thanks ahead to all... windtest.mov

-
There are only two places Library icons come from to my knowledge. The first is from inside the file itself. That icons is created by the user and stored at the end of the file in a data section. If A:M cannot find data at that location the second method takes over and A:M displays a default icon for that asset type. The fact that the bowling alley icon is appearing suggests to me that someone took the time to assign the icon to the project file and that image is embedded in the icon data section of the file. It is a bit odd that the bowling alley icon is present and I'm not sure why that is... there is a reason though! Projects are a little different in how icon/preview images can be assigned. If we select the Project container a the top of the PWS and then attempt to RIght click in a window and assign an image as an icon... it will likely apply that image to the model... choreography or other asset in the Project and not the Project itself. The primary way I know to assign a preview icon to a Project file is via the File Info properties of the file where the Preview image can be assigne by browsing to an image on the harddrive. The two ways I can think that might have led to the bowling alley image being assigned are via manual assignment and by starting a project that already had that specific preview image assigned. There may be other possibilities but that's what readily comes to mind.
-
Comments welcome. One question I have is how do u change the ground to somethingg like grass or a parking lot ? I tried to layer, drop and drag to the project workspace, and even rotoscope nothing works..When I render it ,i get the default ground. I can change the color as u can see...Any advice is welcome.... Thanks, Real Newbie here
-
 I haven't posted in a long while, ever since I returned to college to get my Masters (done) and Doctorate in Music Composition. Also I haven't animated in a couple years, but this summer I got the A:M subscription and decided to make a five-movement work for animation and electronic music. I thought I would post the YouTube links here so you all could check it out. I learned a lot I didn't know about A:M in the process, and actually had to rerender an entire movement after finding a better way to do something. Anyway, without further adieu, here they are: I "Purple": II "Industry": III "Red": IV "Interlude": V "Blue":
 -
The whole premise is that of a midsummers day shot of the hills. I got the idea from the hills next to my house. Here are some sketches. The Windmill that is going to be in the semi foreground area. The overall layout of the shot. I am going need some help though on configuring AM hair to get that grass look. (Gold with white tips) More stuff soon. -Photoman