HomeSlice
-
Posts
4,676 -
Joined
-
Last visited
Content Type
Profiles
Forums
Events
Everything posted by HomeSlice
-
If he puts the bathroom against the right wall, the bedroom can be a heck of alot bigger.
-
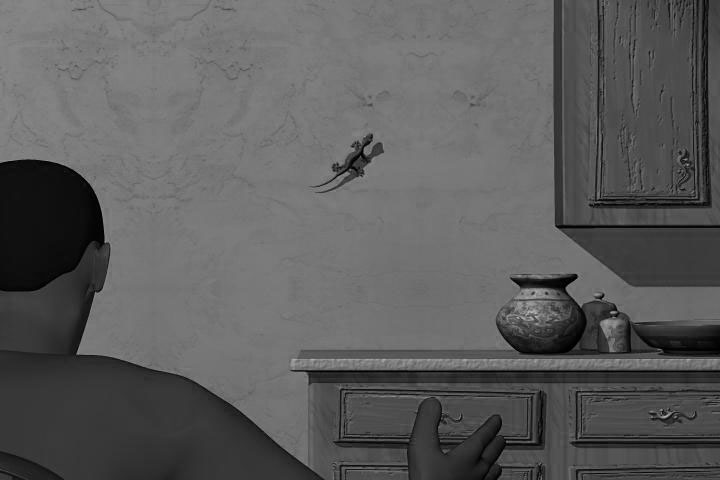
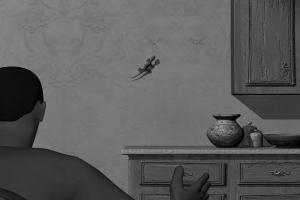
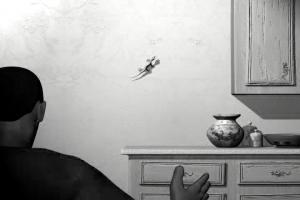
Love the street corner scene! The values in the interior scene are all very similar and make the image seem muddy. I have attached two images. The first one is your render converted straight to grayscale. The second one I adjusted the tonal range and added spot lights coming down from the top left and top right corners.
-
Excellent Tutorial David! And a much needed one too! For someone looking for a tut on how to make a squetchy leg, perhaps take the section where you make the squetchy leg and upload that as a separate video named "How to Make A Leg Squash and Stretch" ? Just an idea. Thank you for making this tut.
-
Jason would be the man to contact.
-
There's a tutorial for that! http://www.hash.com/forums/index.php?showtopic=30871
-
Me Too! I especially dig the hair on the rodent wit the symbols.
-
That was fascinating. So... your preferred method of death is being buried alive?
-
Never mind. I found the Tech Talks section. I guess there isn't one on the NLE.....
-
I'm pretty sure I remember a Tech Talk on the NLE, but when I went to the tutorials section to look for it, I had no idea where to start. Where do you look if you want to find a tech talk on "NLE" ?
-
Thank you Robert.
-
I watched Martin playing with A:M's NLE a few times when we were trying to get TWO rendered and edited. He just imported the image sequence, imported the audio file, dragged the the image sequence into a new Chor and the audio was automatically linked to it. He never actually imported the .sinfo file.
-
Once again, Thank You for the great input. Thank you Jimd. I do realize that, even though I am in no way compromising the commercial value of the original music, I still do not have the rights to the music. I have read that YouTube has agreements with most of the major labels to allow users to post stuff that includes various pieces of music. So I just did a search on YouTube for "Pink Floyd" and saw many videos that were definitely not uploaded by the copyright owners. So I figured I would just upload it and if I get asked to take it down, I will. But I have not done much research into it. Do you know anything about the YouTube agreement with music companies? Thank you Mark. Thank you Michel, That is one more reason to focus on Shorts instead of spending 5 years making 2 feature length movies I'll look at the other stuff I have done and see if any of it is good enough to put in there. Detbear, those sound like very good points. I'll start working on Draft #3.
-
The "step" property is very handy. Before I final-render an animation, I render with step=50 or step=100 (depending on length) to make sure everything is rendering correctly.
-
After a couple of laaaaate nights, here's Draft Number 2!! I added a sound track and cut it down to a little over 2 minutes. I also watched a bunch of other animation reels. All the ones I liked had pretty tight cuts, so I copied that. http://www.holmesbryant.com/files/video/Ho...Demo_draft2.mov (27MB)
-
 That happens to me occasionally in a Model window, but I haven't noticed it in a Chor (but I don't do much direct animation of splines in a Chor). Sometimes if I just select the spline to the right or left of a wonky CP it will straighten out. Sometimes, if I select all CPs and nudge left/right they will straighten out.
 -
Any time you are experimenting in a new subject of A:M (such as cloth), it is common to get a few crashes. After you become more familiar with the subject, and how it works, you will begin to notice a significant decrease in the number of crashes.
-
If the thing you are trying to import is a static model, like a building or something. Import it into A:M as a Prop. Prop importing is very fast. If it is mechanical and you can break up the polygon model into all the different joints of the model, import each joint into A:M as a Prop and use constraints to rig the thing for animation. If it is an organic character that needs to be animated, your best bet is to re-model it in A:M. You can import a poly model into A:M as a prop and use it as a sort of 3D rotoscope to make re-modeling it easier.
-
A Few Things I have done ...
HomeSlice replied to bentothemax's topic in Work In Progress / Sweatbox
Ben, you are really talented. Congratulations! -
OK, I understand now. I have had other issues with the "active chor" thing. My issues weren't bugs though. Sometimes I forget to choose the appropriate chor action before I make a change, so the channels are not created in the right action, which can really mess things up at times. ... kinda like forgetting to re-activate the Animate button.
-
So both of your Actions are trying to manipulate the color of that same group of patches? Why not just do that in a Pose?
-
That looks good. Does she have pants? If not, what are those lines on her hips?
-
The banners are cool Rodney!
-
I haven't noticed that, and hopefully I never will
-
That's really cute. Well done! The only glaring thing I saw was when the guy stands up, he has no sense of weight or balance. Usually when someone stands, they have to shift their body weight in some way so it is over the feet before they can begin placing weight on the feet in order to stand. There is also a small issue with the walk cycles. The forearms should lag a little. And the lower legs should extend forward more before the feet touch the ground.
-
That looks nice! The holds seem too long. I get a little bored after awhile. I would make all of them no longer than 1/2 sec to 1 sec. It also looks like all the bones are set to Zero Slope interpolation. That is good for blocking out the action, but when you are done blocking, I like to switch to "spline" interpolation most of the time. You have to selectively change the interpolation on the keyframes that drive the feet. The keyframes that "plant" the feet should be zero slope. All other keyframes can be set to Spline. The default interpolation for bones generally appears to be set to "spline", but when I look in my channel window, they are almost always actually "zero slope". Make sure the *Default* interpolation for your bones is set to "Spline". Open the channel window. Select the "Bones" folder in your Model Shortcut's Chor Action. Click in the Channel Window. [CTRL A] to select everything. Double click in the selection box. A dialog window will pop up. The field labeled "Interpolation" will usually say "Default". Just hit the OK button without changing anything. All the splines in the Channel window should adjust and look much more curvy now. Find the keyframes that "plant" the feet. Select those keyframes and switch them to Zero Slope.