robcat2075
-
Posts
28,260 -
Joined
-
Last visited
-
Days Won
403
Content Type
Profiles
Forums
Events
Everything posted by robcat2075
-
Is this a Windows-only thing, because I cannot find any way to activate/deactivate multi-threading in the Macintosh version of 16. For the moment, it is Windows only. Steffen put up a note that he had to remove it from Mac because of a compiler(?) bug that prevents if from working in Mac. Most things we do with A:M didn't use MP anyway so you wont' notice the loss much. Particle simulations and "Finding patches" (lengthy on very large models) are the two major things that can be sped up by it currently.
-
I voted again. I encourage everyone to take a minute and vote for Gene! Although the lure of Yugoslavian rappers will difficult to overcome.
-
I saw them and wondered where the hell they came from. Then in the Reports section I saw you bug report. I have added a "monitor". TIP: when shift-selecting several bones for copy/pasting keys... Copy while the KeyBone filter is on and Paste with the KeyModel filter on. That prevents Bone Position Keys from being made.
-
But this is the same model I used in my other animation and it did not have the leg wobble (straight walk.) Maybe you crouched a bit lower or higher or lefter or righter than before. It's like a cliff, it's not a problem until you go too far. Why should I go back. Three dimensional space seems easier to understand. Also, if the W driver is to make things smoother, do I really need that for my machine? 3D space... you got that either way. But we're talking about angles. Quat will interpolate from angle to angle far better and more intuitively than Euler. You don't need to know what the W means. All anyone really does with those curves is look at them and ascertain whether they are changing as fast or as slow or as not-at-all as you want.
-

Commentary tracks! Need BUS STOP Commentary tracks.
robcat2075 replied to robcat2075's topic in Work In Progress / Sweatbox
And I'll add again... you don't even have to try to be synched... just talk about something about your shot. -
You deserved a break. OpenCl, that's some sort of GPU computing thing...that sounds like some new wonders are on the way.
-
btw, there are a bunch of "Bone Position" channels in your chor. These are caused by a bug in copy/paste. You can and will want to delete all those whenever they occur. For example, expand "Pelvis" to see some of them.
-
This is really a problem with the "knee" trying to "aim at" the knee target which is placed rather low. Flopping to the side was the "best" it could do given that the lower leg will prevent it from getting any closer. At the start of your scene, move the Left Knee Target up to about the level of the Pelvis bone. That seems to be a better overall place for the knee to try to point to without having to move sideways. Since legs and arms move quite a bit in animation, elbow and knee targets often have to be managed during an animation to get the best result. Go back to your Quat version. The only time you really need Euler is for things like propellers that need to spin more than 180°.
-
True. This is really the procedure for importing image sequences that have associated sound in to A:M for the purpose of using it in A:M's NLE functionality. Which I didn't think even worked at all until I found this workflow. Ultimately, A:M doesn't give you access to Quicktime's audio compression possibilities, so if you really want a nice Quicktime from your animation with sound I recommend either of the two methods I mentioned previously.
-
But what is in the unexpected pose? Expand it... what's in it?
-
Constrain the leg to the foot, not the foot to the leg. You're the one who made the poses, right? I dont' know what you were doing when you made them, but you do, right? What made you make an extra one? If you dont' recall , it's easy enough to open them in the PWS and look to see what's in them. What's in them? It should only require one pose to contain the IK constraints for the two legs.
-
You have 2. backwrds
-
That picture does not show a gray model window. It shows no model window open at all. If a model window were open, the model's name would be in the title bar. Just double click on any model in your objects folder and it will open and display. Likewise, double click on the chor to open its window up.
-
If you change a channel from Quat to Euler A:M will delete the W on its own as it is converting the values to Euler which has no W. But for character animation you really want to keep Quat. Euler is going to get you weird gimbal lock problems. Do the copy/paste I explained. It works, I've done it a hundred times in the same situation. If it's not working, you're doing something wrong.
-
That's a new one to me. Are you saying the actual model window is gray inside?
-
Lock IK has the effect of preventing IK solving from traveling any farther up a chain of bones than the bone that has it ON. The option only appears on bones that have an IK-affectable parent. A bone that has more than one child is not IK-affectable. Lock IK is rarely needed in today's rigs.
-
Did I need to do that in my simplest IK leg?
-
It's exceedingly rare you would want FK legs. Almost never. With TSM2 (and almost any other rig on this forum) you get both built in.
-
Yes, get your CP weighting going as well as possible first.
-
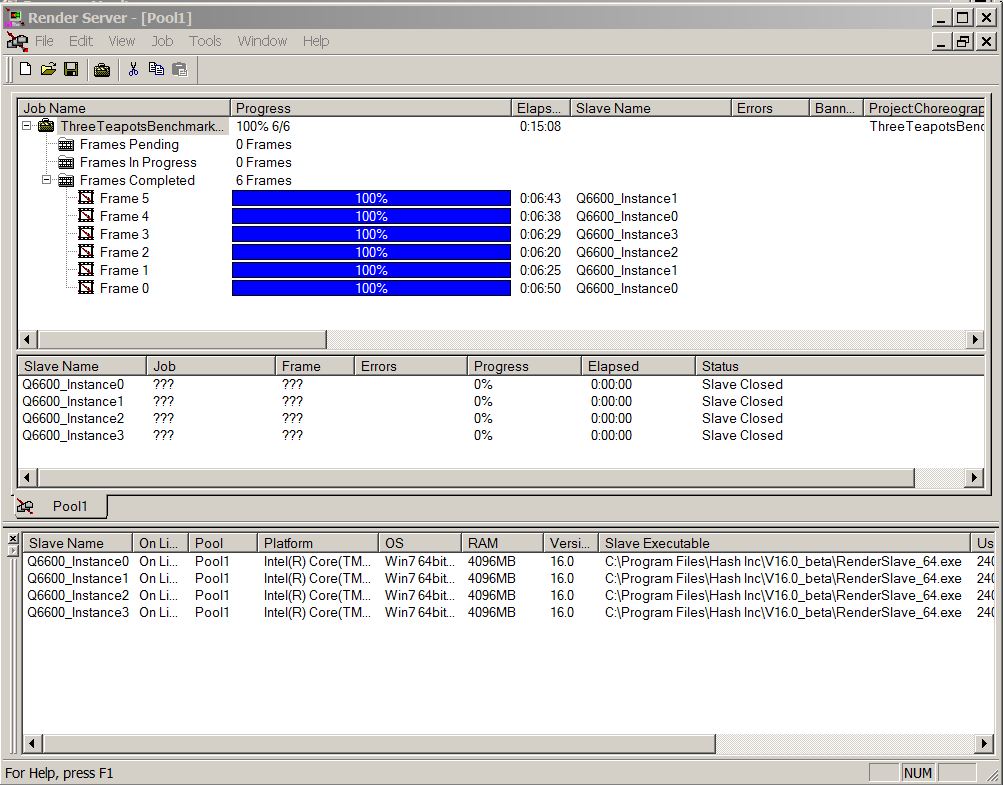
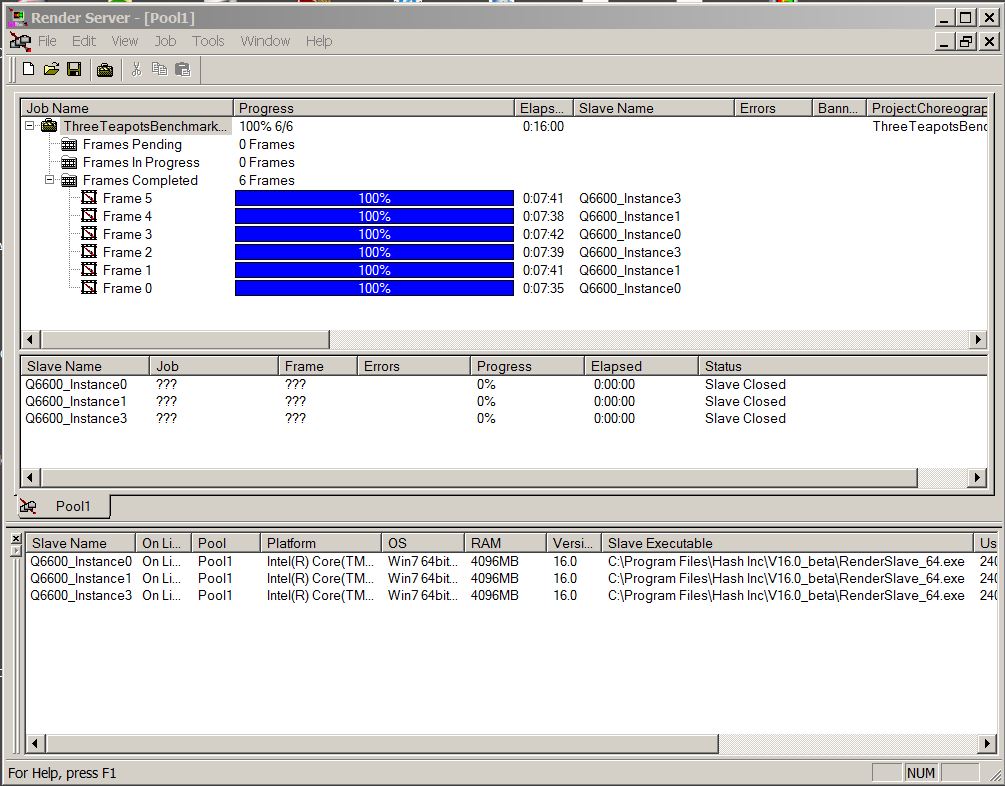
One caveat is that you need enough RAM for each RenderSlave to do its thing as they don't share loaded assets between themselves. For Most A:M scenes this is not an issue but I have run into some TWO scenes that needed all 4 GB on my PC just for one slave. I've been toying with this and find that I can use that last core if I go to the Windows Task Manager and set one RenderSlave's "Priority" to "Below Normal". That gives some breathing room for anything else the OS needs to do in the meantime, which won't be much if I'm otherwise away from the computer. For some reason my all-four-core renders were faster than my three core renders. I don't know why. Very cool! You need to post us a screencapture of that 60-CPU list in Render Server when you get that set up.

-
Commentary tracks! Need BUS STOP Commentary tracks.
robcat2075 replied to robcat2075's topic in Work In Progress / Sweatbox
Bump... more commentaries please... -
nancy explained it but you don't need to really know exactly what the values mean. You just have to see that the values are obviously not staying constant while that foot should be stationary. Set the Key Bone filter Set the Rotate and Translate filters Set the time to the first key Select the bone CTRL-C Set the time to the second keyframe CTRL-V now the first and second keyframes match and the bone will not wander
-
If the start and end keys are the same, zero-sloped and linear interpolation will give the same result, no change between the keys, that you want. However, as an example, take a look at the left foot from 2:12 to 2:27 where it is on the ground. The beginning and end are a bit different, so the foot will creep between. You could manually edit the second key to match the first or, easier, copy the first one onto the second.
-
I tried to take a look at the PRJ but it doesn't have the model in it. None-the-less, I think zero-sloping your channels is the main to-do.
-
I got your message... no problem. Can you send me an example invoice for what you are needing for me to document?