agep
-
Posts
2,099 -
Joined
-
Last visited
-
Days Won
1
Content Type
Profiles
Forums
Events
Everything posted by agep
-
Its no problem changing the iris texture. I have a few creature texture. Give me a sec and I'll give you an example *edit* done

-
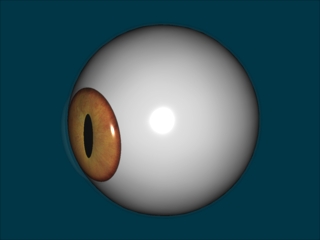
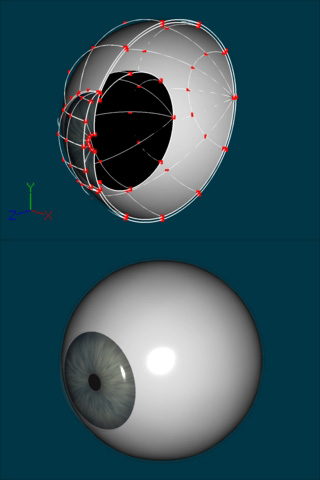
The eye, with iristexture There is also made an poseslider for the irisdilate eye.zip
-
The eye on the last image was just a dummy. This is the eye Im going to use. It might have to many splines I guess. The eye was created from an videotutorial for long time ago (don't remember where). I can share it if there is any interest. *edit* doing a splinereduce on it right now *edit* splinereduce is done. updated image
-
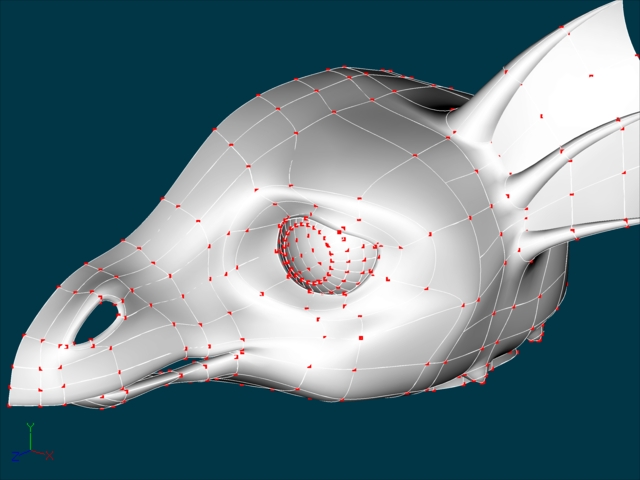
Thanks. I'm working on the eyesocket at the moment. Trying to make the eye fit. Not sure how to make eyelids... btw, have shortened the snout
-
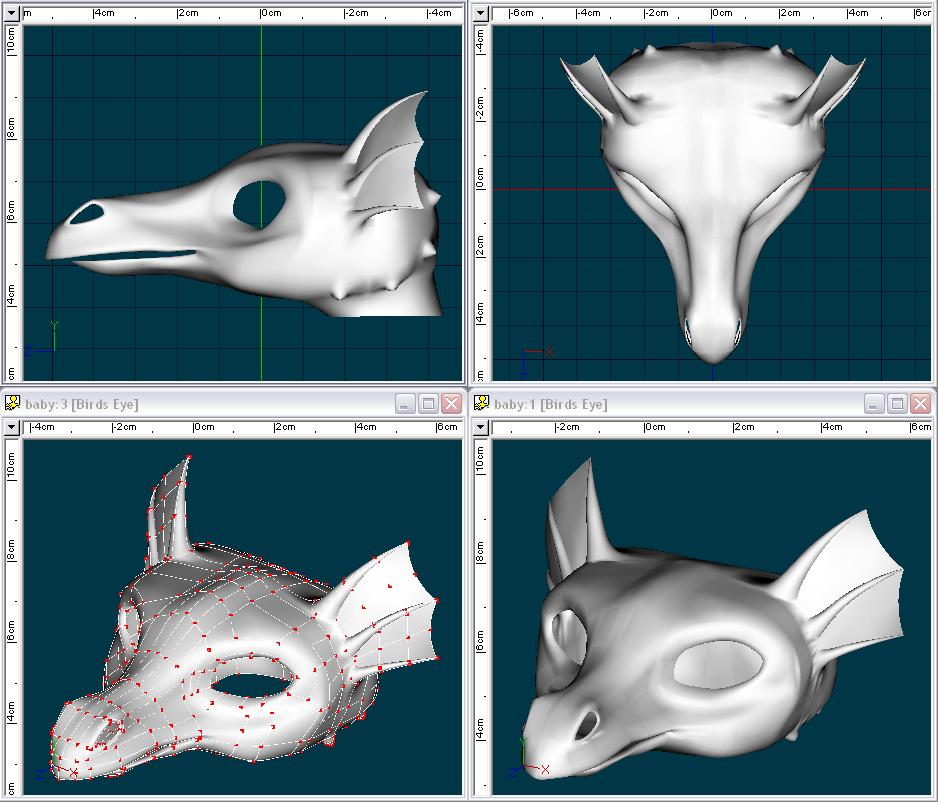
Hello all. I have usually been modeling mechanical stuff, but I found it about time to do some more organic modelling So after 3 cups of coffee and a hour and a half I got this. I could not find any rotos of any dragons so I'm using an Image as an inspirational reference Do this headshape work? is it to wide? missing something? After watching it a few times I find the snout a bit long, agree? So any crit and tips is highly appreciated -Stian-
-
Really cool. Great editing!
-
And here is an clip showing the armrig as requested testarm_Custom.mov
-
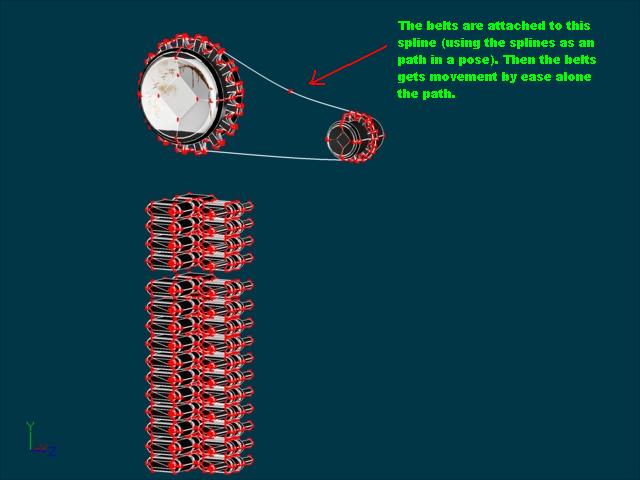
Thanks. I cant take full credit for the belts because they are built up by the same principle as the bikechain that someone on this forum created (I could not find the thread). Anyway here is an image with a simple explanation LOL, I'm bad at explanations....
-
Thanks. btw, I uploaded the image to cgtalk: http://forums.cgsociety.org/showthread.php...839#post2564839
-
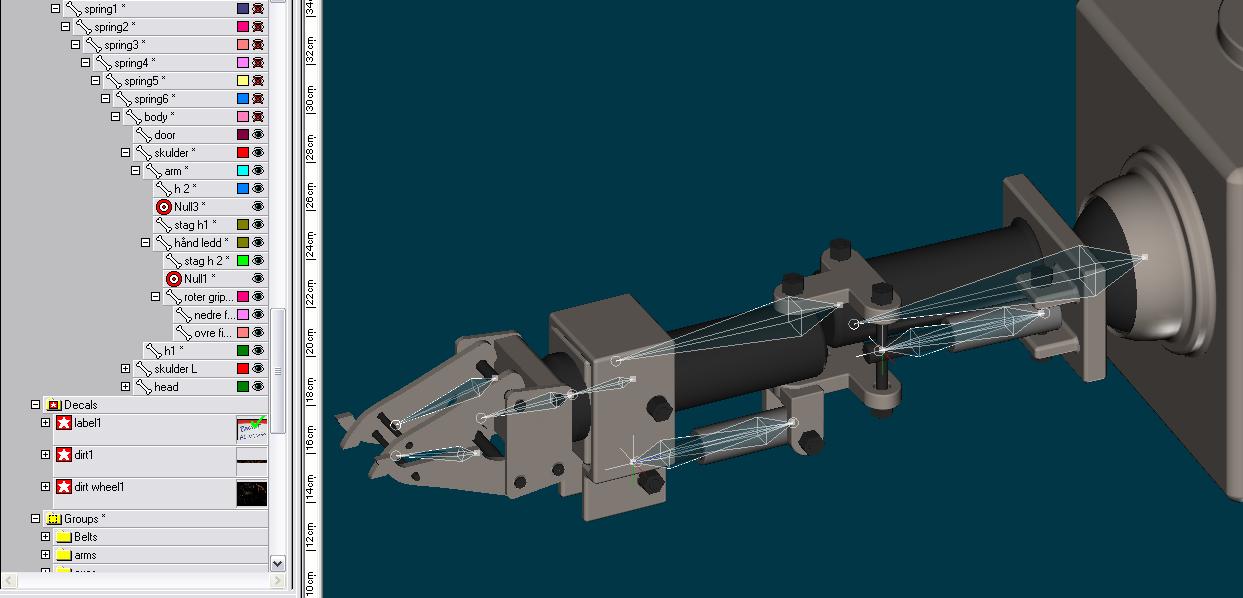
Have sent you a mail The wire to final is done in pinnacle studio. About the arms, good question, but I might not have a good answer for that I don't have to much experience in rigging, but I found that method working best (for me that is), I somehow feel like I get an better overview with nulls. btw I've added an image that shows the armrig
-
Thanks. Yes, its a floppydisc, that was some last minute added "accessories" You can inspect the models a bit better on this image LINK
-
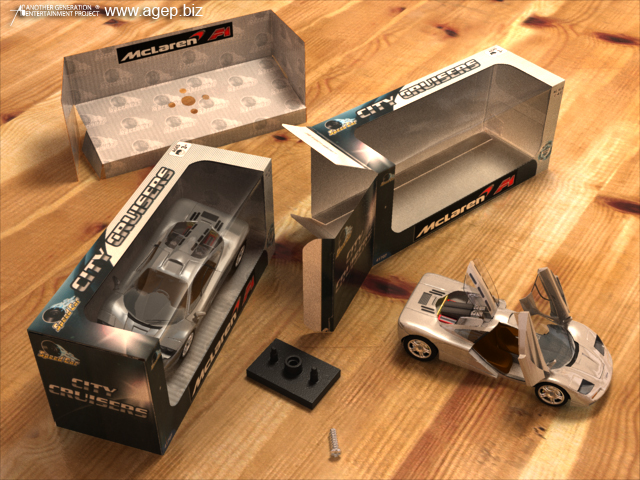
Here is the final version of the toycar. I did try to move the plasticbase, but it didn't look as good as I hoped, so I moved it back again. Rendertime: 40hr A big thanks to Yves for all the great input and suggestion. I agree with Dimos. Yves have helped me a lot, not just on this project, and he have given me many big aha-experiences on many things, like beveling and skyrig. Thanks Yves
-
Thanks Mike 1. Are u sure? I know that they aren't adjusted and syncronised to the ground. 2. It gave me a bit better overview, personal opinion
-
Thanks for the comments. I'm glad that you like the animation, cuz animating is not my strongest side Using him in a story might happen, but for the moment I don't have any story for him
-
And here is a clip showing how the rig is working. The belts (not showed on the clip) are are individually controlled by one pose slider each. rig.mov
-
And here is an animationtest using the image contest environment Johnny6PAL_test_Custom.mov
-
Hello everyone. For the moment Im working on this robot. It's supposed to be an very absent-minded and dumb robot (not evil but just non intelligent). This is also my first serious atempt on doing an rig on a character. I'll in a second upload a few animation tests I have rendered. Comments are welcome First is an 360' of the robot (with an little animation) Johnny6rotatesmall.mov
-
Its uploaded (I think this is the t-rex you're asking for, have not tested it). Let me know when its downloaded so I can remove it. *edit* removed
-
Nice start on your model I downloaded the trex a while back, so I do have it on my computer, but it is very big (18MB). I could if you want it upload it to my website for a sec for you to download, or I could split it in two and send it on e-mail (max 10mb attachment on the gmail )
-
Thanks for the tips Yves, and all the time and effort you have been using on this project of mine. I'll take a look at it when I get home from work. *edit* thanks for the links Thanks Fab. It's you who inspired me you know:-)
-
Latest render. Getting closer? I did increase the bumps on the plastic and the reflectivity, but I'll need to increase it even more. Also changed the spec on the boxes and the cars. reduced saturation and contrast on the floor. I'm getting blind on this project so please tell if there is something to adjust. Regards Stian
-
Is it a flipped normals issue? just guessing
-
Weird. Does it end up like this in a final render also? Are u sure the aren't any duble patches in that area? since it looks like just the center of the patch is missing the decal
-
Thanks for the comment I see your point, thanks. Have done an new arrangement, better?. Also added softness on the reflections, and I think it looks overall better except for the plastic on the boxes (feel like I lost some of the roughness, guess I'll need to tweak the cp's more). Any comments or tips? still get the light on the folds though.... Regards Stian
-
Okey. Here is the last render. How is the saturate now, still to high or to low? Did not get rid of the light/glow in the folds, also got this irritating glow under the short side of the complete box How about the shadows? Yet to do: close the chassis of the car.