-
Posts
3,868 -
Joined
-
Last visited
-
Days Won
1
Content Type
Profiles
Forums
Events
Everything posted by zandoriastudios
-
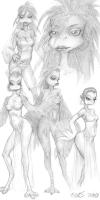
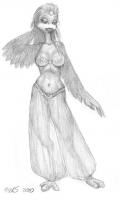
http://zandoria.wordpress.com/2010/01/10/chicks/ I decided that I need to be a little more active online, so here are some sketches of some of the "chicks" in the latest incarnation of Tar of Zandoria. If you want to subscribe to the blog, I am going to be posting sketches, designs, and work-in-progress there. Feel free to comment!
-
Are you trying to import as a PROP? That is the best way to use a .3ds file in A:M....
-
I don't have on this computer, or I would upload it. But You should be able to use any model to follow along, since it is just making colored groups, then hiding things and stamping the decals.... Except for the part where I'm using 3D Painter, you can get the basics from this tutorial: http://zandoria.wordpress.com/tutorials/uv-tutorial/
-

Dolly experiment, landscape layers
zandoriastudios replied to zandoriastudios's topic in Work In Progress / Sweatbox
Ha! No problem except for not knowing what I'm doing (thus the experiments) -

Dolly experiment, landscape layers
zandoriastudios replied to zandoriastudios's topic in Work In Progress / Sweatbox
Playing with the idea of landscape props quickly modeled in Zbrush, dropped into an A:M choreograpy... I had some weird results with an .obj prob (not sure why), but the same geometry renders well as .3ds. terraintest.mov -
Only if you used a map to limit the length property.... I would just groom the hair particles.
-
Awesome, as always! Merry Christmas!
-
Since most control rigs drive a set of geometry bones which are assigned to the mesh, I would start the action by turning OFF the rig and making those geometry bones visible--Then constrain the geometry bones to follow the BVH.
-

Dolly experiment, landscape layers
zandoriastudios replied to zandoriastudios's topic in Work In Progress / Sweatbox
that was from so long ago, I don't think I still have.... I was just playing with the idea at work, and still had that .jpg. When I did this background, I looked for photos of landscapes that matched perspective in areas, then overlayed them in Photoshop and painted a layer mask to blend together. I was reading a book on matte painting at the time [it is #9 in your Amazon wish list]. (in it they were painting on a render, then projecting the painting back onto the model as a texture). It looked very effective: the example in the book was the Jedi temple from one of the Star Wars movies. -

Dolly experiment, landscape layers
zandoriastudios replied to zandoriastudios's topic in Work In Progress / Sweatbox
On the other side of the river! -

Dolly experiment, landscape layers
zandoriastudios replied to zandoriastudios's topic in Work In Progress / Sweatbox
Robcat--yes I rendered that originally, the grass texture (and distant town) was overlayed in Photoshop set to soft light....the idea was to create some matte paintings to save rendering time later the rock was geometry from another program ( just a test--which failed)... -
This is just a quick experiment doing a dolly shot. The background is a layer object ,as are the trees and the grass. There is a Sun light oriented to match the sun in the background (with lens flare). The rock in the foreground is the only geometry (it was a test on using props in the landscape, but it isn't lighting correctly so just ignore MATTE_TEST.mov
-
It isn't scrambled terminology, just instructions from version 8.5p! this tutorial is a bit dated...a Pose relationship is different from what a Pose was in version 8.5
-
The tutorial was done in a much older version of A:M... before Relationships were introduced. I think you will have to experiment a little to adapt it to the current version.
-
hold down 6 to move along the surface normal.
-

3d help for packaging design
zandoriastudios replied to jakerupert's topic in Work In Progress / Sweatbox
Can you give more information regarding how it will be printed or applied? Will it be distortion-printed on a vacuum-formed shape, or is it a shrink-wrap (like you see on a lot of drink bottles)? -
Too many Williams!!! For my work, I am looking at this company (probably the one Robert saw on my blog): http://www.ownage.com
-
I always have been a fan--now it is official!
-

Need a UV Mapping tutorial...
zandoriastudios replied to Kelley's topic in Work In Progress / Sweatbox
My tutorials are online again (yay!) on my blog. Here is the link to the UV tutorial: http://zandoria.wordpress.com/tutorials/uv-tutorial/ -
Well, the last time we got some great interpretations without it being the same ball. One that I thought was pretty cool was the fish taking the round float! Or How about Nancy's "Jelly Ball"?--which was a jelly fish animation! It all worked because of the Left to right motion. Ball enters frame from the left. Ball exits frame to the right. Simple. Everyone could have at least one entry completed already!!!
-
Cool! Are you milling yourself? What type of mill do you have? Any information you can share about the process would be interesting. Thanks for posting!
-
Awesome!!! There is nothing quite like seeing your ideas turned into REAL objects!!
-
try a volumetric effect (cube)
-
It is like a bump map, but it uses the 3 channels of an RGB image (rather than 1 channel of a grayscale image) to fake the detail. The best way that I have found to create normal maps is to use a program called "Crazy Bump". http://www.crazybump.com/
-
Similar situation in this old thread of mine: http://www.hash.com/forums/index.php?s=&am...st&p=235207


