-
Posts
6,560 -
Joined
-
Last visited
-
Days Won
55
Content Type
Profiles
Forums
Events
Everything posted by John Bigboote
-
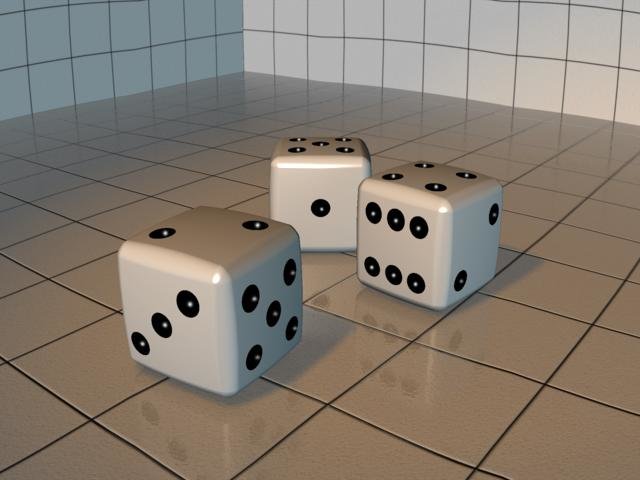
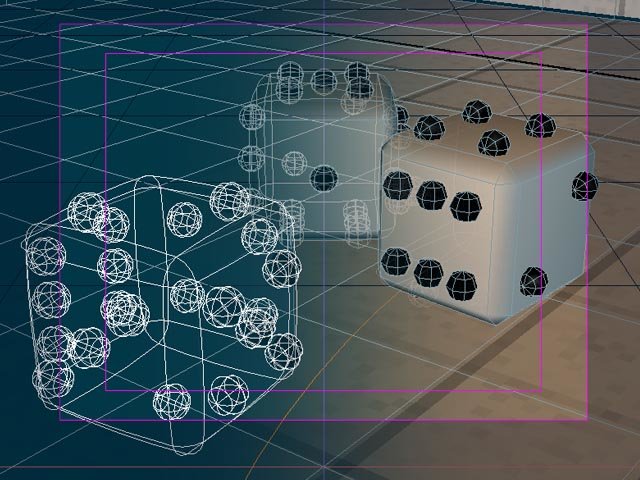
My immediate thought on this was 'use booleans'...and to illustrate my approach, I did one up! 10 MINS! Craps anyone??? (Image made with fisheye lens, default lighting and existing bkgd model.) DICE.mdl
-
Nice work...GREAT CAR! How do the front wheels turn? My suggestion...other than the obvious 'Add a fill light'...would be to go get our new fisheye lens (in the rigging forum) and render a test with it. Your car BEGS for forced perspective!
-
WOW! Welcome Wiskey! Post number ONE and it's a 'doozey! Hope to see more of you!
-
SWEET! You can adjust the 'drag' on the leaves to get more or less wind effect. Maybe add more mass too!
-
The dynamics are working! YES! That's looking a LOT better Ben...
-
What does scaling the geometry slightly smaller accomplish, MT?
-
You could try an 'import'? -Delete all geometry from model A except for the scalp (hair emitting geometry) -Save As new model - Open the destination model and right clik 'import' and select the new model... There's GOT to be a way here...
-
Next-time-shmextime! DON'T do the SSS! It's not always needed. (referring to simulate-spring-systems...not sub-surface-scattering) Try this: Remove the dynamic you now have... and then apply another. That's it...leave the settings alone, unless maybe to lower the constraint percentage to get more 'wiggle'... and then RENDER...NO SSS! I NEED IT! The time frame you mention is very eye opening... my mind boggles at the possibilities. I hope that years from now we look back at 2008 and say "That's when it all happened...remember Ernie?" This opens the door for virtual news reporters...or 'timely animations' delivered very quickly...or- as in Ernie's case...animated opinion-givers spewing 'bovine scatology'... I'm itching to get going on this front...but am currently battling with solving a very important A:M dilemma to me: Hair Collision-Detection, specifically LONG hair... I think I have it figured out... LOOKING FORWARD TO THE NEXT INSTALLMENT!
-
That will tend to happen. You need to think inversely in your copy-paste. Instead of copying your head and pasting it into a new body try the opposite: Delete the entire body from your model and SAVE-AS a new file. Now, copy the body you want on the head and paste it into the file you just created. The hair styling should still be intact! This is known as 'Thinking outside the box'...don't try it at work!
-
Yeah, nice lamb. We would also need to know: What version are you on? What are your render settings? That is wierd alrighty!
-

My First Attempt at Simcloth = Crazy Splineage
John Bigboote replied to Dale_The_Bold's topic in New Users
How dense is the skirts mesh? Denser equals better for SimCloth collision-detection. I find that square shaped patches (uniform) help too. The best way to get going in an advanced feature like this is to conduct some rudimentary tests for your own experience. Drape a cloth mesh over a box, ball or other more complex shapes. Experiment with dense meshes versus not-so-dense meshes. There is no 'for dummies' guide...it's a very advanced feature and to try it on a moving figure means you will have some experimenting. HERE is a 'simple' draping experiment I finished recently for a TV spot that proves A:M SimCloth Collision-Detection DOES work (on a static object at least)...this used an EXTREMELY dense mesh. http://youtube.com/watch?v=Yhv88Vakq6Y -
Yup- both features are newer (jitter and muhair) GOOD NEWS- You can upgrade for only $50 and that will put you in V15!
-
I find that making an object 'unpickable' only takes place once you click on something else...or click on nothing(I'll click on a light or the camera in the PWS). This will reset the 'unpick' and when you go back to try to pick it, you won't be able to.
-
I think people should realize that Zign Track is a facial motion capture solution, not an overall workaround for a good face rig and lip synch poses. The more you rig your face and setup mouth poses the better Zign Track's results will be for you... am I right Luuk?
-
An hour and a half for one image? I have a theory on speeding up your render...seems to work for me. Try this: (Always good advice to 'Save As' before trying something new...) As you noticed, there are two places where you can set your hair emitter's density- one in the main material hair property window and one each in the individual emitter's property windows. I've recently had great speed in renders by reducing the individual emitters density to the lowest value possible- which I believe is .01 (if you set both to .01 you will have a 50-50 ratio of the 2 emitters, but if you set one to .01 and the other to .02,.03,.04 etc you will have a primary emitter and a secondary emitter.) Now this will make your hair quite sparse, so in the main hair property window you will compensate- set that value to 400% or 500% or 900% (experiment) Now- try a render frame and see if you notice an improvement in render time. I hope you do! ALSO= How can you make it look more natural? Have you set the surface attribute to Muhair yet? Muhair gives the overall hair a 'pantene-sheen' that is quite natural. To do this- In the individual emitters 'Surface' property window scroll down to 'Diffuse Render Shader' and click the setting for MuHair, and do the same to the setting below which is called 'Specular Render Shader' (Set to Muhair) There are lots of new settings to dink with but for starts leave the default settings be and see if you like the hairs new look upon render. (Don't forget to specify in the render properties window to turn Render Shaders to 'ON'...under 'options') This will cause a little extra render time but the visual is worth it. Good luck! I like your character!
-
MAN! I can't WAIT to git my fingers on this thing! Those are some pretty usefull features/improvements! Thanks Luuk! Nice sample Paul! I love the dynamic hair!
-
Isn't the 'waving the flag' a pre-SimCloth cloth tutorial? I think it's obsolete. Sounds like you will want to use hair and a force. Lots of experimenting.
-
Not that I know of...but It's pretty simple once you get the basic premise of it. To try it out, make 2 geometries(in the same model)-one to be cut and one to be the cutter (helps to make them different colors, and closed masses, like a lathed sphere-or an extruded box) Now, go into bones mode and assign non-parented bones to each mass. On the properties panel for the cutter mass, select 'make boolean'. Now, bring that model into a chor and slowly animated one shape intersecting with the other and do a quick render... BOOLEANS!
-
The 'cutaway' surface adapts the attributes of the negative shape that cu it away...see my old video(below) AMbooleans.mov
-

A:M Sprites used as SNOW
John Bigboote replied to John Bigboote's topic in Work In Progress / Sweatbox
http://www.youtube.com/watch?v=Yhv88Vakq6Y The spot as it will air. Final with audio, VO, supers and disclaimers... -
AHA! Several of us have had that happen till Will Sutton told us how to fix it. In your choreography properties under 'dynamics' change the default value for 'Reduction Tolerance Error' from .01 to ZERO and re-sim. OR--- Just try no Simulate (Right click on the chor and select 'Remove Sim Data') I find a lot of the times that a simulation is just not necessary.
-
That's good stuff!!! I'm getting to like that Ernie...just wish like Heck that he had dynamic constraints on his antennae! That's encouraging...the 'straight-up' part... Looking forward to more.
-

A:M Sprites used as SNOW
John Bigboote replied to John Bigboote's topic in Work In Progress / Sweatbox
It was made at D1 resolution (720 X486) although I am thinking about re-rendering at a hi-res because it would be great to see in hi-def and also because we are trying to sell that client on the benefits of the higher resolution. Maybe this weekend I'll set up the hi-res... THANKS FOR THE COMPLIMENTS! -

A:M Sprites used as SNOW
John Bigboote replied to John Bigboote's topic in Work In Progress / Sweatbox
Thanks! The billowing snow was added in after effects- but it was an element I made in Hash highly blurred. HA:MR? Where are we that? Is it a viable product? I thought we were waiting for 'the next big release...' and, would the snow particles work in HA:MR? The grid for the cloth is quite dense, and once satisfactorily simulated makes for a mighty heavy project file that takes about 15minutes just to open... -
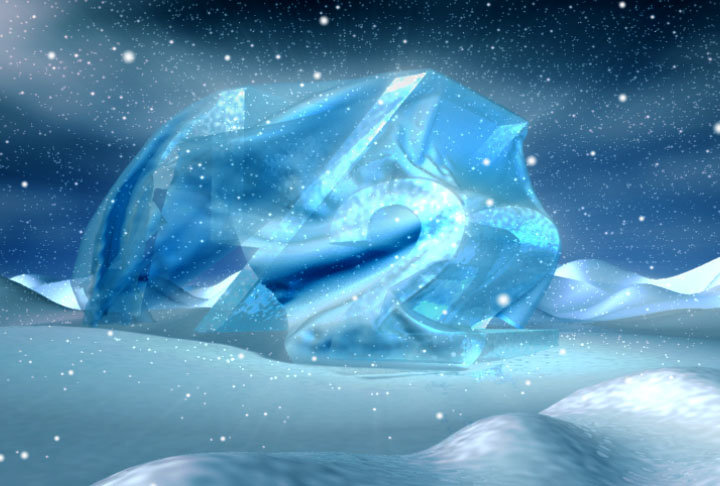
EDIT: I just updated this video as it came out of post-production, ready for broadcast, whereas before it was simply animation... http://www.youtube.com/watch?v=Yhv88Vakq6Y FINAL EDITED SPOT http://www.youtube.com/watch?v=tNtW9yMyTvY The original TV spot, from summer 2007. Hi--- I just updated an old :30 spot for a winter furniture sale and at the last minute decided to employ A:M's particle generator for a snow falling effect. I'm quite happy with the resulting animation, and with A:M's powerful toolkit! I originally used a filter in After Effects (Cycore's CC Snow...which simulates snow falling in depth .) It was good, but was obviously 'pasted' over the scene and did not move with the camera. So then I made a large transparent(100%) patch in A:M and applied a 'streak' particle generator to it. The resulting 3 minutes per frame render prohibited further tweeking on that, so I switched the material over to a sprite generator and used the basic 'blur' sprite off the Hash CD. This rendered much quicker (around 5 seconds per frame, NO multipass) which meant I could tweek settings without worrying (size, number of particles over time, gravity, etc) I let it render the full sequence and composited in After Effects... turned out GREAT! It's hard to believe a $50 animation program is capable of these results in a production environmment! THANKS HASH!


