Mechadelphia
-
Posts
272 -
Joined
-
Last visited
-
Days Won
3
Content Type
Profiles
Forums
Events
Everything posted by Mechadelphia
-
Hi Heiner, I ran into this problem when I first started to learn how rigging works in A:M. I downloaded your model and you'll be fine once you adjust your Mirror Mode Tolerance in the "Options" dialogue. When I checked with your model I set mine to .25' and once I did that the Smartskins mirrored just fine. After you change your Mirror Mode Tolerance, delete the already existing (non-working) Smartskin drivers for the right side of your model. Mirror the Smartskins again and the newly mirrored Smartskins should work for you. If you don't delete the drivers on the target side first then the Mirror All Smartskin function won't overwrite the already existing (but non-working) mirrored ones.
-
Must there be only one? The participation for this contest is the highest that I can recall in a very long time here. Not only that but I think that most of the entries in this year's mascot contest are really very good. I counted ten entries that I think could easily be justified as the splash screen for A:M v18. So why use just one this year? Why not change it where the new A:M uses a random (or cycled) splash screen at each start-up? I'd like to see this because I enjoyed so many of the entries. I can't say that only one should be the "winner". I'm not suggesting handing out 1st place to everyone but if the top 5 placing entries this year could have a chance to be be rotated in as a splash screen at start up then I think that would be a good thing. Alternatively, Hash Inc. could decide which ones could be included along with the 1st place winner. I also think that this would keep the participation for this particular contest high (and competitive). Also moving forward (maybe from v19 on out) why not consider rotating in some of the older splash screens from the previous versions of A:M with the newer ones? I think that interchanging past and present splash screens would really be a nice touch. It would show that there is some sort of legacy to all this and not just a spot light for this year's winner. What do you all think of this? I'll put in a feature request for this if a lot of you feel this is a good idea. Sure I could submit it now but I'd rather know what you think about it first. Thanks.
-

The Caped Crusader - Return to AM
Mechadelphia replied to Darkwing's topic in Work In Progress / Sweatbox
You can see if the ones at the Draw Angry web site will work for you: Sam Liu's "Draw Angry" web site -
Somebody please tell me there is a simpler way to rig. I tried holmes' tut but it get jacked up in the second vid when I try to make the null for the neck. Hi Douglas, Telling us that things are "jacked up" does not put us in a better position to help you. I'd like to try and help you get this right but can you be more specific about which problems you are running into right now? I don't know anything about the Lite Rig so I'm guessing that I may be able to help you at a more fundamental level when it comes to rigging. If you are comfortable with uploading the model file with the rig here then I can look at it and see what you have done so far.
-
Hi Mark, I like the look of that. How long did that take to render?
-
Hi ToreB, I think that what robcat2075 said there is pretty much the basis of the problem that you are running into. The workflow that you are describing (exporting models out of A:M, adding uv coordinates in a polygon application, and then importing them back into A:M ) does not seem like an optimal workflow when working with A:M. I don't think that A:M was designed with the level of interoperabilty that you are expecting in mind. Yes, I know this is a very common or even standard practice when working with strictly polygon based applications but A:M is not one of those programs. Also, UV mapping in A:M is usually not as cut and dry in a way that you might be used to with other polygon based applications. If you have not already, you should look into some of the UV mapping tutorials that were done in A:M. That might serve you better than trying to incorprate A:M into this particular pipeline that is better suited for other programs. I don't want to seem dismissive to you since I really do understand what you trying to do but I think you should try to map your UVs within A:M or try A:M Paint if your final output will be coming from A:M.
-
Hi Simon, You're welcome. Do you mean that you also are seeing the same type of bug in v17 when using z-buffered shadows or do you mean raytraced shadows in v17? I have not seen that occur with the z-buffered ones but I have never really used that kind of shadow as much. I don't think that the z-buffered shadows are going to produce a shadow that is as well defined or as dark as the ray traced one in the toon renderer. I'm sorry for not being more clear about that. I meant to suggest rendering a raytraced shadow with the standard renderer separately and then composite that back to you toon rendered image. I did not mean doing that with the z-buffered shadow (unless you prefer that). If you separate the shadow pass in A:M's compositor using the OpenExr format and light buffers you can clearly see the problem in the shadow pass when using the toon renderer. I don't recall at the exactly at the moment but the problem is less evident when using raytaced shadows with the standard renderer or not really existent at all. You don't have to use the OpenExr format (in the compositor) but it might make it a little easier to manage. As for your question about the jagged shadow on your rock... Yes, that is a rendering issue that occurs with the toon renderer. I've run into the same issue as you in my Clark WIP. I've been working with separate render passes in an attempt to get around it but I still have a little bit work to do with that. I'll post an update there momentarily so that you can see it.
-
I have not posted in awhile about this anyway so an update won't hurt. I'm actually posting this update as sort of a follow-up to Simon's thread about lines showing up in his rendered shadows. The same thing is happening to me as you can see with the cape. I've been working around that(and a few others) by using separate render passes like Simon intends to do with his project. I have not gotten to a separate shadow pass for the cape yet but once I do that should clean things up quite a bit. This particular render of Superman is a result of me trying to find a visual style that I like for this project. I think that I'm getting close to something that I'm happy with here. The texturing and a few other details (etc) here are still not final yet. Ironically, I would not have created a render like this if I had not been working around some of the render issues I've run into. I'm going to keep experimenting with this for a little while and follow up on this a little later.

-
Hi Simon, I think that this is actually a bug with no practical workaround that I could work out. The render time polygons are showing up in silhouette inside of the shadow. It occurs while using the toon renderer and ray traced shadows. I'm still trying to sort the exact conditions that cause what you are encountering for a bug report. I have reported a somewhat related bug at A:M Reports (ID# 0006339). That report addresses the jagged transition from light to shadow that you see in your render. I've held out on reporting the one you ran into until after A:M v18 gets released. You could try to render a separate shadow pass with the standard renderer and then composite back to your toon render (minus the rendered toon shadows) but that will take a bit of experimenting on your end to get a look that you are happy with. If you work out a workaround in the meantime please share your results.
-
Everything that you may need is in the first post of this thread. ( Good luck to you if you try it out.
-
Yes.
-
I tried following that link while logged into AM Reports but got an "Access Denied" page. Is that link a priviate request where only certain people can view it?
-
Yes, thank you. Keep up the good work!
-
Hi markw, The photo that show of your mirror bone settings show values of .01 . The instructions for the for the 2008 rig say to use .1 . I don't know if changing those values will fix your issue though. If it does not, check to see if the bones representing the spinal column (back, pelvis, head, etc...) all line up along 0 of the x axis. Please update us here if that works for you or not. Take care.
-
In the future, try working with a copy of the character that your are animating just in case something like that happens again. That way you can just recreate a copy of your original without having to redo all of your work. That works well for me so I hope a similar approach will work well for you too.
-
Rich I'm glad to know you are ok. I'm still around as you can see. John probably has copies of some of your stuff. I'll let him know that you are back (if he does not know already). I'm close by so let grab lunch sometime. I have an older computer that I can give you and some A:M disks too if you want to get back up to speed. The computer is nothing special but it works and is better than nothing for now. PM me or email me. Take care.
-
(Solved) Trouble mirroring Steve's Hand Gizmo
Mechadelphia replied to Mechadelphia's topic in Featured Rigs
I just tried the fix out and it works perfectly. Thank you again! Edit: Added "(Solved)" to Topic Title. -
(Solved) Trouble mirroring Steve's Hand Gizmo
Mechadelphia replied to Mechadelphia's topic in Featured Rigs
Thank you mtpeak2 for looking at that and letting me what the issue was. And another thank you for putting that modified version together. I'll download it now and put it to work. Take care. (Edit: And thank you for solving this so quickly!) -
Ok. I'm stumped. I've been looking at Steve's Hand Gizmo and I think that it is pretty nice. So I decided that I would incorporate it (the first version) into one of my rigs. The first thing that I realized that I needed to do was to rename all of the bones to a "Left and Right" naming scheme so that I could use the Mirror Bone plugin to mirror the set up easily in my rig. So I renamed the bones (plus a little extra naming clean up) and I think that I have all of the bones named exactly as its mirrored Left/ Right counterpart. The setup works fine in the file that I have attached named "steves_hand_gizmo (renamed to left and right).mdl" while using it in an Action window. But if I delete all of the bones for the left or right side and then use the Mirror Bone plugin, the bones mirror just fine but the relationships no longer work correctly for all of the bones. The most notable error is that the CFingers Right/ Left functionality is inverted on the mirrored side in an Action window. I have also attached "steves_hand_gizmo (only right side bones).mdl" if you care to try this and see for yourself what I am talking about. My guess is that I either renamed some of the bones incorrectly or that the expressions that are part of the relationships may have something to to do with this (or both). I know nothing about using expressions in A:M so I am not able to troubleshoot those. Does anyone here know what I may be doing wrong with trying to mirror this hand gizmo setup? I'm using 17d if that matters. Thanks. steves_hand_gizmo__only_right_side_bones_.mdl steves_hand_gizmo__renamed_to_left_and_right_.mdl
-
60K... 80K... 100K views for my Heavy Push!
Mechadelphia replied to robcat2075's topic in Animation:Master
Thanks. I'm just curious, what was your instructor(s) final assessment/ feedback about this shot? -
60K... 80K... 100K views for my Heavy Push!
Mechadelphia replied to robcat2075's topic in Animation:Master
The animation is really very good. I did not read the comments on the Youtube page so I don't know if this was asked but how long did it take you to animate that shot (just animate not the render time)? -
You are certainly welcome Mark. It was my pleasure and thank you for your work on the 2008 Rig.
-
steve392 and Rodney, You're welcome and thanks for your compliments. I'm glad that you have found it useful.
-
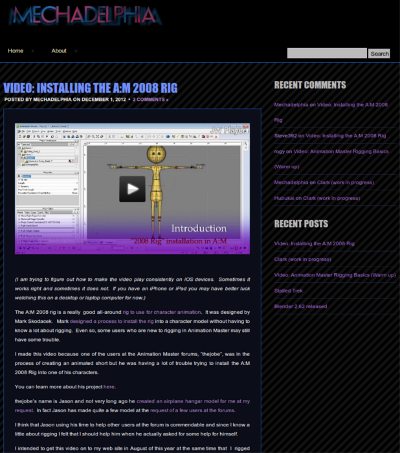
Hello everyone, I finally posted the 2008 Rig Install video that I made while I helped thejobe install the A:M 2008 rig into his elf model. You can watch the video at my web site. If any of you were looking forward to seeing it I am sorry for the delay. This is a long one at about 3 1/2 hours and I have yet to cut it down into smaller videos for those of you who may only want to check out certain sections of the process. Here is a index listing that you can use to jump around the video in the meantime: 00:00 Opening 00:30 Introduction 11:18 Instructions Overview 16:30 Spine Install 37:10 Leg Install 1:10:41 Balance System Install 1:23:40 Arm Install 1:47:33 Hand Install 2:25:48 Running the Install Rig Plug-in and assign CPs 3:05:08 Running the Mirror Bone Plug-in 3:14:20 Testing the Rig 3:25:48 Credits There are parts that I cut out that I will post separately but that will be later on. I hope that those of you who may have had trouble installing this rig find this useful. Take care. Edit: You can download the rig itself from this post here the forums.
-
Thank you.