JTalbotski
-
Posts
1,571 -
Joined
-
Last visited
Content Type
Profiles
Forums
Events
Everything posted by JTalbotski
-
Overexposed view in model window
JTalbotski replied to Eric2575's topic in Work In Progress / Sweatbox
You may have turned up the specular size or intensity. Jim -
Beautiful. I almost want you to leave them untextured. The gray tone shows off the form so well, I love looking at untextured models. Thanks for showing! Jim
-
Cool! Great stuff! Now I want to play the game. What game is it? Jim
-
Cool! Nice and rusty and rugged. But the eagle's head is a decal, isn't it? I'm looking forward to this image contest, it's gonna be a goodie! Jim
-
Hi Paul, Here's a link to a cinepak version. I hope this will work for you. Thanks, Jim http://homepage.mac.com/talbotj/ballet-cinepak.mov
-
Hi Greg, You can get some here: http://www.bvhfiles.com/ The ballet file I think I got here: http://www.e-motek.com/entertainment/downloads/index.html I chose the biovision bvh example file. ( The fourth one down.) There's not a great selection, though. Jim
-
Thanks for the kind comments everyone! Paul, Cost? I don't know about that. Available? We'll see. Kevin, yes, she had hair before but I had to remove it to work on her body mesh. JL, Here's the closeup thread: http://www.hash.com/forums/index.php?showtopic=11267&hl= John Bigboote, She doesn't have as much dynamic mass (how's that for being delicate?) as your Miss Demeanor, but she could use some secondary motion for sure. Pancho, Yves skin shader is for the PC only at the moment. Yves has given the source code to Ken to port it to the Mac, when Ken gets some free time. I did use porcelain on her. trajcedrv, Thanks! I only use what talent I was given. There's no pride in receiving and using a gift. Jim
-
Cool! I like it. It kind of reminds me of a Jack Vettriano painting. Jim
-
Absolutely fantastic! It's got so much atmoshere and feeling of space. An incredible render! Jim
-
Fog doesn't work, at least not on the Mac with v11. Jim Edit: I take that back, fog does work on the Mac. I was assuming the setting that I gave the camera would transfer to the final render panel, but it didn't. If I set fog in both places, it works. (Double check before posting, Jim!)
-
The car model is progressing VERY nicely! That car looks fast! The movie of your progress was fun amd interesting to see. Thanks! Jim
-
That's Stephen's great animation. I did do one version for the CGTalk 8th Dwarf contest, which you can see here: http://homepage.mac.com/talbotj/SCHLITZY-F...-JTalbotski.mov Anyway, I did a test with a bvh file on my new femal character and here's what I got. Thanks, Jim ballet_on2.mov
-
Wow, David, very cool! He's got a lot of personality already! My only crit I see is the brow bone that encircles each eye should come farther out than each eye it's supposed to protect. The areas under the brows recede too much into the head right now. Please keep showing your progress! Jim
-
What d'ya mean?! I remember your schlitzy animation was solid! -Alonso I guess I'd have to say years. I do a lot of frankensteining of my old models for parts and reworking them to make new characters, so I can't be sure exatly how long it took. I don't use rotoscopes in A:M, but I do sometimes have photos around that I eyeball to fine tune some features or proportions. Most of the time it's just tweak it until it looks good to me. Well, my Schlitzy animation wasn't so good. Stephen's was excellent! But I meant that animating a realistic person is even more difficult, because the expectation is total realism. A cartoony character can be expected to animate like a cartoon. When realistic characters don't move realistically, people will notice anything wrong with it. Jim
-
I was thinking of trying some of those bvh motion capture files on this model. I KNOW I can't animate anything realistically. But I just like to create models, so if I never animate them, that's okay, too. Jim
-
Thanks, Jon and Nosferatu. The feet on this model are pretty rough, I agree. Feet are strange things to model, with all the splines coming from the toes into a big boring slab of area. I tried to limit the amount of splines in the toes to simplify the mesh. Personally, I'm not wild about feet. I'd rather just model the shoes and not have to deal with all the distortion a foot makes as it does it's job. Shoes are much simpler. Jim
-
Semi-realistic cloth movement for a cartoon cloak
JTalbotski replied to luckbat's topic in Work In Progress / Sweatbox
It did work...really well, too! Looks great! Jim -
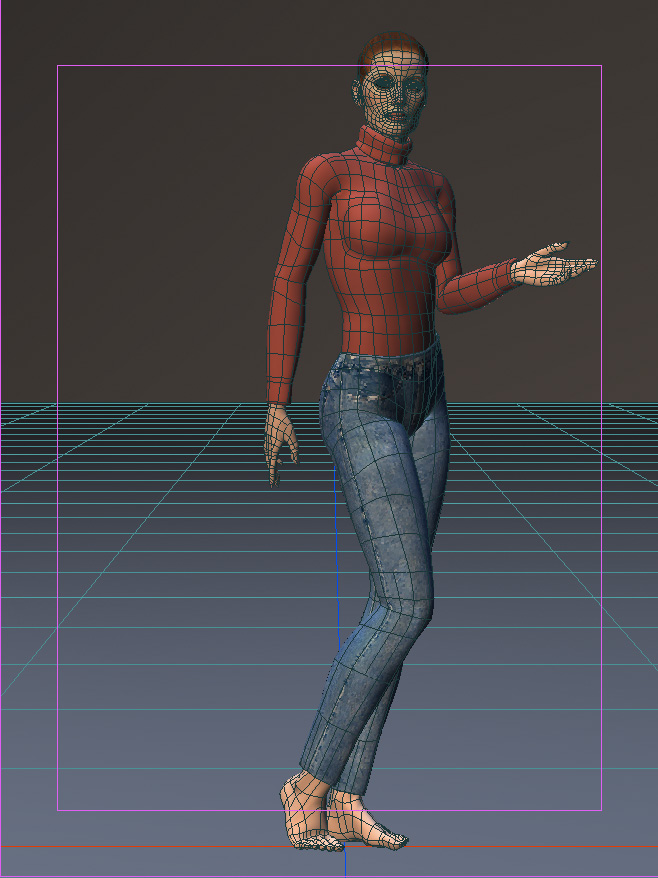
Thanks guys! Here's a shaded wire capture to show the mesh. You can see that I tried to make all of the sweater patches almost the same size, so the texture wouldn't distort too much from one patch to another. Jim

-
Good crit! Thanks, John! Jim
-
Thanks, David! At the moment it's just color and bump maps. I plan to add some geometry to the jeans to define the fly and pocket areas better, and probably the side seams too. Yes, the jeans are too thick at the waist. I originally had the sweater overlapping the pants, but just changed that. Gotta fix that, I think I will need another spline there to get it right. Jim
-
Could you elaborate on this just a teeny bit? I have never used this image technique because I never got good results and didn't like the lack of control. How exactly can you rotate these image patches? Is this something new in v11 with the UV editor? Vernon "!" Zehr Hi Vern, When using patch images you drop an image onto a group name in the PWS (Project Work Space). A:M will make it's best guess which way the image is oriented for each patch in the group. It may add the image to one patch with the top at the top, but in the patch next to it, the image may be upside down. So you would choose the patch select tool (shortcut=shift-P) and click on the offending patch to select all the cp's of that patch, then right-click (PC), control-click (Mac) on the selected patch and choose rotate images from the pulldown menu. You would have to do it twice to get an upside-down image to rotate 180 degrees. In my case none of my patch images are set to be color maps, so I can't see them in the realtime preview. I would have to temporarily turn my them into color maps to be able to see which ones needed rotating. Does that make sense? It's not new, although I don't know when it was originally added. Jim
-
Thanks! The sweater texture is made by using patch images (images that you drag onto groups in the PWS), one as a diffuse map and another copy as a bump map. The patch image decals should be tileable. Some of the patches need to have their images rotated still. If you have my Schlitzy model (on the new cd) you can see that his longjohns are done the same way. I use the micro textures that Marcel provided on his site: http://www.kci-group.com/z/ I tweaked them a bit to get different looks, but they are a good starting point. The hair is just decals right now. I plan on giving her v11 hair, but I am having trouble deleting parts of the mesh when she has the hair material applied, so I have to wait until the model is done before she has "real" hair. Yes, I have to go back in and add some of the details to the jeans that everyone would immediately miss, since everyone is very familiar with blue jeans. Thanks again, Jim
-
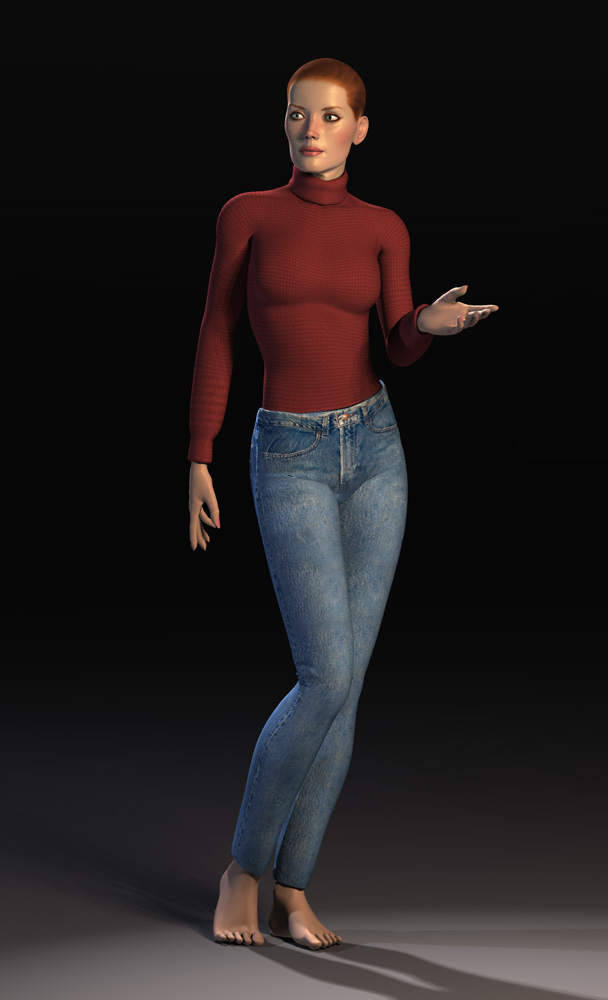
Hi all, I felt guilty for not posting anything new in a while, so here's my newest character render. I'm trying out some photo texturing to add more believabilty. The jeans texture is pretty lo res right now, I used a digital camera. I'll probably use my scanner to scan sections of some jeans for a more detailed decal. I need to rework the feet a bit, too. Shoes would be easier to model, I think. I'm thinking she could wear a jacket that uses the v12 clothsim. Jim
-
Very cool! I like the lighting and modeling a lot. Show some more! Jim
-
Too funny, Kevin! Thanks for sharing! Jim