photoman
-
Posts
588 -
Joined
-
Last visited
Content Type
Profiles
Forums
Events
Everything posted by photoman
-
Hmm I dont know if this willhelp but here is a video tut on how to make a greeble like effect in photoshop. Geekatplay.com Scroll down to #11 Hope its useful Photoman PS INSANE MODELING!
-
You dont need the actual Darktree program to use them in A:M. You can download premade ones from the DarkTree Repository. I use a lot of those in my work. Photoman
-
Update! Did some more minor things. Added stones and the moon etc. Photoman

-
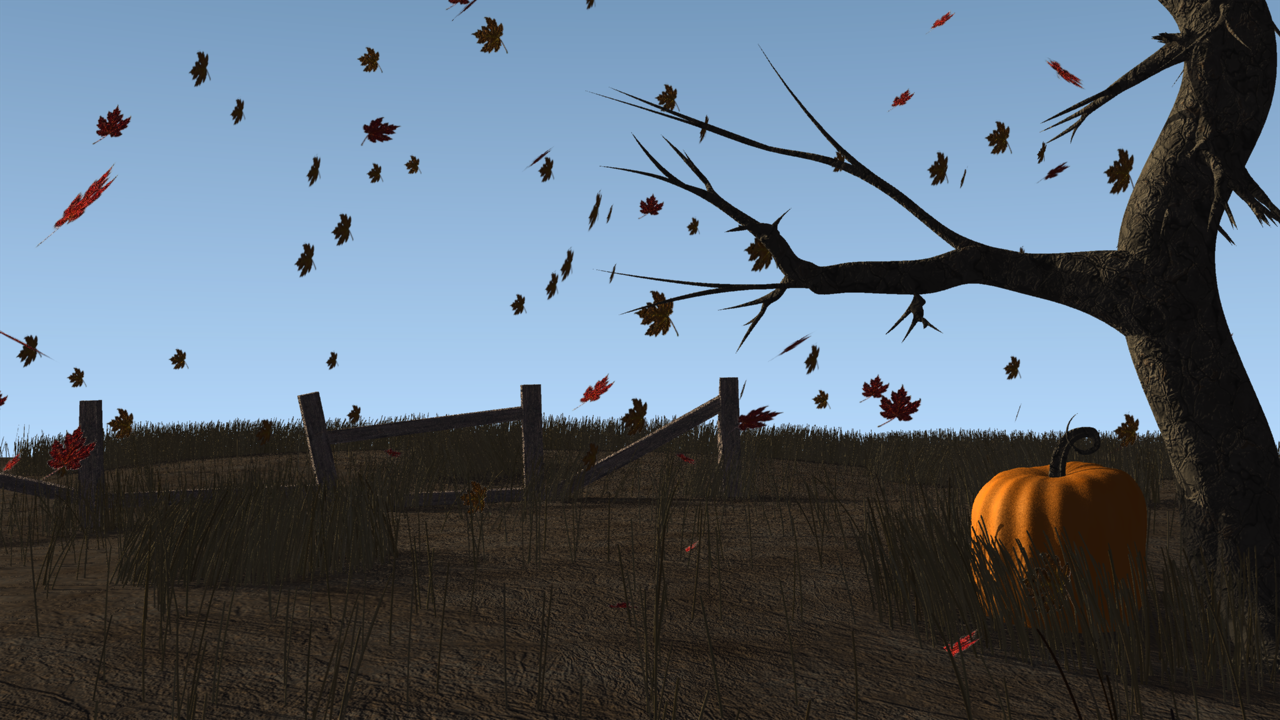
Update! I did some adjustments here and there. Added the background which is a very low res render of hills, I will render a higher res one for the final render. Tweaked the tree, added the pumpkin and created a displacement map for both. I feel like the foreground is empty, I want to add something but I dont know what to add. Ideas? Photoman
-
Hi! I finally managed to get settled in with my classes ! So I know have enough time to start a new project! I plan to make a fall scene and maybe transition it over to a Halloween scene.... Here is what I got so far, it is very rough needs some work: The grass needs to be thicker and better distributed and the pumpkin looks a bit uniform. Also the lighting isnt final, its just a single sun-light. C&C Welcome Photoman
-
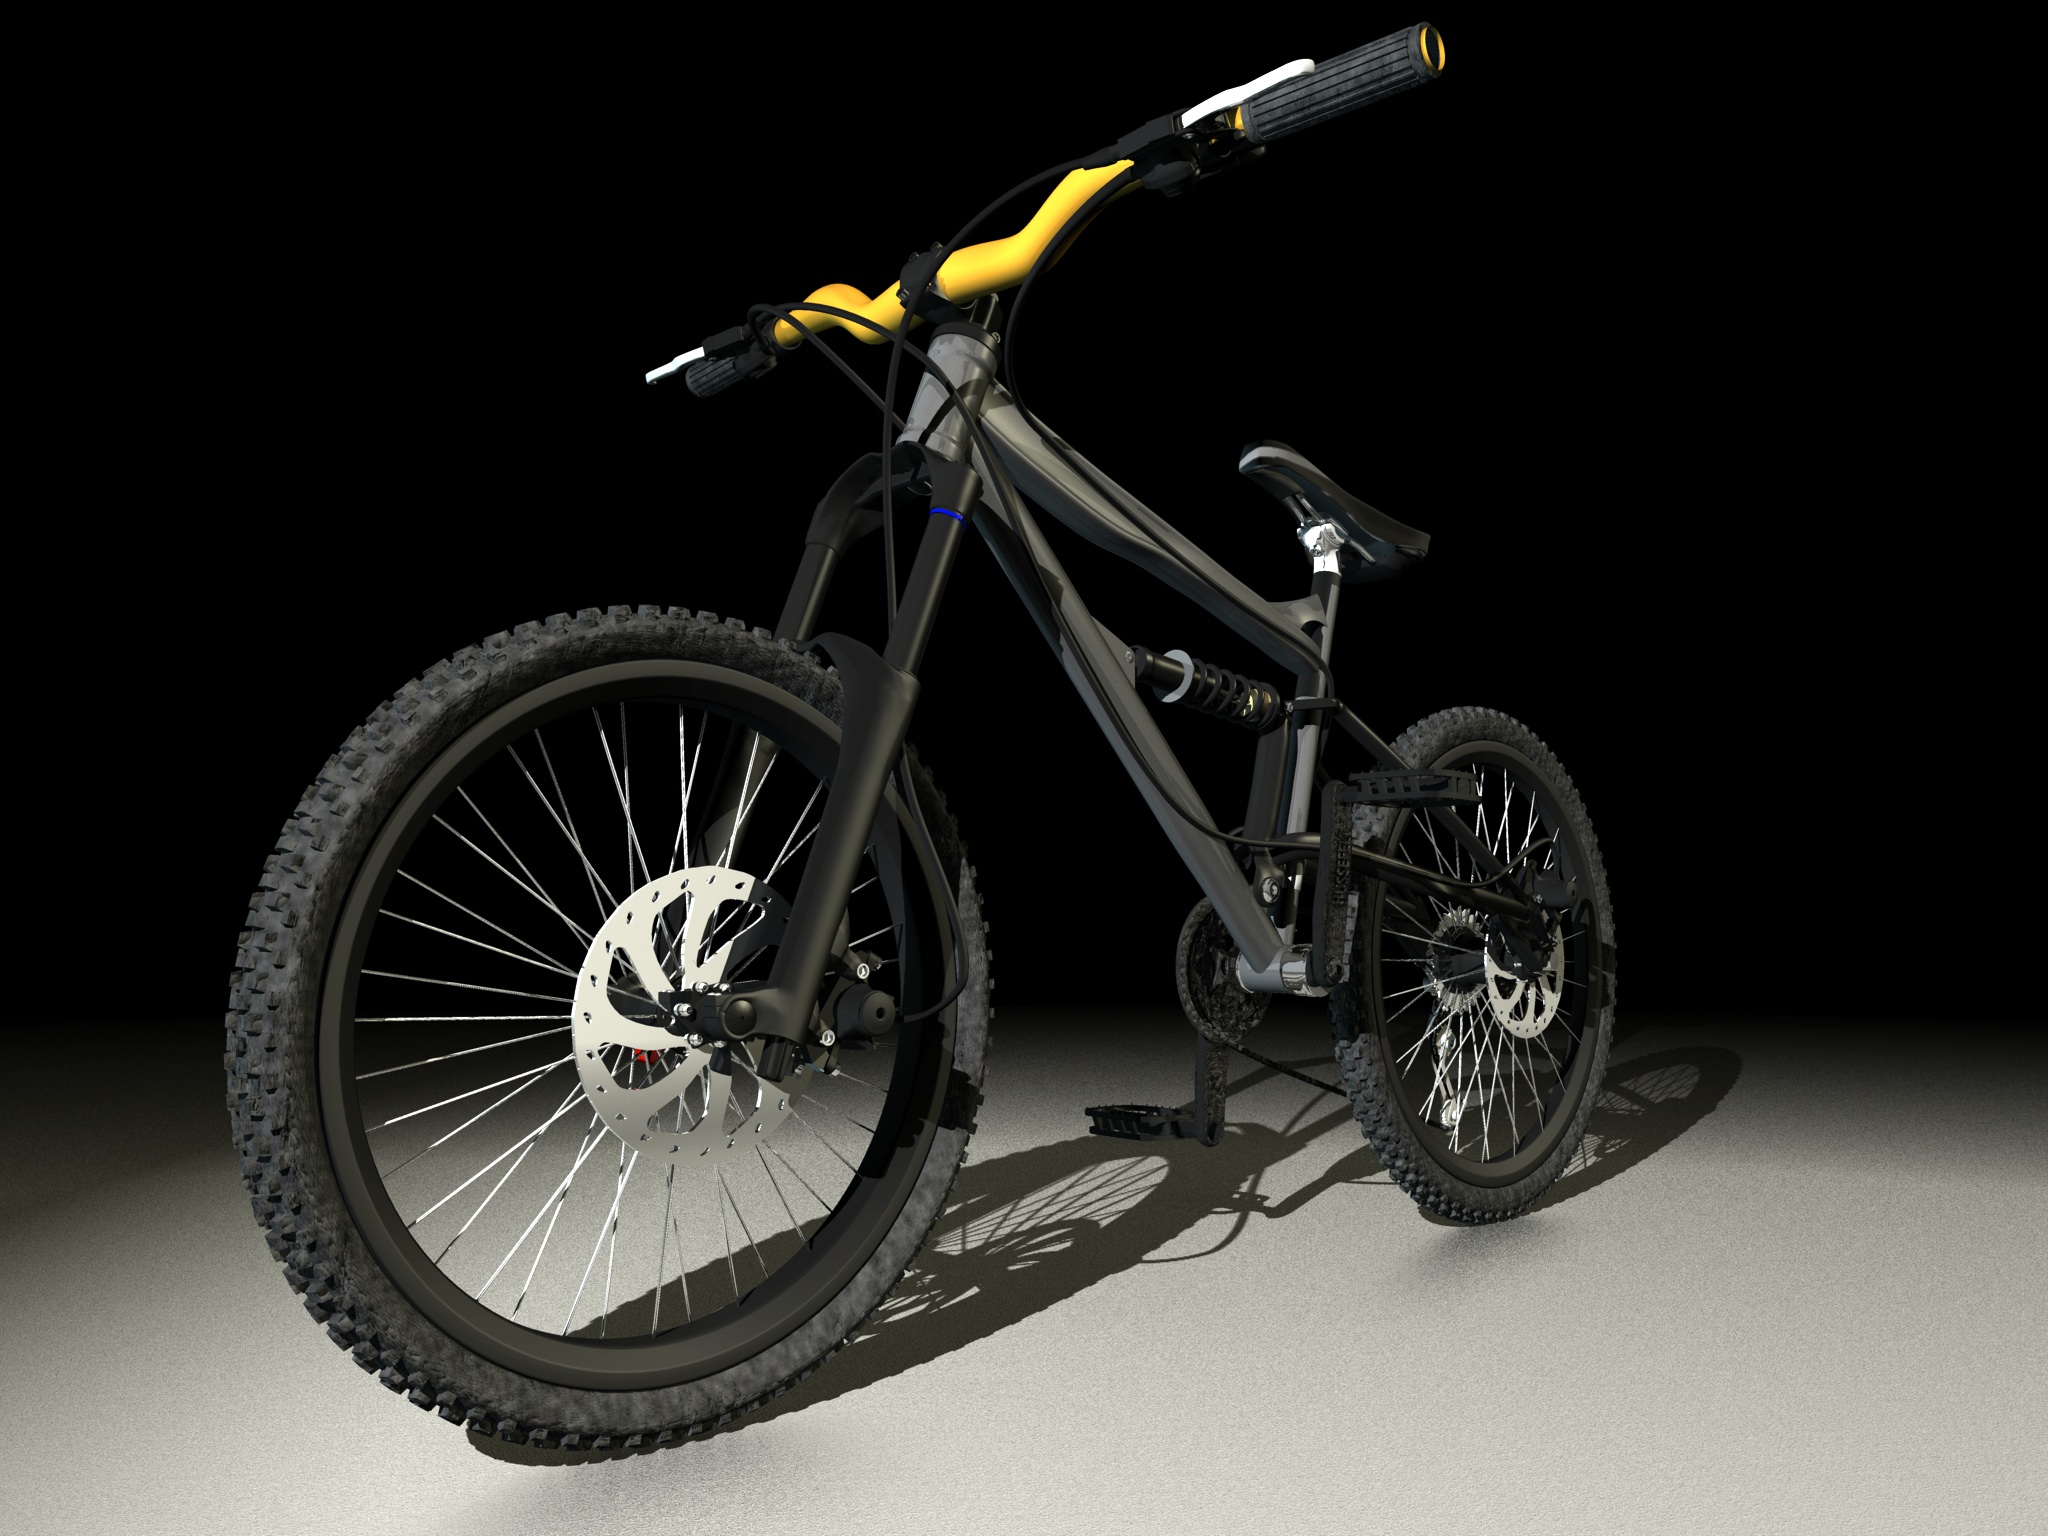
Thanks again!! Here is a qiuck animation of the bike assembling itself(Basicly just the seperate models I made combining into the bike) Here is another Thom shot: I saturated the colors it a bit too Photoman
-
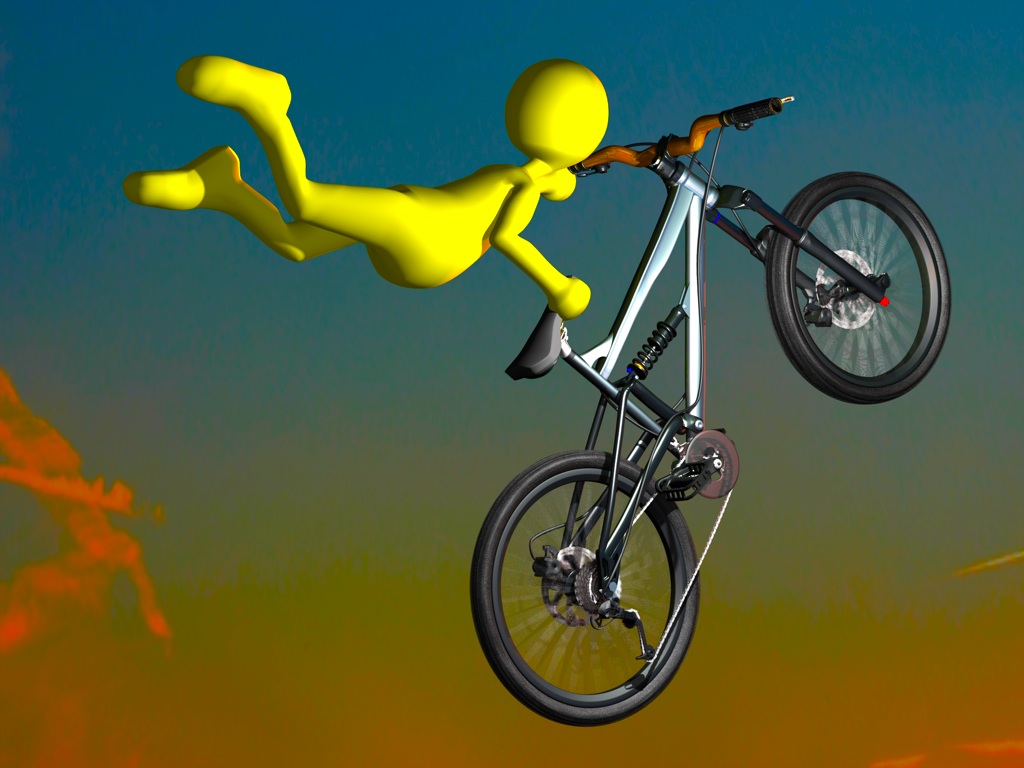
Thanks!! Here is Thom catching some air: My 5 min attempt. Im still tweaking the HDR shot and I also still need to add decals to the model.... I also adjusted the tires abit Photoman
-
Here is the HDR composite, no post work, yet... I fixed the edge problem by adding a ground plane in the background. I will edit the edge out in post as well. I rendered it as a OpenEXR to take advantage of its passes. Also instead of using a dome for reflections I just used the Hash Environment Map shader on all the reflective materials. I will start working on the other shot (The one with Thom catching big air ) tonight. Photoman
-
I think I will do the bridge/ladder shot with our inhouse stunt devil Thom doing a superman seatgrab off the ladder/bridge. It should be easy enough to model (Cube here, wood decal there). Rendering the HDR scene now as well. If I get a good enough grasp on how to do it I will make another video tut Photoman
-
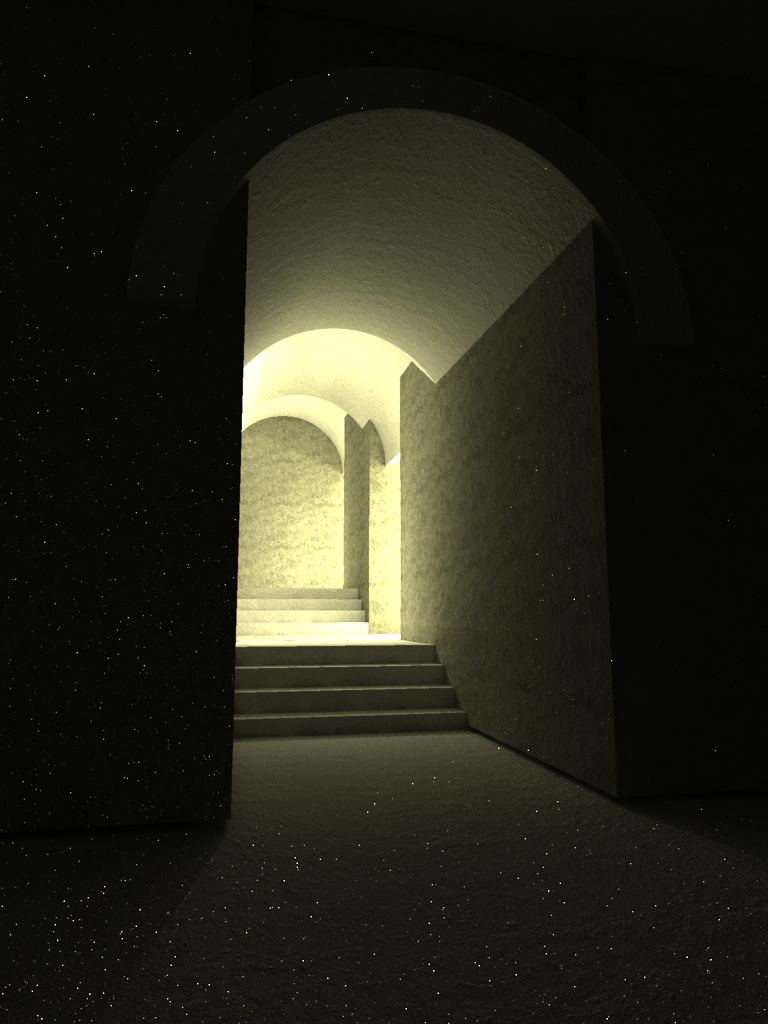
I started on the HDR idea. Here is what I got: The models that i used for the ground and wall seem to "tint" the roto. How do I get them to not do that? Actually better yet does anyone know a good HDRI tut for A:M, I remember Agep had one but I cant seem to locate it on the forum. Another idea for the beauty shot would be to model the bridges/ladders they use in slopestyle events and at bike parks and put the bike on one of those. EX: Example As for the earlier scene here is a better render: (White dots are b/c of low photon count and low final gathering sampling rate) Photoman
-
Here is the render I set before I went to bed: I need to create all the decals now. I plan to make my own and not exactly follow the original picture. I am working on a set right now for the beauty render, I want to have it radiosity so Im just doodling around with an idea. Another Idea I could do is take a HDR picture of my garage or somewhere else and put the bike in there.... Photoman
-
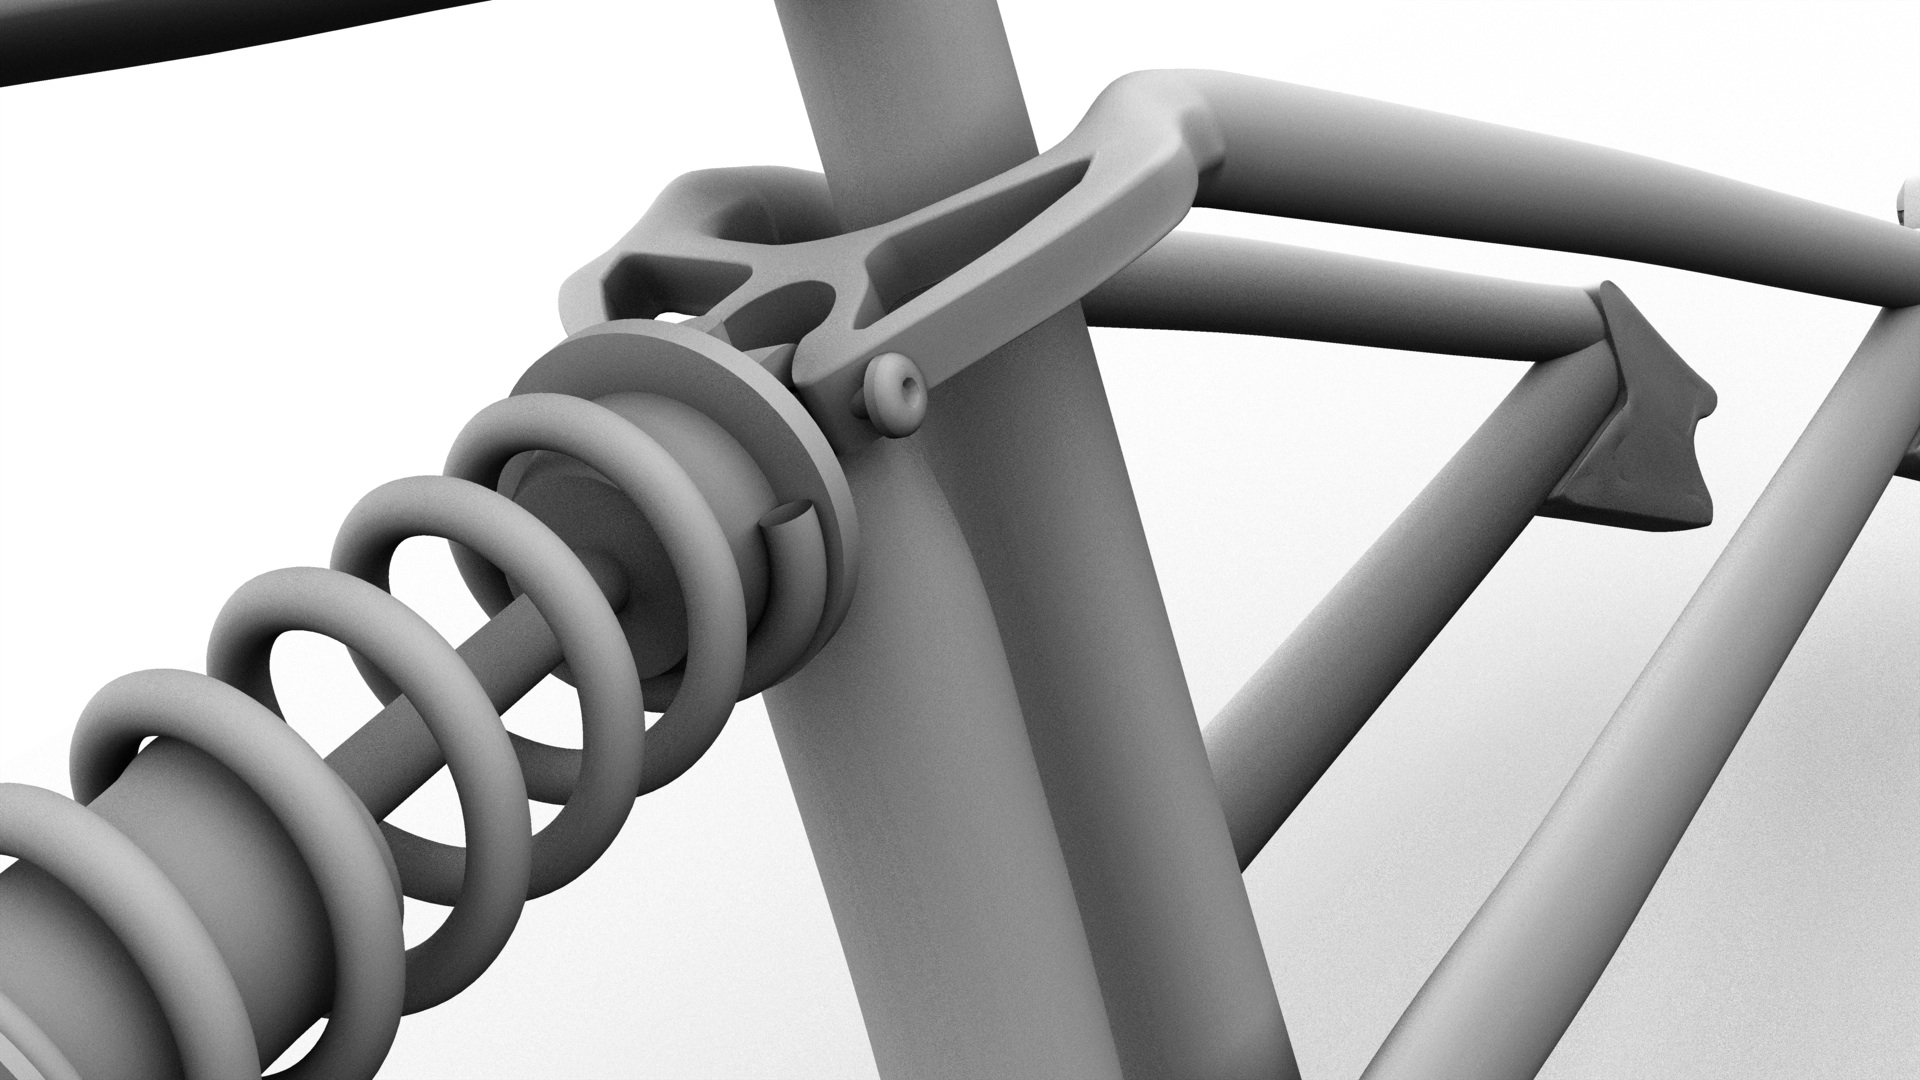
Update! I slapped on some basic materials to see rough look. Nothing is final right now: I am trying to think of a scene to use for the beauty shot. I plan to have a few "studio" renders but I want something other than that for one.... If you have an idea feel free to share I think those flipped patches could be hooks, AO doesnt like hooks. Also there is the bottom mount for the brake caliper, there is something wrong with it, ill fix it later.. Photoman
-
Update! I have finally finsihed the modeling of the rear derailleur! I also modeled the chain and the cables/hoses. I just have to finish some odds n ends and I will be done modeling (Probably by tonight). I use a lot of wizards (Font, AI (I used it but did not like the look), Sweeper (Cables, hoses, rims, tires, grips, spokes, etc), and the Primative plugin for the springs.) Photoman
-
Update! Finished the rear wheel: Now all I need to do is finish that pesky derailleur and model the cables and I am done modeling! I can see the light at the end of the tunnel! I have also made most of the materials I am going to be using, but I have not started making the decals yet. I need to refresh my GIMP skills a bit, or maybe Ill learn to use Inkscape for some vector stuff. I did a quick tut on how I did the tires here: Tire Tut Photoman
-
Update! Finished the front wheel! I still need to finish the rear derailleur but Ill probably get part of the rear wheel done first. Photoman
-
Minor update! I finished the brake calipers: I am working on the rear derailleur, but its a bit complicated and my interest/attention level is kinda fluctuating right now so I am working on other things while I model it. Gerry: Thanks! The fork needs to be spline weeded but it was fairly simple to model (just extruded splines connected to a few lathed cylinders) Pixelplucker: I was thinking of doing something like that for the welds. Next up(if I ever finish the rear derailleur) are the wheels (Tires, spokes, rim, and hubs) Photoman
-
Been busy this weekend. (Big swim meet (Larges recreational meet in the US) and last of my swim season, now to water polo) While at the meet I set a render for a basic scene I want to render the Bike (When finished) in. Its very simple, kinda cliché. Radiosity render too. Are there any ideas for a good scene to place the bike in? Photoman
-
You are asking a very broad question.... Realism is more about the quality of the model, the texturing and shading of said model, and the lighting. The render settings should not have to much to do with that* *The few was to achieve good more photorealistic type results depend on the scene. When I make my outdoor scenes I choose to use radiosity and base my lighting and scene around that. When I render a single shot of a model I am working on I use a pure Ambience Occlusion render (AO). The bottom line is its not about the render settings so much as the quality of what you are rendering. Photoman
-
Its in the advanced render options under buffer on the first page. TGA (Targa) should be fine, I render mostly to them and for final images I render out to OpenEXR and take advantage of its many buffers in photoshop/GIMP Photoman
-
Update! Modeled the saddle, seatpost, and the front derailleur. You cant really see the front derailleur but its there Patch count (Dare I post it *): 20,149 *DISCLAIMER: I know that it is a heavy patch count, I will weed it down when I have finished all the modeling. I have about 8 different models that I have put together in a action. I plan to also make an action where the bike assembles itself when I have finished the project. Up next to model is: Disc Brake calipers Photoman
-
Update! Finished the cranks and pedals: Now onto the saddle, seat post, and front derailler. Photoman
-
When creating terrain in A:M you have to be wary of patch count. Its not like other programs that can cerate a 10 million poly terrain. The best way to make terrain is to create use a low res heightmap (256x256) (Use AM Terraform here: http://www.tachyonburst.com/software/amterraform/). Then use the highres (2k+) heightmap for displacement. I once made a 500k patch terrain in A:M, it took ran at 5spf (Seconds PER frame) in wireframe mode, 30 spf in shaded! See thread here: Super High Patch Terrain A:M can render high patch counts pretty fast but it takes it a while to "Compute patch visibility" It also depends on how you texture it and the use of fog and other atmospheric effects that add the realism and depth. Photoman
-
Update! I modeled the stem (Needs a bit of tweeks): I need a breather from this project so I did a few quickie doodles today mostly. I also realized how much I have to model I need to model the: Peddles, Cranks, Both deraillers, Wheels (Hubs, spokes, rims, tires), Disc brakes + calipers, seat, wires, hydraulic hoses, gear casset, axles, and more I cant recall right now. I need to texture: Everything..... Though I plan to make about 5 or 6 procedural ones that I can slap on most parts and create decals for the logos and dirt and wear. Fun fun fun Photoman
-
If you can convert the LWO file to quad poly's in the OBJ format. Ive had pretty good luck importing OBJ's Photoman
-
Update! I modeled the handle bars with the shifters and brake levers: Another frame shot: Pixelplucker that looks like a good looking method there, I will have to try that, though I plan to model everything else and come back to the frame. I do realize I am pretty (really) patch heavy right now (over 10k now). I will weed them down when the whole model is finished. Next up is the headset, stem, and then the center derailler and sprocket. Photoman