Search the Community
Showing results for 'project'.
Found 8,665 results
-
Count me as a fan too! I like the look. Sure wish they had fun 3D characters like that to guide me through math when I was kneehigh to a grasshopper. Like others, I'd like to hear more about your project! Best, Rodney
-
Nicely done. I'm curious, what sort of project is this for?
-
Keep it up Doug. Looking very nice thus far! Glad to see you've picked your project back up too.
-
Christina, I'm a little behind in answering the mail (email and here in the forum) Glad to hear San Diego went so well! While I'd like to say that upgrading won't effect your project it almost always will. The question becomes whether or not the changes are significant enough to hold you back. Personally, I think you will want to upgrade to v12 the day it becomes available... from what I understand it will be THAT good! I also think that you'll want to start a new project/sequence at that time. You can always use the older version right along with the newer! It takes more time to isolate any differences but can be done. Concerning v11, the main reason it would appear for you to upgrade would be to get familiar with the newer tools that have come on line. When in doubt an email to support@hash.com might be in order. They would be able to give specifics on render changes (if any). If there are specific areas of concern perhaps posting them to the main forum with a link to any pics here in your WIP. Just a few words from the peanut gallery! Rodney
-
The black areas with porcelain are most probably flipped patches. Sometimes it's hard to see. I like to set the option to render only one side of patches. Also there is a way to unify the direction of patches in the "right click" menu. Finally, sometimes you have to save the project and re-open to see the black patches are gone. To your questions: 1. Not sure. Maybe the render to file option would fix this. 2. Are you sure you're rendering the right frame range? And there is a light right? 3. Could be Opengl/Directx related. Update any drivers and/or switch between the two. 4. Can't find the thread, but basically you turn on the "floating menu" then select a piece of the spline and press /(or is it ,) then in the floating menu you input 0 to the x fields. This is from memory, so it's probably flawed...
-

Vortex Force On Hair Test
SHADOWMASTER replied to John Bigboote's topic in Work In Progress / Sweatbox
LOL! You do anything special to get that? Cuz I'm needing exactly that same effect for a project I'm doing. -
don't have any time to play right now so here is the project. just remember with gradients you have to adjust them for the model and in this case scale the turbulence too as well as "animating" then in the chor or by an action or even a pose would work if anyone gets a better effect with this please share johnl3d...the tinkering gnome newcloud.zip
-
Nice effect, Jim. I just might use your technique in my current project. Whare do I send the royalty checks? Brian
-
whoa... thanks Yves... Yeah, car tutorials are pretty scarce, guess i have to do a car tut now Well, it's between a 1979 VW Rabbit or a Ford Focus... I'm thinking of doing the Ford because those cars are pretty simple in design and a lot newer. Besides, I can't find those rabbit blueprints anywhere on my hard drive... it would have been nice to give it a few dings and then add rust decals to the rear quarter panel to give it a bit of authenticity but we'll make do with the ford I guess. We'll begin as soon as I finish this project I'm working on.
-
The ocean generator would be a great addition to A:M. I've downloaded your project file (thanks) and have a few questions. How did you create the movement of the waves? Is it part of the ocean generator? Different perimeter setting? If not..... Did you use a distortion box, magnet mode or change the displacement and bump percentage of the decals? Or none of the above. Thanks again. P.S. I'm sure there is alot more people interested in your efforts to produce such a tool than there seems to be. And I hope you decide to continue your efforts. Looking forward to your finished product.
-
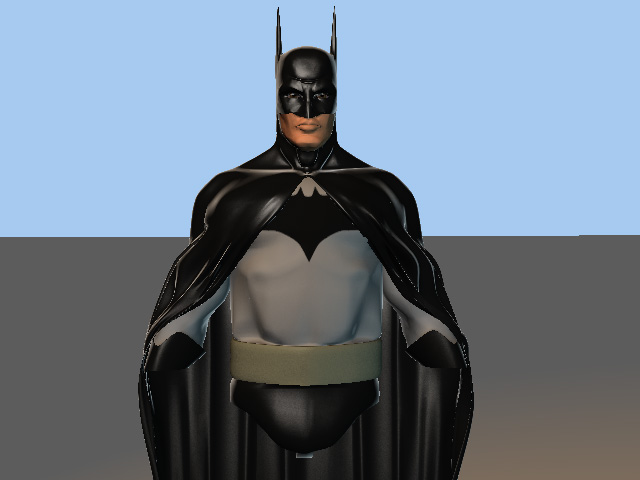
Looking really good from that first view! I'd like to see and know more about your project. There are a lot of comic fans in the A:M Community I'm sure they'll pop in to comment as well. While waiting if you can post from a few angles and maybe add a spline shot that will help them give you better feedback. I sure am interested in seeing what you have planned for him! Rodney
-
Hello, all! Just wanted to get some feedback on my latest project. Tell me what you think. I'll update as soon as a can. Thanks!
-
Not for a method, but for the 'Ocean Generator' when (if) its ready If you like to play with this you may download an A:M project file for the first frame. The whole movie project is to large though. You'll have to wait for the 'Ocean Generator'...
-
Man that's good! I hope you didn't shave your head for this project! If that's the inner mouth, it looks a little patch heavy to me. Especially as it's rarely seen in detail. Keep it up!
-
Here's the project.
-
Here's a side render. Steve, as for a tut, it's been just playing with the settings of the emitter to get what you are looking for. The modeling is pretty basic. I'll post the project file for anyone who is interested in it.
-
During the last couple of weeks I have done some experiments with realistic Ocean Waves in Animation Master. For now there is only one image to watch, but I'm working on a short animation that I hope to be able to show in a day or two. (The image is rendered with the simplest possible environment. No sky sphere, one single sun light and a simple reflecting gradient material.) Click here, for more information on this (The page will be updateted as the "project" evolves.)
-
Hey SpaceToast, I just took a look at the images for this project. They are really amazing! I was just wondering how you have gone about getting this look? You said you were using glows, are you using them on everything? Is it coming out of A:M's renderer this way or are you running it through something else after? Can't wait to see the finished short! -Alonso
-
I just checked the zip archive, its in there.. project file is called modelshopb.prj and turns out there is a second copy of itself in there... you can just ignore that :-D Here's the link again (5.5 mb zip file)
-
Here's the link to the ball project. http://www.hash.com/forums/index.php?showtopic=5959&st=0 http://www.hash.com/forums/index.php?showtopic=7303 P.S. The lightening looks good. I like it.
-
Great characters. I really like how different each are from the other. It'll be very interesting when you have an enviroment to drop them into. If the crew's ship is any indication, it should be fun. The expressions of the green guy are very nice, should be able to get some good acting from the character. I like the colors of the uniforms, could lend itself to some pretty neat visuals. Such as in a dark, very dark place, you could use the 'typical' eyeball white (like in comics and 2d 'toons) and add the white of the uniforms to this fx and have a totally black scene with only the whites of the eye(s) and the white of the uniform visible. This could be a good back-ground info, as the whites of the uniforms would make it easier to pick out the crew in the blackness of space if an accident happens. Too bad the acronymn (or OrangeWorld Legion) for the crew is "OL" instead of "OWL" -- that could add a bit of word-play and visuals that OL just doesn't have for moi. IMHO, having a symbol for them makes it seem a bit 'super-hero-ish." Some kind of graphic logo would serve the job better. Or if you look at military dress uniforms, the actual branches of the services distinquish themselves apart by the overall look of the whole uniform. If done right, you can have a look for the uniforms and give some visual indicators of the crew's status (rank) and job by tweaking the uniforms a titch. I feel that little things like this may not be overtly noticed by viewers, but add to a sense of 'realism' when the overall scene/series is taken as a whole. And you could take the visual look of the uniforms and extend it to the way the ships/interiors and such look. This could be really good if there's some kinda dog fight in space. Good luck with this project, I'll be looking forward to seeing how it develops.
-

Adjustable spherical constraint
itsjustme replied to itsjustme's topic in Work In Progress / Sweatbox
Rodney, Here's a two eye setup of the cartoon eye for people to mess with. You can dilate each eye individually or together and you can manipulate both eyes at the same time or individually...there's an on/off pose for manipulating them at the same time in the model's (tooneye) "User Properties". I also applied the porcelain material this time and re-sized them. When you first open the project the "botheyesmanipulator" is set to "on". In "Action1" grab the center null to move the eyes around. If you turn the "botheyesmanipulator" property off then you can use the right and left eye manipulators independently....it could be done better, I'll mess with it again tomorrow. -
David, I gave your project file a looksee... I like! I was going to post a pic or two so others can see what is going on. I attempted to place two eyes in a chor with one constrained to the other. I failed to take baby steps though and managed to come up with a circular contraint problem when I attempted to get the two pupils to react together... In short, I went a little to far beyond the simplicity of the setup and got myself in a corner. I'll try again when I have a little more time to play. I still think the setup would work great with a solar system of planets too!
-
I know this is a little earily for one of my weekly posts but -- Okay, discussion time.... To upgrade or not to upgrade, that is the question. When I started on the 'Stolen Child' project I made the mental decision not to jump to the next version mid-stream. After all, every time I've tried to upgrade in the middle of a project with *any* program, I usually find that I've hosed myself. So, I told myself that I wasn't going to make that mistake again. Simply to avoid temptation, I've gone out of my way to *not* get v.11 until after I finished the short. But.... Going through some of the documentation, they've added some new controls to the Dynamic Constraints (ie Collision) that looks like it would make my life easier and keep from pulling my hair out too much when it comes to hooking up and animating the skirts of the major characters (of which they have a lot). In the past, the problems that usually crop up with upgrades tend to be with; a. Smartskin (which my models have none). b. Muscle poses on the pose slider (if I upgrade I will have to reset them). c. Modifying animation done in previous versions (bad gen-locking problems, especially if a new bone has been added anywhere along the chain). <-- Note; playing the animation is fine, I just run into problems if I try to modify it after importing from earlier versions. At this point in the project, I've only completed half of the major character models and have done none of the animations for the short. Any animations completed so far have only been to test the models. Also, I know there was some talk about working on the Toon Renderer in future versions, which, for the most part, I think is a grand thing to do. But to change the Toon Renderer right now for this short would be a *disastrous* thing. Have there been any changes to the Toon Renderer from v.10.5 to v.11? Would the Dynamic Constraints really be worth the headache of trying to upgrade from v.10.5 to v.11 at this time? Can anyone think of any other problems I might encounter upgrading this project from v.10.5 to v.11? Any and all feedback would be really helpful! -- Thanks!
-
I have just finished building a facial rig for Niomi. It consist of a series of poses that some what mimic the muscles of the face Which was inspired by this article @ http://www.gamasutra.com/features/20000414/lander_01.htm among others. These poses are driven by a "funky user interface" as seen in other software packages. The core of the interface is made up bones and nulls whose translation and rotation drives the poses.This I learnt from Bill Young's visime project. (Thanks Bill).These are arranged to make animation as intuitive as possible. An outline of the model is used as a guide for animating on the fly. I intend to use this in conjunction with the traditional phonemes and expression. Here is an image that should make things clearer A tutorial version of the rig is also attached below.Please give it a try and tell me how it can be improved. I will do a full blown tutorial for newbies when I have the time but I am preoccupied with finishing Niomi right now. LUV Pat FaceRig.prj


