Tralfaz
-
Posts
899 -
Joined
-
Last visited
-
Days Won
1
Content Type
Profiles
Forums
Events
Everything posted by Tralfaz
-
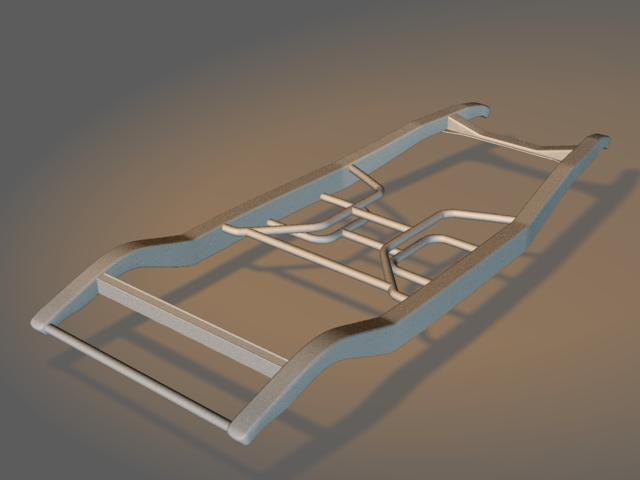
Don't worry about babbling, I know enough to be dangerous but not enough to be really knowledgable! I will eventually be going for the look of a daily driver and not so much show quality. So, the frame and axle will probably end up being a gloss or semi-gloss black. For strength and longevity, the frame is entirely boxed. I will be using drum brakes in the rear and disc brakes up front. Not too sure about the final paint color yet, which is why I was trying different shaders on the frame. I also like to add color every now and then to make sure I have the groups set up properly before things get too complicated. Does anyone know of an easy way to turn the shaders / materials off and on without removing and reapplying them? For modelling purposes and quick renders, I prefer to not have the materials applied or turned off. However, for test renders I want to be able to turn them back on without reapplying them. Thanks... Al
-
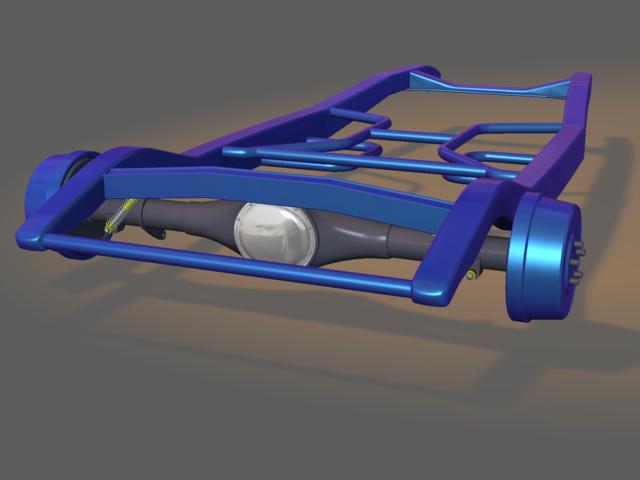
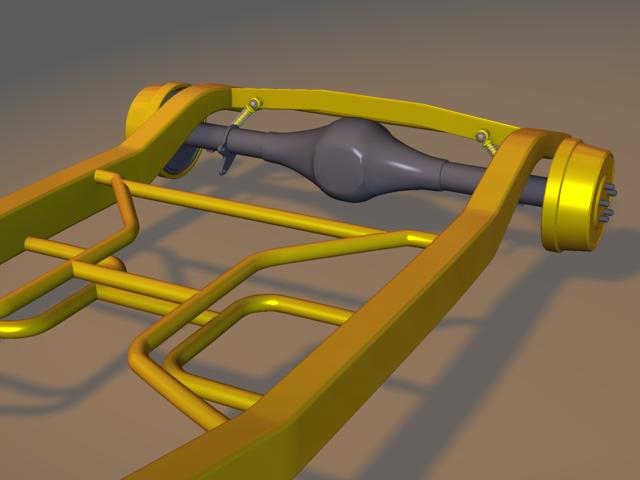
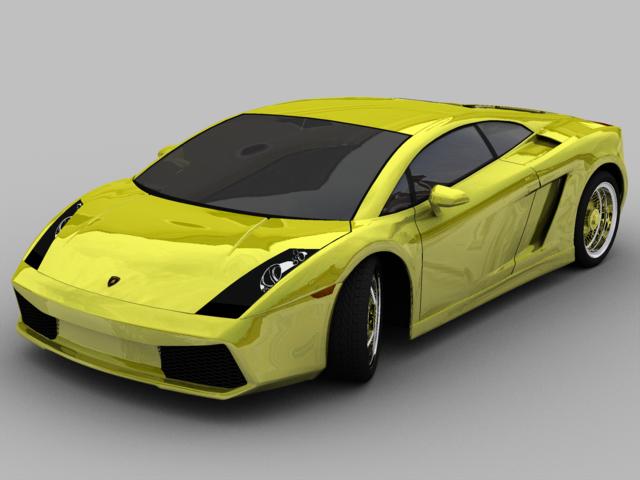
Thanks Xtax. One more quick update before turning in for the night. Added brake drums on rear axle and started playing around with paint shaders again. Tried two different types, a metallic blue and a yellow/gold. Opinions on the colors would be appreciated. Thanks... Al

-
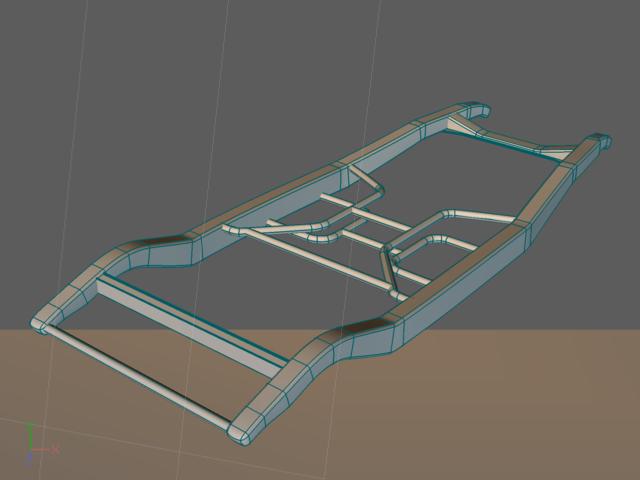
I am just using photos off the internet for this project. Couldn't find any blueprints for a 33 or 34 Ford, so photos are the only thing I have. Found a great side shot of a 34 Ford frame from a custom frame manufacturer, so I know I have that correct. I recently bought the April 2008 issue of Street Rod Builder, which has a couple of 34 Fords in it. The ads in the magazine are great as they usually list the web address for the different vendors. I downloaded some reference photos from Pete & Jakes, great for frames, suspension parts, etc. Also in this issue, there was a pretty good side view of a 34 Ford 5 window car, but it spanned two pages. So, I scanned both pages in and assembled it in Photoshop. Unfortunately, there was a gap between the two pages, so I roughly (and I meanly really roughly) filled in some of the gap and am using that image as a side rotoscope. Embarassed to show it, but this is my side rotoscope... ... and this is the frame reference. Al
-
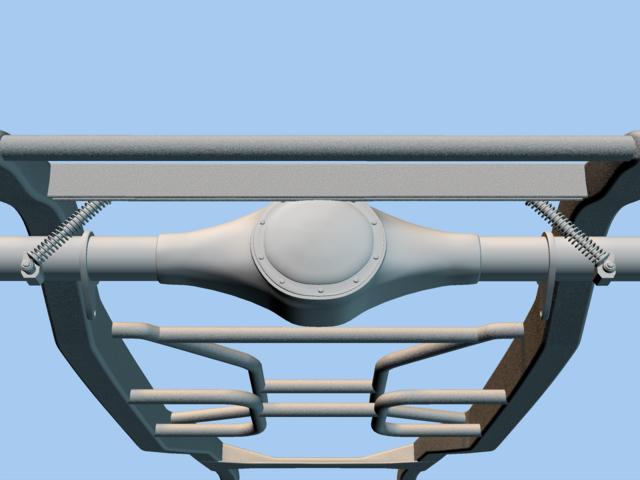
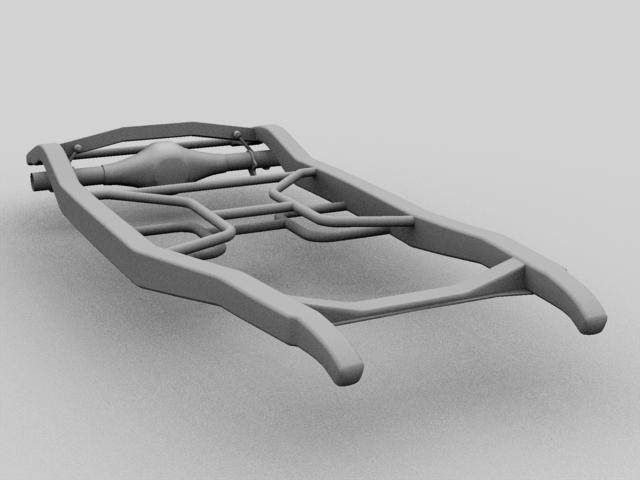
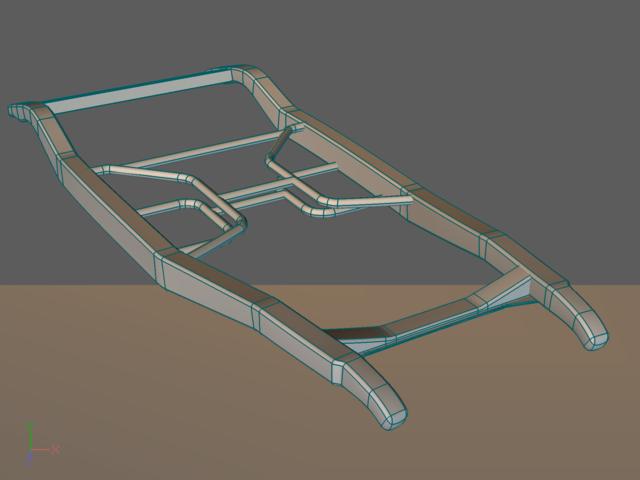
Update: Added the coils to the rear coil over shocks on my lunch today. C&C always welcome... Al
-
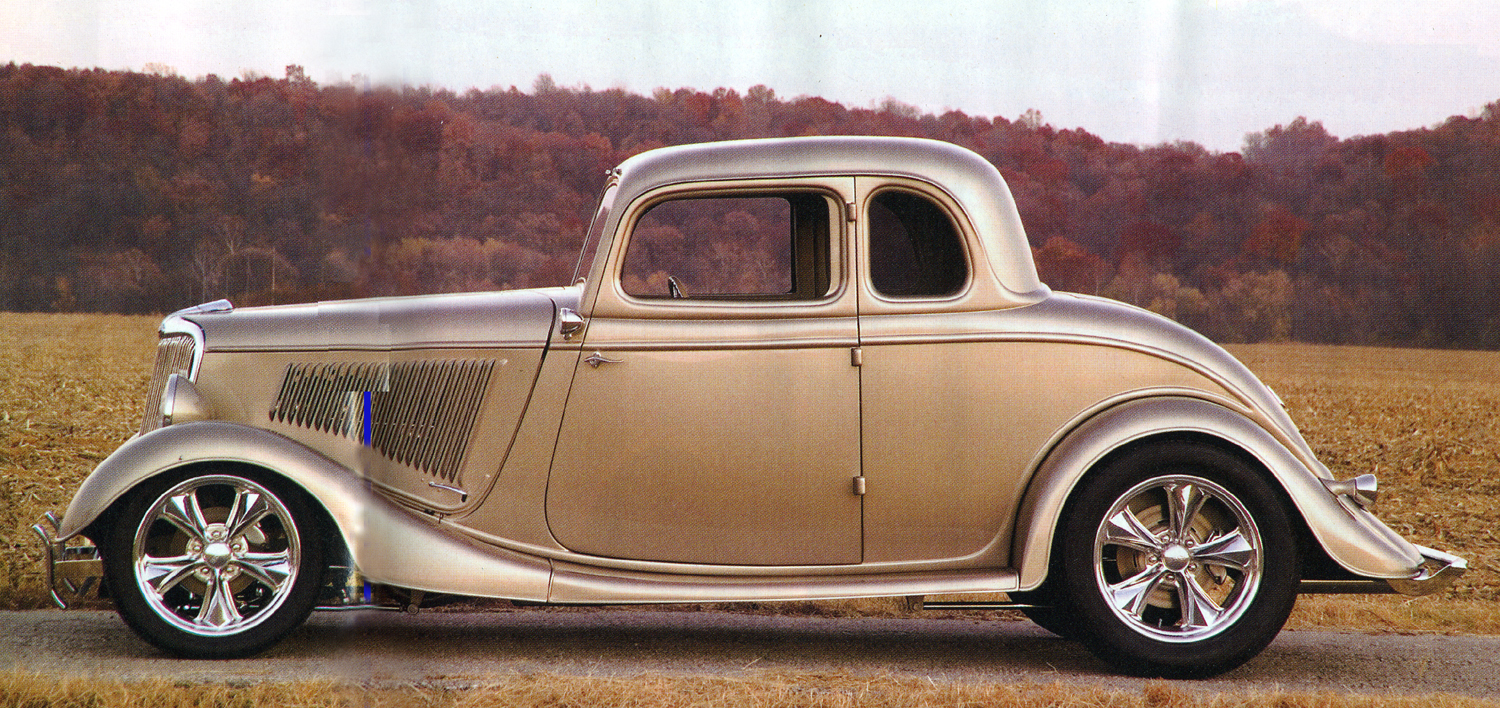
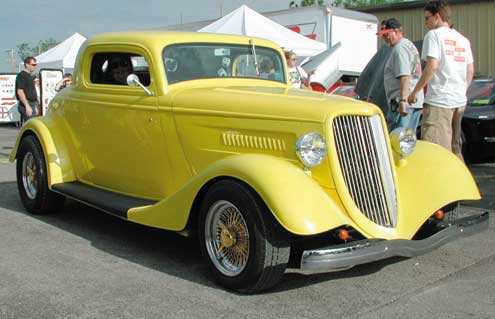
Thanks everyone. Quick update, worked on rear axle, shocks and mounts. C&C always welcome... Al Here is a reference picture of a 3 window 1934 Ford. The more I look at the 3 window, the more I like it and may model that one instead of the 5 window. I will have to figure out how to change the title of this post to 1934 Ford 3 Window Coupe.
-
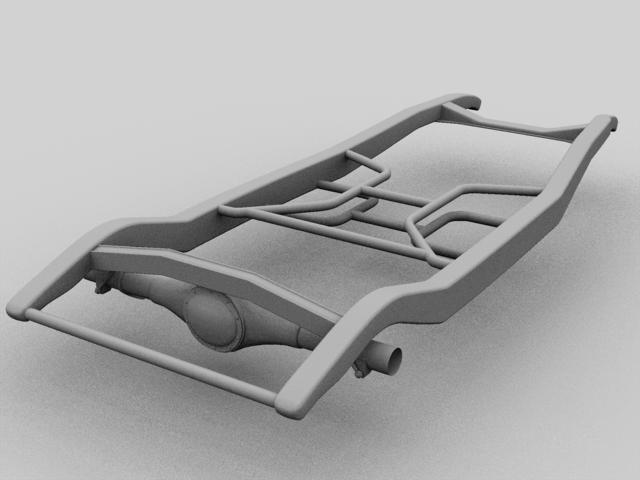
After completing the Lamborghini Gallardo, I wanted to try another car and hopefully improve on what I learned from the first model. So, here is the start of a 1934 Ford 5 window coupe street rod. And since I needed to start somewhere, I started with the frame. I am hoping to add a full suspension, working doors, windows and full interior. If I get really ambitious, then a fully detailed motor and tranny as well. The body will be left mainly stock in appearance. I figure this is going to be a fairly lengthy project if I can accomplish all I want to. When I model this car, I want to be aware of the splines and patch count, trying to minimize each but still have a fairly high level of detail. C&C always welcome... Al
-
Check out Jeff Lew's website. Jeff Lew is the guy who did the Killer Bean videos. I believe he explains somewhere on his website how he did the Matrix style bullet effects. He used Animation Master when he did Killer Bean 2. http://www.jefflew.com/articles.html Thanks... Al
-
Hi Eric: A while ago, someone was looking for a method to create an ECG display. http://www.hash.com/forums/index.php?showtopic=27566&hl= I responded with a project file and sample movie (near the bottom of the page). Hope this helps... Al
-
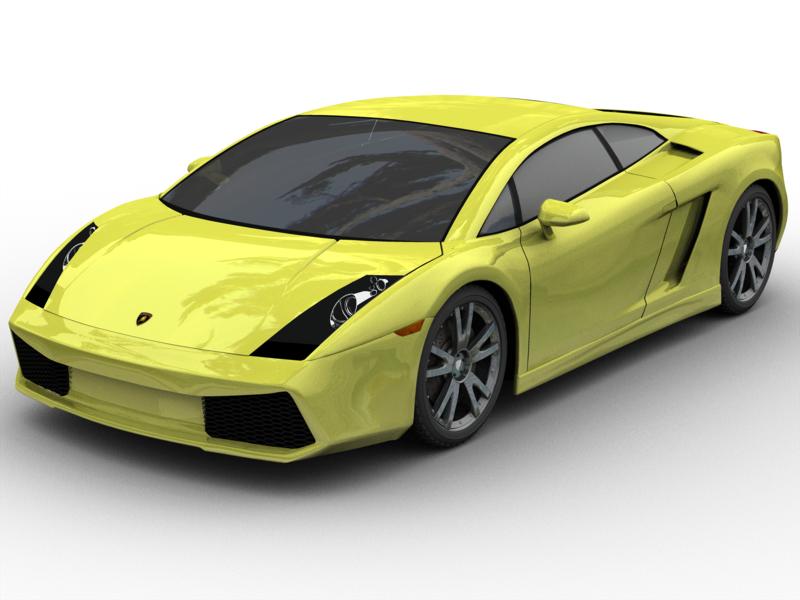
Thank you Xtaz. As mentioned in my previous post, here are the exact specifications of the paint material I am using: I played around with a new paint material. Here are the settings ... ... and the results ... I still prefer a yellow car though. C&C or tips, suggestions welcome... Al
-
Posted this image over at CG Talk, and most of the crits I have received so far are about needing a better paint material on the car. Does anyone have any tips or ideas on making a good car paint material or how to make the finish look more realistic? I am at work right now, and from memory, the material I created is a Gradient going from light yellow to dark yellow. All other adjustments are on the light yellow attribute, such as white specular, no ambience color, reflections set (can't remember the numbers right now). I have also applied an environment map of the warehouse scene to the body and glass. I will post exact details of the material when I get home tonight. Thanks.... Al
-
The F1 is coming along nicely noober. Thanks for the info John. I rendered and posted a 360 degree view of the Gallardo this morning. Will definitely look into the HA:MR stuff tonight and see what I can come up with. Funny thing though, when I did a search on HA:MR, the search came back with zero results. Al
-
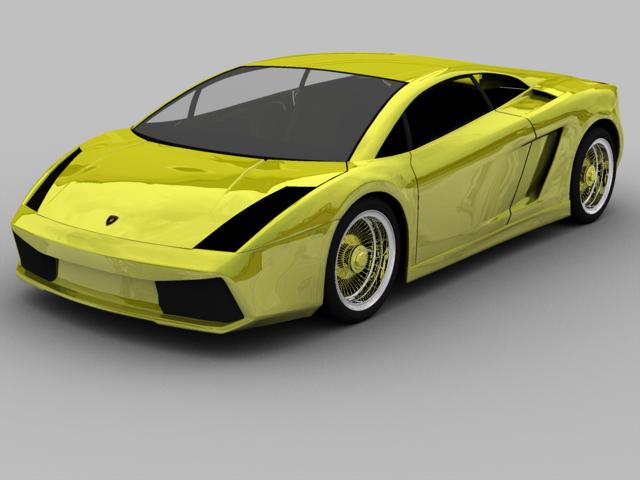
Another quick animation, this time 360 degree view of the car. Reworked the mesh grilles and tail lights. Thanks... Al gallardo.mov
-
Hi John: I vaguely remember HA:MR, but am unable to find anything about it in the forums. Any links or help would be appreciated. Thanks.... Al
-
Quick update: Started working on the interior, seats, dash, steering wheel, etc. Also worked on making the driver door open and the window go up and down, as shown in the attached video clip. Thanks... Al gallardo.mov
-
Hi noober, I tried replying earlier today, but everything went belly-up when I clicked on the Add Reply button. Thought I would wait until my lunch to try again, so here goes. The F1 is looking pretty good so far, but would like to see a rendered version of it without the lines. I think I will be able to get a better feel for the car that way. I definitely agree with David on modelling the car in it's individual body components. It will make a daunting task much more manageable and easier to work with. While working on the Gallardo, I modelled each body part separately and gave them their own named group. That way, when I wanted to work on a specific part (e.g. the driver's door), I would simply select that group and either hide or lock the control points. Look forward to seeing more... Al
-
I had to see for myself... that is so cool! What do the crooks drive???? Al
-
Thanks everyone. Not my house or income bracket, wish it was though. Re-modelled the tires to reduce the patch count and re-modelled the rims to better suit the car. C&C always welcome... Al
-
When i click on the above link, I am redirected to the Hash main website. If anyone knows how to get to the above thread, please let me know. Thanks... Al Never mind, I found it here.... http://www.hash.com/forums/index.php?showt...mp;hl=propellor Thanks.... Al
-
When i click on the above link, I am redirected to the Hash main website. If anyone knows how to get to the above thread, please let me know. Thanks... Al
-
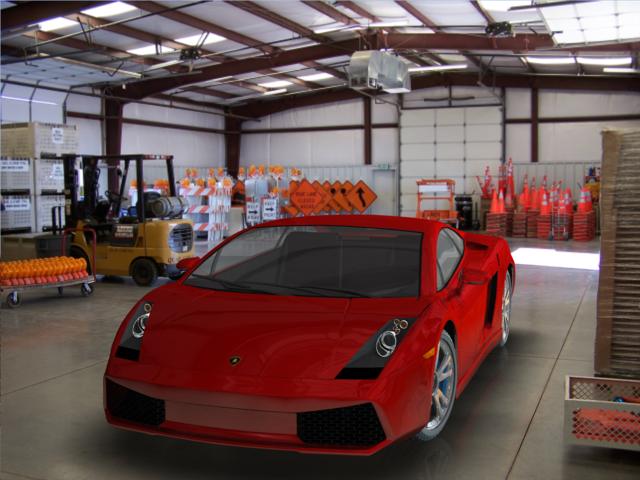
Not yet. It has a basic tub, just needs details added to it. Perhaps in the future. Thanks Caroline. The dent under the door in the rocker panel is actually supposed to be there. It is part of the real car. Just for the fun of it, I added the car to a driveway scene. Not very good at lighting though. Al
-
Well, other than a few little things, the Gallardo is pretty much done. C&C always welcome... Al
-
Quick update: Added the new rims and tires to the Gallardo. Really can't see too much of the tires in this render, but I know the treads are there... Have a basic interior tub in place now. Things to still complete on the outside are head and tail lights, meshes in the grill openings, mirrors, front side marker lights, door handles, tinted side and rear windows and more tweaking... As always, C&C welcomed... Al
-
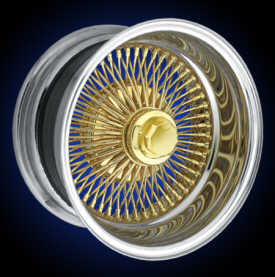
Thanks for the crits jzawacki. I am still doing a lot of tweaking on the body to smooth things out. Today, I played around with a rim for the car. I have always liked the design of wire spoke rims, think they look pretty classy. Found a design I liked on the internet and gave it a shot. I am kind of thinking the gold looks a bit more like brass than gold. Anxious to see what it looks like with the high res tires when I get home tonight. C&C always welcome... Al Reference Image My version
-
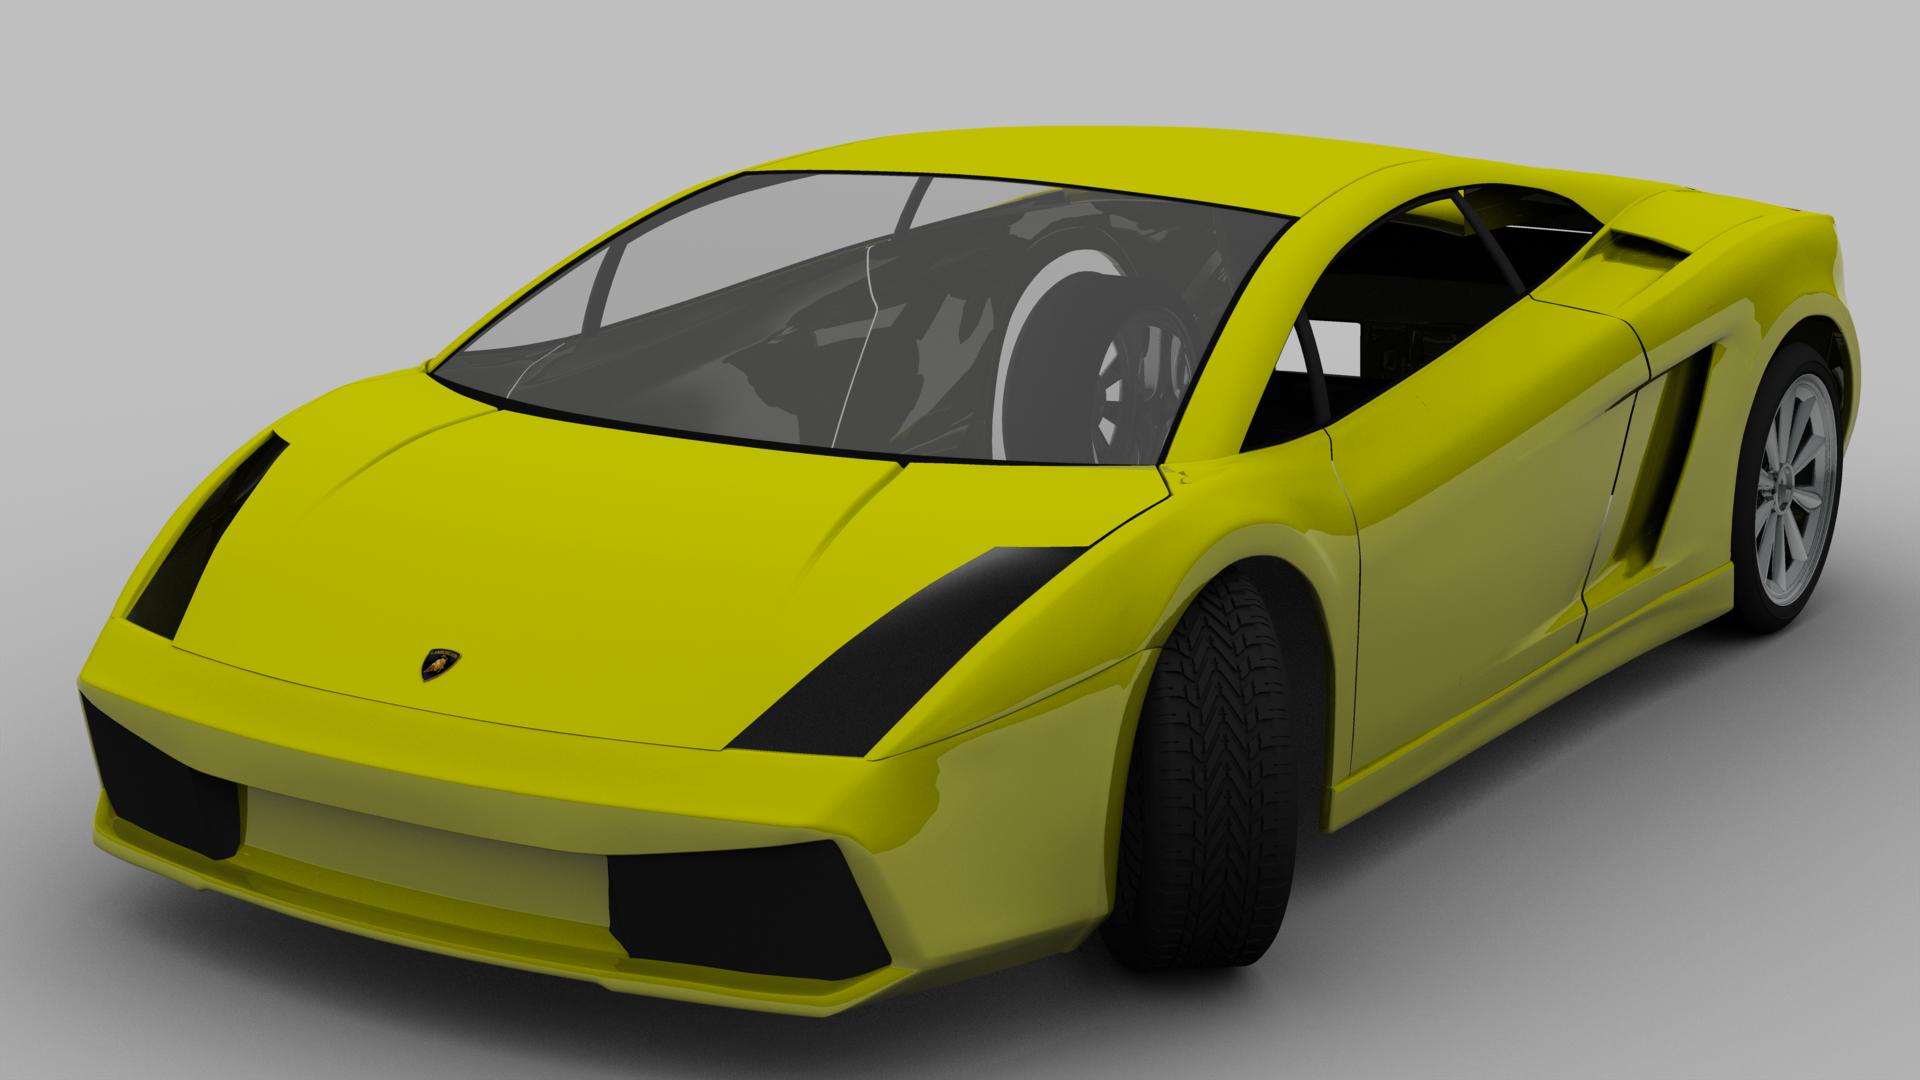
You are right Stian. Found 'Refind Normals' by right clicking within the model window itself. Thanks for that tip. BTW, I am using v14. As requested Eric, here are a couple of large (1920 x 1080 - 16 pass) renders. The first one is just the regular render. The second one has Porcelain applied to it. I was surprised in how much it affects the model and how it looks in a render. The body still needs some tweaking, but it is getting there. Also, major thanks to MMZ_TimeLord for his instructions on modelling tread on a tire (found it here in the forums). I am really pleased on how the front hi-res tire turned out. C&C always welcome... Al Car body without Porcelain Car body WITH Porcelain
-
Wow! That is really a great model and wonderful textures on it. Great job Stian. Al