nerrazzi
-
Posts
374 -
Joined
-
Last visited
Content Type
Profiles
Forums
Events
Everything posted by nerrazzi
-
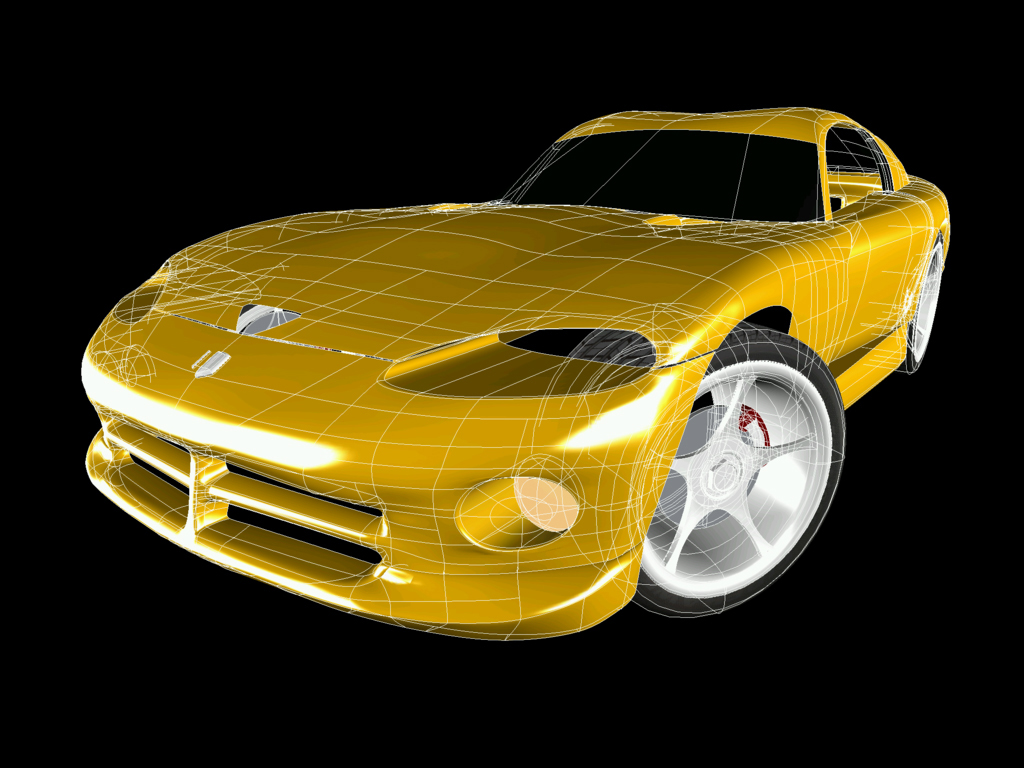
I was cleaning off the ole hard drive and found this pic of a Dodge Viper I built in 8.5, this was a real pain in the neck because 8.5 didn't have the "maintain curvature" feature, I would have liked to have had that on certain parts of of this sucker

-
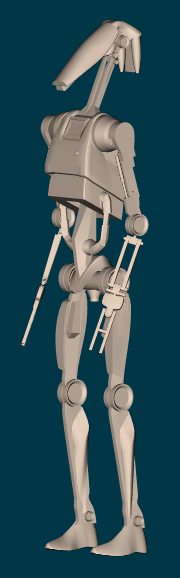
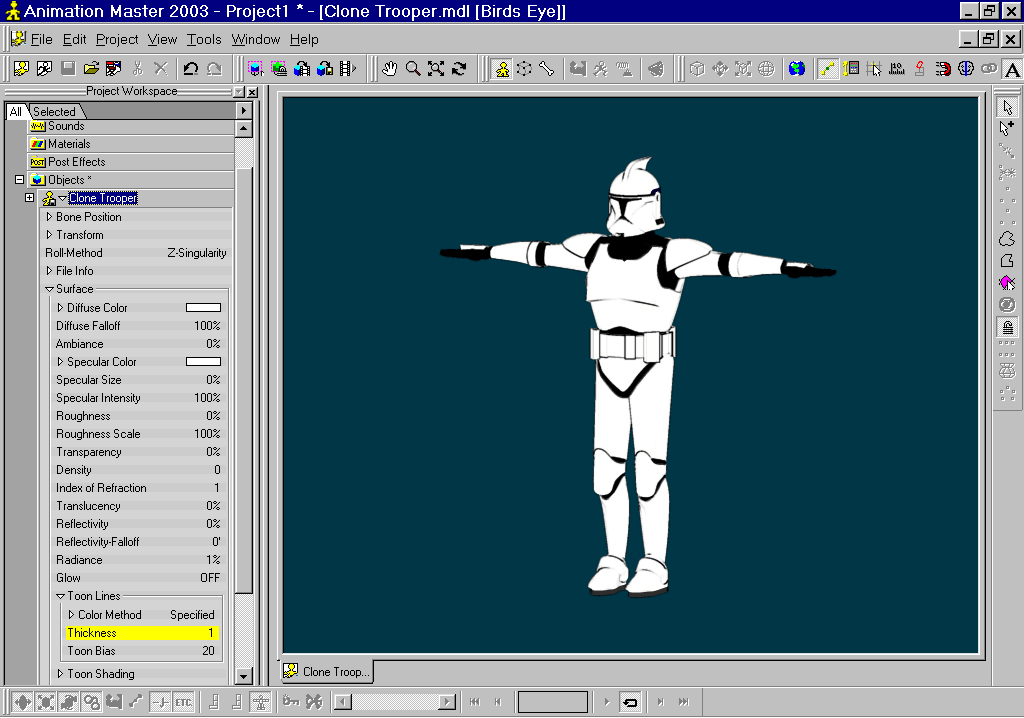
Thanks! I appreciate the kind remarks... I built that thing maybe a year or so ago and was going to do a massive army scene just to see if I could pull it off but gave up because I was dissatisfied with the Clone Trooper. (Maybe I'm too hard on myself...) Anyway, I wouldn't think of trying to place 200-300 troopers in a choreography and render it, so what I was planning to do was render small groups of say... 5-10 troops and composite like there's no tomorrow. I even considered building ultra-low patch count Troopers for not so detailed scenes to get the ball rolling faster.... Just some ideas i guess... As for the fanfilms, I've been in the process of putting together my own Star Wars fanfilm but I won't say what I'm doing... I will divulge some behind the scenes facts about my 2005 fanfilm, it will be a blend of live action, 3D & stop motion or go motion animation for those politically correct person(s) out there... So knuckle-up future contestants!!! Here's a look at a Battle Driod I made around the same time as the Clone Trooper...
-
You're kiddin', right? The Trooper needs rigged, if you're going to make a fanfilm you're going to need to rig him, are you prepared for this? Just wondering since you were having trouble with the "Lock" feature...
-
You can get a lot of starwars models here & here. I do have one clone trooper model that you can have that I totally hate and refuse any credit whatsoever.
-
I like this! Looks great!
-
Yeah, I suppose it could be accomplished with a nice look, the only problem you'd have is exporting the completed model into other apps. I uploaded it to my website which I have since shutdown...
-
Hey... looks like you're building a Subaru, takes me back to when I built one almost a year ago. If you'd like to take a gander it's located here. Occasionally, I talk about how I made certain parts for my cars so, hope they help.... keep up the good work
-
Wow! kind of has a "monsters inc" feel to it... i love the lighting, great work!
-
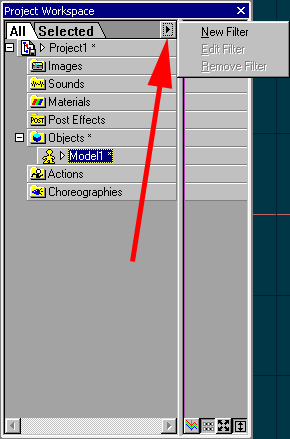
I was going to post this in the AM section but it wouldn't let me add an image. I clicked on the little arrow at the top right hand corner of my PWS and selected New Filter, does anyone know what this does?
-
Overall, I think that the models look pretty good but there a few areas that you should consider making some adjustments. -In the video, the bird's claws didn't look round and full enough when it landed on the branch. -The tops of it's wings closest to the torso would look more realistic if they were closer to the torso when the wings were folded. -Smoothing the torso & blending the neck into it would be a plus but unnecessary if you're going to add feathers. -Bring the legs up closer to the body during flight. +On the plus side, I loved the bird's wing span! Excellent modeling! -The dino's look very good but I'd experiment with the dynamics of the model to give the impression of massive weight being shifted during it's walk cycle. I know, that really doesn't have anything to do with modeling but if you're trying to land some work, dynamics is what stood out most to me. Possible tips: *Definately some sound would be great. *I've always been a fan of watching a model walk in wire-shaded mode and then dissolve into shaded-mode, then finally fully textured. (All this while the camera circles the model.)
-
Excellent work!!!
-
Here's a nice one for the hands. Painting Hands
-
Here's a link to a great tutorial on hand painting human skin for everyone in need of good custom textures to finish up your models. Painting Skin
-
full size pics??? No, i don't. the model is actually stored on my other computer inside one of those dusty hard drives. That particular model is sort of patch heavy, last time i checked it was over 33,000 patches, that was just the head, torso & both legs. With the arms and all those fun hydrolics, that would send it over the 50k mark making it nearly impossible to work with even in wire-frame mode... Oh and render times are plain ridiculous with that patch count, this single image took 14 minutes.
-
click meh'
-
Looks good... You ought to insert the little red glow from behind his sunglasses to "officiate" his look. That reminds me, I did a terminator endoskeleton a year or so back, I'd be happy to post a pic if you'd like to take a gander. It's not really the T-800 model but...
-
Okay, here's the deal... I've got a boat load of work and probably won't be able to finish this fella up for a little while, I still need to complete the hand, so... Here's what I'm going to do... This only applies to interested applicants of course. I'm going to present a little challenge, I'll post just the arm & shoulder area of this character for you folks to rig. Whoever can get it to bend fluidly at the shoulder, elbow & wrist I'll give that person the fully completed model (copy/flipped and all) as an award. I'll let you folks decide who the winner is via voting. You could maybe post a quicktime of the arm bending. (I hope this isn't against forum rules...) I've got too many projects going on and rigging that sucker would probably drive me crazy anyway... But if you think you've got what it takes, I'll post the arm sometime this weekend for you guys to download.
-
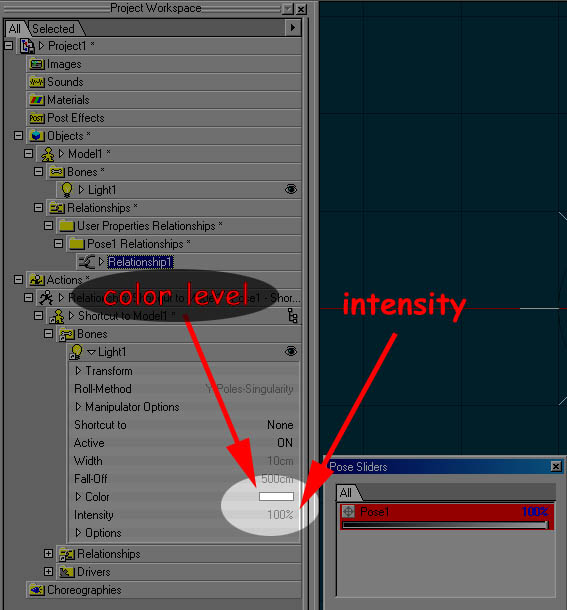
Controlling a light's intensity with a Pose Slider
nerrazzi replied to nerrazzi's topic in Work In Progress / Sweatbox
Open up the "Bones" folder and then the "Light" folder. Also, make sure your Pose Slider window is open. If you set the pose slider to 0 and the intensity level of the light in the PWS to "O" (zero), then set the pose slider to 100 and the intensity level of the light to 100, you can now adjust the light via the pose slider. You can probably do the same thing with the color but I didn't test it out...
-
Controlling a light's intensity with a Pose Slider
nerrazzi replied to nerrazzi's topic in Work In Progress / Sweatbox
1. Create a new model and select "bones mode." 2. Right-click the model name in the PWS and select New > Light. 3. Right-click the model name and select New > Pose > Percentage. 4. Click that little white thingy with the red thingy on it under the "Actions" folder. (See Illustration)
-
I didn't know that you could control a light's intensity level by using a pose slider, you couldn't do it in 8.5. Anyway, here's a small movie and a tut on how I did it for those that didn't know either... light.mov
-
Wait a second.... you can paint on A:M models in ZBrush? Is there a clone tool that will allow you to reference a pic and paint on the model using that reference? Like photoshop's clone tool...
-
Bjorn, those CP Weights are the shizel!!! Focusing on modeling and rigging has caused me to overlook some of these new features..., I think I love 'em. I haven't even used them and I think I love 'em! That's it! I'm in love! Looks like less of a hassle than using smartskin with comparable results... Sweeeeet! Bruce, that's excellent advice, however, I start with trying to get my model to "look" right first and then I work on the correct cp placement afterward for the rigging portion. I may have to create and or delete splines in some areas to make it functional while maintaing the look of the model... I know that's retarded because I'm only double working myself but if you try it the other way around, I think you find yourself compromising some with your characters overall look, unless your really good at it. I know that you can also use bump maps in some areas say for example the veins in the arm, wrist & hand. Making a "vein bump map" is a good way to create the illusion of detail while maintaining a low-patch-count model unfortuanately, that doesn't work so smoothly say in my character's shoulder area. Ain't a bump map made that can fake those hills & valleys! His head & neck are finished and I've been working on the hand to get it made. I'm just about ready to try out some of these great techniques you guys have been suggesting, I'll post the results in Quicktime and information on what I'm doing to make it bend as they become available.
-
Thanks Mike, I know you have a lot of experience with making joints super-bendable and I respect you opinion alot. I can see how hashers would have some reservations about it working right but I'm going to remain optimistic about it until the end. Traditionally, you'd like to get 4 to 6 patches together in a set of three ring splines to make up the shoulder, elbow neck etc... perfect bendable joints, but models like that are just too plain and void of any kind of detail. I love detail, I don't know... I, I just love it man... True, it would have been easier to make this superhero look more like Mr. Incredible but looks like someone's taken that idea Worst comes to worst, it'll make a nice statue in some sort of fighting arena though.
-
CP weights 'eh? I've heard of them but I haven't tried it yet. Specifically, what are they for and are there any tuts showing you how to use them?
-
Thanks for the compliment Zaryin! Movin' him is going to be tricky but I think it can be done. I'm going to use a whole boat-load of intermediate bones between the shoulder and bicep bones, with each intermediate bone assigned to a certain areas of the mesh so that it bends fluidly. That ought to be one huge, huge headache It'll also have to blended with smartskin.