arkaos
-
Posts
358 -
Joined
-
Last visited
Content Type
Profiles
Forums
Events
Everything posted by arkaos
-
I also noticed that just over and left of the area I suggested using a hook, there seems to be a 5-point patch that looks like a 4-pointer with an extra cp in the middle on the bottom. You should consider deleting that extra cp and using a hook there as well, or else you will get a weird distortion in that area. 5-point patches should really only be used when you integrate an edge/spline loop into a rectangular mesh (i.e. wherever you put a hole) I gotta say, though, the model is looking great so far. I am very impressed.
-
The model is coming alone really nicely. Before you know it, you will have an awesome car model to play with B-). Here is one piece of splinework I think you should avoid. Those 2 splines merging together as circled in the attachment will always leave unwanted creases. A better approach is to reroute the lower spline and turn that 3 point patch into a 4 pointer as shown.

-
ROFLMAO... KILLER Soundtrack. Awesome. B-)
-
I don't think a lens flare would be very appropriate for this scene, unless you change the angle of the sun. I would simply try changing the light color to a really soft yellow / almost white. The global lighting setup seems pretty good and it already looks like it is in full daylight to me. Try experimenting with different light colors, but keep them really fairly close to the white side of the spectrum. Very cute ladybug...I dig it
-
AWESOME character model, Tai. I AM a Rush fan and can't wait to see what you do . P.S. Which Bass ya gunna give him?
-
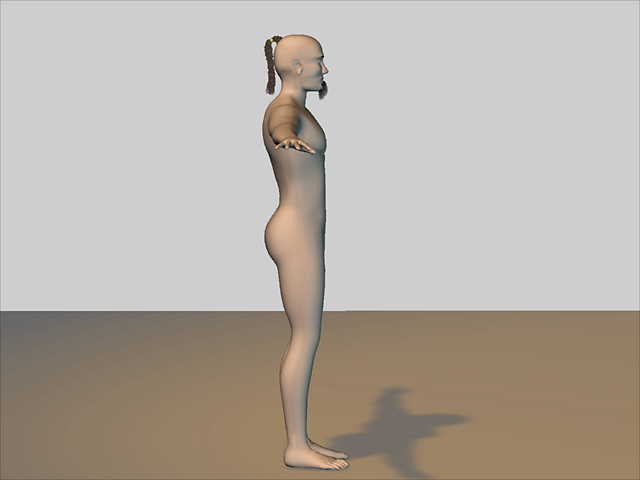
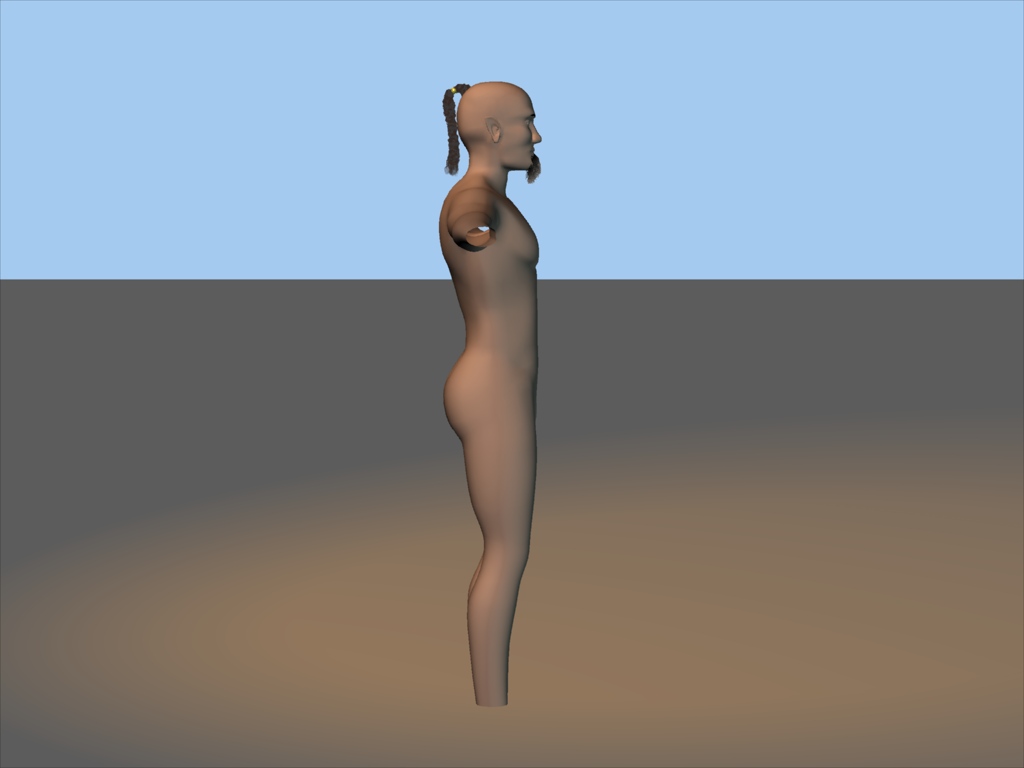
I finally finished the modelling on the main body "YEAH". Next weekend (when I can afford Painter) I will texture this bad boy. In the mean time, I will model the sparse clothing for his first scene and put on some fingernails / toenails. I really can't wait to rig him and make him spring to life. spin01.mov
-
Awesome animations there, Paul. Your experience really shows.
-
Try using an animated displacement map for the footprints. It can be as easy as each image in the sequence showing an additional footprint and use the frame property of the image sequence or movie (whichever you use) to show the appropriate map at the appropriate time. So.....: (Image sequence example): footprint0.tga -- shows first footprint footprint1.tga -- shows first and second footprint footprint2.tga -- shows first, second and third footprint. footprint(n).tga -- etc. until you have all the prints you need. It is a little overhead work, but it seems like the best way to do it. All you need is to have the image for left and right foot and copy/paste in paint shop. If you end up having, say 100 footprints showing in the final animation at once, then you will need 100 frames of displacement mapping. If you come up with something better, please share it with us. I'd DEFINATELY like to know the easiest way, myself.
-
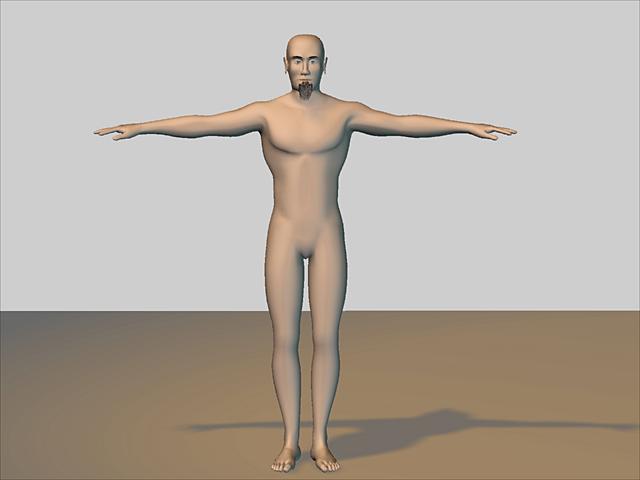
Well, I've been working on the body a bit. I don't have much muscle definition on the arms, legs and abdomen yet. I still have a bunch of tweaking to do, but the base mesh is getting there. Oh yeah. Obviously the hands and feet aren't done yet.
-
Cute little animation, Heath. And yes, I DID get the blender joke right away (i've used blender b4). Good animation and very creative.
-
Is the sound loaded into chor as a child of the chor action for a character or is it a child of the choreography itself? Also, look to see the settings for the sound shortcut within the chor, as these are keyframeable. There may be a keyframe setting the sounds volume too low to hear. Post a zip of the project and all it's objects if you can. That way we can open it and see what is going on. We'll get this worked out, not to worry.
-
If you want help with a particular area of the model, it is helpful to post a shaded wireframe render so we can see the spline work. My suggestion is to reshape the head a bit. In the front view it looks a little square. Round that off a bit. As for the ears, with a cartoony-looking dog like that, you could model them any way, really. Whether spline them into the head or make them separate meshes, it doesn't really matter. What matters is: If you are going for floppy ears, then model the ears with just enough spline rings so they can flop around during animation. With cropped ears, give them only enough splines to achieve the shape. Personally, I think he/she would look more cuddly with floppy ears. I have another name idea, too. Since he is brown, why not name him Cocamutt? Remember to always think about how the model is supposed to animate when creating the geometry. Lastly: Have fun with it.
-
No, you don't make them up. First, you will need to make sure that "Show Advanced Properties" and "Show Property Triangles" option is turned on in the general options. Drag the eyeball material into the eyeball group you want. By default, the eyeball material will project along the z-axis. In the material's transform->translate property, you must input the x and y of the center of the eyeball in the model window. To find the coordinate of the center of the eyeball: 1. select a cp at or near the center of the eye (or the location you want the pupil to be). 2. with the "Properties" window open, the Pivot property will give you the coordinate of the selected cp. In my picture example, the eye is projected onto the models mid-section because I dragged the material over the root of the object in the project workspace and I input the y coordinate of 137cm (which was the location of an arbitrary cp I selected on the model for illustration purposes). The eyeball material projected at that location. If you look carefully, you'll notice that the material also projected onto his back. All surfaces in the line of projection of the group you apply the material to will render the projected image. So, you must set up a group for each eyeball and specify the transform->translate location for the material under each eye group. I can also supply you with a sample of a character I used the eyeball material on when I get home, if you'd like. Though the character I created didn't have forward-facing eyes, I still projected along the z axis and rotated the eye bones in chor so you'd see them correctly. I hope this advice helps. If you are still confused, I will probably be available in online chat in Animation Master's chat window after 9 pm eastern time. I would be happy to help you out. Edit: in the picture, the "Shorcut to Eyeball" is the shortcut to the material, not the group to which the cp's are assigned. You can adjust the size of the projected image setting the iris and pupil size (in cm) properties within the material.
-
If producing stills is your goal and render time not a big concern, than using materials would be a great way to go. In areas were you need a little more control (like faces) and other body areas, UV is your biggest asset. A:M has a robust decal/stamp setup that allows you to layer decals to control surface attributes like color, displacement, normals, transparency, etc. You can get fine control and high levels of detail by using the uv system.
-
Personally, I would like to see A:M licensing be all usb dongle. I use those for other software. They are way more convenient to use, especially if you own more than one computer.
-
I'll tell ya what. Nothing regarding 3d modelling and animation is really easy. It is an art and takes a lot of dedication. From using several different 3d modelling / animating packages, I can say that animation master is the easiest and quickest to learn and the only all-inclusive package that doesn't take 2nd and 3rd mortgages to pay for, lol. Animation in A:M is the best, hands down, compared to ANY package. Rendering is a bit slower, but then it's really the end result that is important, not the render times.
-
Can you post a couple of images as an example?
-
Darktrees, unfortunately, only show up under the material type after to changed if to a darksim type. I recommend you do not get emotionally attached to the darktree materials, though. They render slower than snails crawling across molasses. The best use of them, is as Rodney stated, render them to a flat plane and use that image as a bases for UV texturing of your model (decals/stamps). If I want to use a particular darktree on a background prop, I just use the material itself. Any characters or character clothing I use them as decals to improve render quality and time. I hope this information is useful to you.
-
I had that same problem when I first used toon nation eyeballs. Here's the deal: Toon Nation eyes are a projection material. They project the image along a specified vector. you must set the x,y,z coordinates for each material to "point" at the location you want them visible. Set the "z" to a place somewhere just in front of your character. Then set the x and y of the material shortcut under each eye group to the same x,y values as the center that eyeball in modeler. When you then move the eyes in an action window or chor, the material will follow the translation and rotation properly. But if you move the object to a different location in model window, you will have to reset the values in each material shortcut again.
-
Oh yes. Bias handles are one of A:M's specialties. Everything in A:M is controlled by splines with bias handles, that's what makes this program so powerful for animation. Ball bouncing are looking pretty good. It took me quite a few trys to work out the timing on mine.
-
Skimpy 1.0 or 2.0, either way, there is nothing technically wrong with either one. If you are finished with the design of the character(s) then go ahead and start rigging. My only suggestion would be to add more interesting texturing to whichever one you use for animation. Have fun with it .
-
Contest Animation - April Fools
arkaos replied to Heath_Naylor's topic in Work In Progress / Sweatbox
One thing that stands out in my mind is the timing of ..."The Event" we shall call it, lol. It would seem like the naughty ball would not stick around long enough for "The Event" to almost flood were his/she/it is standing. A better approach: After the naughty ball places his gag prop and snickers to audience, he should be already on his way out of the scene when "The Event" begins to occur. The exaggerated timing delay between ball snicker and gag event allows the audience a moment for their minds to compute what is going on. Overall composition: I like the unique twist you gave to this simple excersise. It shows an inherent creative talent that cannot be taught in school. -
Looking pretty great. Are you going to complete the entire head, or is this just for play. Personnally, I'd like to see you put the head on a body and animate it. . I agree that the lip poses to need a little tweaking. They are a little unnatural right now. Usually when a mouth opens, the corners don't really move up or down because that is where the most stretching of the skin occurs. When a smile is added to that, the corner do come up some, but not that much. You have done great work so far. Keep up the good work.
-
Update: 1) Made eye a more realistic size. 2) ditched the hair. I didn't like it. The update is back to what my orignal design was before I started this wip. Now he's starting to look like the character in my head. I still have to do eyebrows, but I am lacking experience there. My first several attempts looked pretty bad. If anyone can give me some pointers on that, I'd really appreciate it. You people have been very helpful, I thank you.