-
Posts
28,400 -
Joined
-
Last visited
-
Days Won
425
Content Type
Profiles
Forums
Events
Everything posted by robcat2075
-
Very impressive result! I see a movie in this... "Attack of the 50 Foot Flower Man"
-
The Babbage tut is great, but as Vern noted, it's more of a high level concept than a step-by-step tut. I think he presumes you have a compositing app to combine the displacement map and the map you get from rendering the particles. I suppose there's a way to do that in A:M, but I'm not immediately sure. Of course, you wont' be any worse off for experimenting with those particles.
-

Moving to A:M from another 3D software, what to expect?
robcat2075 replied to Path other's topic in New Users
Welcome to A:M (we hope)! "possibly" OBJs that are the result of good "Sub-D" modeling are the most promising. They have a topology that is more similar to A:M topology. however... Most OBJs will be overly dense for a good A:M model. -the initial import time may be enormous -some large ones will not be importable -substantial editing and thinning will be required poly models made of triangles are pretty much hopeless, except in the special import option called a "Prop". A Prop is not quite a "model" in A:M. You can place it in your animations, move it, but it can not be edited or rigged like a character model might be. Don't toss out that other app. You may find that judicious pre-editing or breaking a model into parts to export separately may increase the chance of success. A:M was really made to be a beginning to end pipeline for modeling, animating and rendering so import from other apps hasn't been a priority. The best app for making A:M models is A:M. Martin explains that NURBS are a degraded subset of A:M splines. So anything you can make in NURBS you can make in A:M splines. The actual tools may appear quite different. In general, A:M uses a few tools that do many things rather than a large set of narrow focus tools. yes! There is a clever AI importer plugin that converts AI (a particular AI version format, i forget the #) lines to A:M spline outlines. It can even fill the interior and bevel the edges. because a few spline patches can represent the same surface as many polygons, A:M models tend to be reasonably small. However, more RAM is always better than less RAM. I feel 1 gig is a minimum. User experience indicates the PC version of A:M is more nimble than the Mac version. -
That was pretty good! I'm impressed.
-
in A:M it would probably be possible to do this in reverse. Emit the particles from an invisible form, render that and then reverse the footage so they look like they are going TO the form.
-
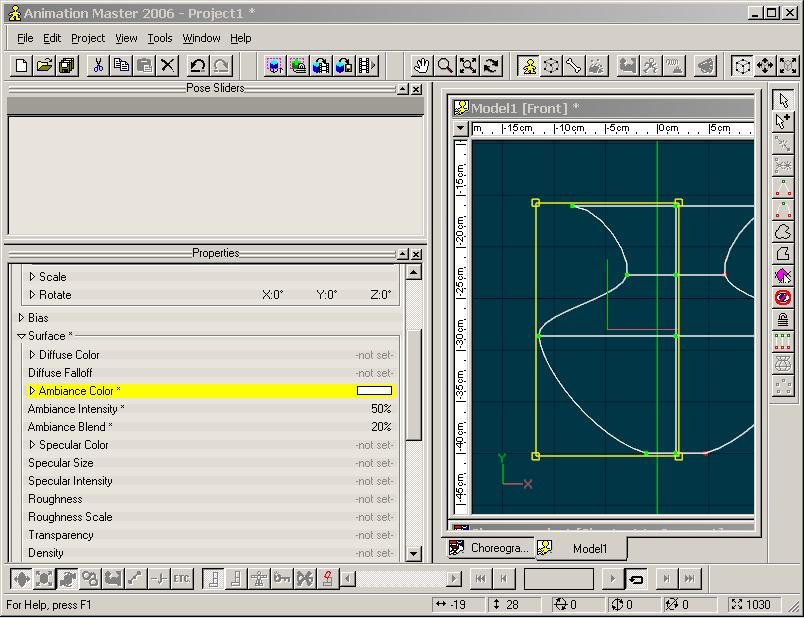
ambience is a surface property of a model or a "group" in a model. Check the Help menu for more info on that. This is where a link to the tut would be helpful. And indication of where he says that.
-
If you want the shadow as a separate file you can use "shadow buffers". As noted you will need some geometry in the scene to catch it. in the shadow options for that geom set it to "shadows only" and enable "alpha" and "shadow buffer" in the render options. you will get a file that looks black, but the alpha channel will have the image of the shadow. For compositing. You will need to render twice. Once for the ball. Once for the shadow.
-
This list will show all models currently in the PRJ, even ones that have just been created and not saved to a file yet. An unsaved model will have a default name like "model 1" but it will be in that list. I prefer dragging the model from the PWS into the chor, but then you have to explain what a PWS is, where it is, where the objects folder is...
-
could you give a link to it and point to the steps that you are having trouble with?
-
Welcome to A:M! One of many ways.... right click in the chor window>import this will show "other" and then a list of models currently loaded. pick from that list. If you want a model that you haven't loaded yet, choose other and it will open a dir window to browse for the model you want.
-
perhaps the muhair shader is just too shiny for old-person gray hair.
-
The 2008 rig is fine but it won't be easier to install than what is already in Jeff Lew's models. Just don't drag the arm bones. If you do , hit ctrl-z and undo it. Rotate the arm bones. Don't drag them. Just rotate them. Select the bone. Just click on it. Calm down, don't move your mouse while you're clicking on it. just click on it. then hit r to turn on the rotate manipulator. Use the manipulator rings to rotate the bone. Don't drag the arm bones.
-
Are you trying to get the shadow of the ball or the underside of it that is darker than the topside?
-
What is your refresh rate? on the PC it's continuously reported in the lower-left corner. Jeff Lew did speed up his vids to show his process faster, but by "paging down" appropriately you ought to get at least 8fps which more than responsive enough for posing. What are you getting?
-

Render Problem- Strange artifacts showing up on final render
robcat2075 replied to cindylyoung's topic in New Users
You should make an AMReport of this, showing the different results you get with different versions of A:M. -
That's a very promising first time out!
-
the hair just seems way too bright for gray hair.
-
You can constrain objects to the camera, just like you can constrain bones to each other. A "translate to" and "orient like" constraint will make an object stay with the camera
-
I've tried 3 time to get it to play but it doesn't. If you post a quicktime you might get some notes.
-
What are you rendering to? The only Quicktime codec that can hold an alpha channel is "Animation". The codec is set in the "compression " settings. (Avoid "Animation" for all other purposes, however. It makes huge files.) Targas can also hold an alpha channel. I don't use FCP, but I know After Effects can ignore an alpha channel if the import settings are not right/
-
I should also note that if you just want to get your character rigged with a good rig, look into one of the ones on the Rigging subforum such as Squetch, TSM2, 2008, "lite"... All of those have the essential rigging challenges already solved for you and are more robust than my Simplest IK leg. But if you're just experimenting to learn more about it, that's fine too.
-
An Euler constraint will set minimum and maximum rotation limits on each axis on a bone . However such a constraint isn't used on an elbow in most rigs as the constraints that enable controlling the arm prevent an elbow from bending backwards anyway. In other words, no matter where you place an IK hand the rig always aims the elbow in the right direction. My "Simplest IK Leg" vid show the concept for a knee. If your Arm is an FK arm you just pay attention to which way you're bending the arm. But if you need to limit rotation of a bone, Euler constraints will do that for you.
-

I don't have access to the libraries and Help menus
robcat2075 replied to banditsgirl's topic in New Users
She probably won't be back to school until Tuesday, after MLK day. -
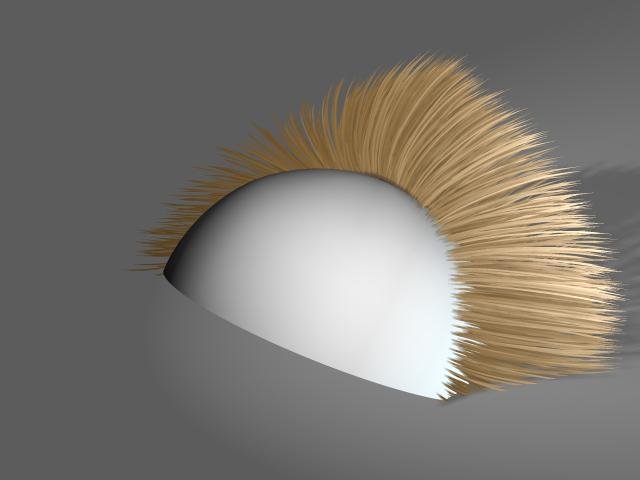
I did that in V13. I also tried using the transparency on the ends of the hair but it gave them all a dark tip rather than make them fade out, so instead I tapered the thickness to 0.01 (0 isn't possible) Here's the PRJ of my test. frame 00:13 is a good frame. See what you get. haritest02B.zip
-


