-
Posts
28,056 -
Joined
-
Last visited
-
Days Won
360
Content Type
Profiles
Forums
Events
Everything posted by robcat2075
-
How big are the files in question?
-
You would constrain the "IK foot control" to a null. But I've never had trouble selecting the IK foot controls. I'd have to see an example in practice to know what was wrong. I'd have to see an example PRJ Falloff is a property that can be on or off but it only has effect if you actually "Compute CP weights" in the model window. If any of the TSM2 control bones have falloff on it's just an oversight.
-
The new animation needs to be in a 2nd Choreography action. >New>Choreography Action on the "Shortcut to" your character. In the PWS, make the redbar of the first end where the second one begins "Blend Method" on the new Chor action should be set to "replace". The first Chor action should have "hold last frame" ON The new chor action should be below the first one in the PWS. set the time to the first frame of the new bar select the 2nd Chor action. It will get the Green check on it in the PWS. set your key filter to "Key Bone" select a bone that you will be translating and/or rotating in the new animation and force a translate and/or rotate key on it... Force a translate by using the left/right cursor keys to nudge it out and back. Force a rotate key by turning on the Rotate manipulator ® and rotating the bone from and back to its current position. This is easier if you temporarily set your Options>Units>rotate increment to a high value like 30. Do this forcing for every bone you need to animate in the new Chor action Now you can go on to later frames, animate new movement for those bones and the keys will not affect what was in the first Chor action. It used to be possible to CTRL- select all the bones at once and force a key on them, but a bug is currently preventing that workflow from working.
-

" toon with falloff" and "toon with multiple lights"
robcat2075 replied to jakerupert's topic in New Users
Yup, that's it exactly. -
The background is already 100% white in my example. How much more illuminated does it need to be?
-
Thanks for making those!
-

" toon with falloff" and "toon with multiple lights"
robcat2075 replied to jakerupert's topic in New Users
I just tried it and could only detect a very slight difference in the shading. I tried V13 with the same result. If you have some old versions available (before V13) you might try them and see if they do differently. -
I recall a test a long time ago where some did the puffy smoke that trails behind a rocket taking off. I think that was with sprites. High viscosity made them stay where they were spit out. But you want the fire? How about a volumetric effect set to cone shape? Can you show an example of something that looks like what you want?
-
Can you explain that a bit more?
-
I believe it's >mirror all smartskin Black sss usually means reversed normals
-
On My PC OpenGL is faster for real-time, so you might want to try the other tricks and see if you can get OpenGL 100%. Remember you have to restart A:M after a Direct3DOpenGL change.
-
Welcome to A:M! I think it's "disable desktop composition" time try this http://www.hash.com/forums/index.php?s=&am...st&p=314433
-
Yay! Congratualtions on solving the problem.
-
She's looking real good!
-
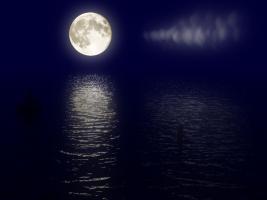
I see a wake in there, don't you? I've done a little R&D on wakes. Here's a test of cloth as a water surface. It has problems like wanting to stick to the boat and pinching itself but there might be some promise in it. ClothWake4_H264.mov
-
He's turning out real well! A smartskin might be a good solution for the pinching.
-
Not anymore. New displacement since v13.
-
I always have a hard time telling whether bump maps are innies or outies. Someone posted a process for converting a bump map to a normal map. Those shade slightly differently and maybe slightly more realistically in some situations. I'd also be curious to see how the bump map looks set to "displacement".
-
expand the + sign next to the start icon, to show the Images container. You can drop multiple images in there and (presuming they have the same dimensions) the will be aligned exactly. You can drop your new version of the bump map in there and then delete the first. This is the typical way of aligning related maps like color...bump... tranparency... reflection... that are all based on the same thing. Set the "type" for each one after you drop it. If it's just a matter of reversing the black/white of a bump map you can set the percentage to - number.
-
It was added to deal with "buffers" in OpenEXR renders Fuchur made a nice intro to it.
-
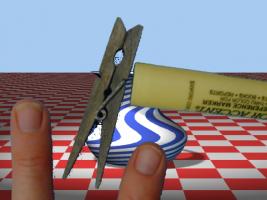
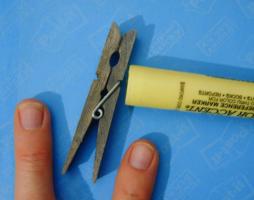
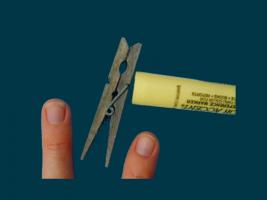
Here are real-world objects shot against a (poor) blue screen. With A:M Composite it's possible to pull out a matte like this... and use that as a transparency map to remove the background from the original image... and overlay the photographed objects over CG imagery Ta-daaaahhhh! I"ve been wanting to figure out a way to do this in A:M by itself for maybe 5 years now. I'm still R&D-ing this so no tut yet.
-
I just downloaded it from Hash page>support>reference http://www.hash.com/2007web/reference.htm It seems to be there. A good introductory book on CG lighting is Birn's "Digital Lighting and Rendering, 2nd Edition". I made an annotation thread on it in the tutorials forum.
-
-
You had me going there. I gave it a try but I didn't find a way to copy/paste pivots to materials. I haven't looked at how pivots are stored... it's possible a text editor copy and paste might be feasible.


